For 1990-2009 cars only
Removal Procedure
- Remove the bridge console. Refer to Front Floor Console Extension Replacement - Center.
- Remove the front floor console extension trim panel. Refer to Front Floor Console Extension Panel Replacement.
- Remove the console shift lever bezel. Refer to Console Shift Lever Bezel Replacement.
- Remove the ashtray assembly. Refer to Ashtray Side Panel Replacement.
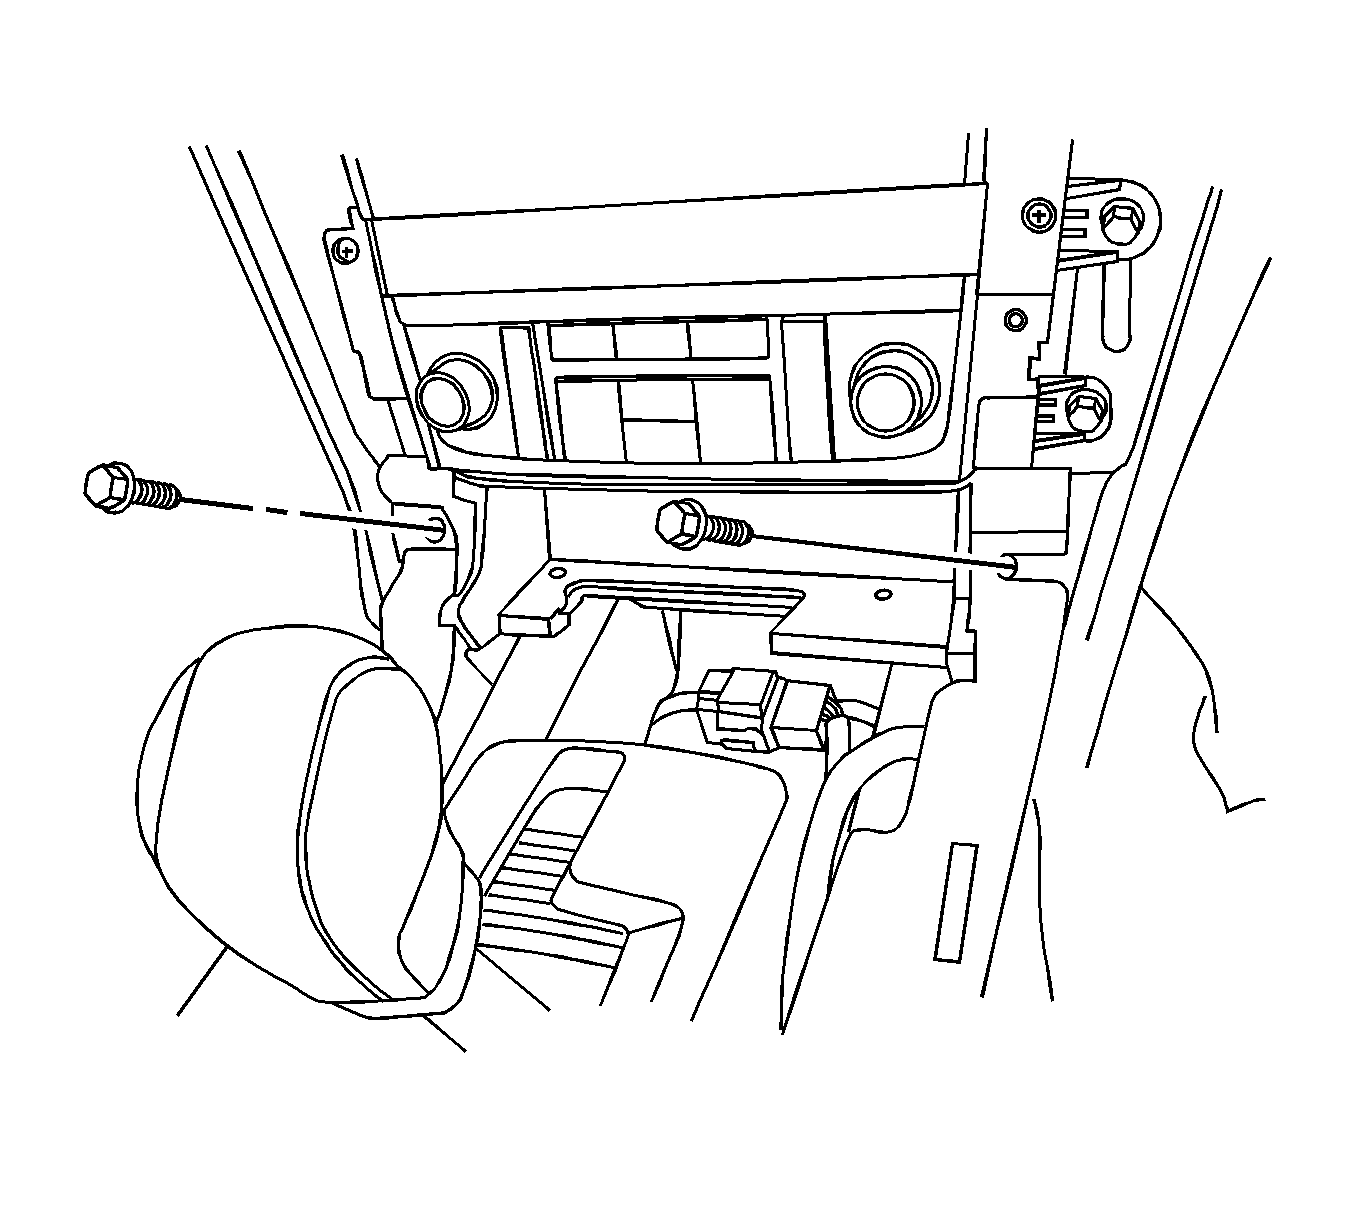
- Remove the bolts securing the front floor console to the I/P carrier.
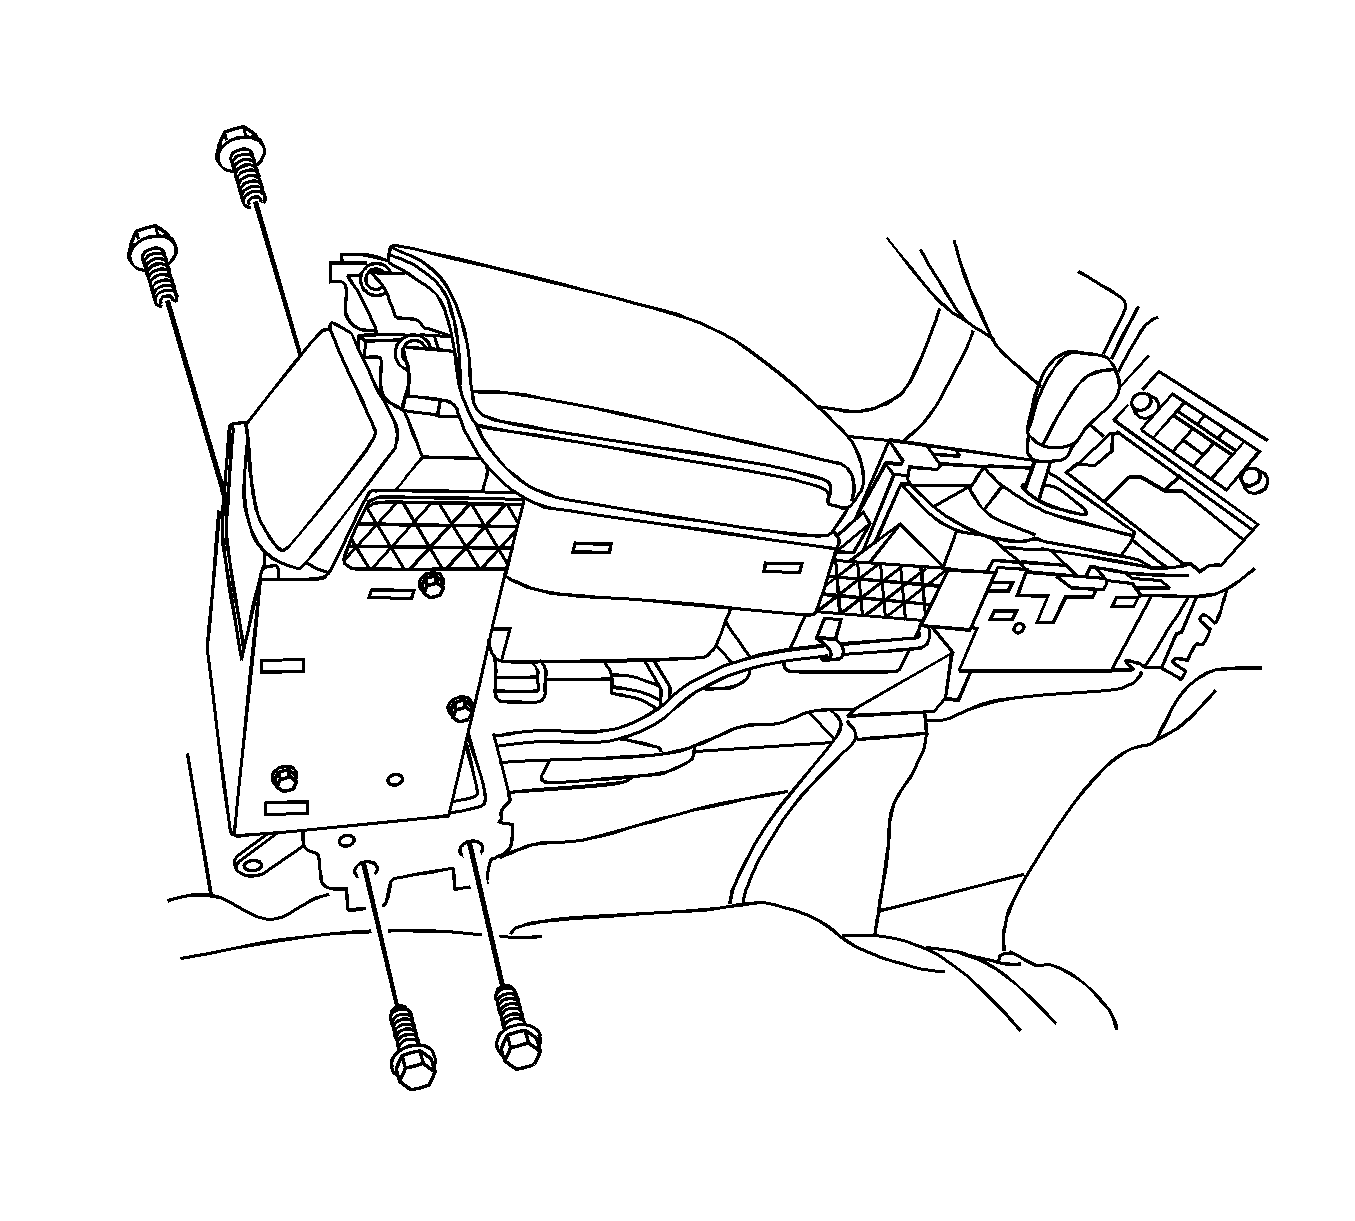
- Remove the bolts securing the rear of the front floor console to the floor.
- Disconnect the electrical connector, and remove the front floor console rearward and upward.


Installation Procedure
- Connect the electrical connector, and install the front floor console.
- Install the bolts securing the rear of front floor console to the floor.
- Install the bolts securing the front floor console to the I/P carrier.
- Install the ashtray assembly. Refer to Ashtray Side Panel Replacement.
- Install the console shift lever bezel. Refer to Console Shift Lever Bezel Replacement.
- Install the front floor console extension trim panel. Refer to Front Floor Console Extension Panel Replacement.
- Install the bridge console. Refer to Front Floor Console Extension Replacement - Center.

Caution: Refer to Fastener Caution in the Preface section.
Tighten
Tighten the bolts to 9 N·m (80 lb in).

Tighten
Tighten the bolts to 9 N·m (80 lb in).
