Sunroof Window Replacement Front
Removal Procedure
- Open the front sunroof window approximately 350 mm (13.7 in) to a point just past the air deflector in the full upright position.
- Depress the weatherstrip seal in order to access the screw locations.
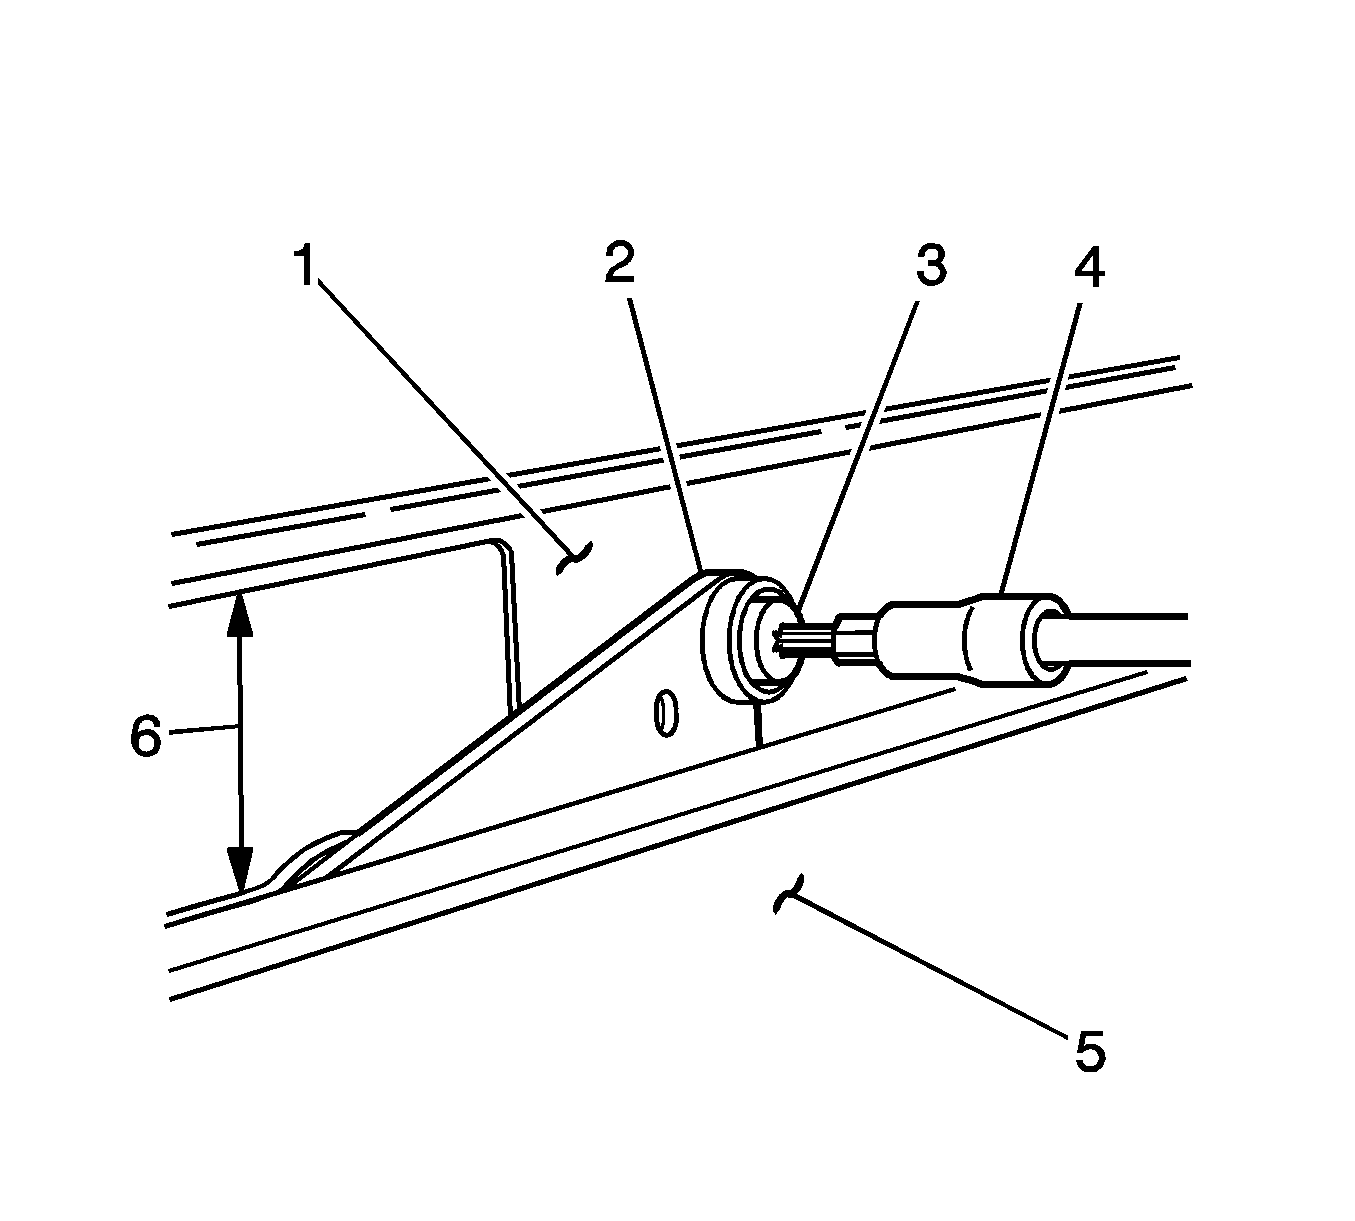
- Carefully remove the front sunroof to guide the assembly (2) shouldered screws (3).
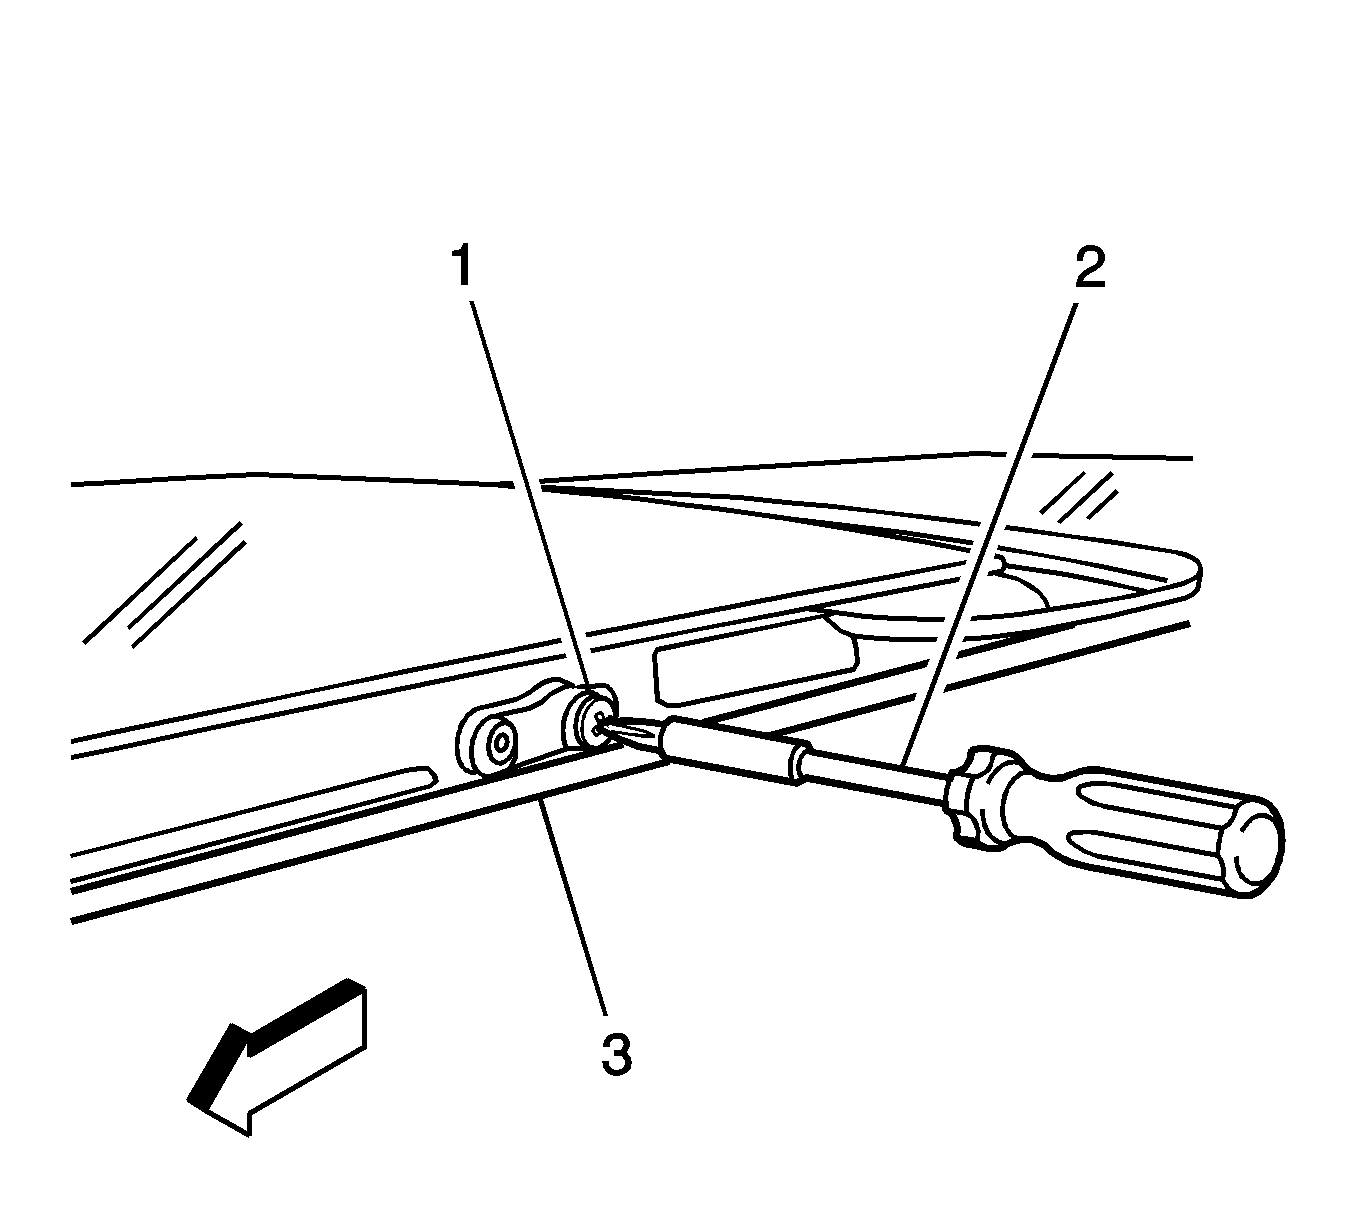
- Carefully remove the rear sunroof to rear cam lift arm screws (1).
- With the aid of an assistant, lift upward from the side edges of the sunroof window.
- With the aid of an assistant, remove the sunroof window, rearward from the top of the vehicle.
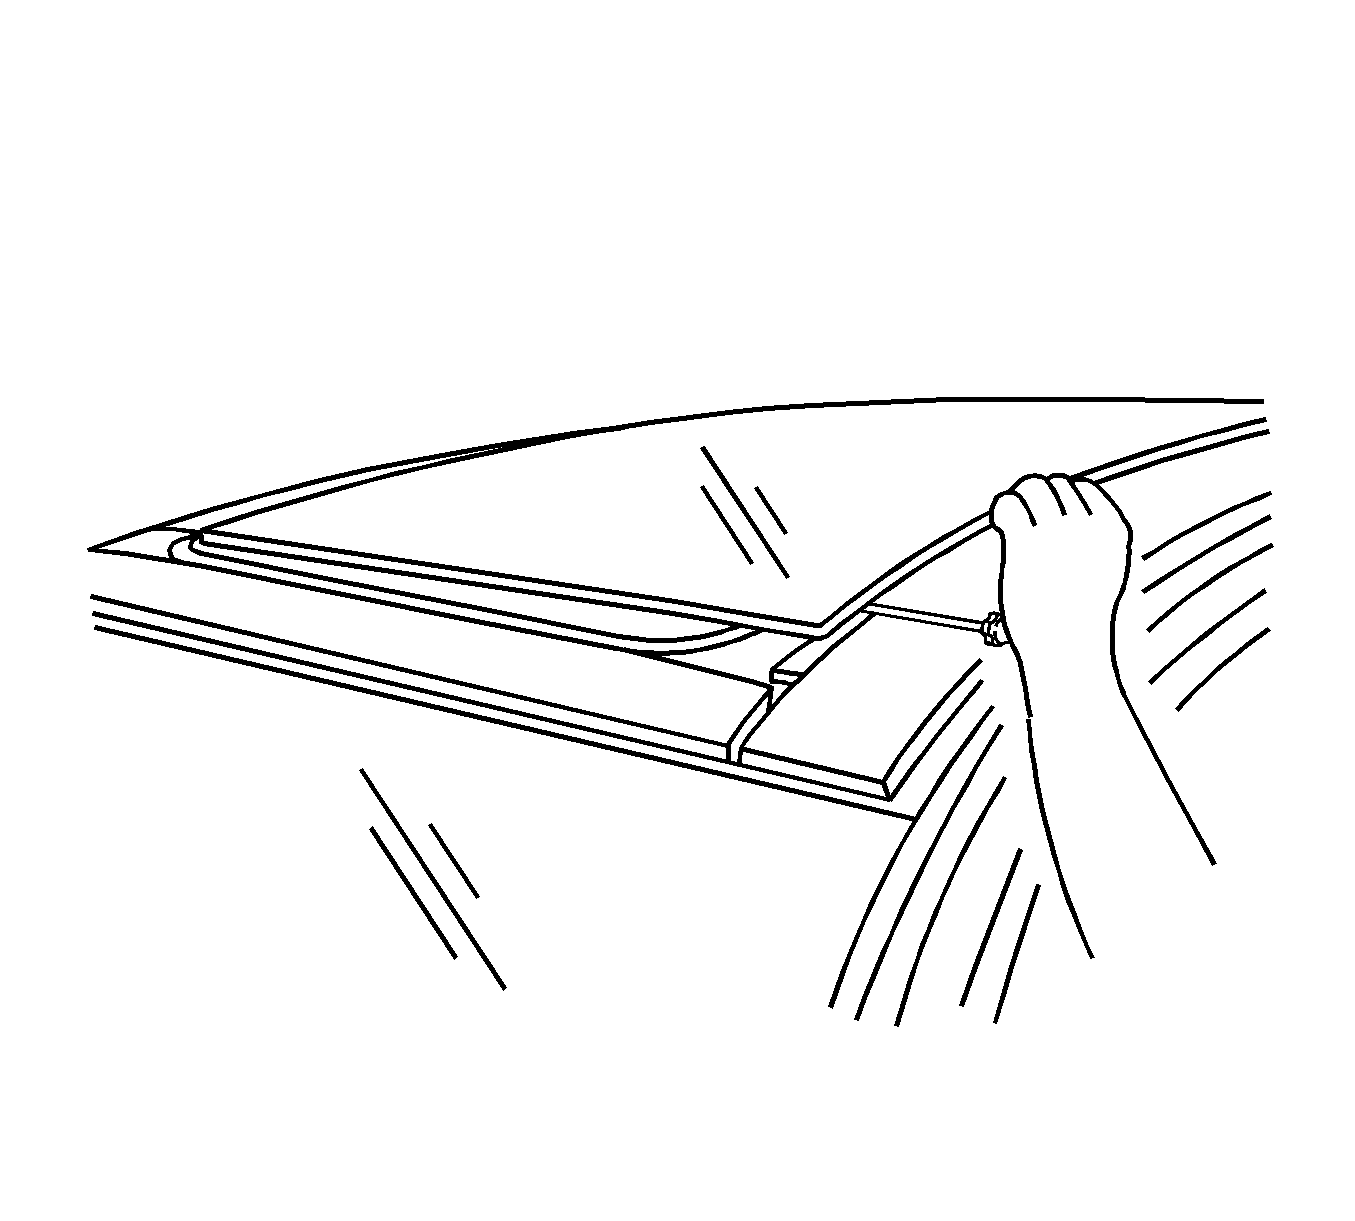
Important: Do not damage the sunroof window weatherstrip seal when removing the screws.
Installation Procedure
- With the aid of an assistant, position the front window to the sunroof guide and lift arm assemblies.
- Align the front and rear holes located on the track arms to the sunroof window attachments.
- Loosely install the rear screws (1) to each side of the rear cam lift arms.
- Align and install the front shouldered screws (3) to each side of the assembly.
- Cycle the sunroof front window closed then to open.
- Verify the operation of the front sunroof window.

Notice: Refer to Fastener Notice in the Preface section.

Tighten
| • | Tighten the front screws to 5 N·m (44 lb in). |
| • | Tighten the rear screws to 5 N·m (44 lb in). |
Sunroof Window Replacement Center
Removal Procedure
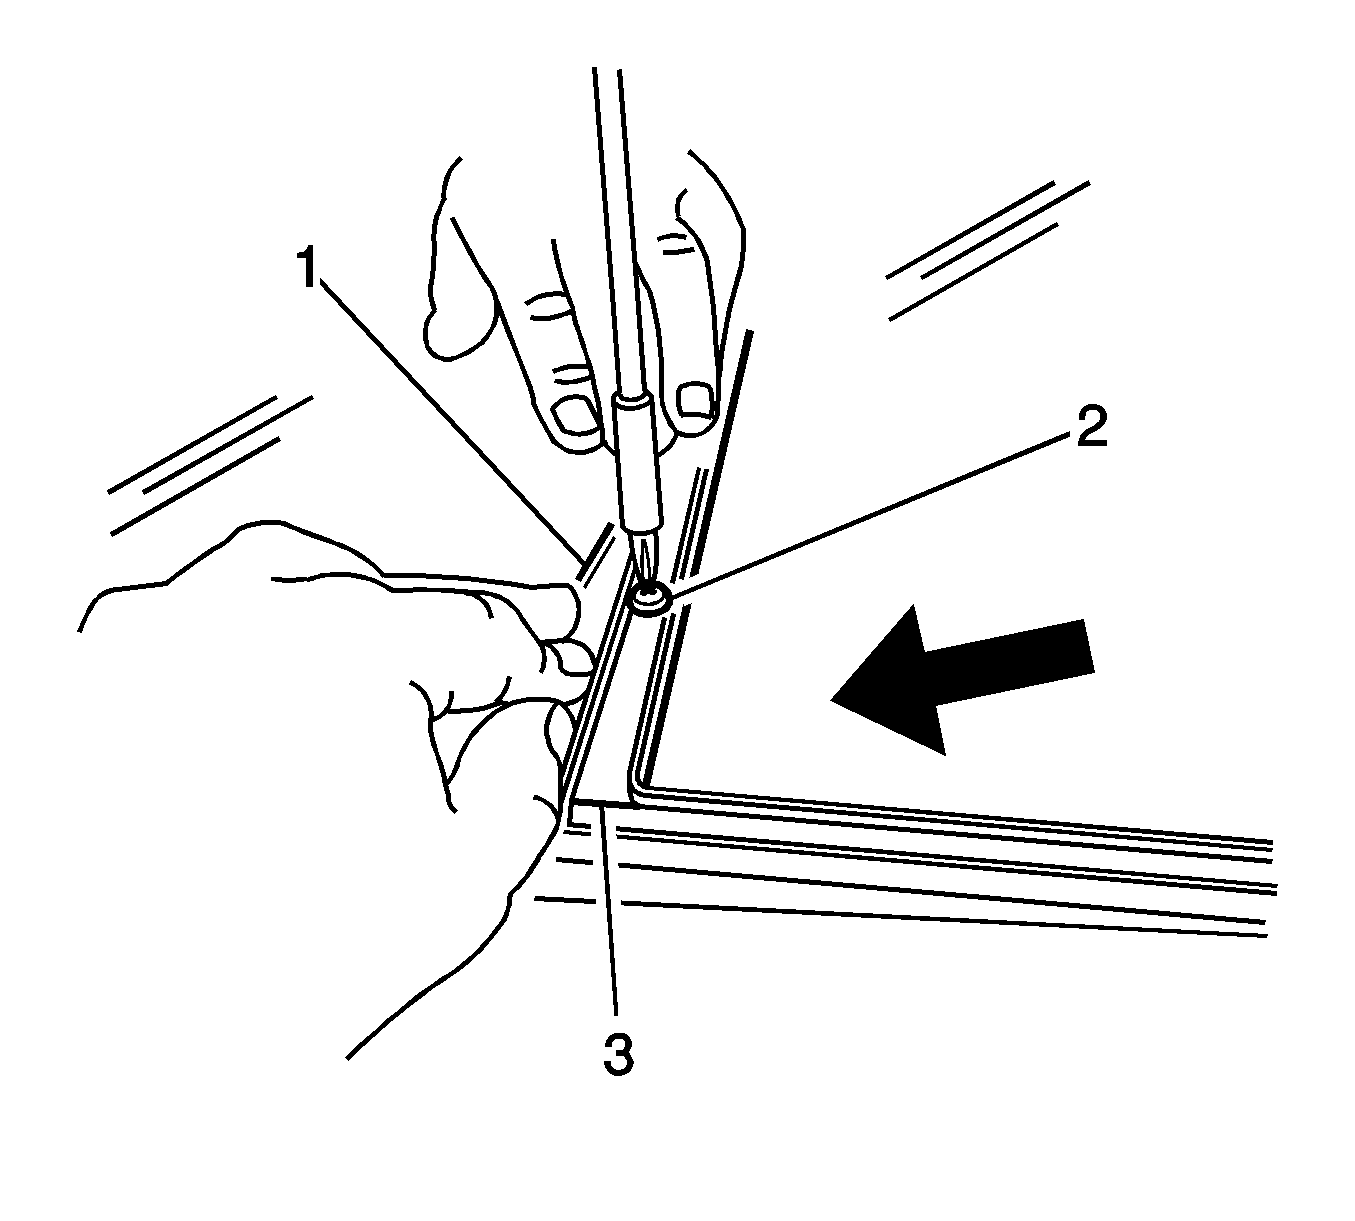
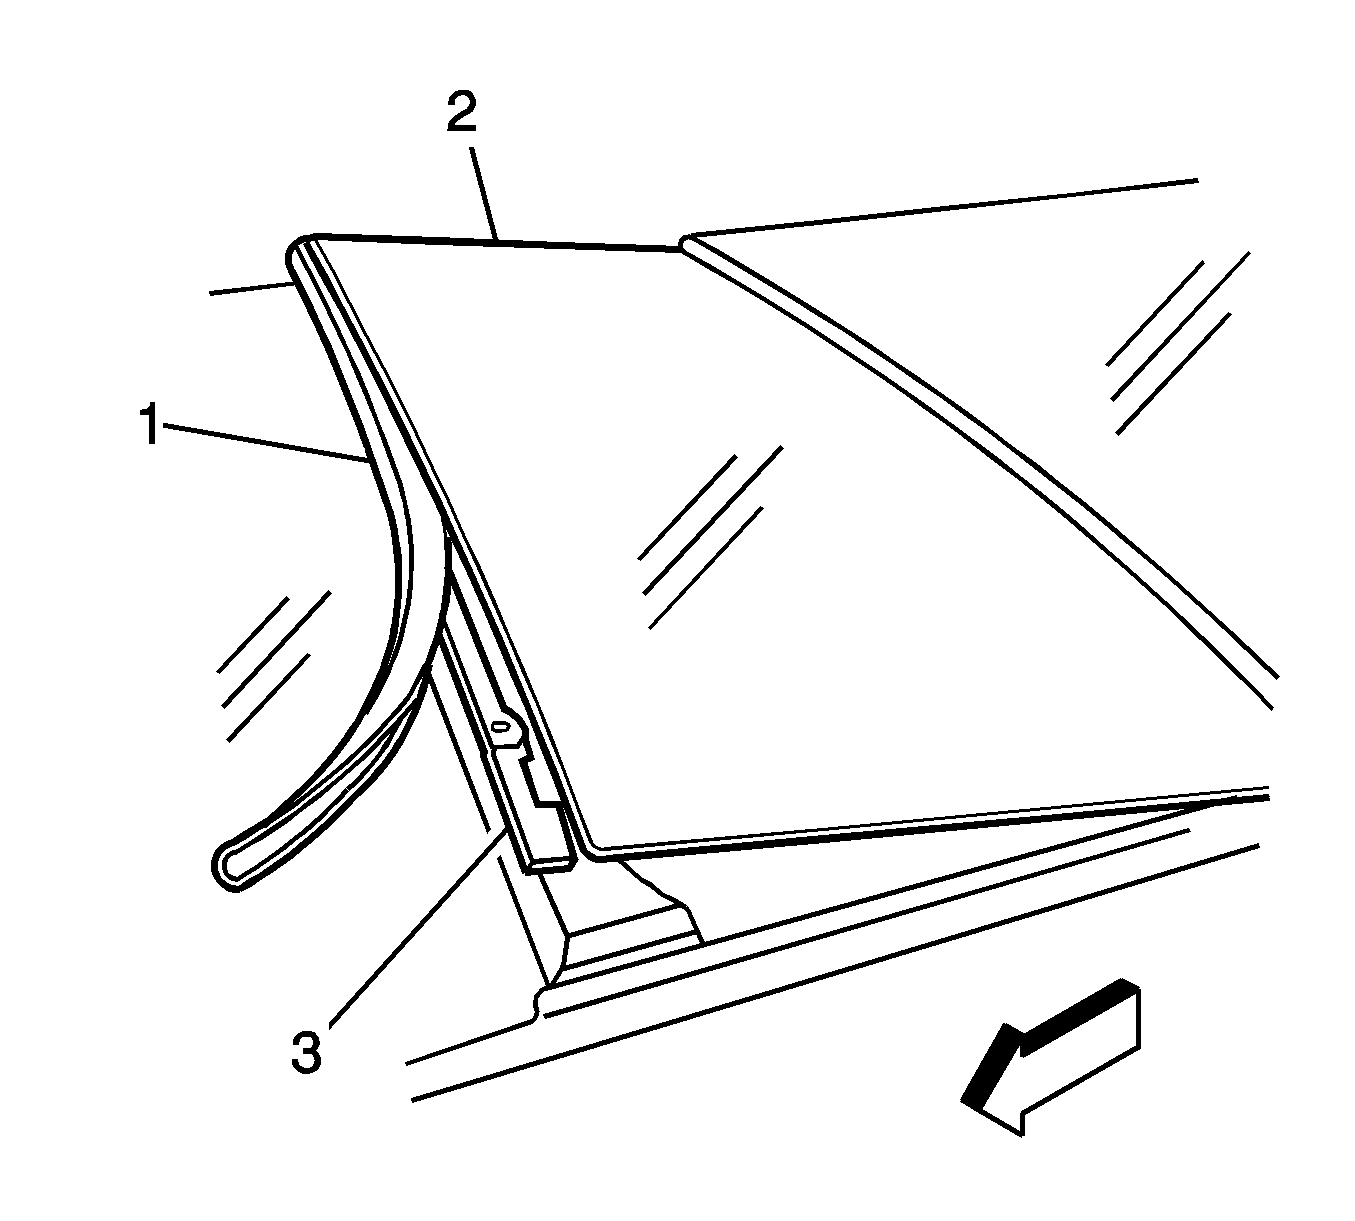
- Pull back the forward sealing strip edge (1) of the center window panel.
- Remove the 5 attaching screws (2).
- Tip the window panel (2) upward. Slide the window panel toward the front of the vehicle.
- Remove the window panel.
Installation Procedure
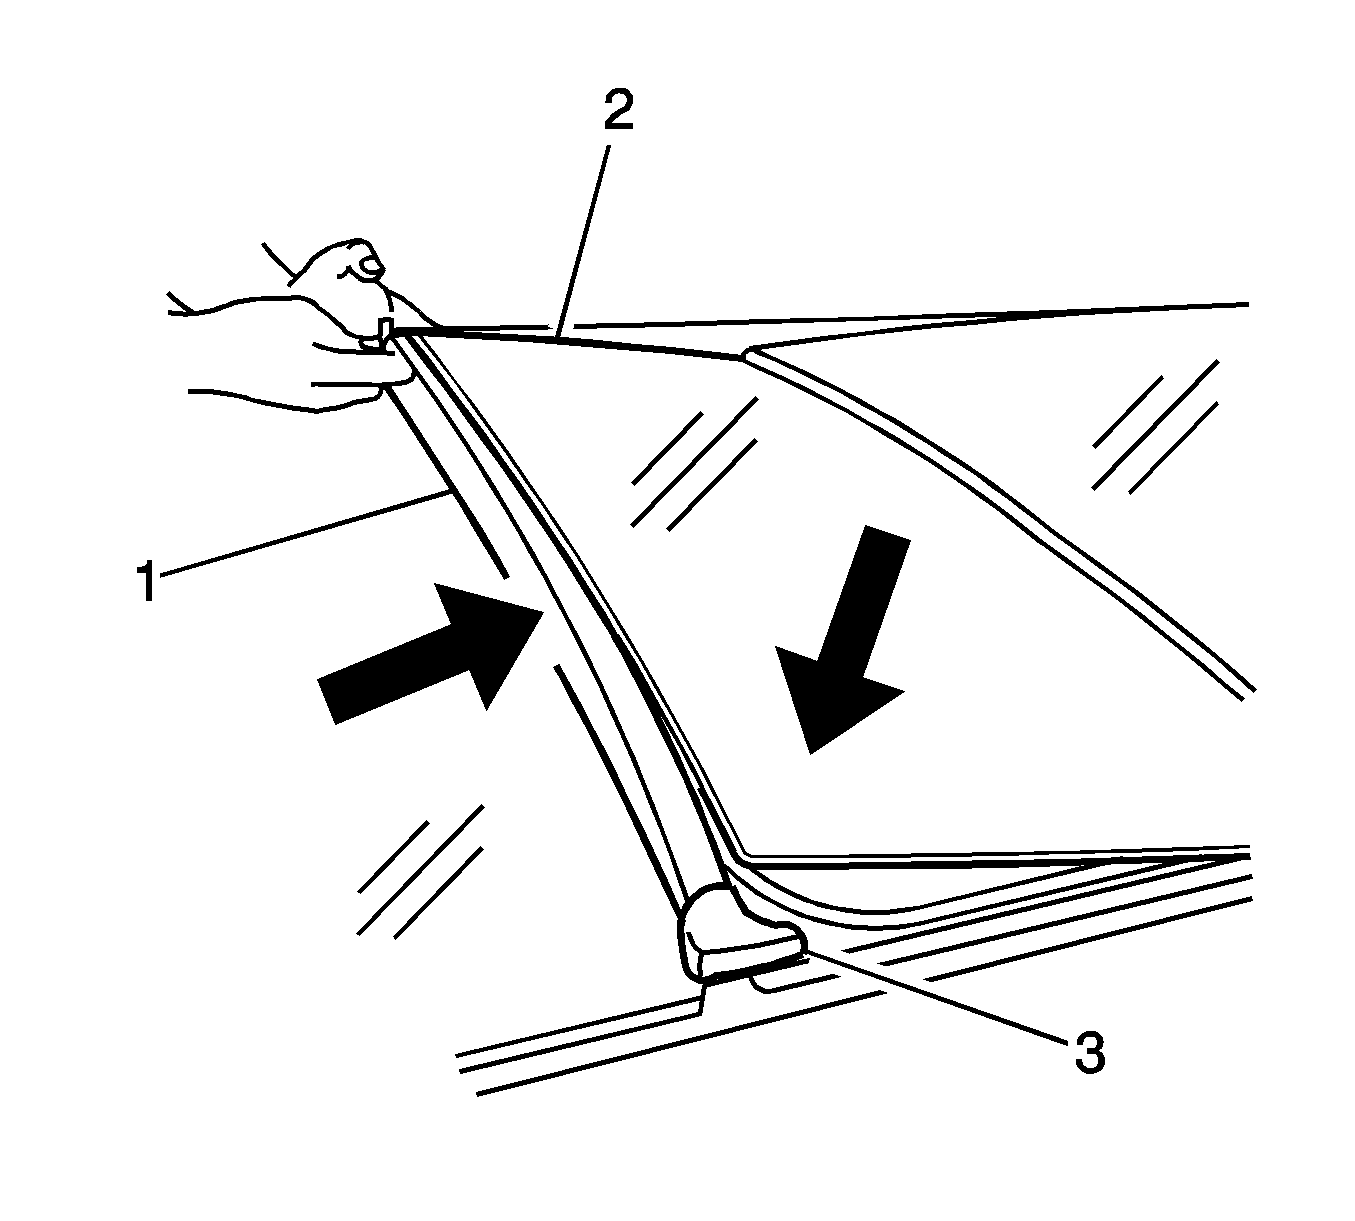
- Tilt the window (2). Slide the window rearward into position.
- Position the forward weatherstrip (1) under the forward edge of the center window flange (3).
- Firmly set the center window panel (2) into position.
- Ensure that the forward and rearward window seams are centered.
- Install the 5 panel attaching screws.

Notice: Refer to Fastener Notice in the Preface section.

Tighten
Tighten the screws to 5 N·m (44 lb in).
Sunroof Window Replacement Rear Vent
Removal Procedure
- Move the rear sunroof window to the vent position.
- Remove the headliner. Refer to Headlining Trim Panel Replacement in Interior Trim.
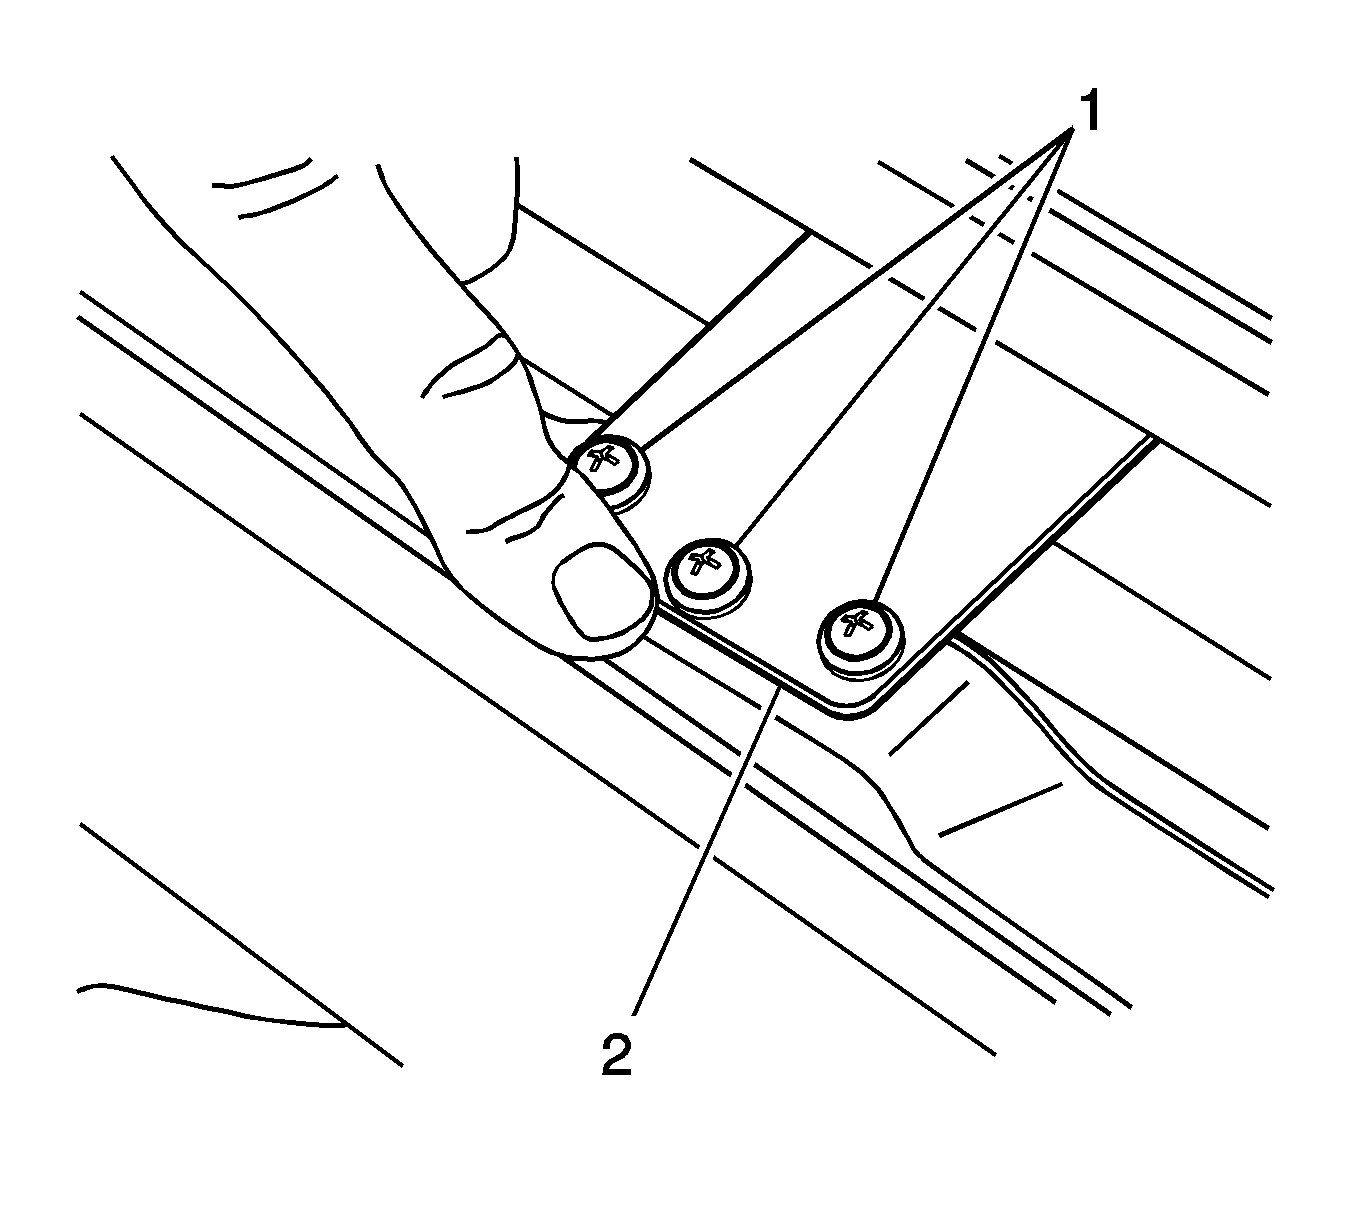
- Remove the six hinge-to-frame screws (1).
- Remove the two outer lift cam arm-to-window shouldered screws on each side.
- Remove the window from the vehicle.
Important: Do not damage the rear vent window seal when removing the screws.
Installation Procedure
- Position the rear vent window to the sunroof frame (2).
- Loosely install the six hinge screws.
- Install the exterior shouldered cam to the window screws.
- Install the headliner. Refer to Headlining Trim Panel Replacement in Interior Trim.
- Verify the operation of the window.
Notice: Refer to Fastener Notice in the Preface section.
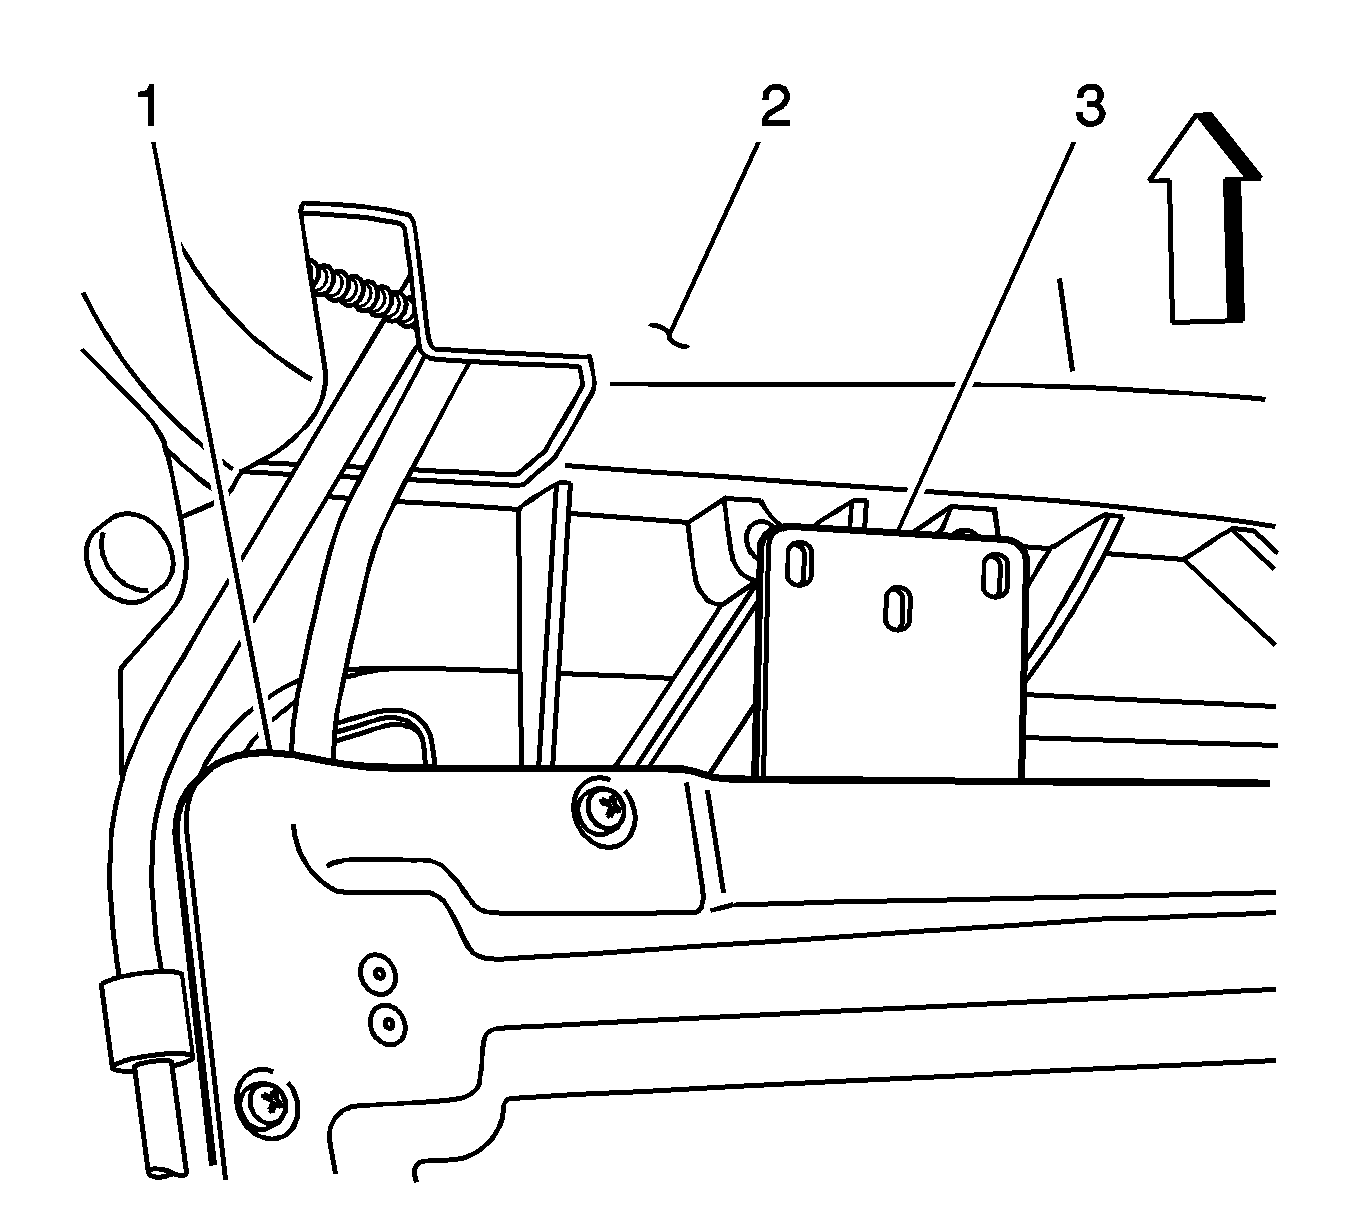
Important: Set the gap from the motor/actuator compartment window to the vent window at 8 mm (0.3 in)
Tighten
Tighten the screws to 5 N·m (44 lb in).
Tighten
Tighten the screws to 5 N·m (44 lb in).
Sunroof Window Replacement Rear Stationary
Removal Procedure
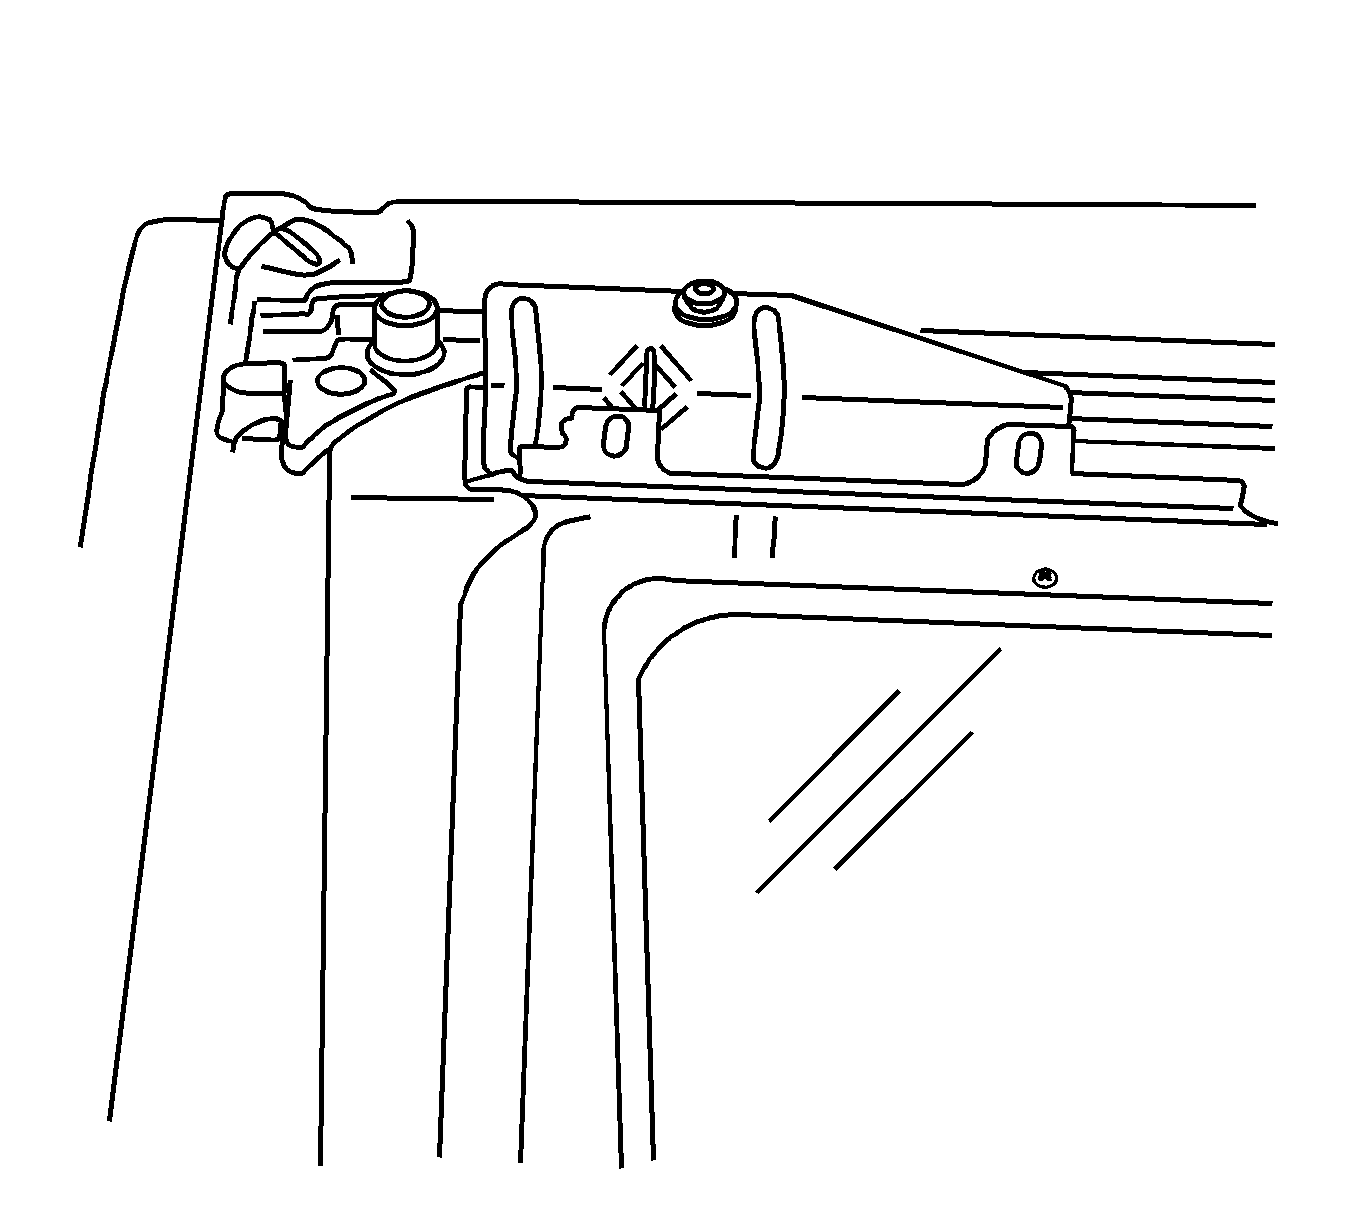
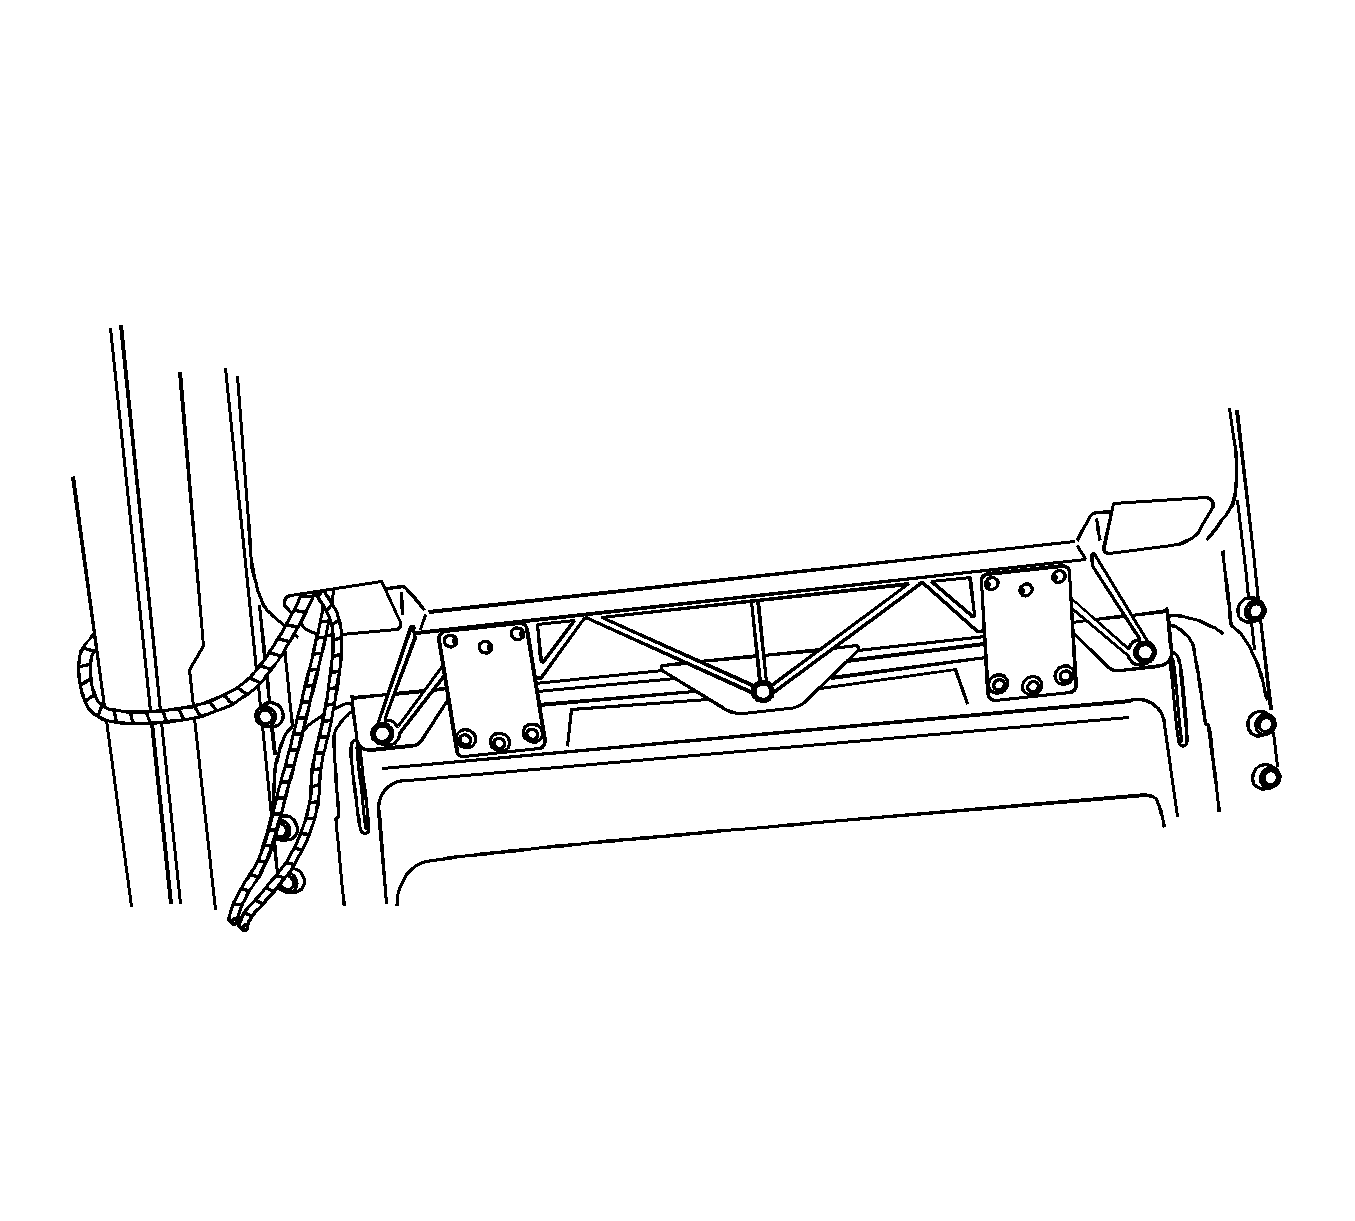
- Remove the headliner. Refer to Headlining Trim Panel Replacement .
- Remove the screws from the panel bracket to the sunroof frame.
- Remove the hinge plate to sunroof frame screws.
- Remove the window panel.
Installation Procedure
- Position the window panel to the sunroof frame.
- Loosely install the screws to the window bracket.
- Loosely install the screws to the hinge plate sunroof frame
- Verify the panel edge clearances. Refer to Sunroof Window Height and Opening Fit Adjustment .
- Install the headliner. Refer to Headlining Trim Panel Replacement .


Notice: Refer to Fastener Notice in the Preface section.
Tighten
Tighten the window bracket screws to 5 N·m (41 lb in).
Tighten
Tighten the hinge plate sunroof frame screws to 5 N·m (41 lb in).
