Tools Required
J 42841-A Rear Oil Seal Remover
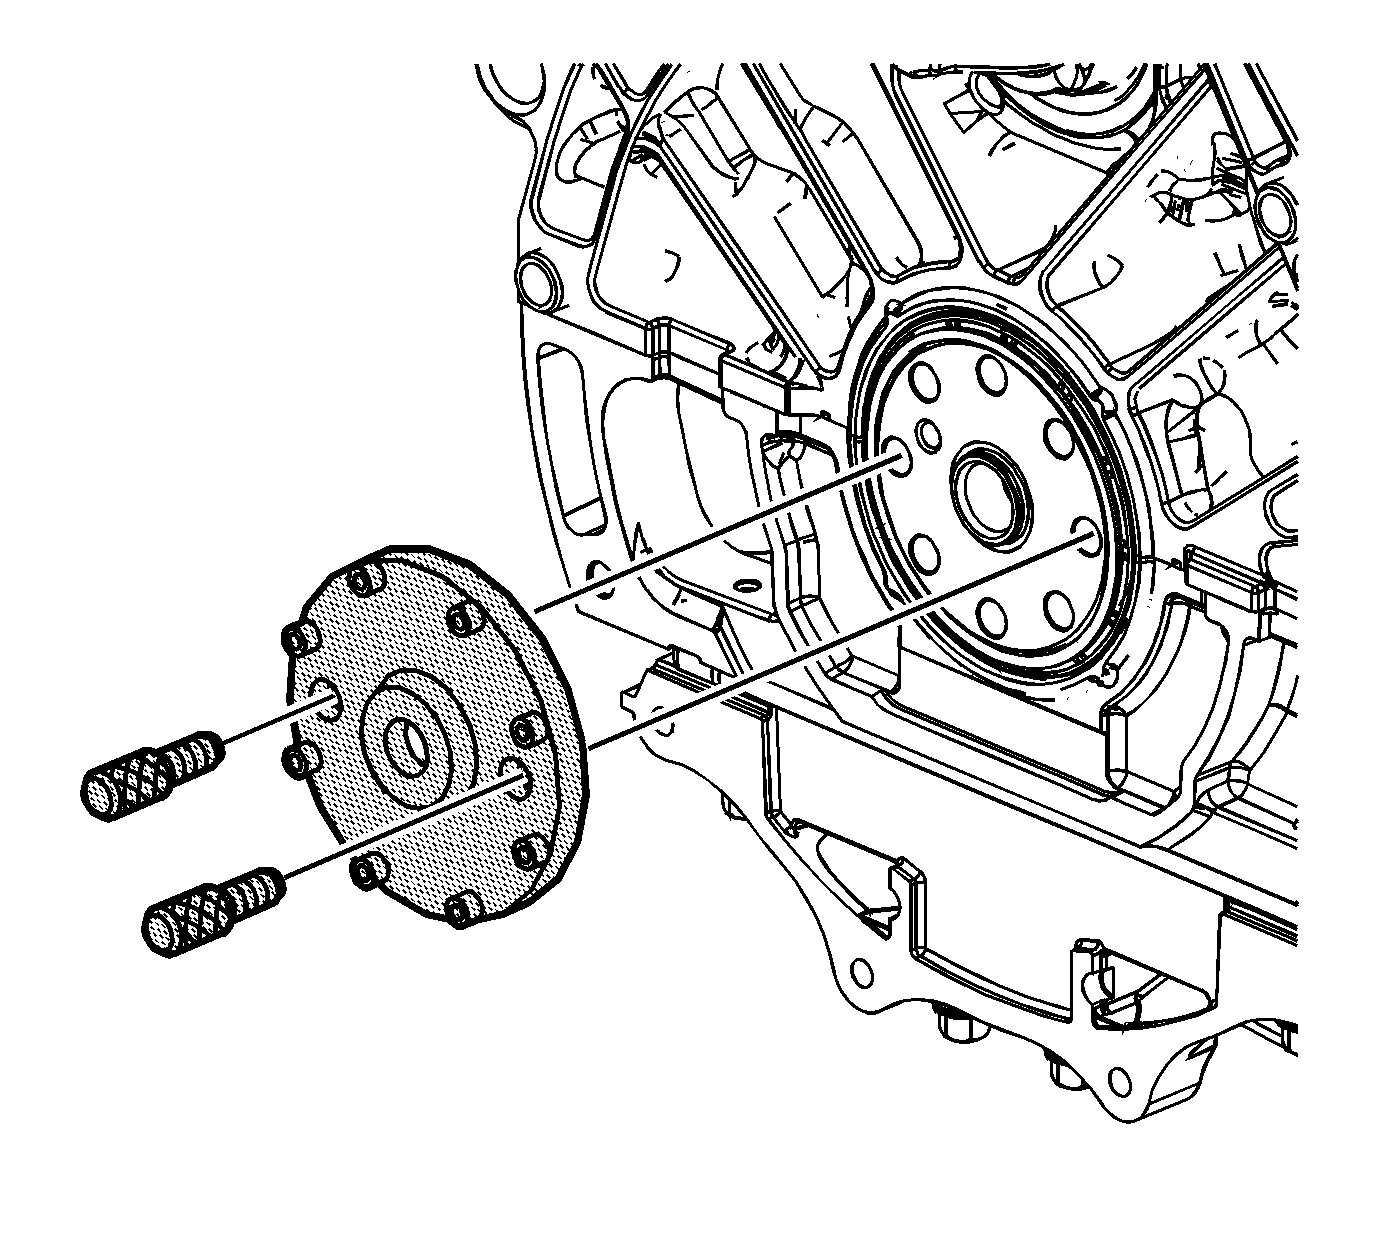
- Install the J 42841-A plate onto the crankshaft. The hub on the crankshaft will fit into the recess on the inboard side of the J 42841-A plate.
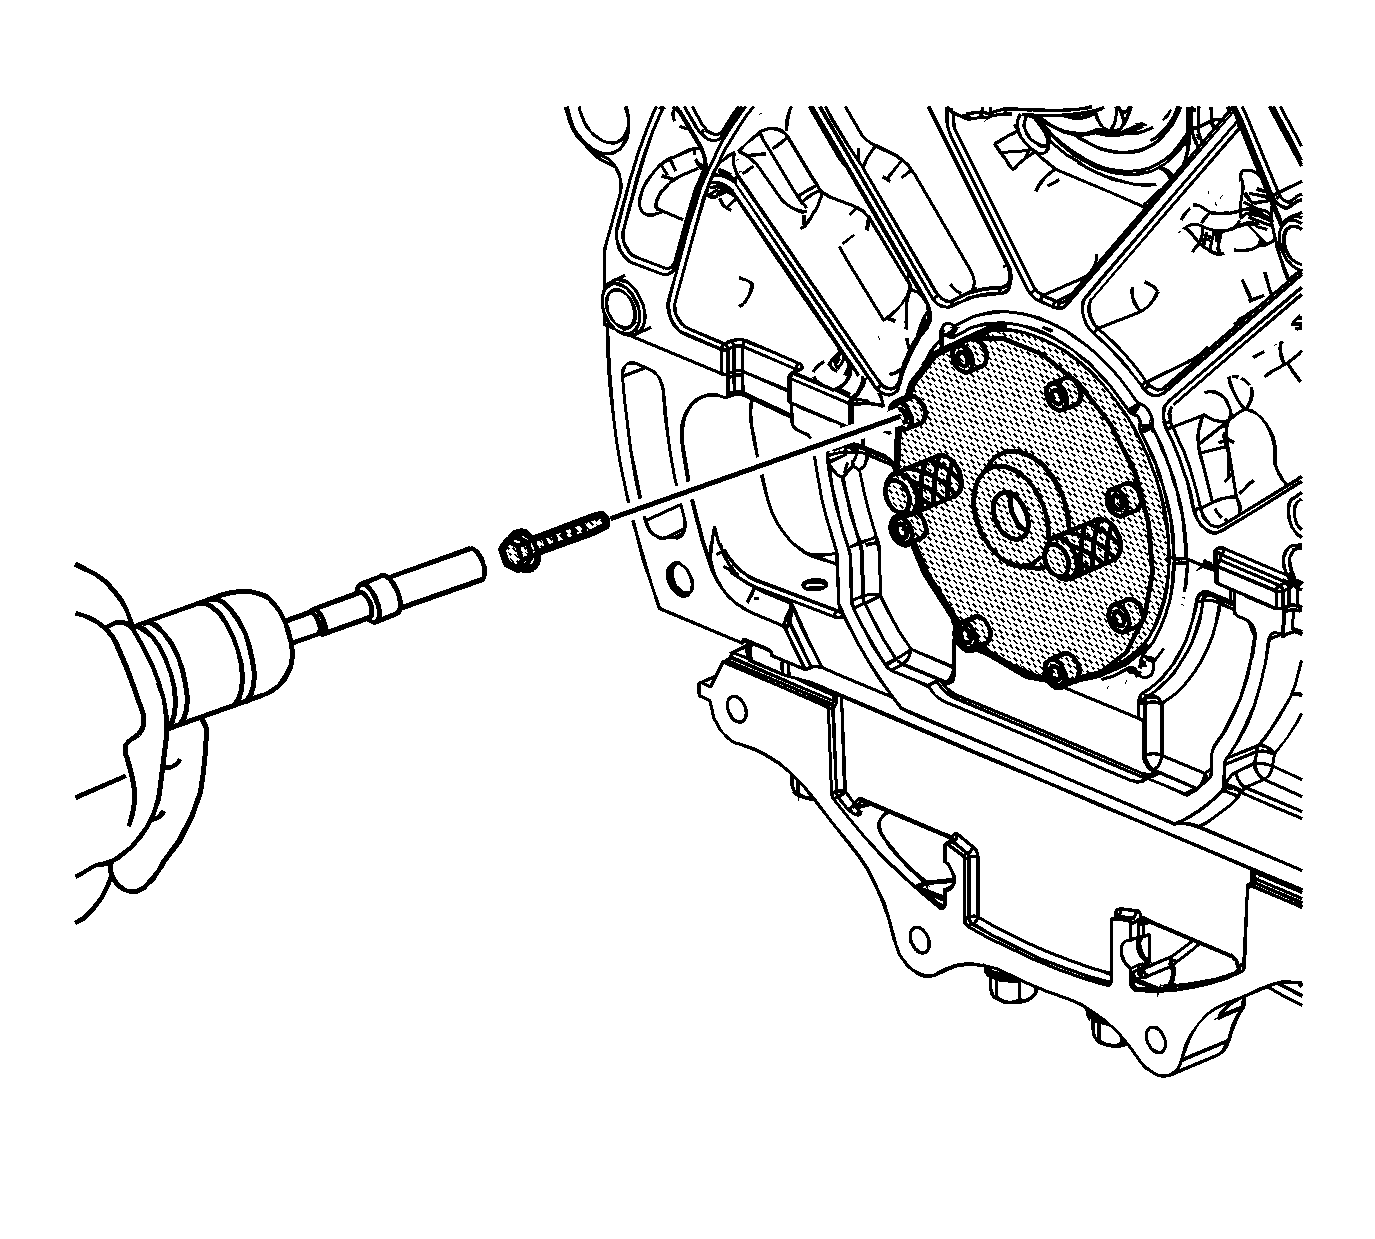
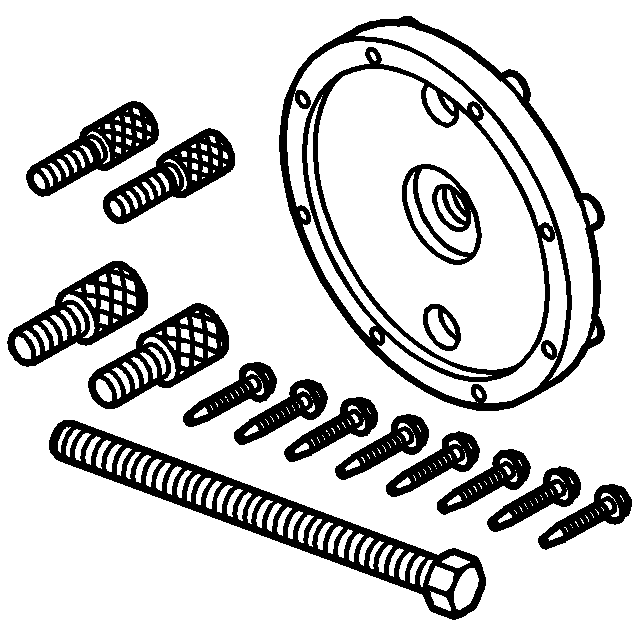
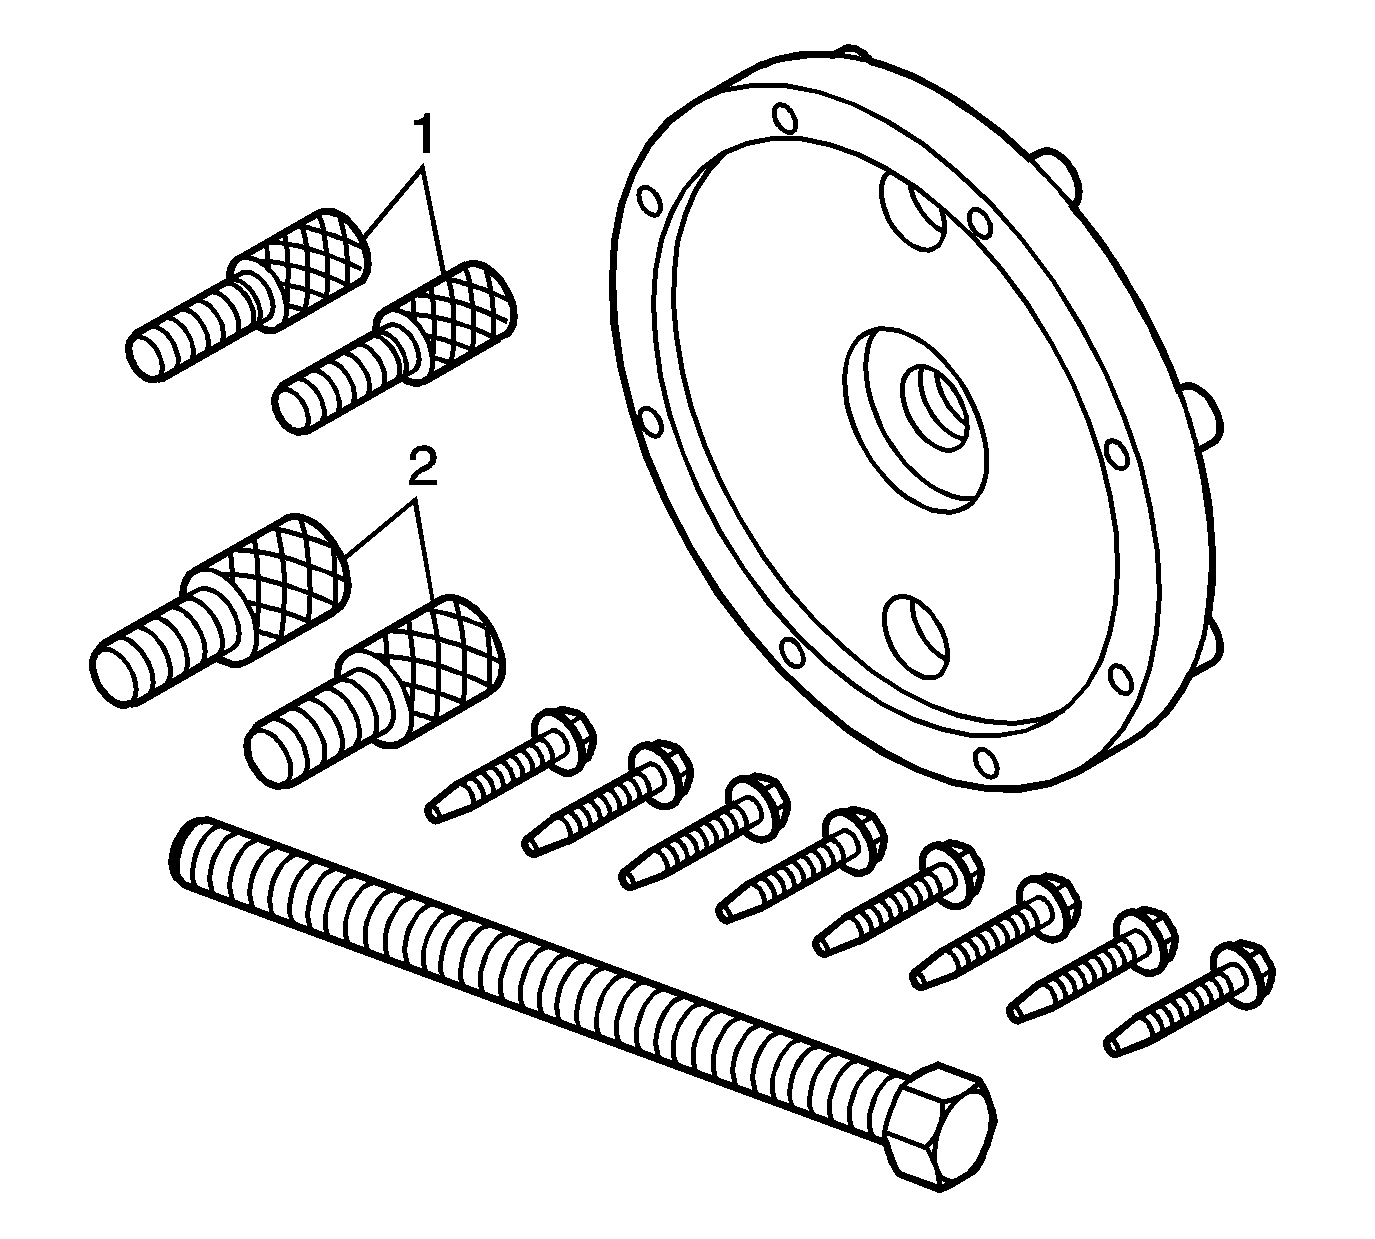
- Use the proper bolts from the J 42841-A to retain the plate in place. Use the bolts (1) 8 mm or the bolts (2) 11 mm.
- Using a drill motor, variable speed preferred, with a socket adapter, install eight 25 mm (1.0 in) self-drilling screws into the seal using the guide holes in the removal tool. When drilling, ensure the drill motor speed is reduced when the screw begins threading into the seal.
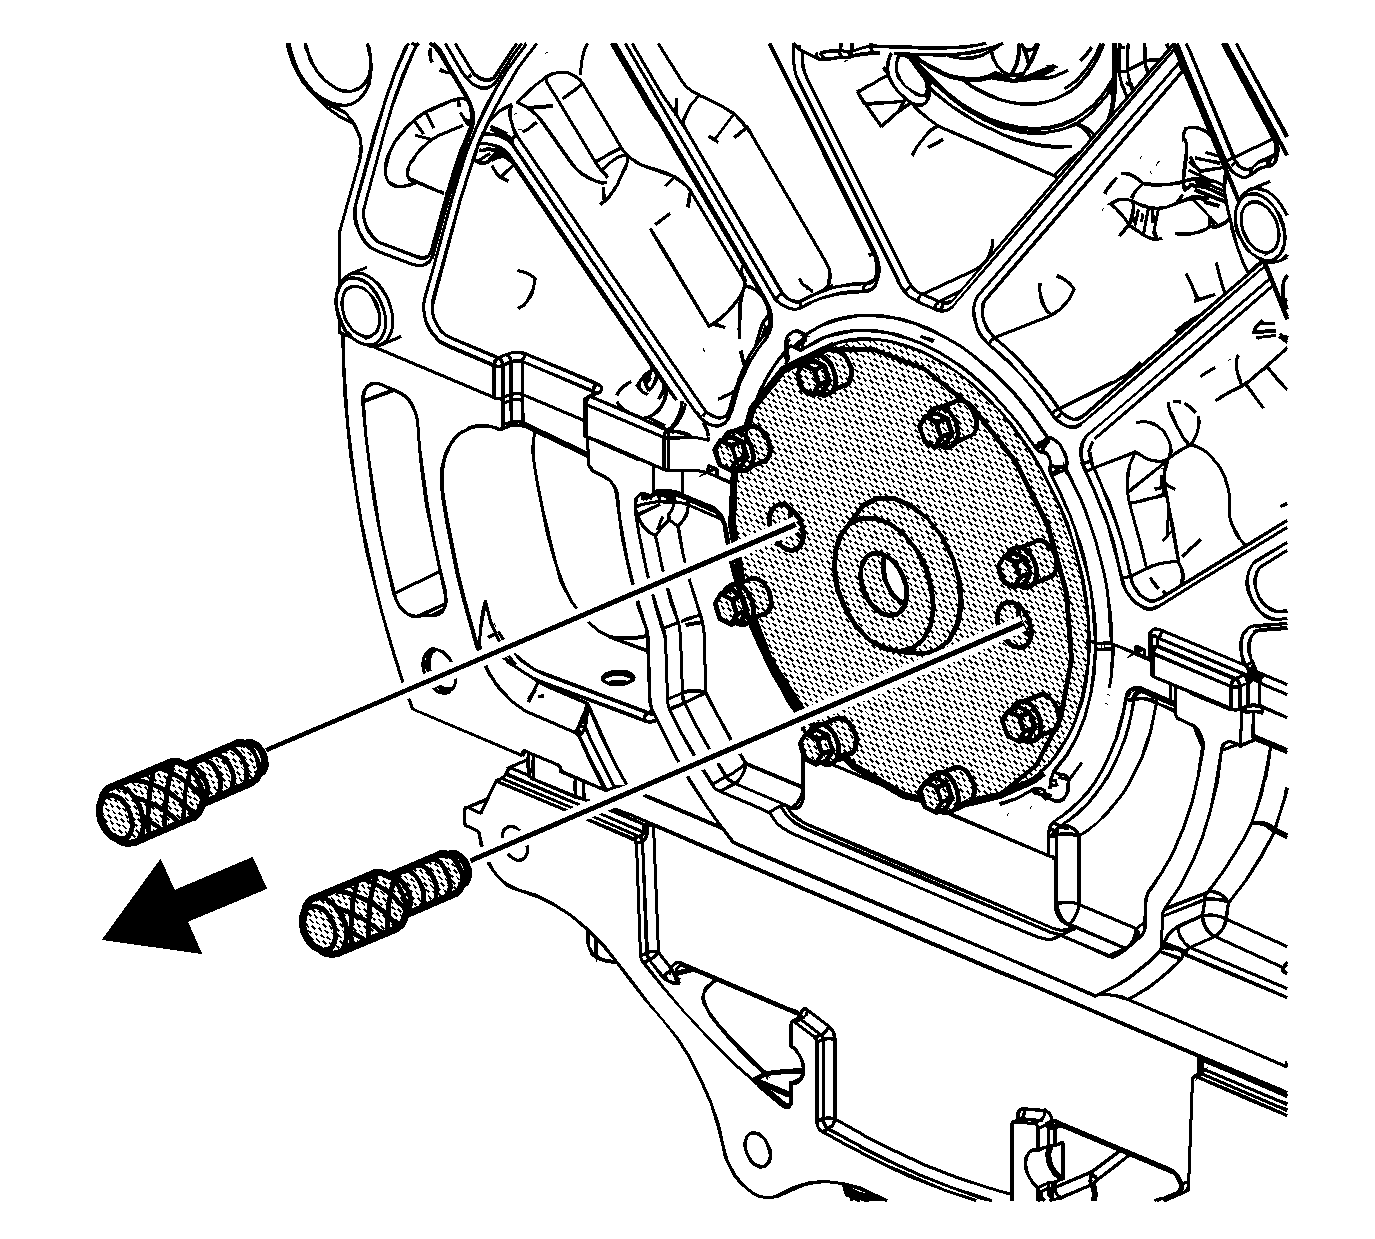
- With all eight removal screws installed, remove the J 42841-A retaining bolts.
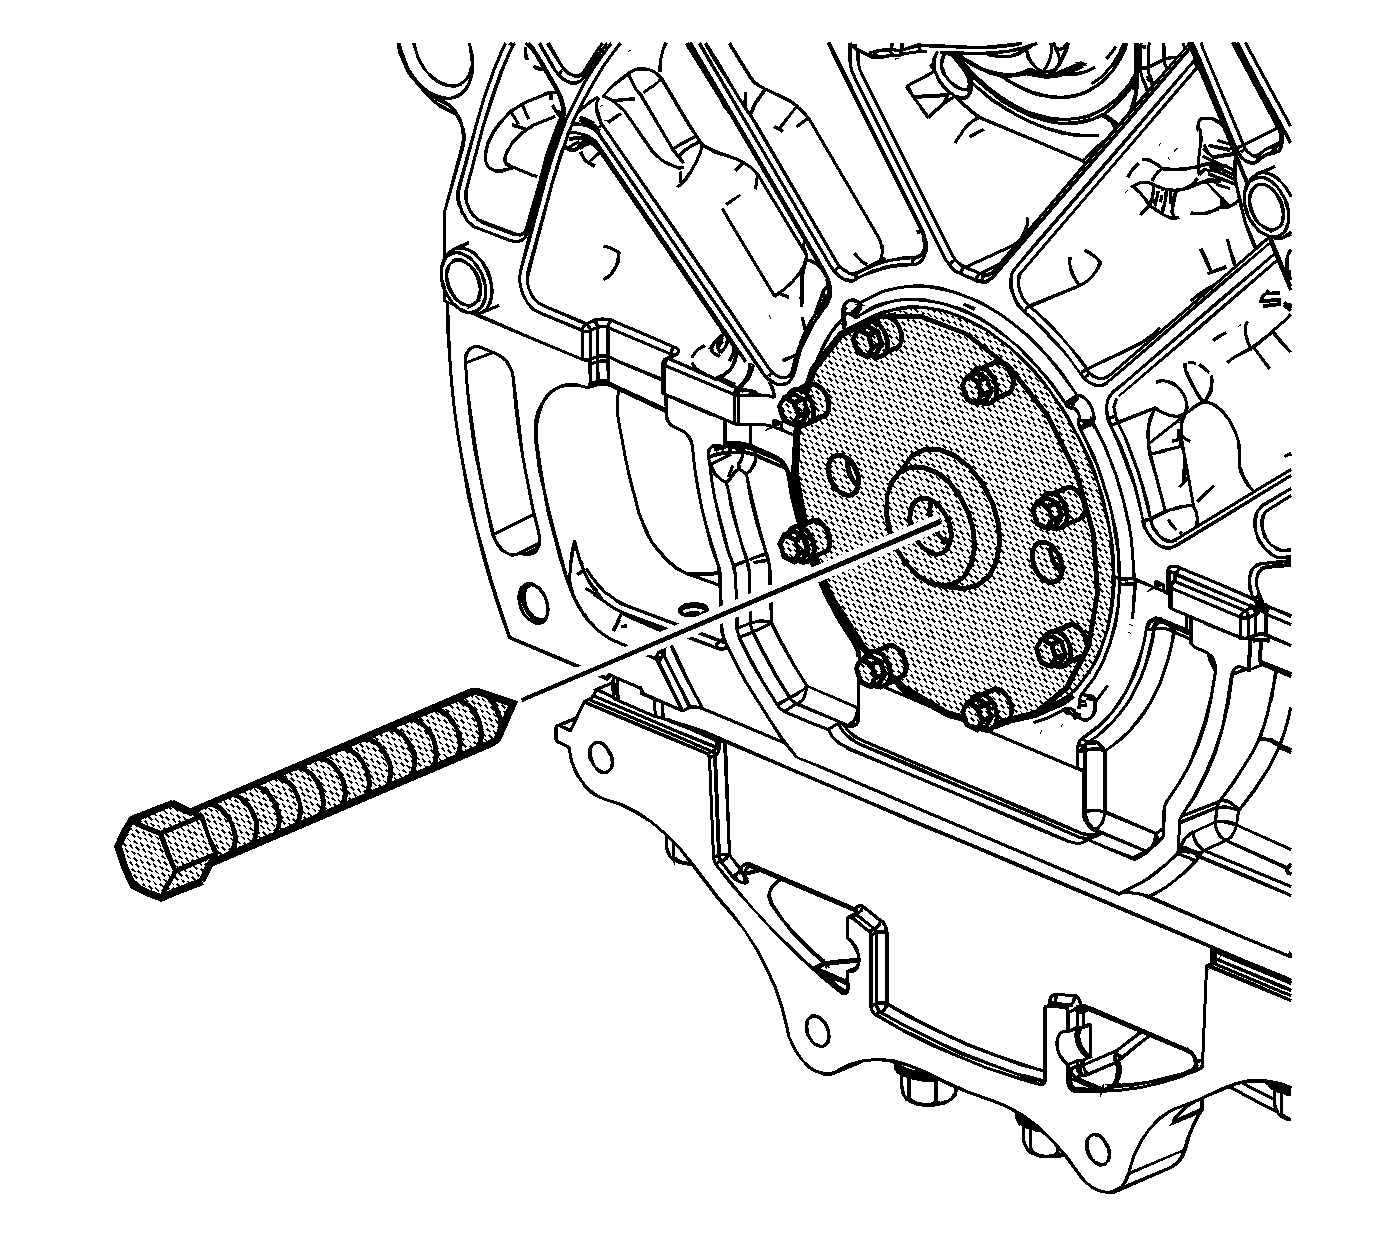
- Install the center forcing screw.
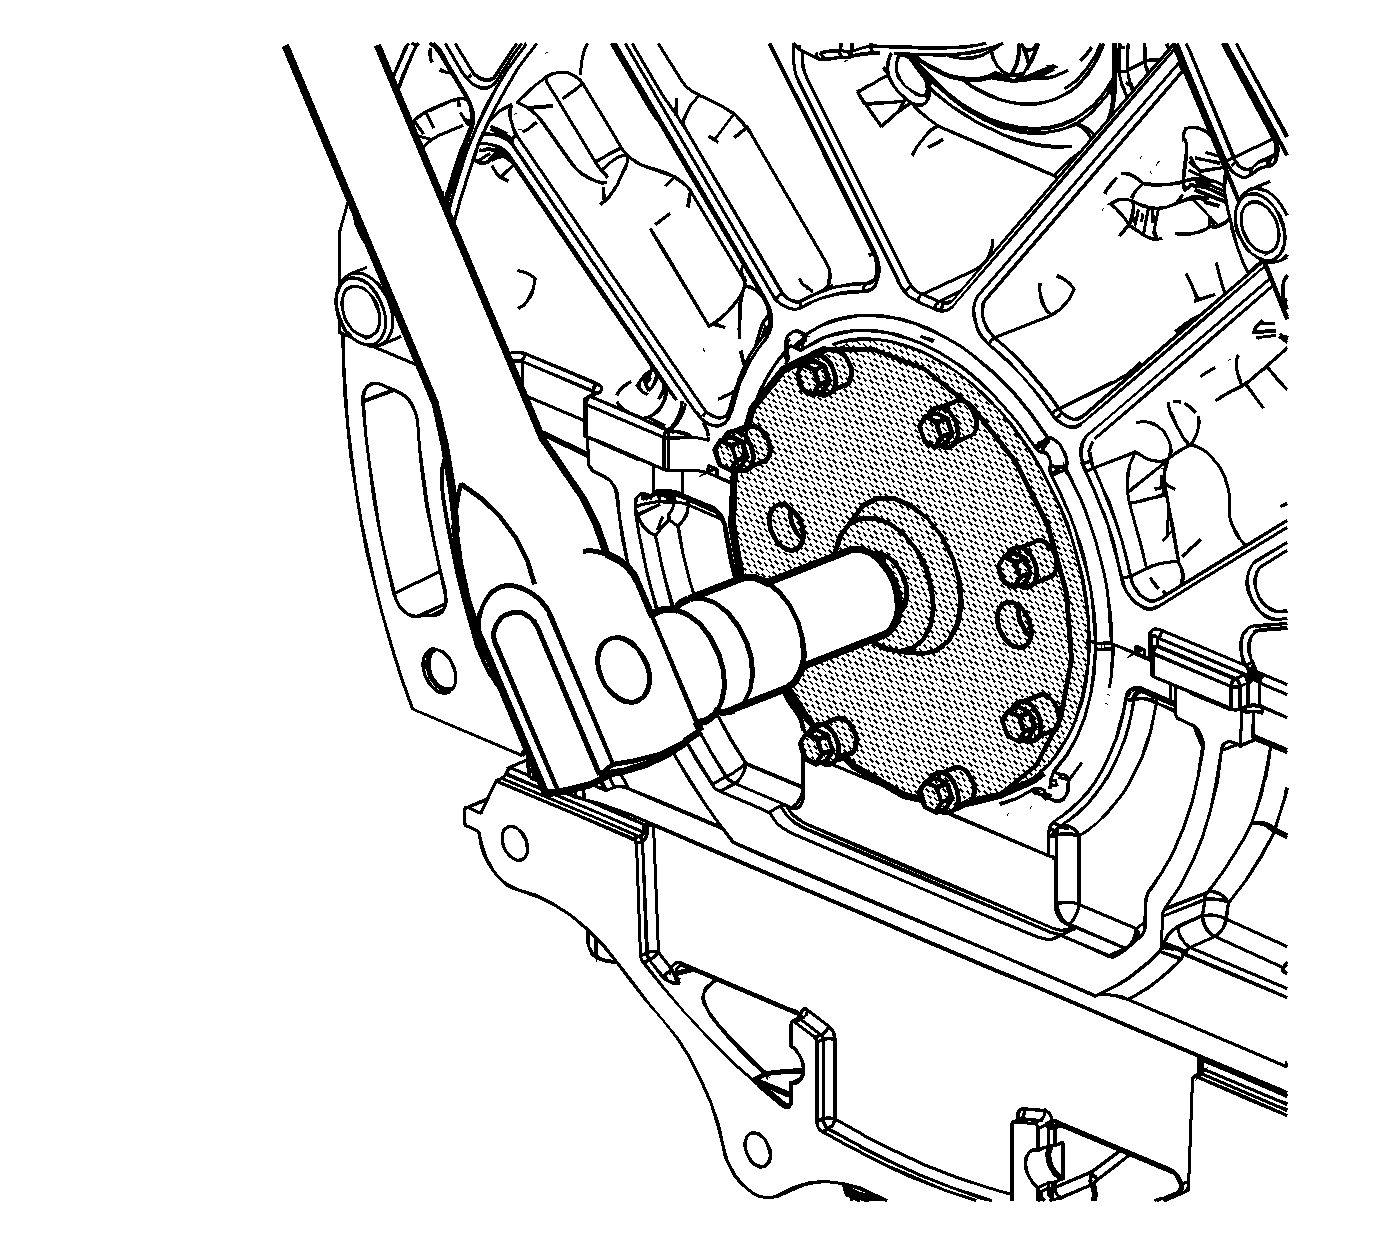
- Tighten the center screw on the J 42841-A to pull the seal assembly off the end of the crankshaft.
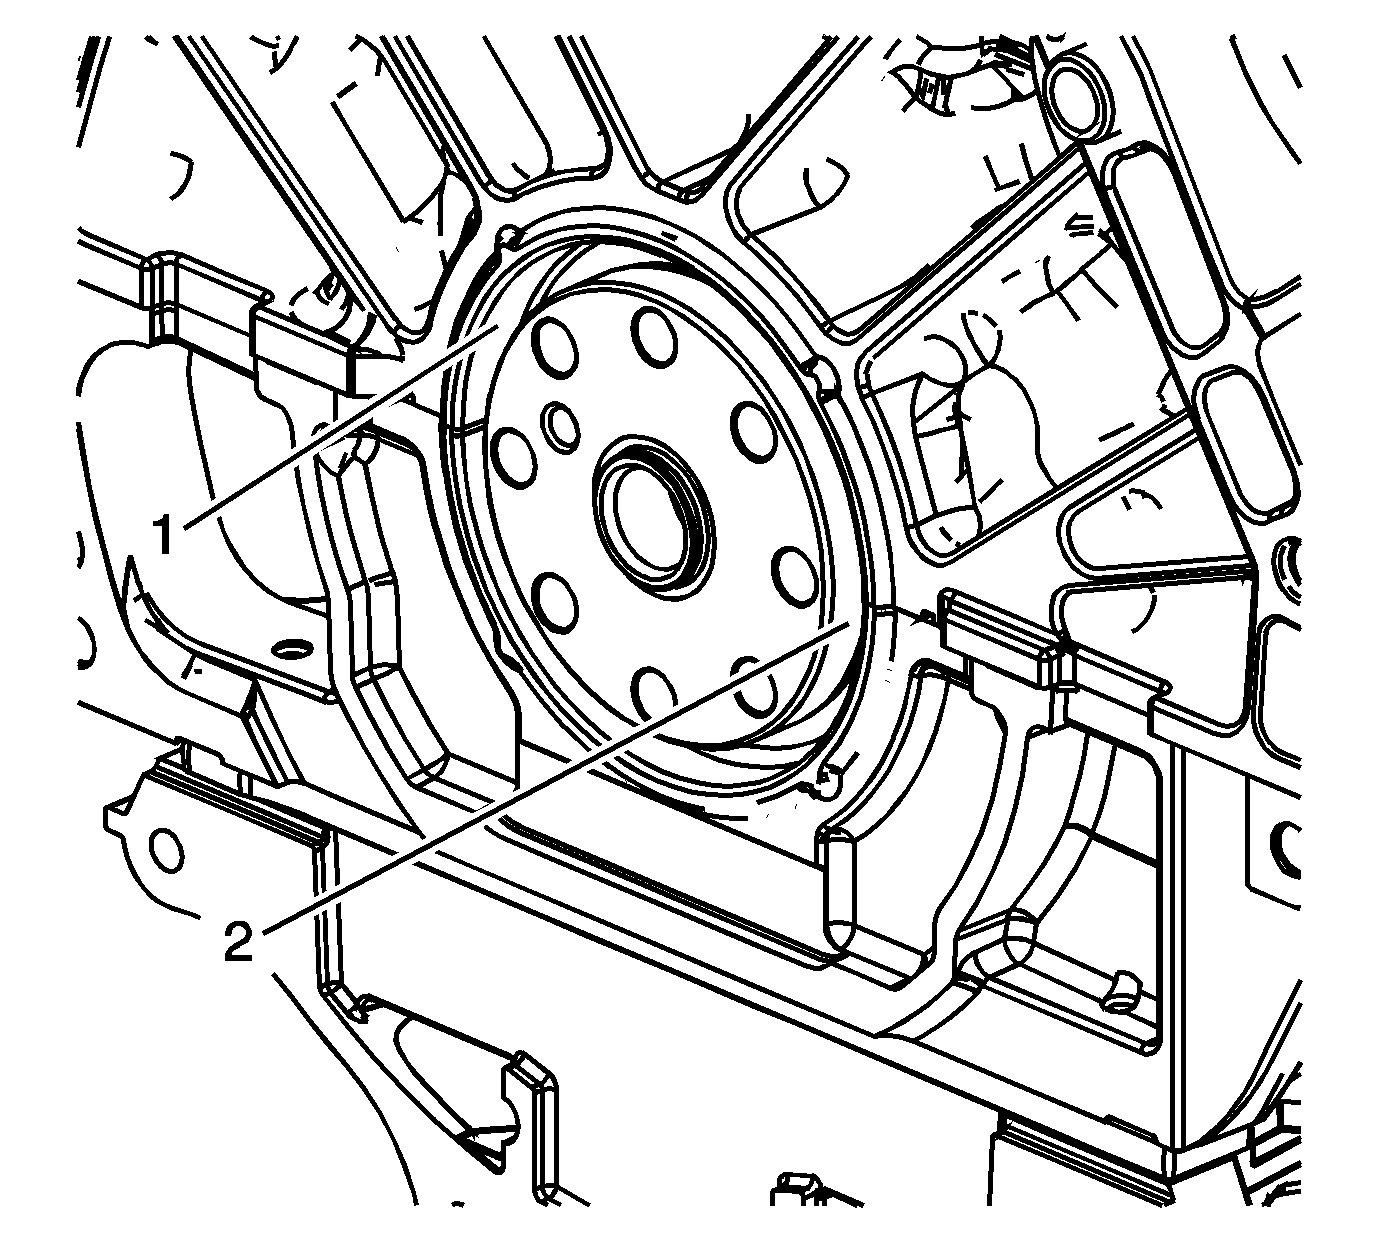
- After removing the crankshaft rear oil seal inspect the engine block bore (1) and the crankshaft flange (2) for the damage. Repair or replace any damaged components.
Important: If the engine is in the vehicle, the crankshaft rear oil seal can be removed/installed after the transmission/transaxle and engine flywheel are removed.
Important: Crankshaft rear oil seal removal requires adequate space for removal. Mount the engine on a suitable engine stand which will properly space the engine in order to use the J 42841-A in order to remove the crankshaft rear oil seal. If necessary remove the crankshaft rear oil seal with the engine properly supported on the floor or on a bench.
Important: Beginning with the model year 2006 the flywheel/flexplate crankshaft bolt hole thread was changed from 8 x 1.25 mm to 11 x 1.5 mm. The J 42841-A will service the cassette seals installed on engines from March 1, 1996 and later. If the older J 42841 is to be used on a 2006 or later engine the update kit, J 42841-10, must be used to convert the J 42841 to a J 42841-A .
Important: Northstar engines 2005 and older have an 8 x 1.25 mm flywheel/flexplate crankshaft bolt hole thread. Northstar engines 2006 and later have an 11 x 1.5 mm flywheel/flexplate crankshaft bolt hole thread.