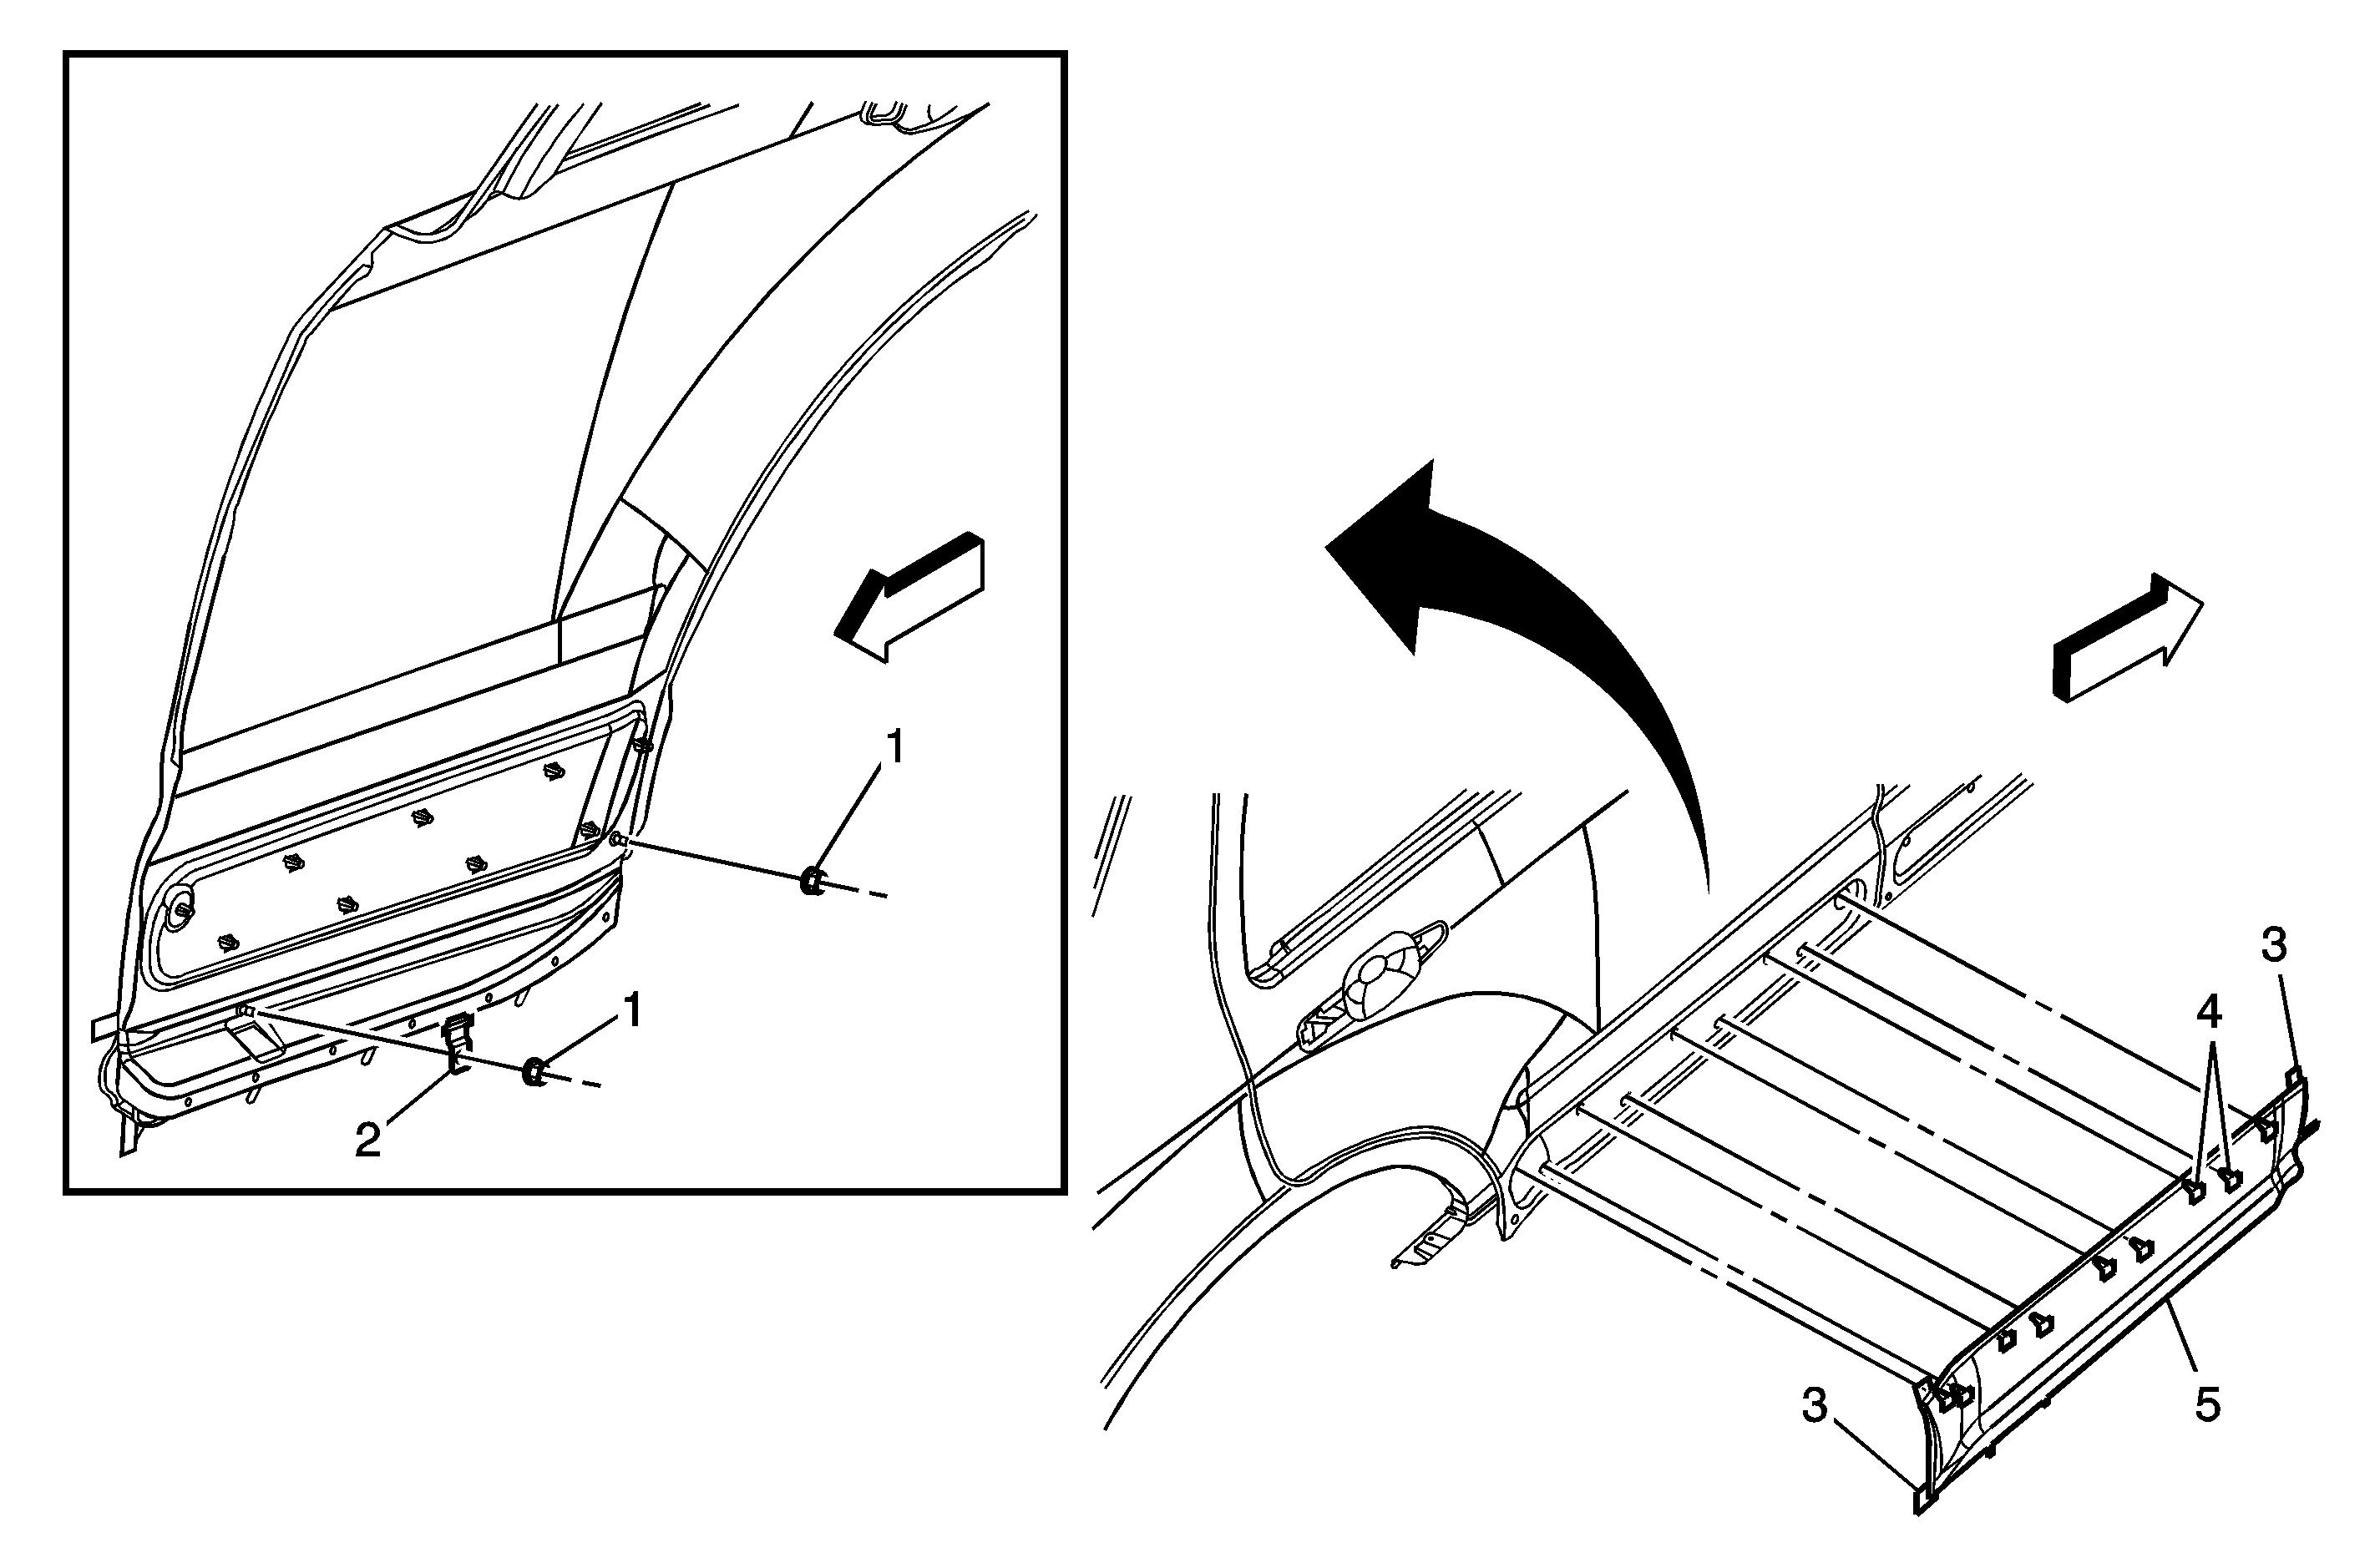
Callout
| Component Name
|
1
| Molding Retainer Nut (Qty: 2)
Notice: Refer to Fastener Notice in the Preface section.
Tighten
10 N·m (89 lb in) |
2
| Retainer Tab
Tip
Remove the tab prior to removing the exterior lower rear door molding. |
3
| Double Sided Adhesive Molding Tape
Procedure
- Clean all tape residue from the exterior door panel prior to installing the new lower door molding.
- The new molding must be at least 66°F prior to installing the molding to the body panel.
- Close the rear door.
- Remove all three protective liners from the adhesive tape.
- Be careful not to touch the adhesive tape with hands or allow molding to come in contact with any dirt or foreign material prior to adhesion.
- Align the 9 retainer clips to the holes in the door.
- Apply hand pressure to secure the 9 molding retainer clips to the door.
|
4
| Retainer Clip (Qty: 9)
Tip
Pull the molding from the rear edge carefully in order to disengage the retainer clips and remove. |
5
| Rear Side Door Lower Molding
Tip
Ensure the rear door is in the closed position when installing the new lower door molding. |

