For 1990-2009 cars only
Liftgate Trim Panel Replacement w/o TB5
Removal Procedure
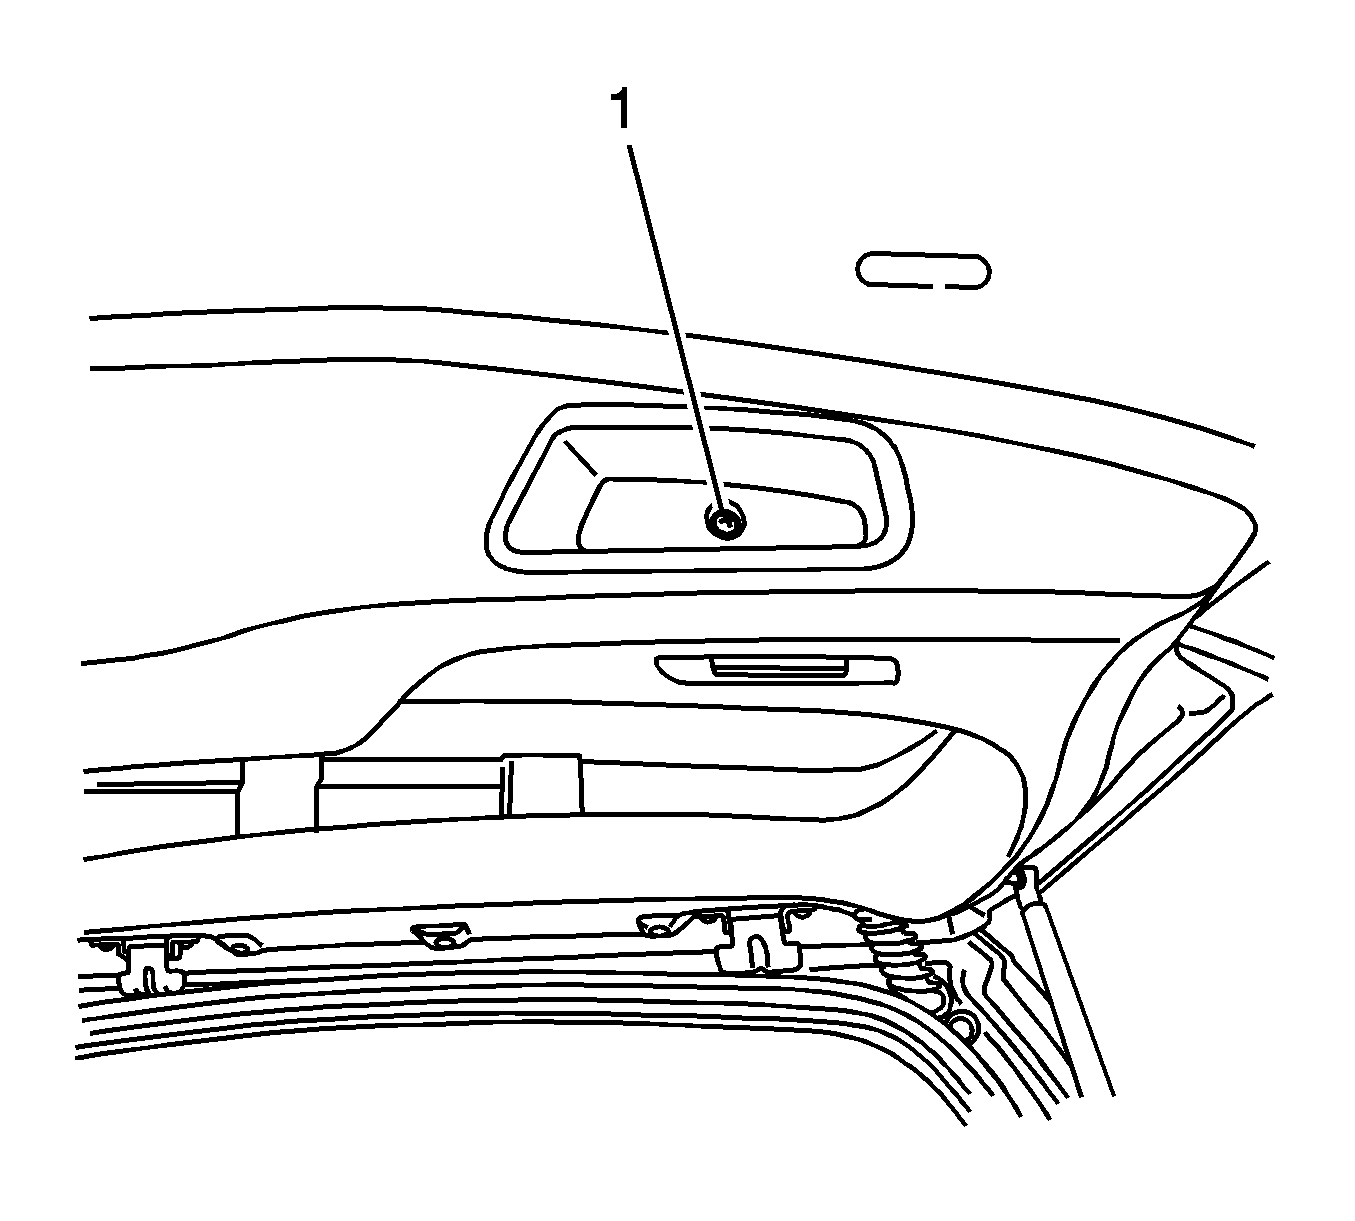
- Remove the liftgate retaining screw (1).
- Partially remove the trim panel near the rear courtesy lamp.
- Disconnect the rear courtesy lamp electrical connector.
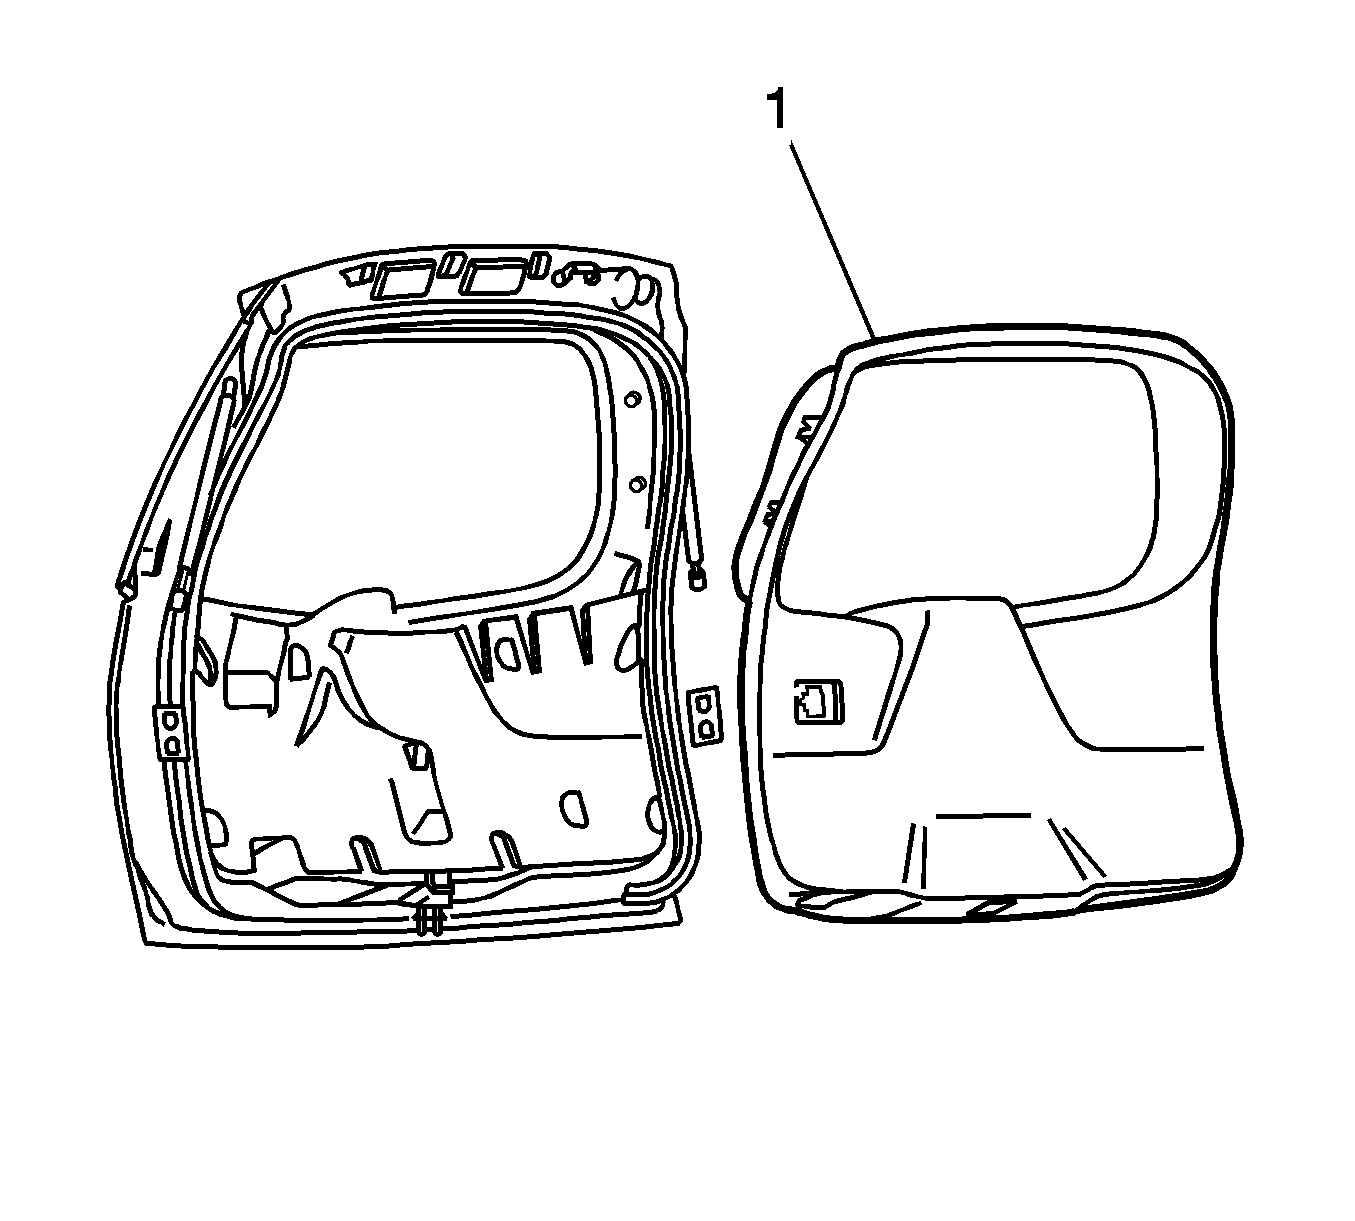
- Remove the liftgate trim panel (1).
- Inspect for broken or missing retainers.
Installation Procedure
- Replace any broken or missing retainers.
- Connect the rear courtesy lamp electrical connector.
- Align the 2 outboard locators on the trim panel with the holes in the liftgate.
- Apply pressure to attach the clips in the lower portion of the trim panel to the liftgate.
- Align the outboard clips around the window opening with the slots in the trim panel. Press the panel (1) into position.
- Install the liftgate screw (1).
Important: The plastic retainers around the window opening should remain in the liftgate.
Notice: Refer to Fastener Notice in the Preface section.
Tighten
Tighten the screw to 2 N·m (18 lb in).
Liftgate Trim Panel Replacement w/TB5
Removal Procedure
- Remove the liftgate retaining screw (1).
- Remove the liftgate rod cover and liftgate rod.
- Partially remove the trim panel near the rear courtesy lamp.
- Disconnect the electrical connectors.
- Remove the liftgate trim panel (1).
- Inspect for broken or missing retainers.
Installation Procedure
- Replace any broken or missing retainers.
- Connect the rear courtesy lamp electrical connector and liftgate actuator switch.
- Align the 2 outboard locators on the trim panel with the holes in the liftgate.
- Apply pressure to attach the clips in the lower portion of the trim panel to the liftgate.
- Align the outboard clips around the window opening with the slots in the trim panel. Press the liftgate trim panel (1) into position.
- Install the liftgate rod cover and liftgate rod.
- Install the liftgate screw (1).
Important: The plastic retainers around the window opening should remain in the liftgate.
Notice: Refer to Fastener Notice in the Preface section.
Tighten
Tighten the screw to 2 N·m (18 lb in).
