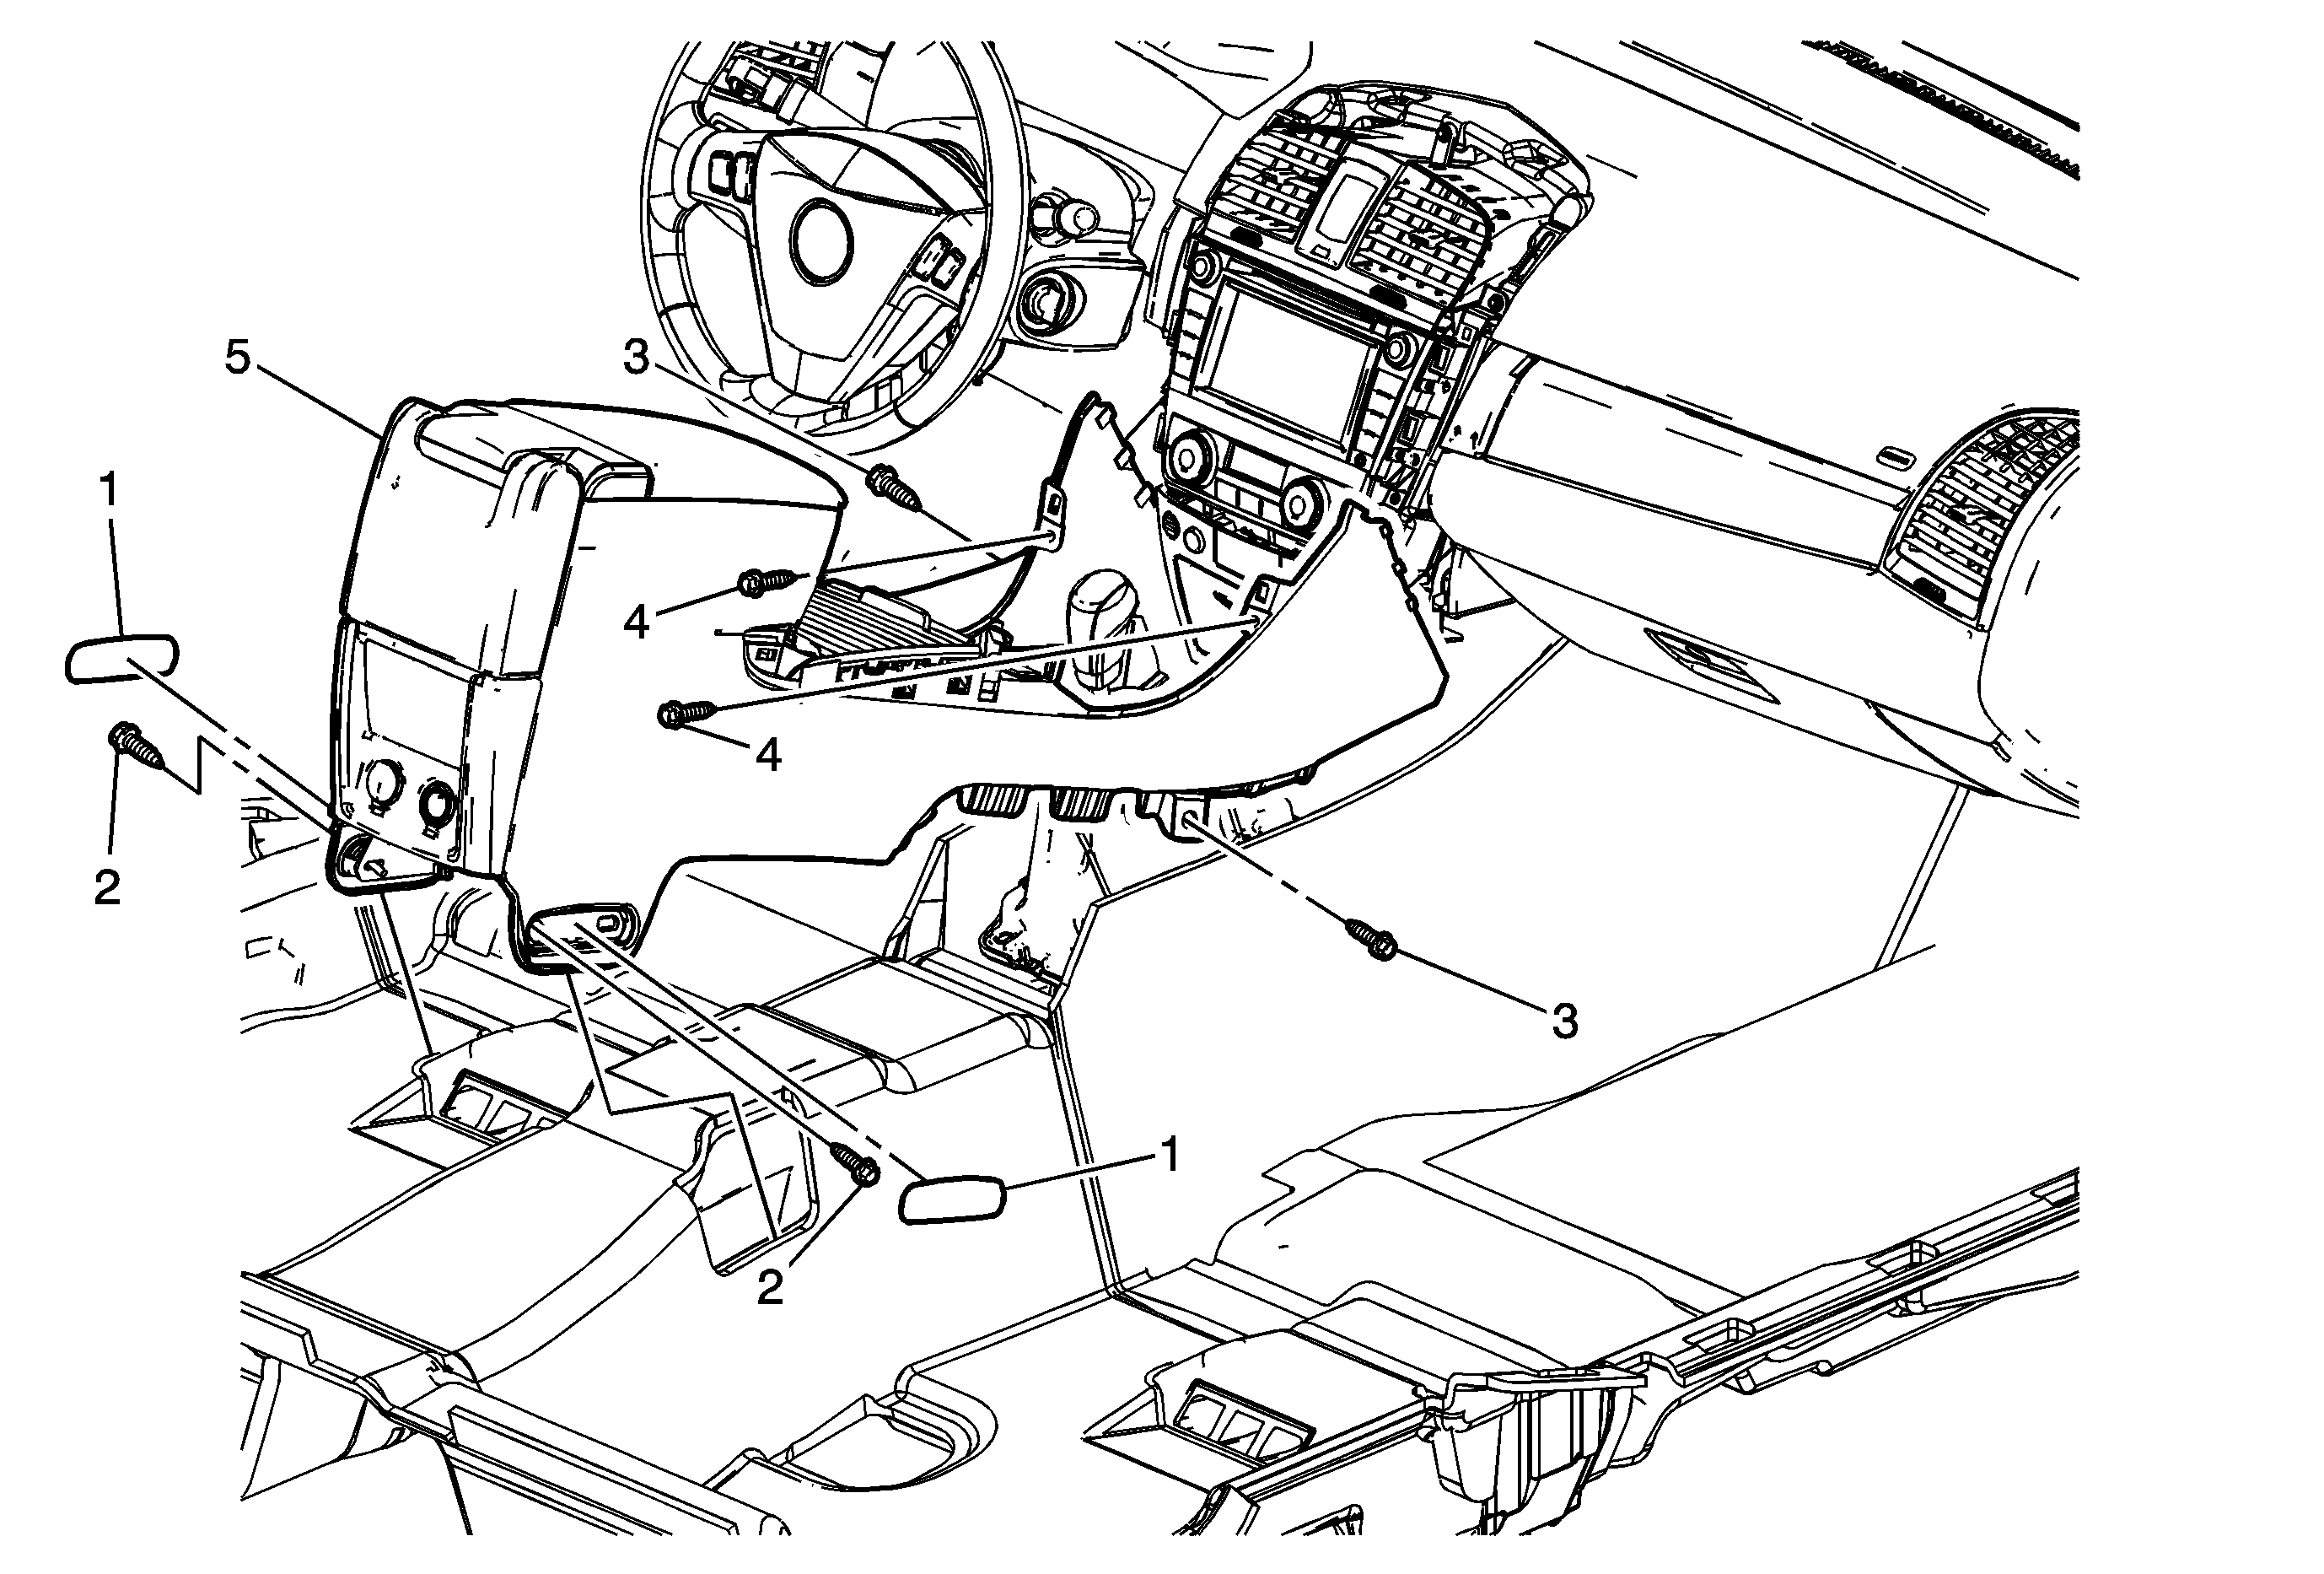
Callout
| Component Name
|
Preliminary Procedures
- Remove the instrument panel accessory trim plate. Refer to
Instrument Panel Accessory Trim Plate Replacement
.
- Remove the console shift lever bezel. Refer to
Console Shift Lever Bezel Replacement
.
|
1
| Console Bolt Cover (Qty: 2)
Tip
Use a flat-bladed plastic trim tool to remove the covers. |
2
| Console Rear Bolt (Qty: 2)
Notice: Refer to Fastener Notice in the Preface section.
Tip
Move the front seats to the full forward position to access the rear bolts.
Tighten
9 N·m (80 lb in) |
3
| Console Front Bolt (Qty: 2)
Procedure
- Move the front seats to the full rearward position to access the front bolts.
- Pull the carpet away from the console to access the front console bolts.
Tighten
9 N·m (80 lb in) |
4
| Console Screw (Qty: 2)
Tighten
2 N·m (18 lb in) |
5
| Console Assembly
Procedures
- Disconnect the electrical connections.
- With the add of an assistant remove the console from the vehicle.
- When replacing the console assembly, transfer all necessary components.
|
Callout
| Component Name
|
Preliminary Procedures
- Remove the instrument panel accessory trim plate. Refer to
Instrument Panel Accessory Trim Plate Replacement
.
- Remove the console shift lever bezel. Refer to
Console Shift Lever Bezel Replacement
.
|
1
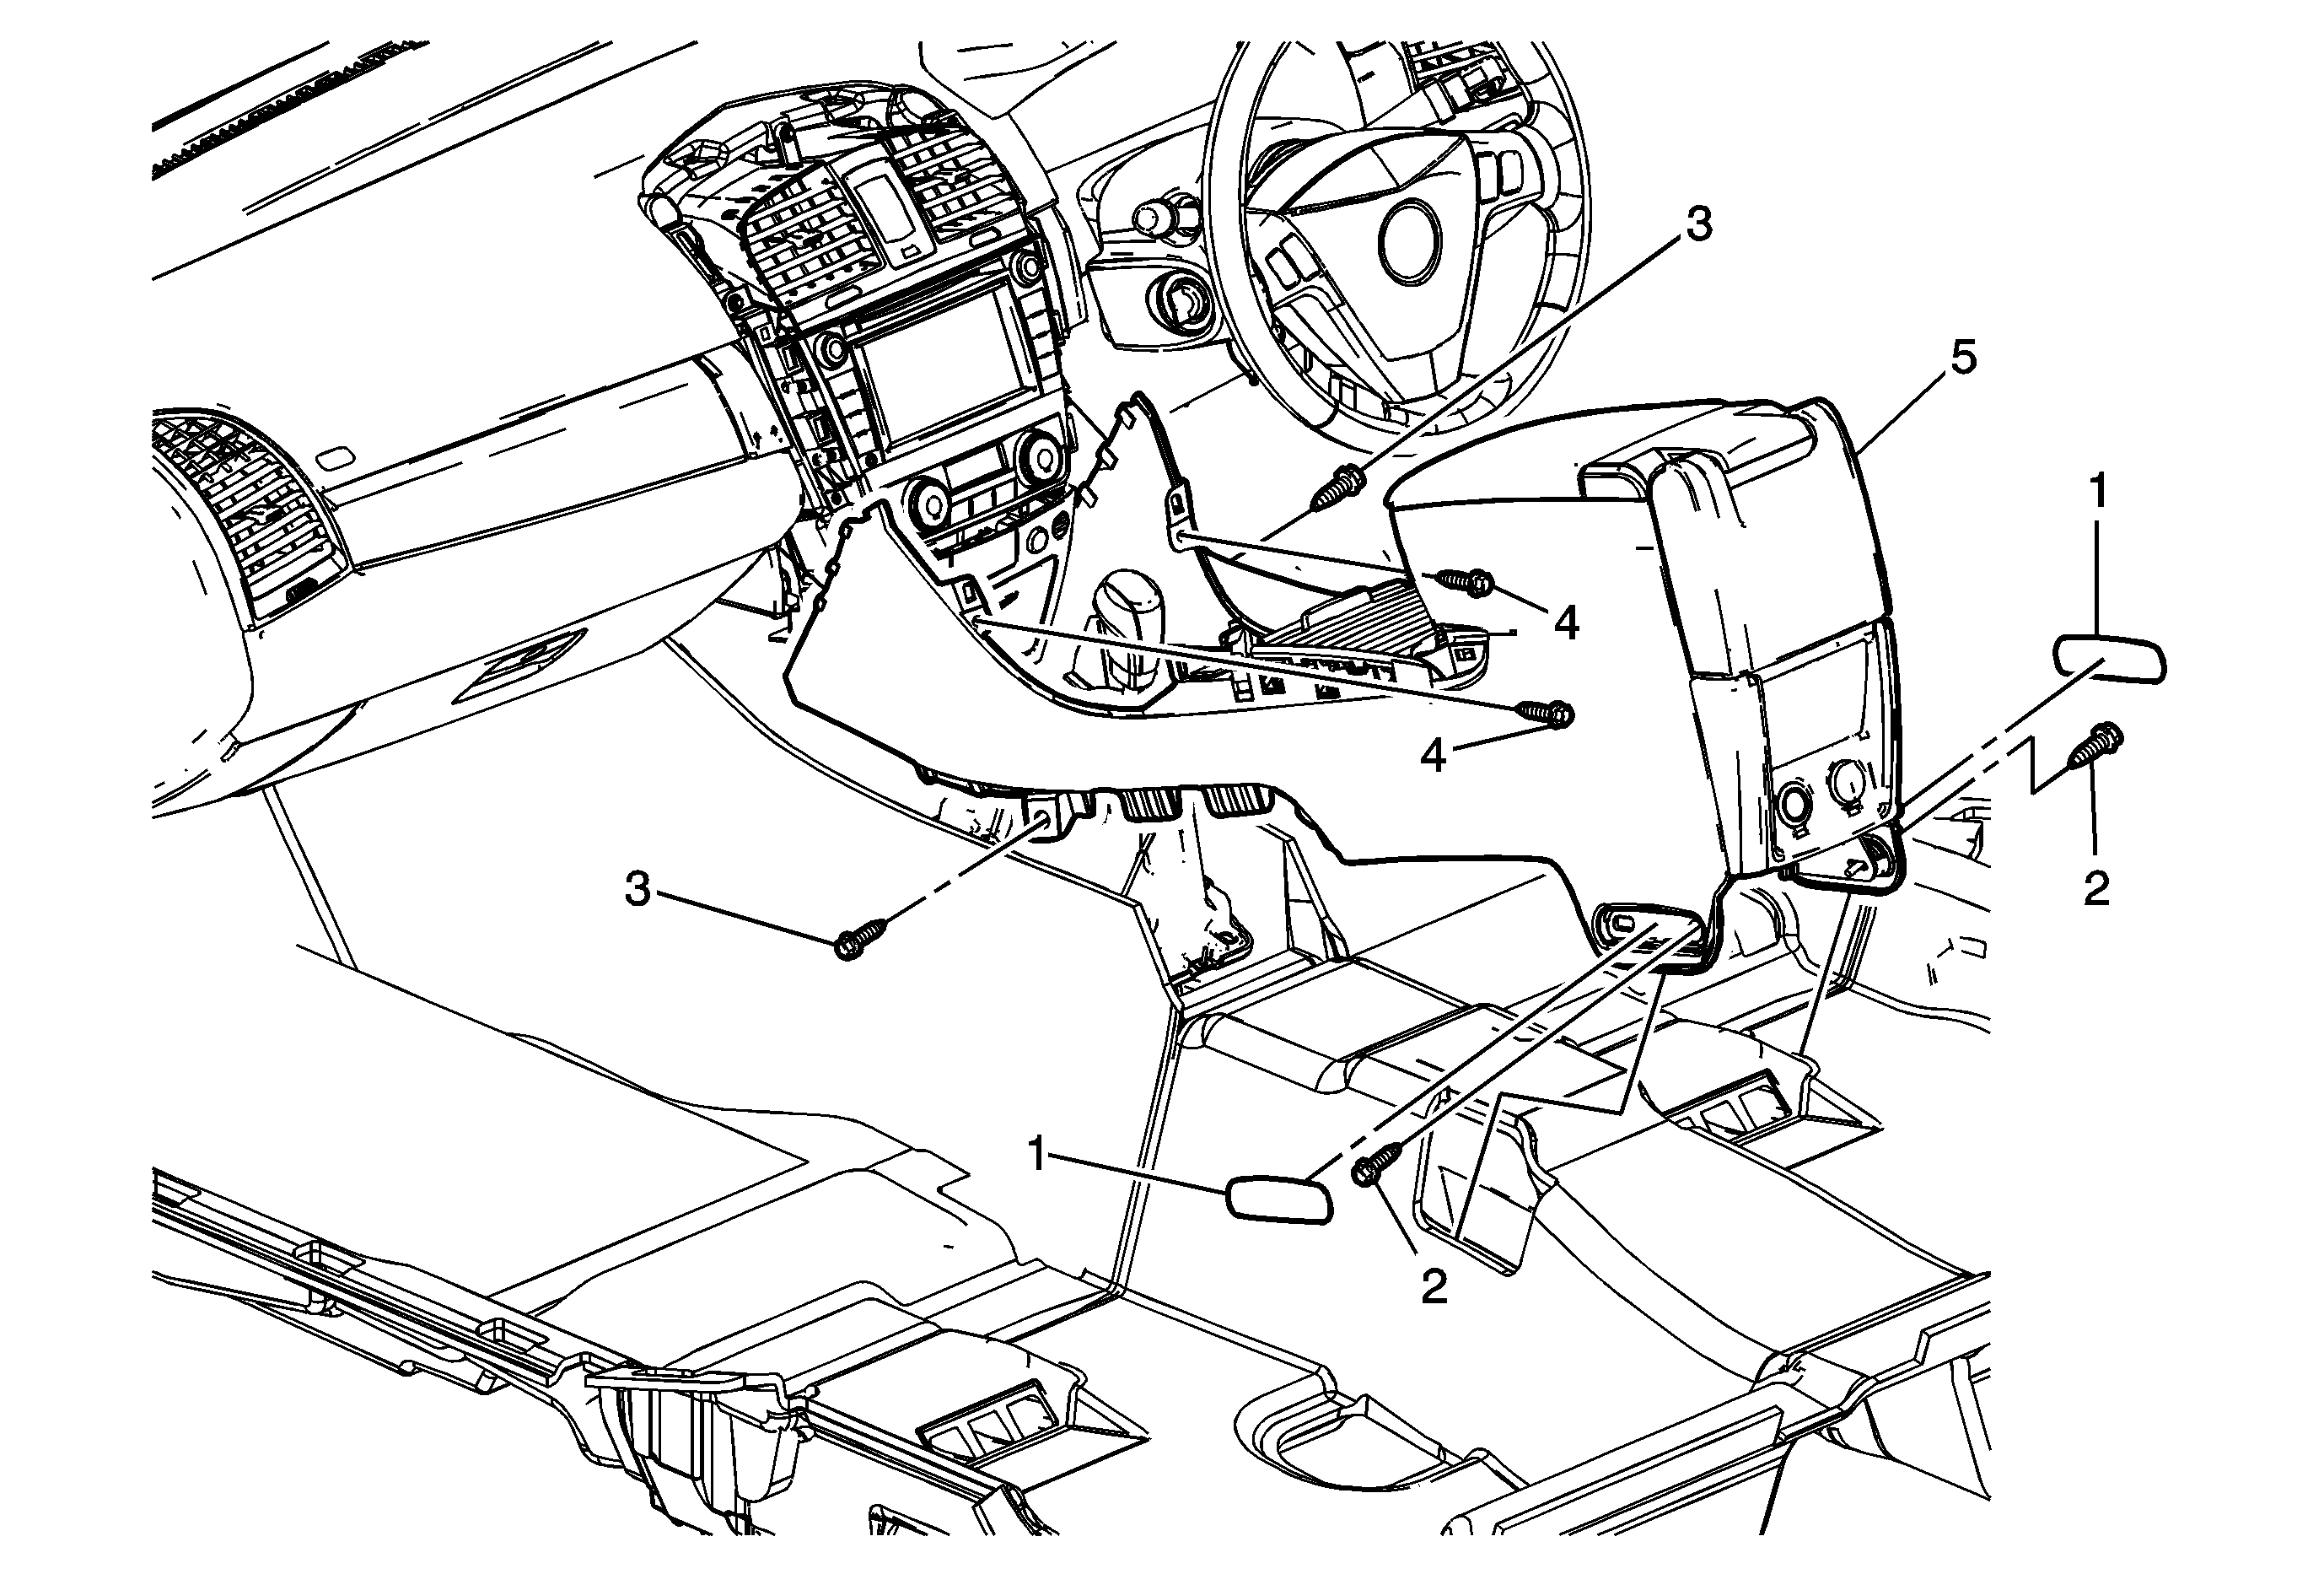
| Console Bolt Cover (Qty: 2)
Tip
Use a flat-bladed plastic trim tool to remove the covers. |
2
| Console Rear Bolt (Qty: 2)
Notice: Refer to Fastener Notice in the Preface section. ProcedureMove the front seats to the full forward position to access the rear bolts.
Tighten
9 N·m (80 lb in) |
3
| Console Front Bolt (Qty: 2)
Tighten
9 N·m (80 lb in)
Procedures
- Move the front seats to the full rearward position to access the front bolts.
- Pull the carpet away from the console to access the front console bolts.
|
4
| Console Screws (Qty: 2)
Tighten
2 N·m (18 lb in) |
5
| Console Assembly
Procedures
- Disconnect the electrical connections.
- With the add of an assistant remove the console from the vehicle.
- When replacing the console assembly, transfer all necessary components.
|


