For 1990-2009 cars only
Radiator Outlet Hose Replacement LY7
Special Tools
J 38185 Hose Clamp Pliers
Removal Procedure
- Drain the coolant. Refer to Cooling System Draining and Filling.
- Remove the radiator inlet hose. Refer to Radiator Inlet Hose Replacement.
- Using the J 38185 Hose Clamp Pliers , disengage the tension on the hose clamp and remove the radiator outlet hose from the thermostat housing.
- Disconnect the radiator outlet hose from the engine support bracket.
- Remove the air cleaner intake duct. Refer to Air Cleaner Inlet Duct Replacement.
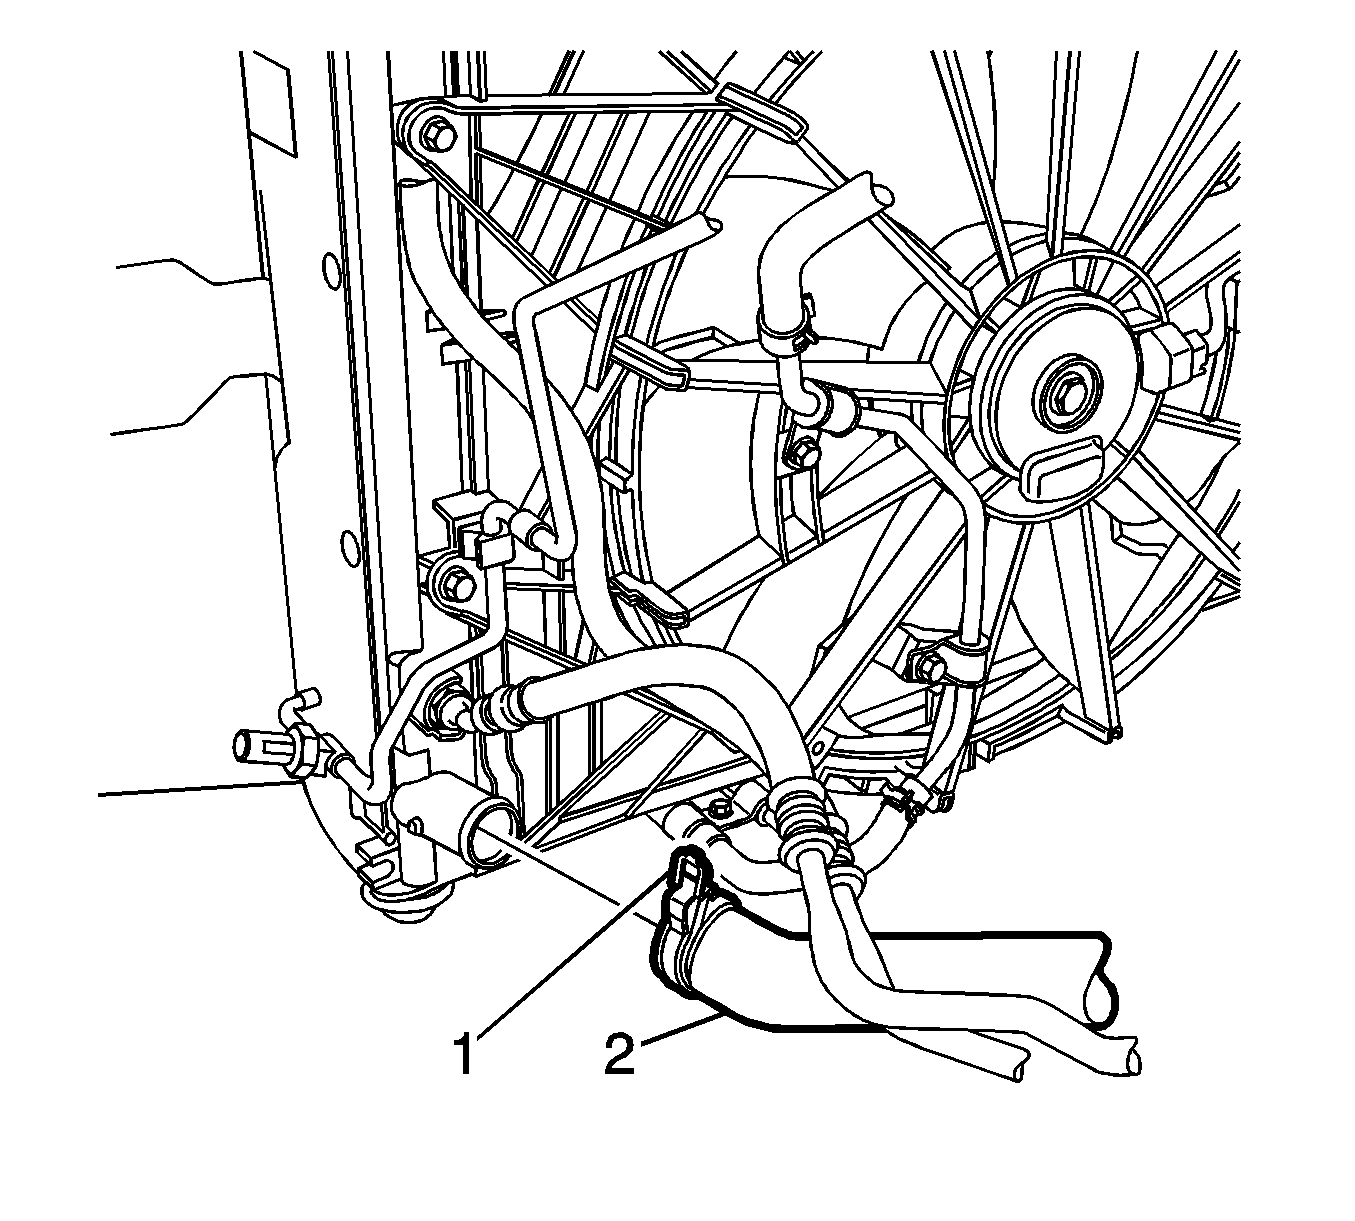
- Using the J 38185 Hose Clamp Pliers , disengage the tension on the hose clamp (1) and remove the radiator outlet hose from the radiator.
- Remove the radiator outlet hose (2) from the vehicle.
Installation Procedure
- Install the radiator outlet hose (2) to the vehicle.
- Using the J 38185 Hose Clamp Pliers , disengage the tension on the hose clamp (1) and install the radiator outlet hose to the radiator.
- Using the J 38185 Hose Clamp Pliers slide the clamp into the original position.
- Using the J 38185 Hose Clamp Pliers , disengage the tension on the hose clamp and install the radiator outlet hose to the thermostat housing.
- Using the J 38185 Hose Clamp Pliers slide the clamp into the original position.
- Install the radiator outlet hose to the engine support bracket.
- Install the radiator inlet hose. Refer to Radiator Inlet Hose Replacement.
- Fill the cooling system. Refer to Cooling System Draining and Filling.
Note: Lubricate the inside diameters of the hoses with clean coolant prior to installation.
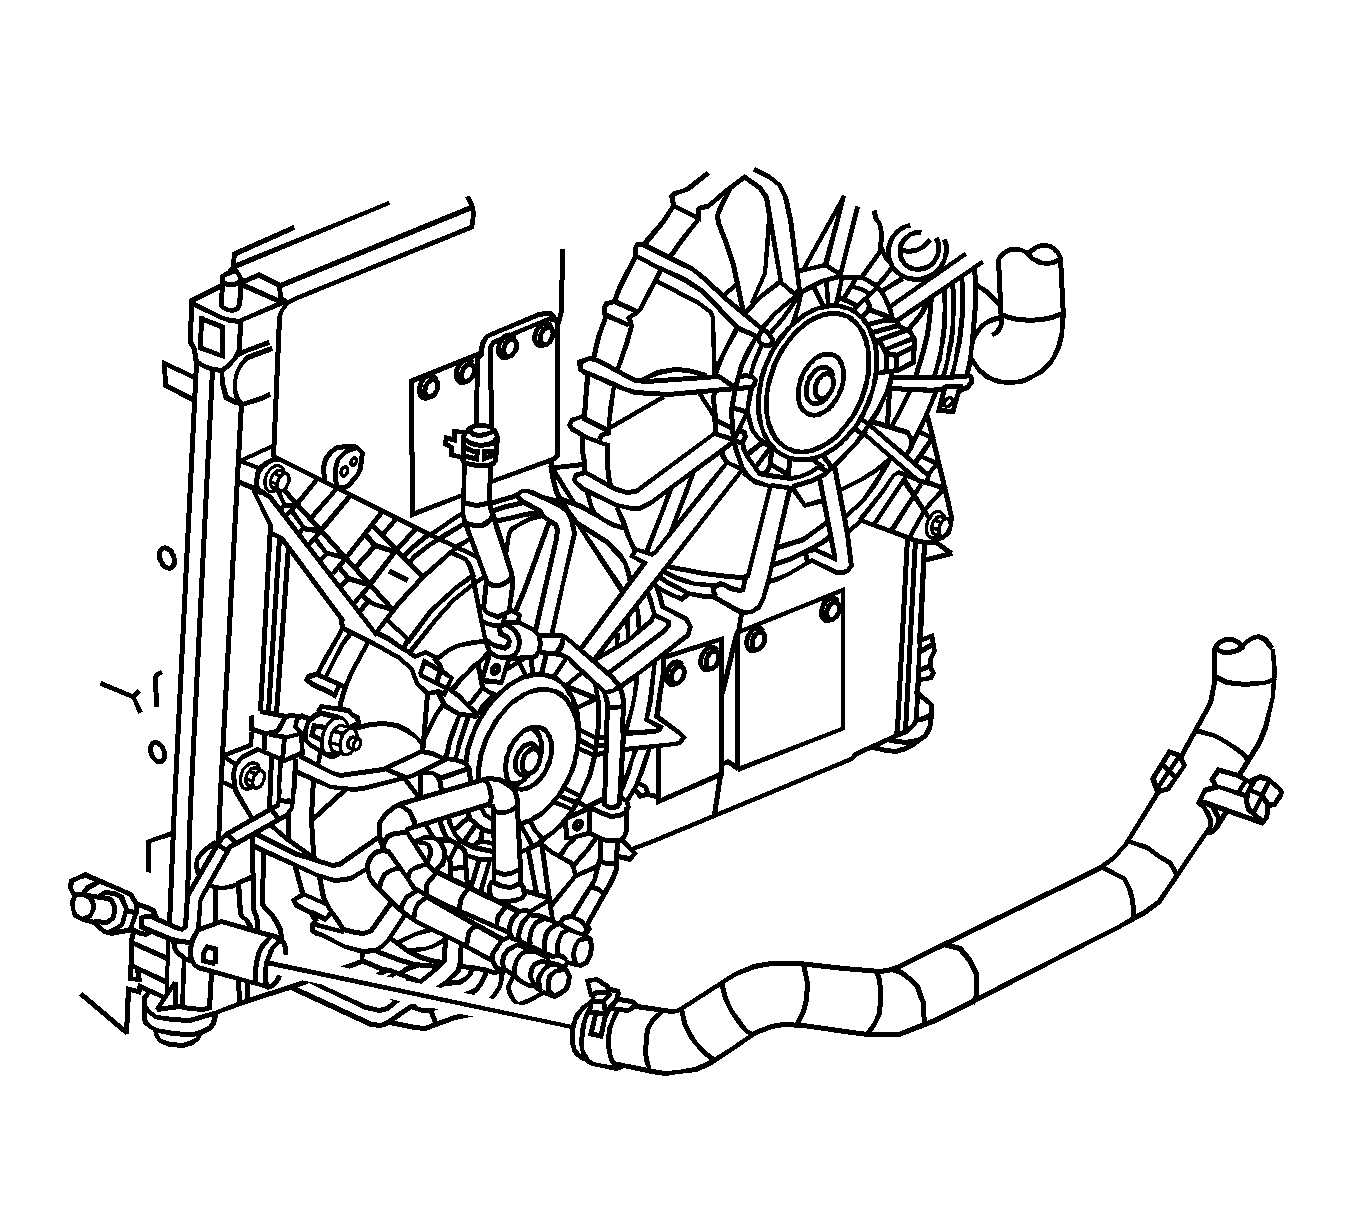
Radiator Outlet Hose Replacement LH2 - Standard Cooling
Special Tools
J 38185 Hose Clamp Pliers
Removal Procedure
- Drain the coolant. Refer to Cooling System Draining and Filling.
- Remove the air cleaner outlet duct. Refer to Air Cleaner Outlet Duct Replacement.
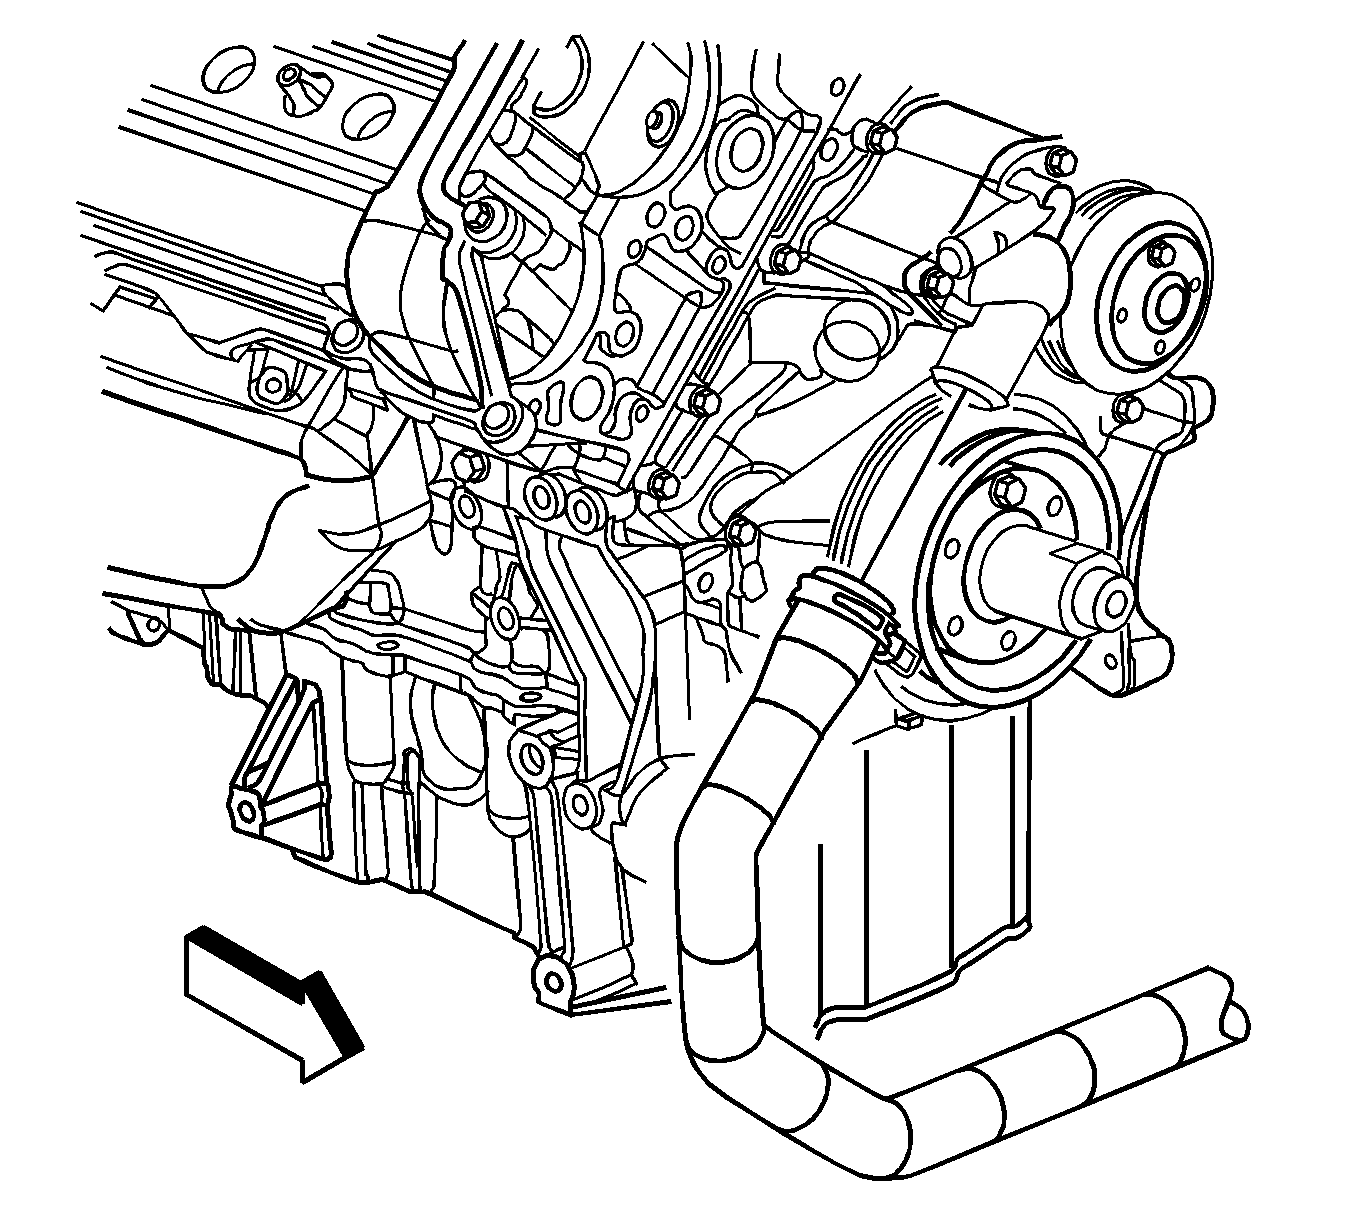
- Using the J 38185 Hose Clamp Pliers , disengage the tension on the hose clamp and remove the radiator outlet hose from the thermostat housing.
- Disconnect the radiator outlet hose from the support bracket.
- Raise the vehicle. Refer to Lifting and Jacking the Vehicle.
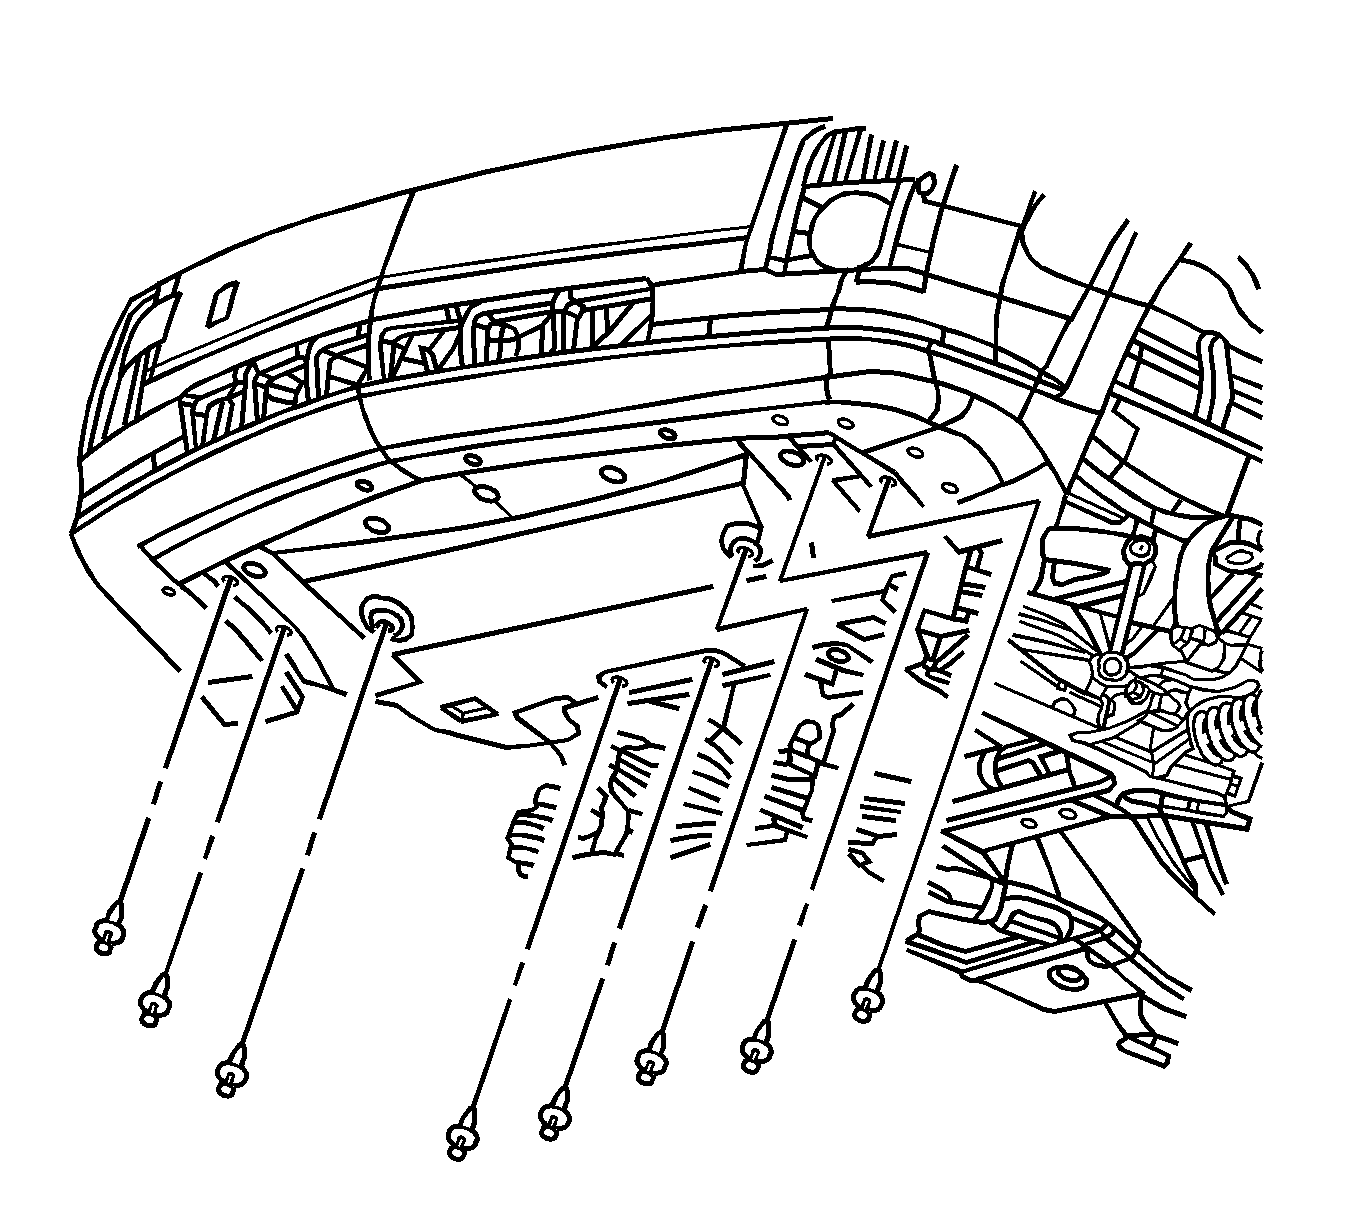
- Remove the front air deflector retainers.
- Remove the front air deflector.
- Remove the ECM mounting nuts and reposition ECM aside.
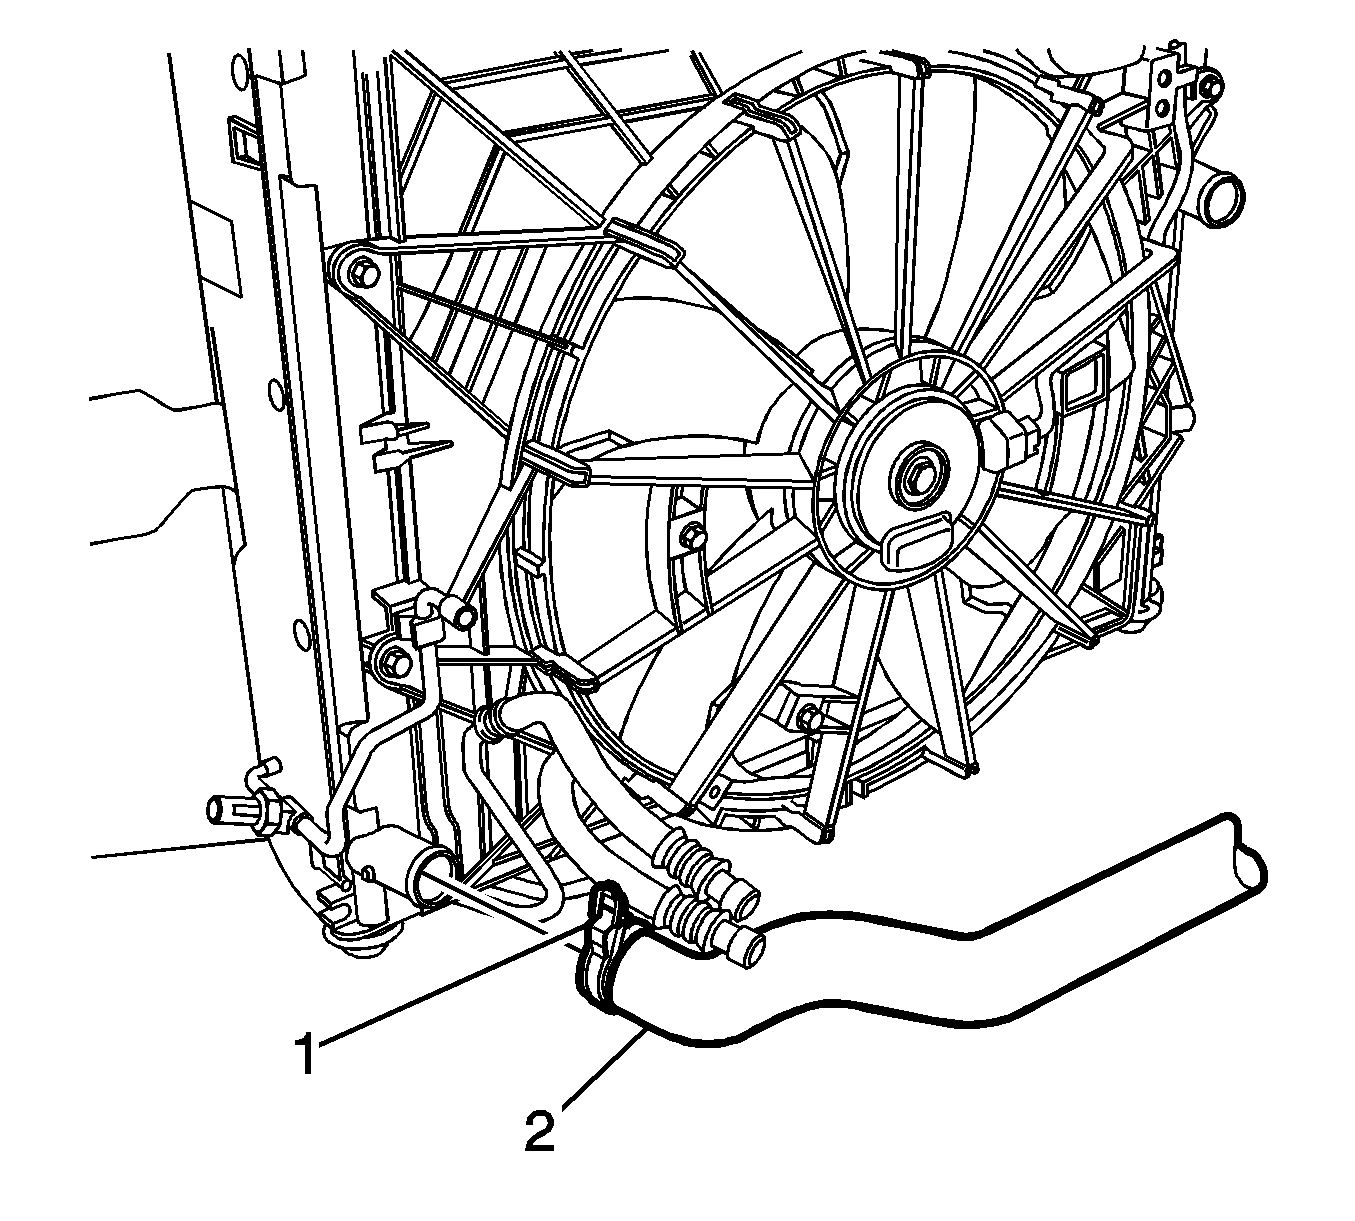
- Using the J 38185 Hose Clamp Pliers , disengage the tension on the hose clamp (1) and remove the radiator outlet hose from the radiator.
- Lower the vehicle.
- Remove the radiator outlet hose (2) from the vehicle.
Installation Procedure
- Install the radiator outlet hose (2) to the vehicle.
- Raise the vehicle.
- Using the J 38185 Hose Clamp Pliers , disengage the tension on the hose clamp (1) and install the radiator outlet hose to the radiator.
- Using the J 38185 Hose Clamp Pliers slide the clamp into the original position.
- Position ECM on the mounting bracket.
- Install the ECM to mounting nuts and tighten to 8 N·m (71 lb in).
- Install the front air deflector.
- Install the front air deflector retainers.
- Lower the vehicle.
- Using the J 38185 Hose Clamp Pliers , disengage the tension on the hose clamp and install the radiator outlet hose to the thermostat housing.
- Using the J 38185 Hose Clamp Pliers slide the clamp into the original position.
- Install the radiator outlet hose to the support bracket.
- Install the air intake duct. Refer to Air Cleaner Outlet Duct Replacement.
- Fill the cooling system. Refer to Cooling System Draining and Filling.
Note: Lubricate the inside diameters of the hoses with clean coolant prior to installation.

Caution: Refer to Fastener Caution in the Preface section.


Radiator Outlet Hose Replacement LH2 - Heavy Duty Cooling
Special Tools
J 38185 Hose Clamp Pliers
Removal Procedure
- Drain the coolant. Refer to Cooling System Draining and Filling.
- Remove the air cleaner outlet duct. Refer to Air Cleaner Outlet Duct Replacement.
- Using the J 38185 , disengage the tension on the hose clamp and remove the radiator outlet hose from the thermostat housing.
- Disconnect the radiator outlet hose from the support bracket.
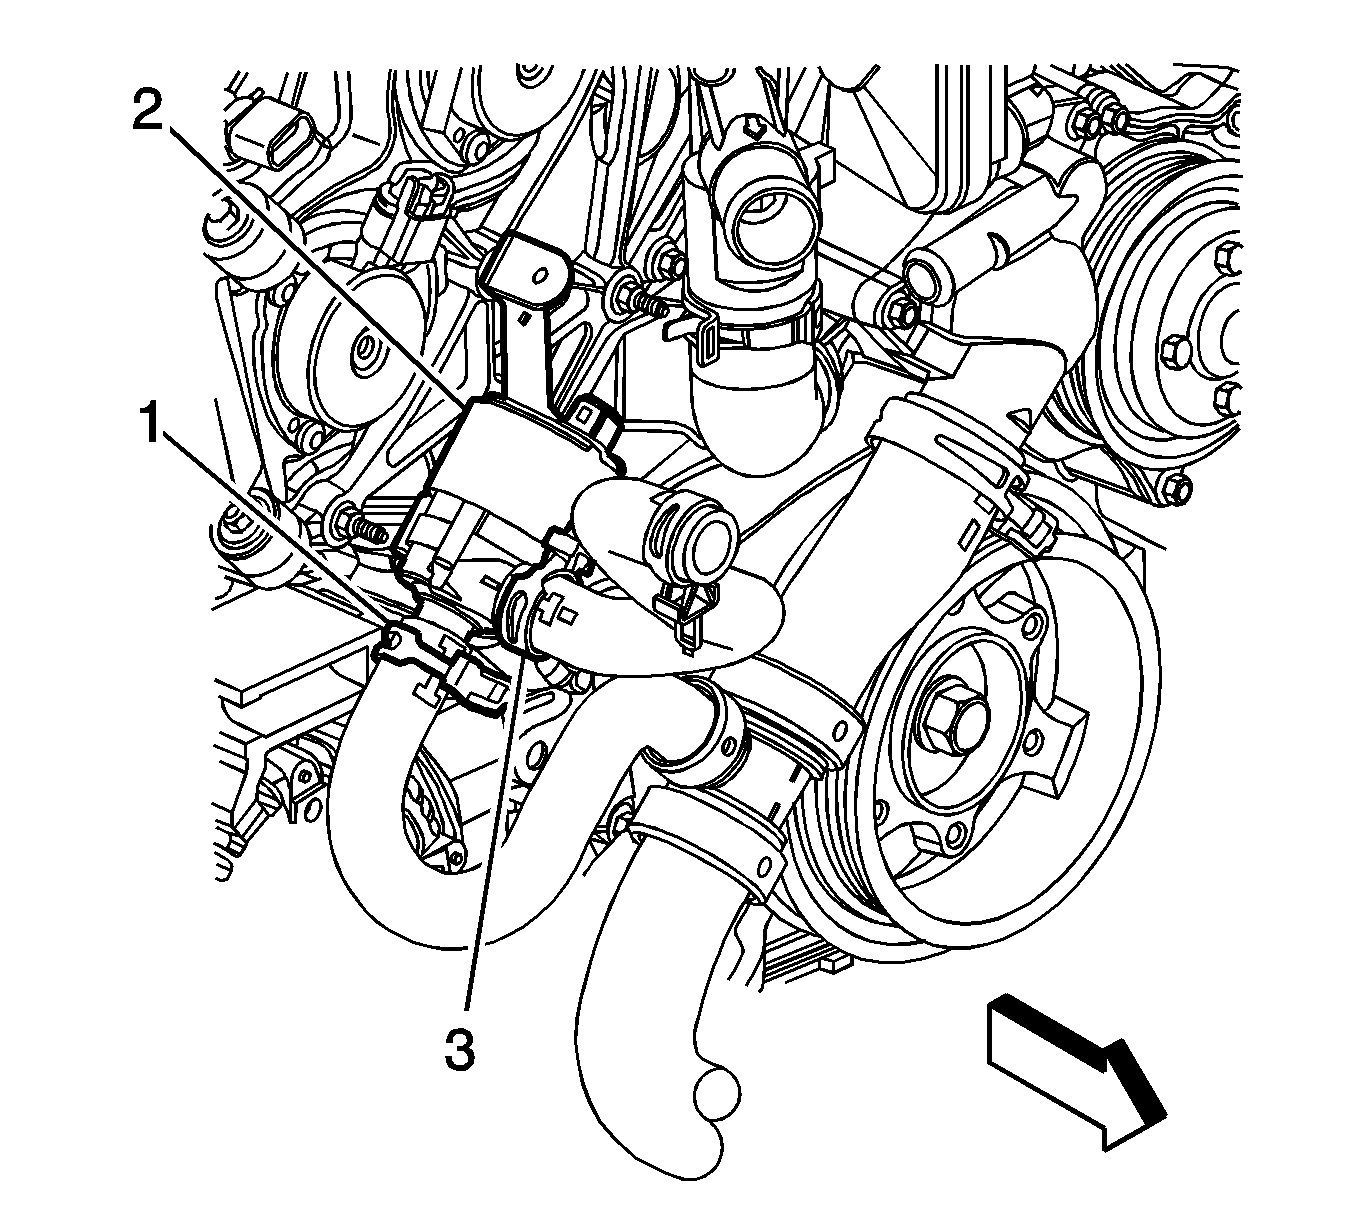
- Using the J 38185 , disengage the tension on the radiator outlet hose (1) clamp.
- Disconnect the radiator outlet hose (1) from the afterboil coolant pump.
- Raise the vehicle. Refer to Lifting and Jacking the Vehicle.
- Remove the front air deflector retainers.
- Remove the front air deflector.
- Remove the engine control module (ECM) mounting nuts and reposition ECM aside.
- Using the J 38185 , disengage the tension on the hose clamp and remove the radiator outlet hose from the radiator.
- Lower the vehicle.
- Remove the radiator outlet hose from the vehicle.


Installation Procedure
- Install the radiator outlet hose to the vehicle.
- Raise the vehicle.
- Using the J 38185 , disengage the tension on the hose clamp and install the radiator outlet hose to the radiator.
- Using the J 38185 slide the clamp into the original position.
- Position ECM on the mounting bracket.
- Install the ECM to mounting nuts.
- Install the front air deflector.
- Install the front air deflector retainers.
- Lower the vehicle.
- Connect the radiator outlet hose (1) to the afterboil coolant pump.
- Using the J 38185 , reposition the radiator outlet hose (1) clamp to secure the radiator outlet hose to the afterboil coolant pump.
- Using the J 38185 , disengage the tension on the hose clamp and install the radiator outlet hose to the thermostat housing.
- Using the J 38185 slide the clamp into the original position.
- Install the radiator outlet hose to the support bracket.
- Install the air intake duct. Refer to Air Cleaner Outlet Duct Replacement.
- Fill the cooling system. Refer to Cooling System Draining and Filling.
Note: Lubricate the inside diameters of the hoses with clean coolant prior to installation.
Caution: Refer to Fastener Caution in the Preface section.
Tighten
Tighten the nuts to 8 N·m (71 lb in).


