Special Tools
J 21368 Pump Body Cover Alignment Band
For equivalent regional tools, refer to
Special Tools.
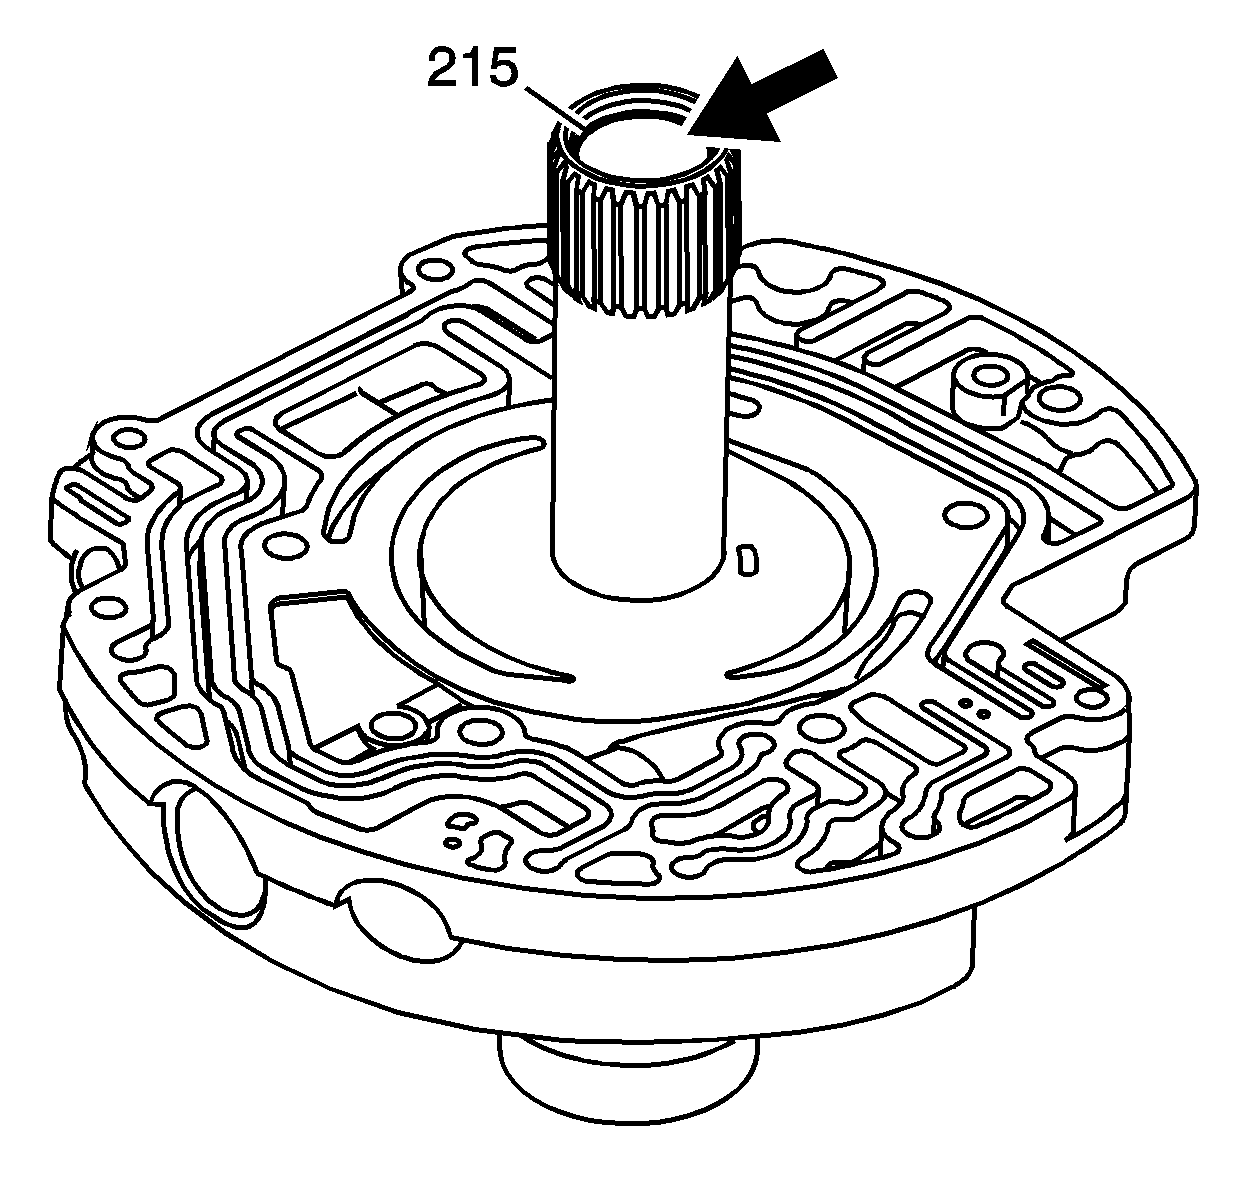
- Inspect the bushing (215) for wear - not serviceable.
- Inspect the oil pump parts for the following:
| • | Worn, scored or gouged pump slide |
| • | Cracks, wear or damage to the rotor or vanes |
| • | Cuts or damage to the seals |
- Inspect the oil pump housing for the following:
| • | Interconnected oil passages |
| • | Damaged machined surfaces |
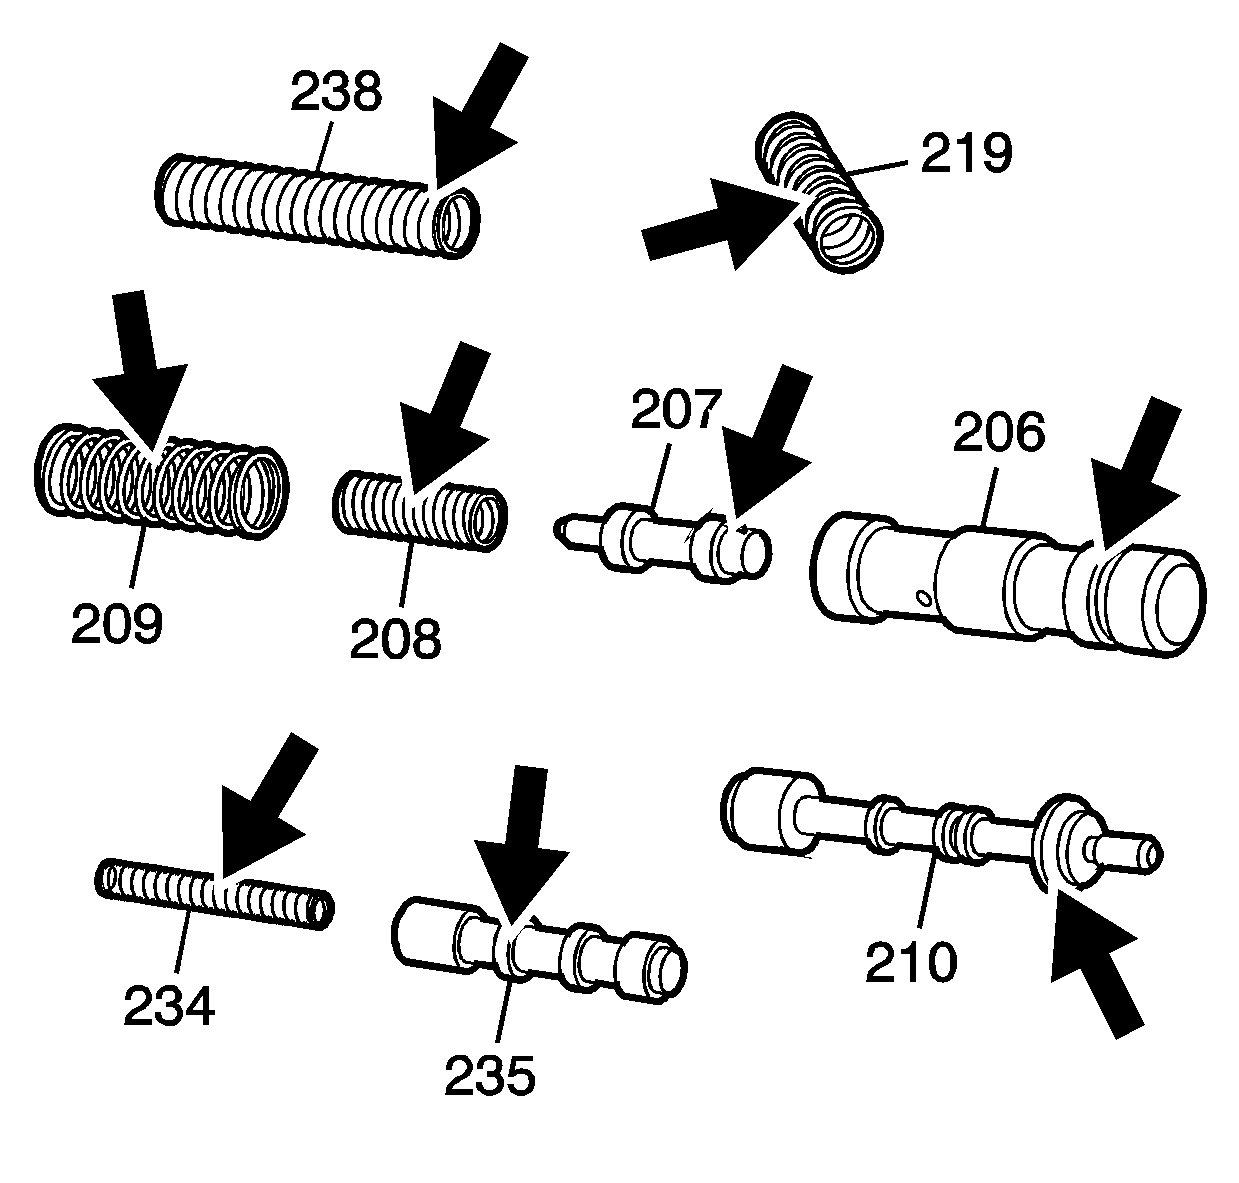
- Inspect the valves (207, 210, 235) and springs (208, 209, 234, 238, 219) for the following:
| • | Nicks or burrs on the valves |
| • | Worn, distorted or cracked springs |
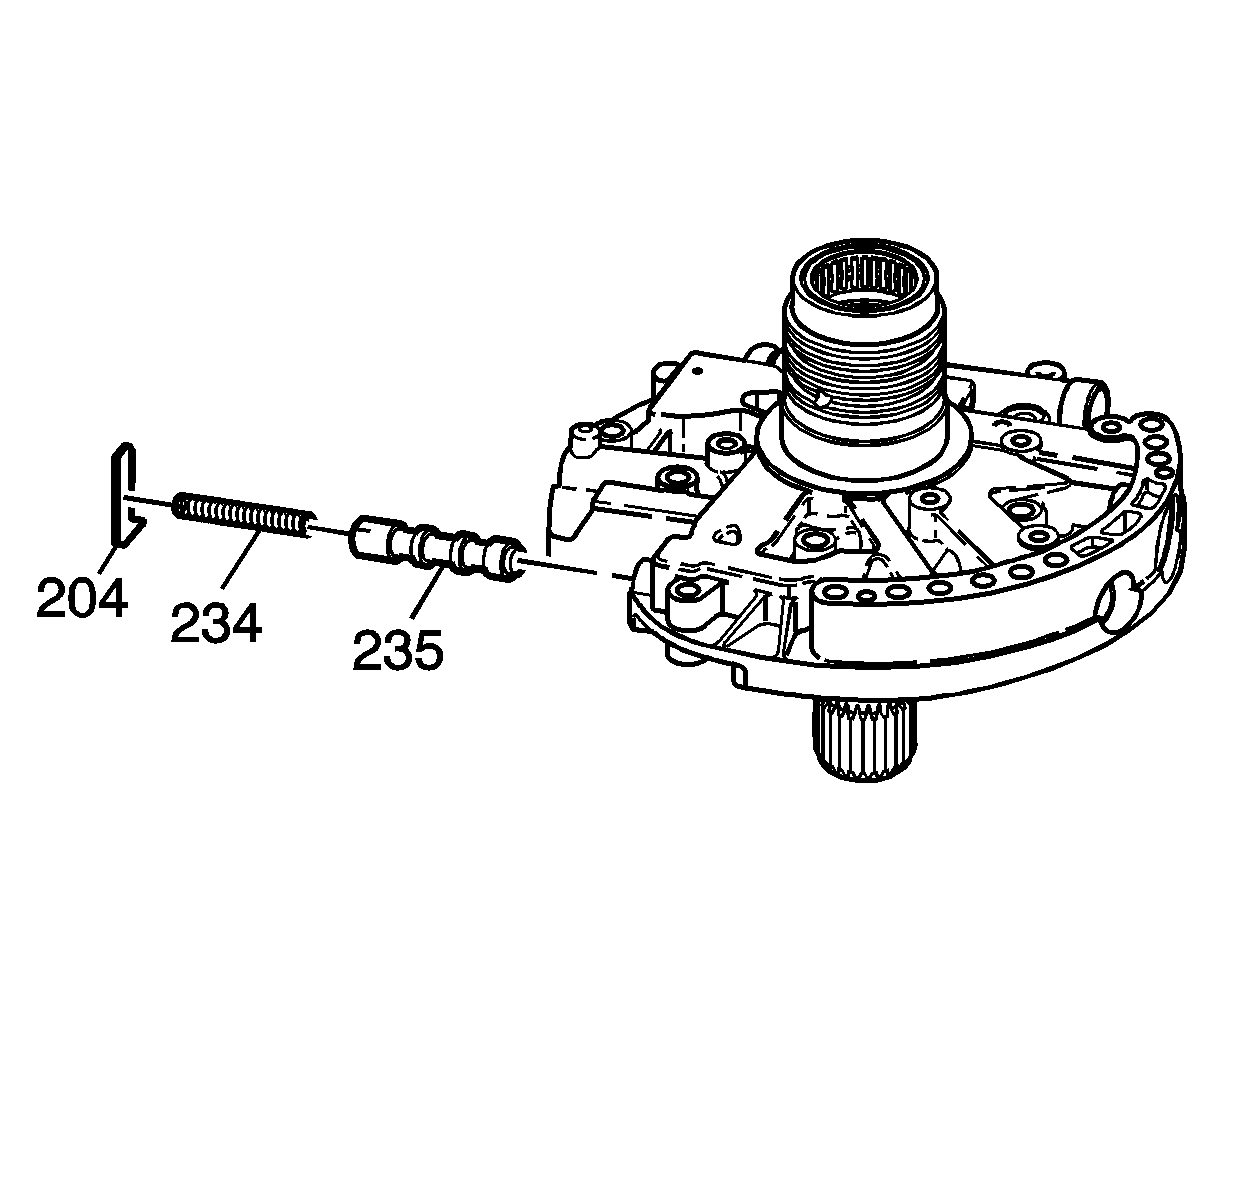
- Install the TCC control valve (235) and the TCC control valve spring (234).
- Install the TCC control valve spring retainer (204).
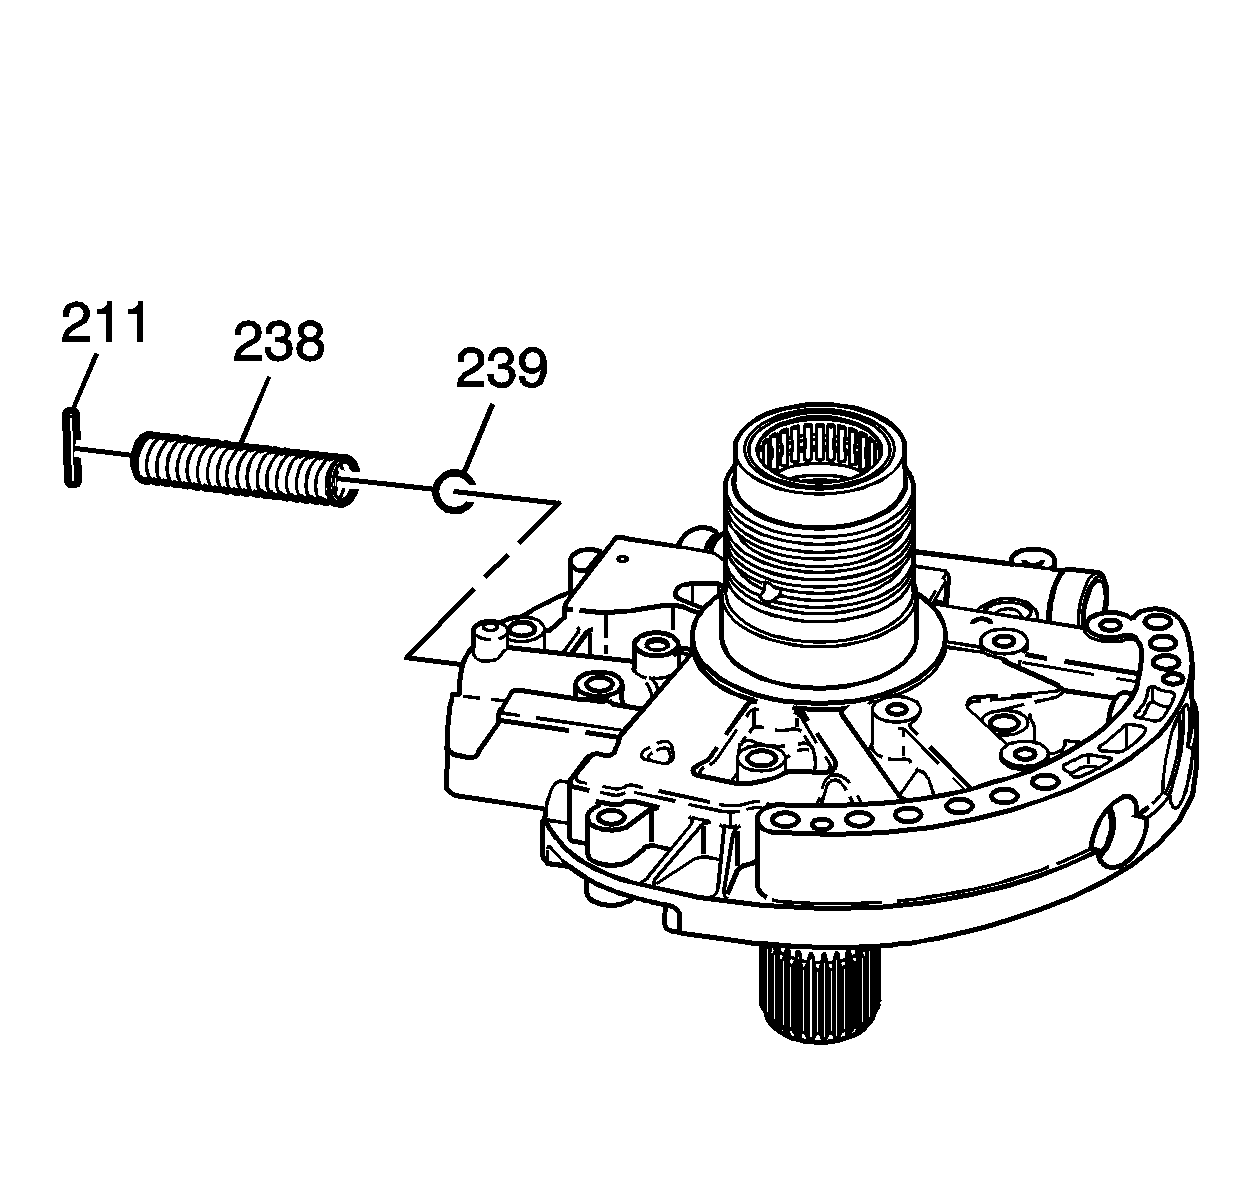
- Install the pressure relief valve (239) and spring (238).
- Install the pressure valve spring retainer (211).
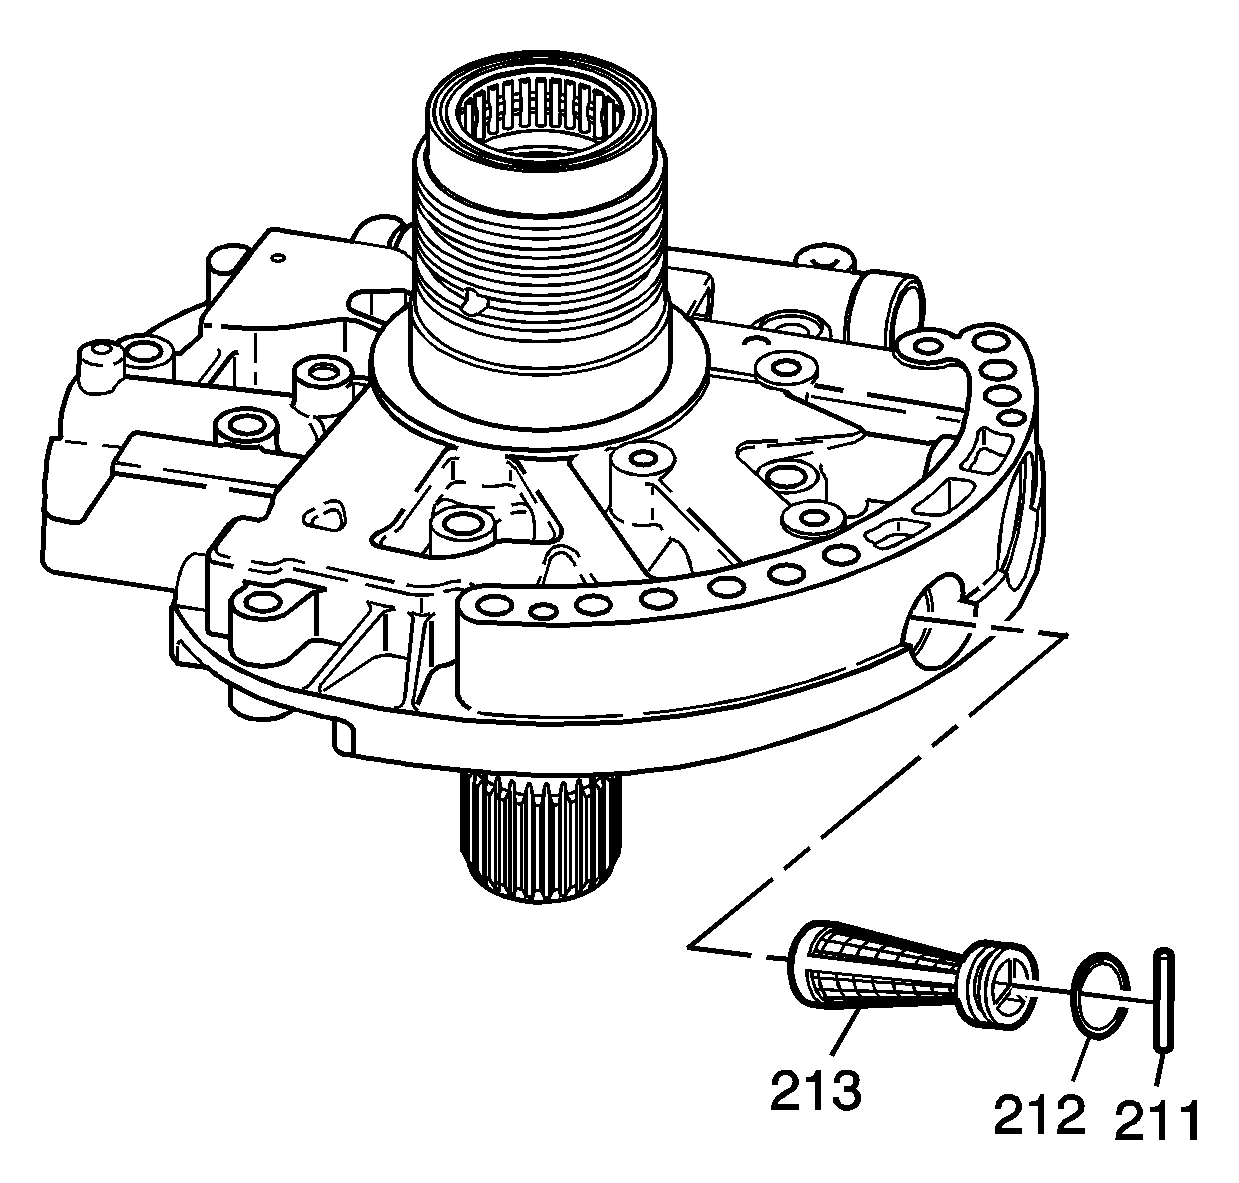
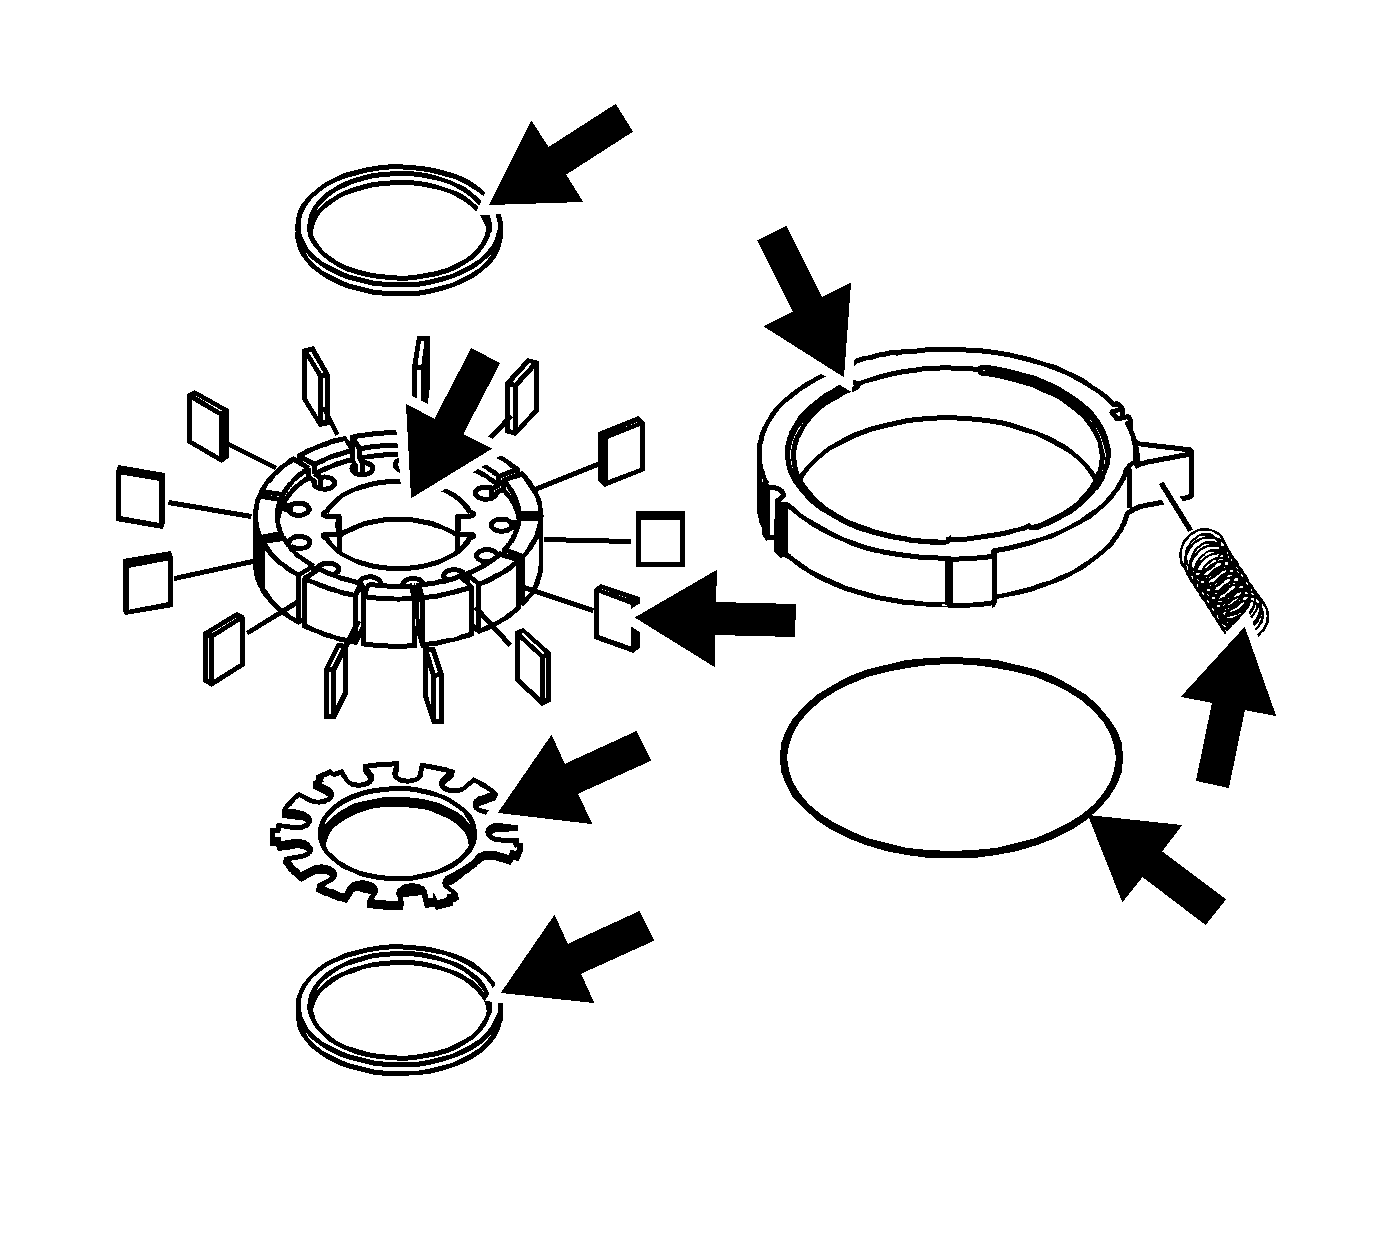
- Install the pump cover seal (212) onto the new pump cover screen (213).
- Install the pump cover screen (213).
- Install the pump cover screen pin (211).
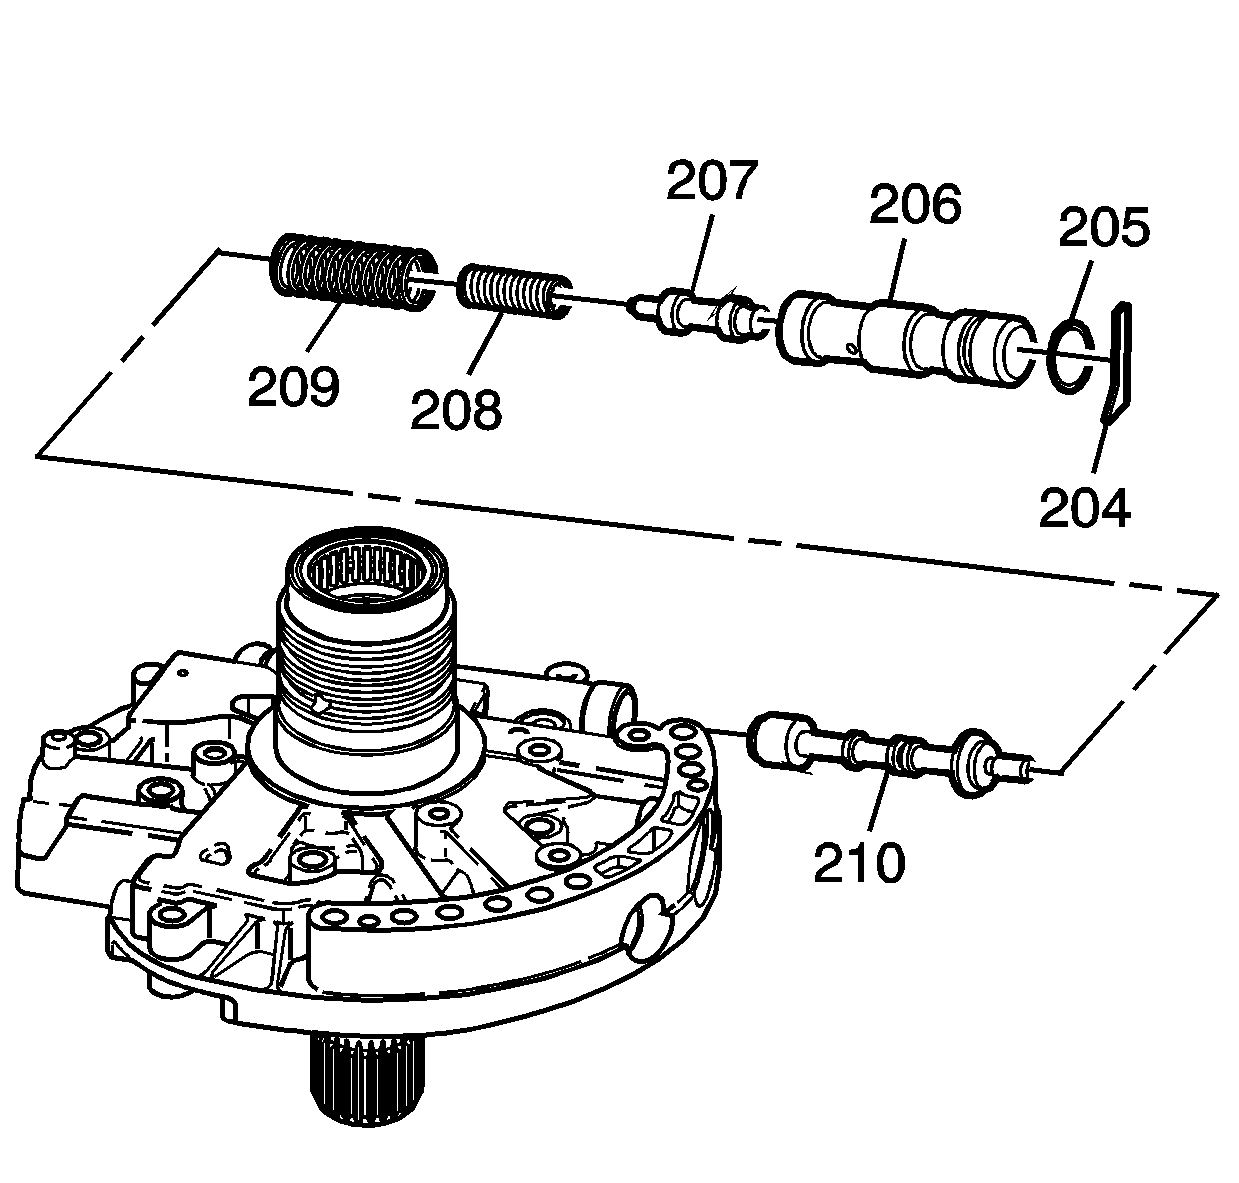
- Install the pressure regulator valve (210), the pressure regulator valve spring (209), and the line boost valve spring (208).
- Install the line boost valve bushing seal (205) onto the bushing (206).
- Install the line boost valve (207) and the bushing (206).
- Install the line boost valve bushing retainer (204).

- Install the reverse clutch housing fluid seal rings (200).
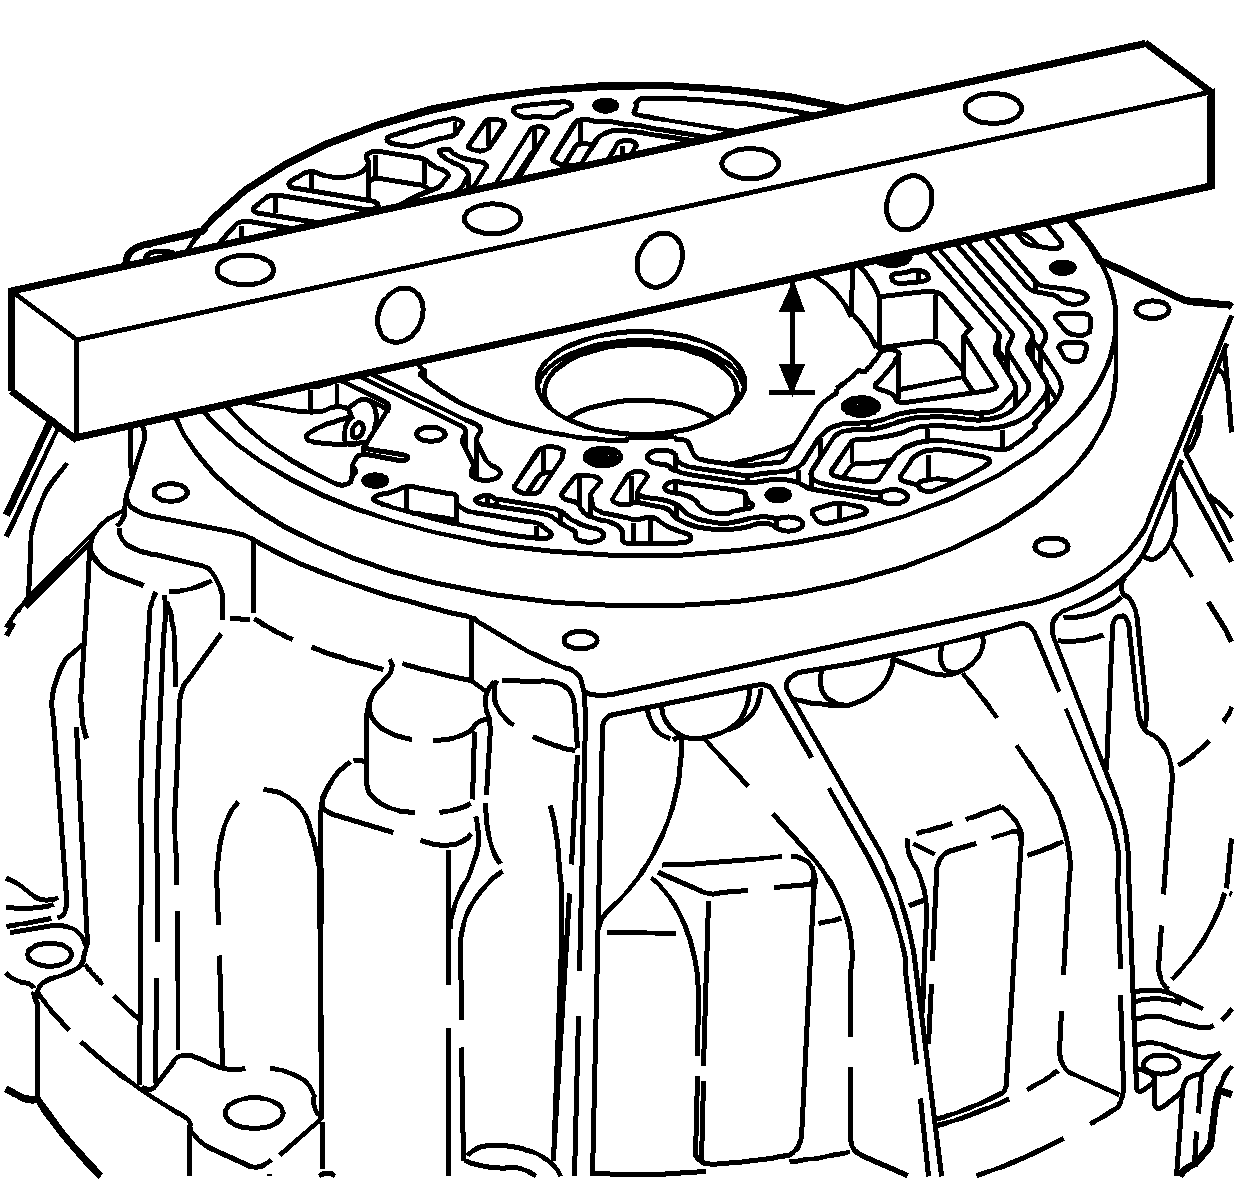
- Measure the distance from the bottom of the gage bar to the pump body. Refer to
Transmission Fluid Pump Specifications.
- Measure the thickness of pump slide.
- Select the proper size, refer to
Transmission Fluid Pump Specifications.
- Measure the thickness of the pump rotor.
- Select the proper size rotor refer to
Transmission Fluid Pump Specifications.
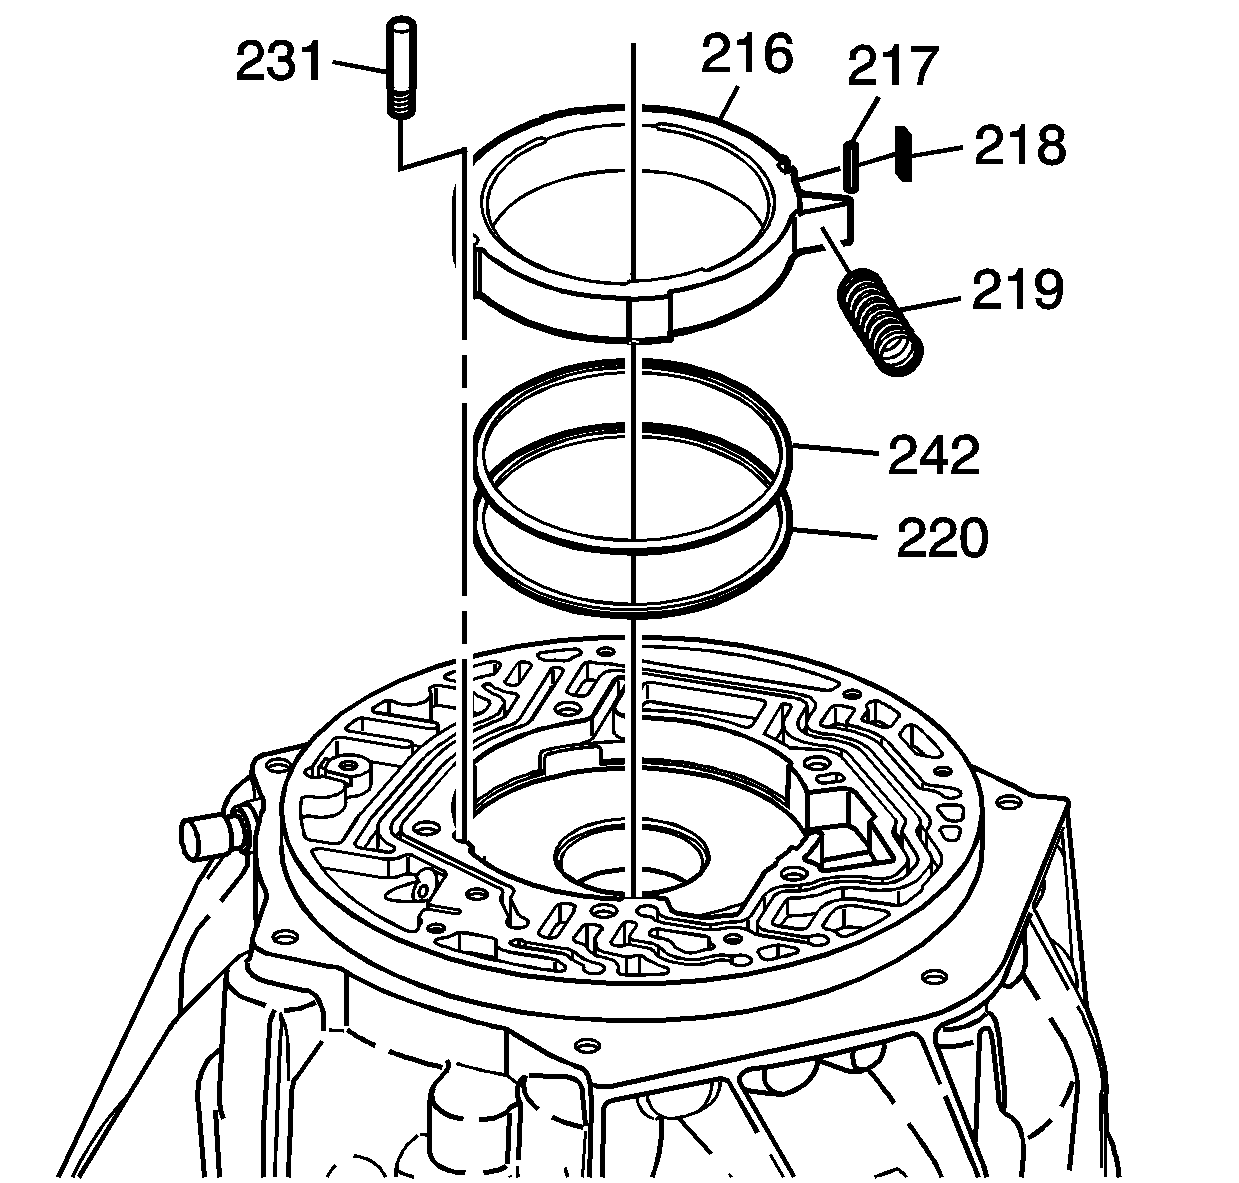
- Install the fluid pump support (217), the slide seal (218) and the fluid pump slide rings (220), and the fluid pump slide o-ring seal (242) onto the pump slide (216).
- Install the slide pin (231).
Note: The fluid pump slide (216) is selective.
- Install the pump slide (216).
- Using a screwdriver install the slide spring (219).
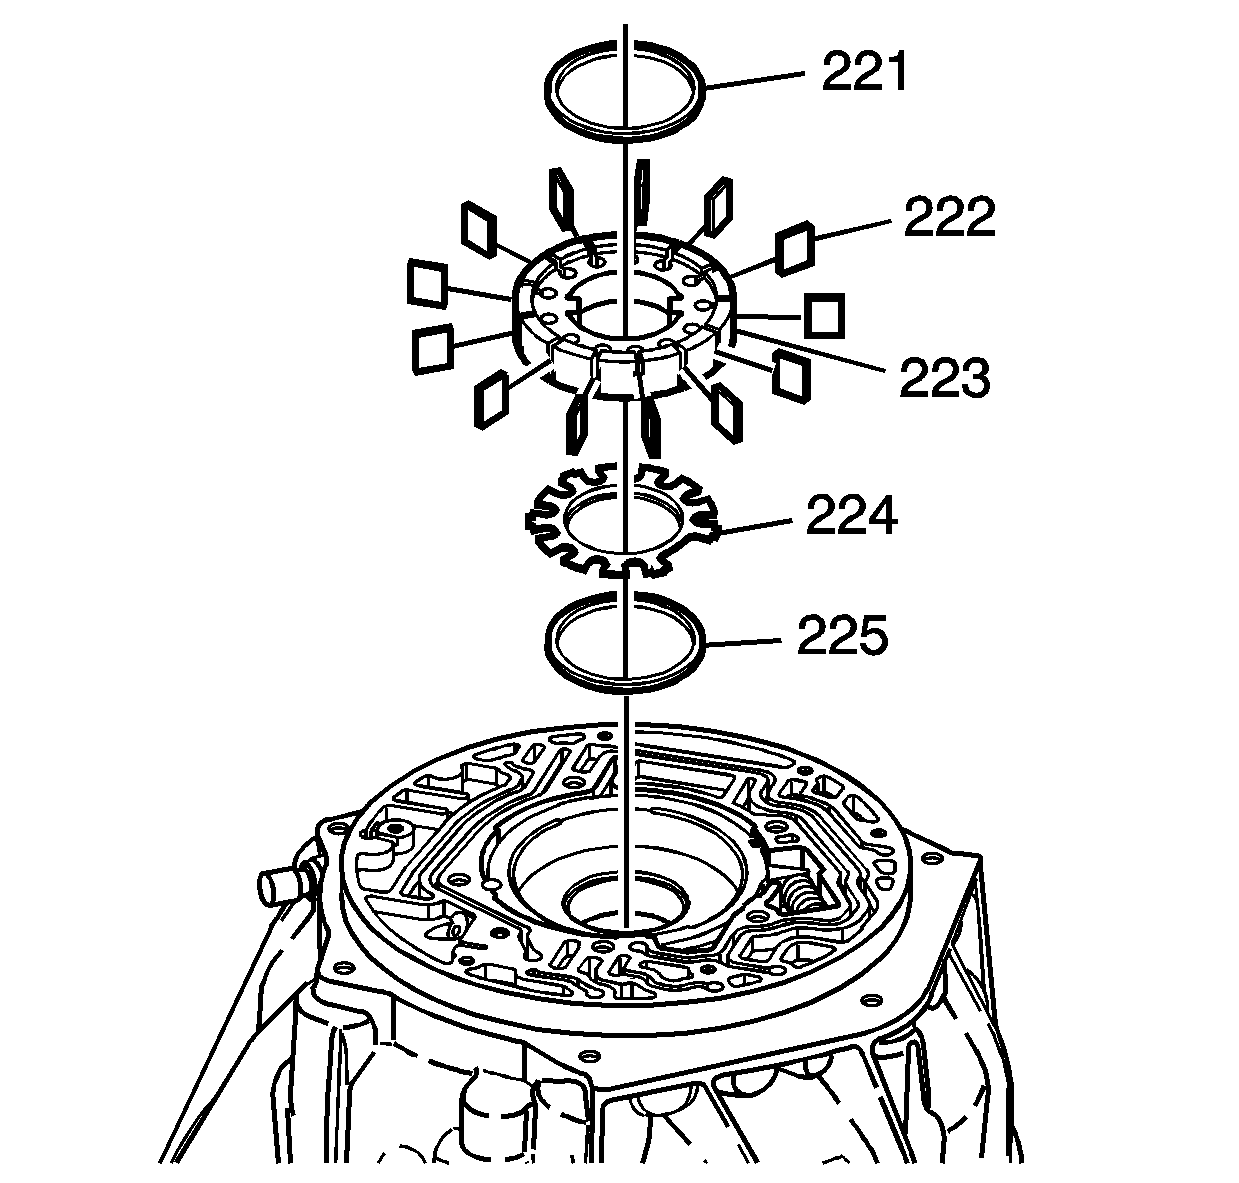
- Install the fluid pump vane ring (225).
- Install the pump rotor guide (224).
Note: The fluid pump rotor (223) is selective.
- Install the pump rotor (223).
- Install the pump vanes (222).
- Install the pump vane ring (221).
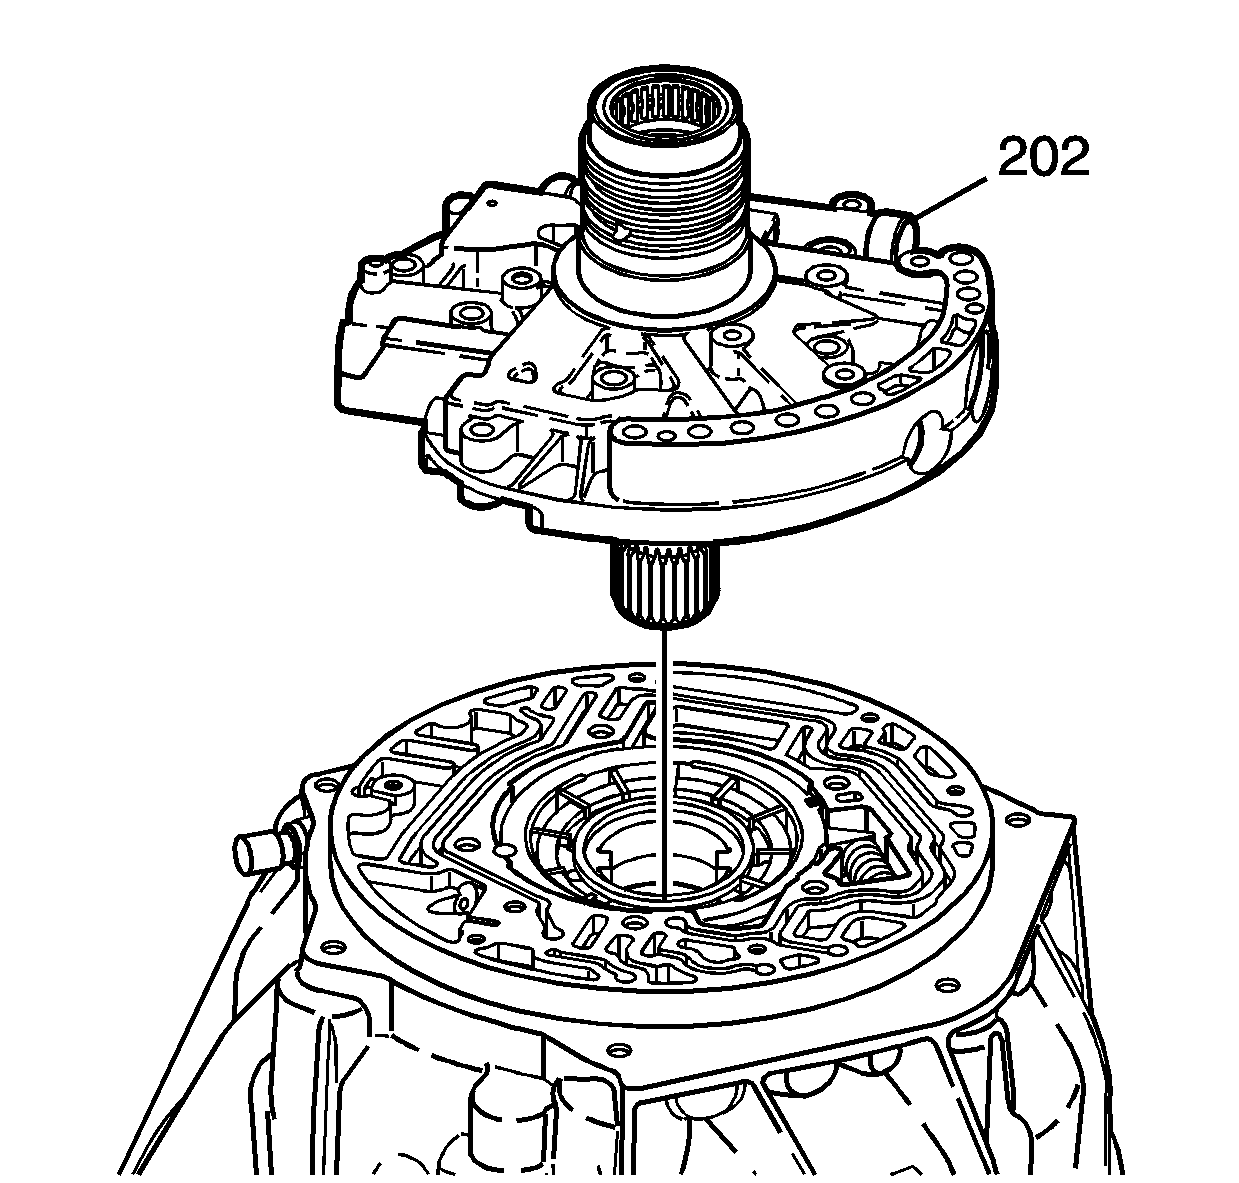
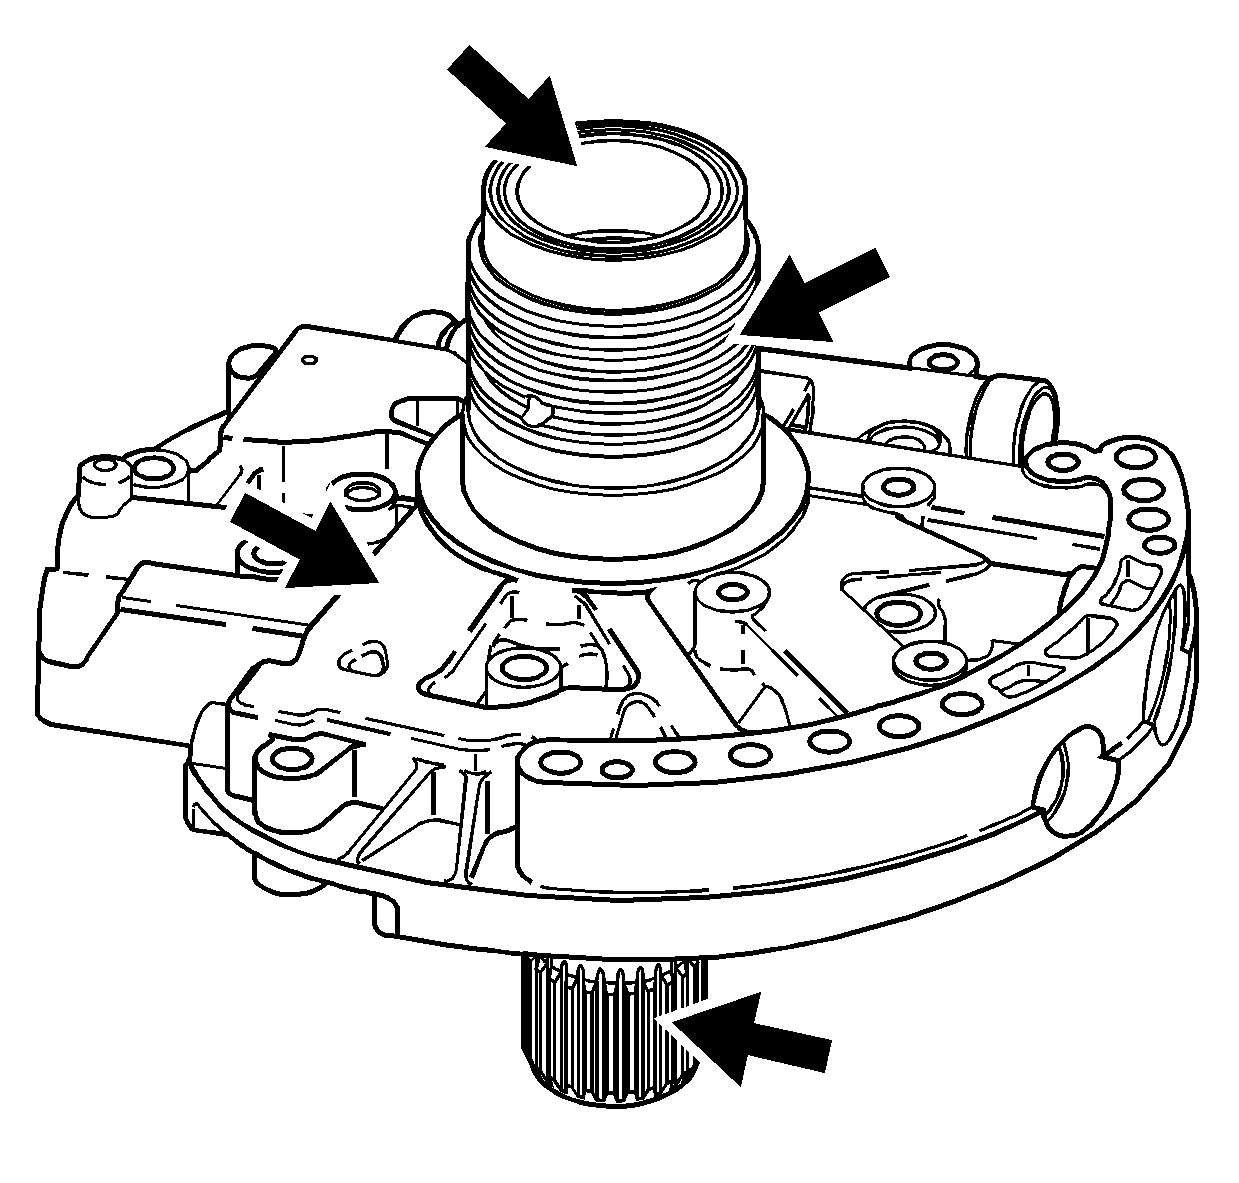
- Install the pump cover housing (202) onto the converter housing.
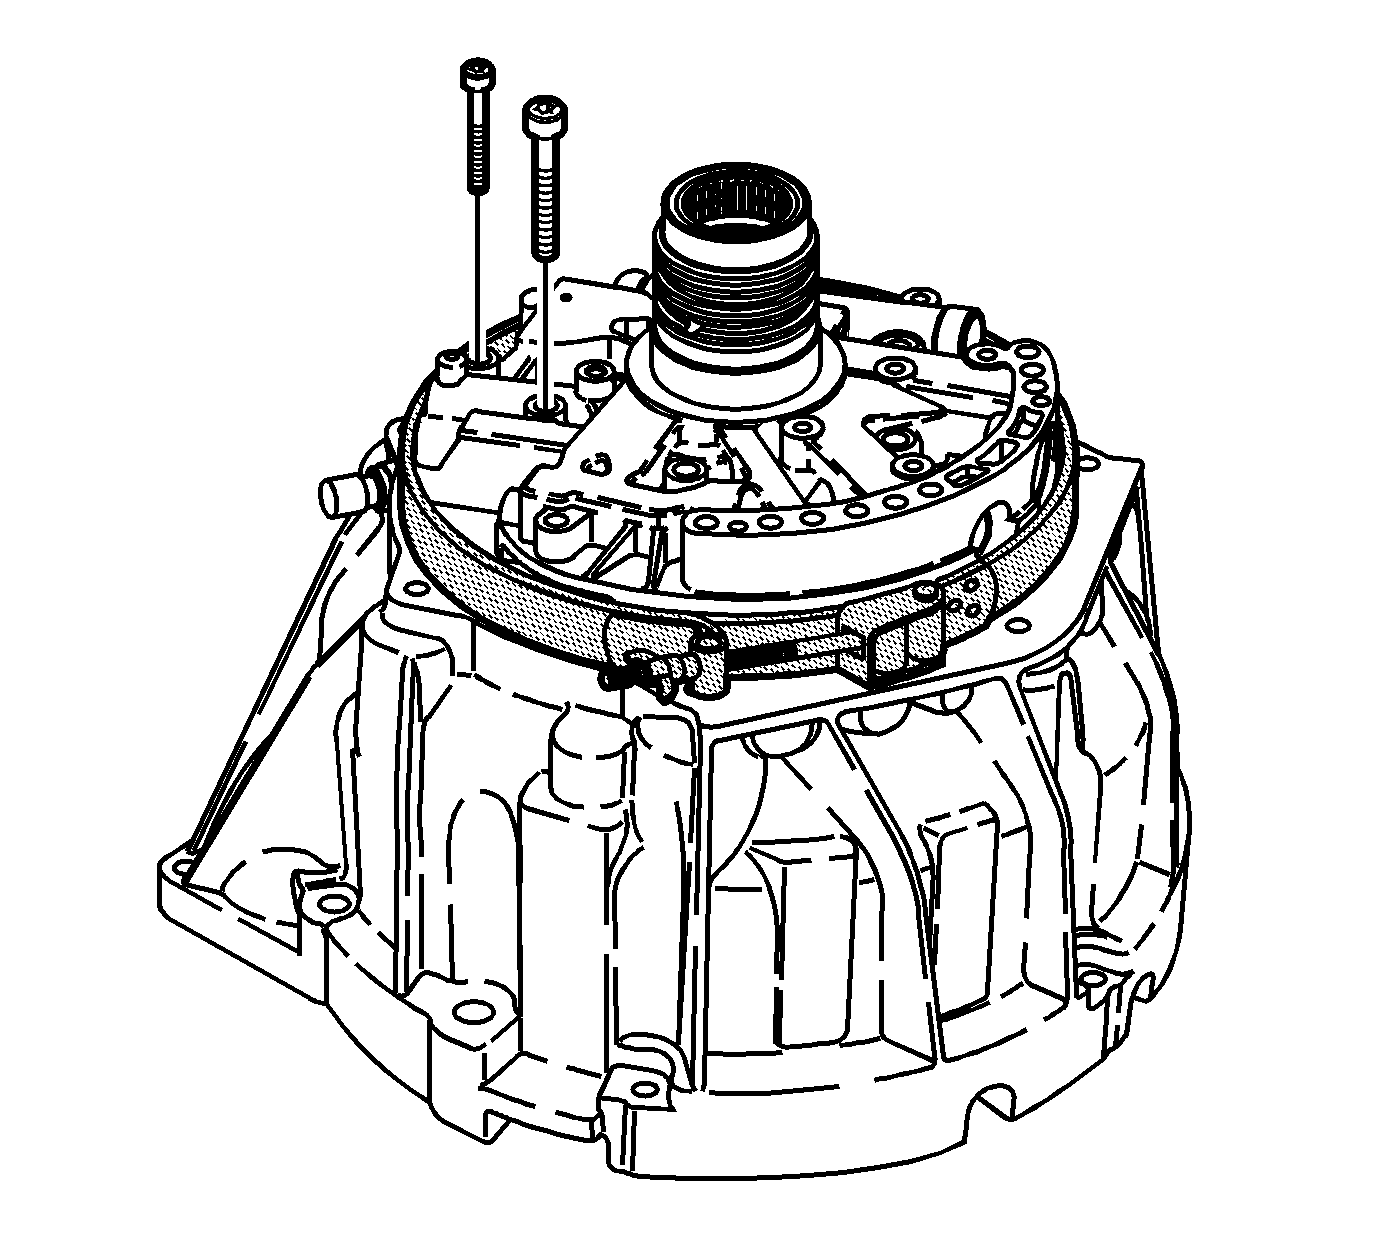
- Install
J 21368 alignment band
and tighten.
Caution: Refer to Fastener Caution in the Preface section.
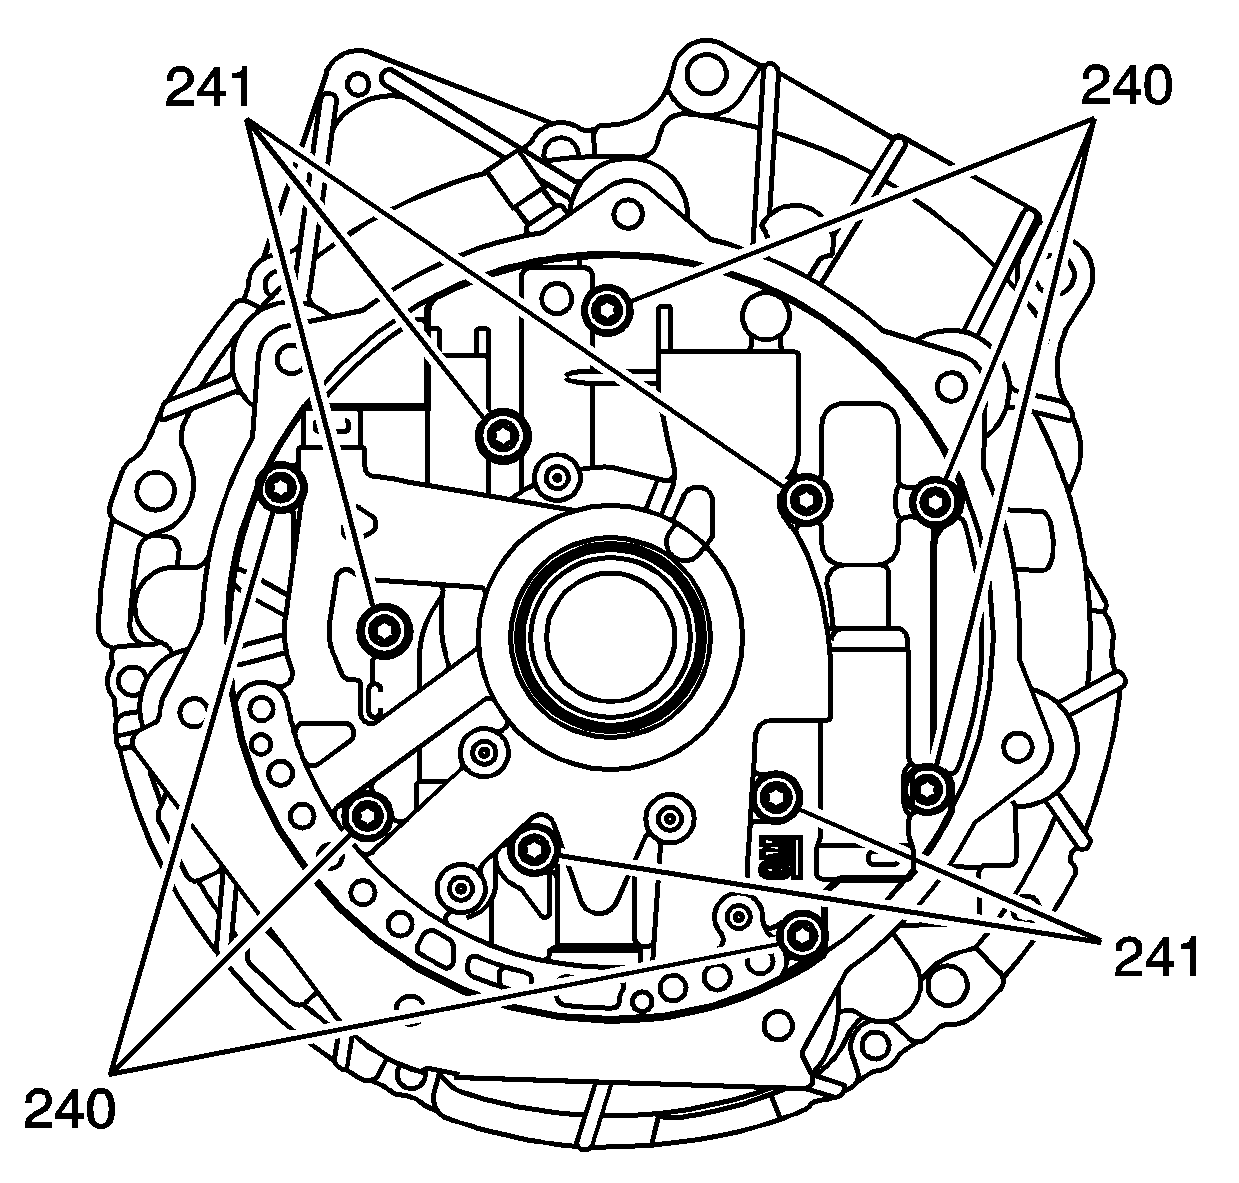
- Install the oil pump housing bolts (240, 241).
| • | Tighten the fluid pump housing bolts (240) to
11 N·m (8 lb ft). |
| • | Tighten the fluid pump housing bolts (241) to
22 N·m (16 lb ft). |
- Remove
J 21368 alignment band
.
