Accelerator Pedal Assembly Replacement LHD
Removal Procedure
- Remove the knee bolster bracket. Refer to
Driver Knee Bolster Bracket Replacement.
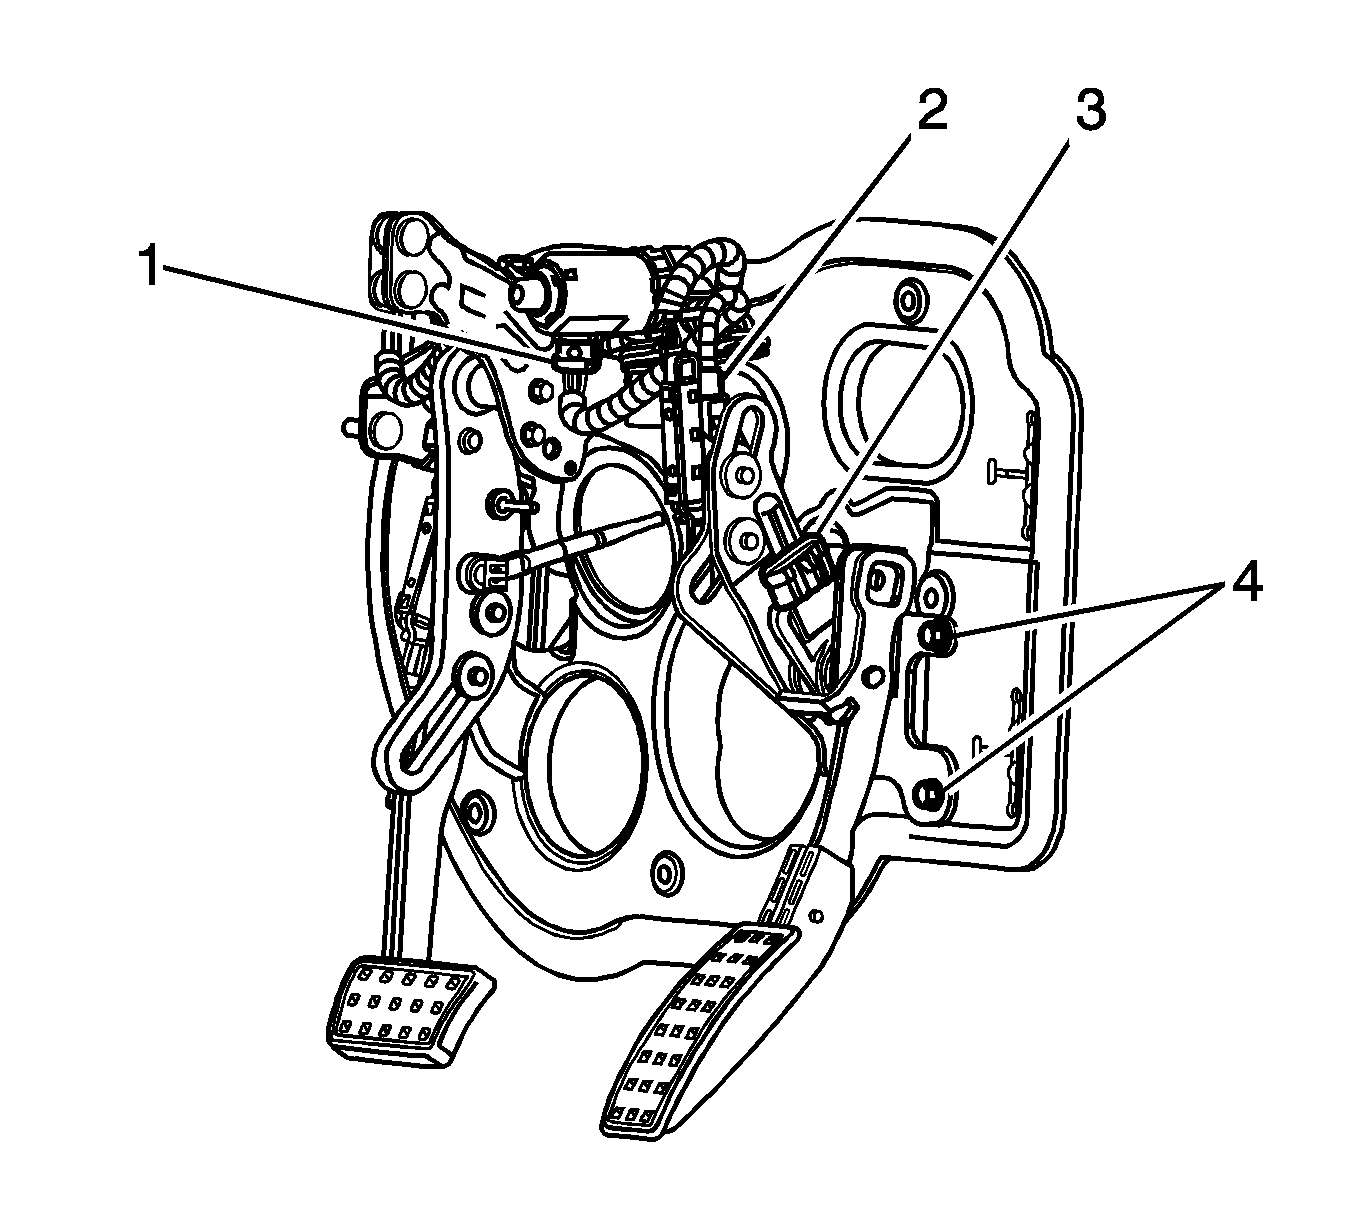
- Remove the accelerator pedal assembly mounting nuts (4).
- Remove the pedal assembly from the studs.
- Disconnect the electrical connector from the electronic throttle control sensor (3).
- Disconnect the electrical connector from the linear position sensor.
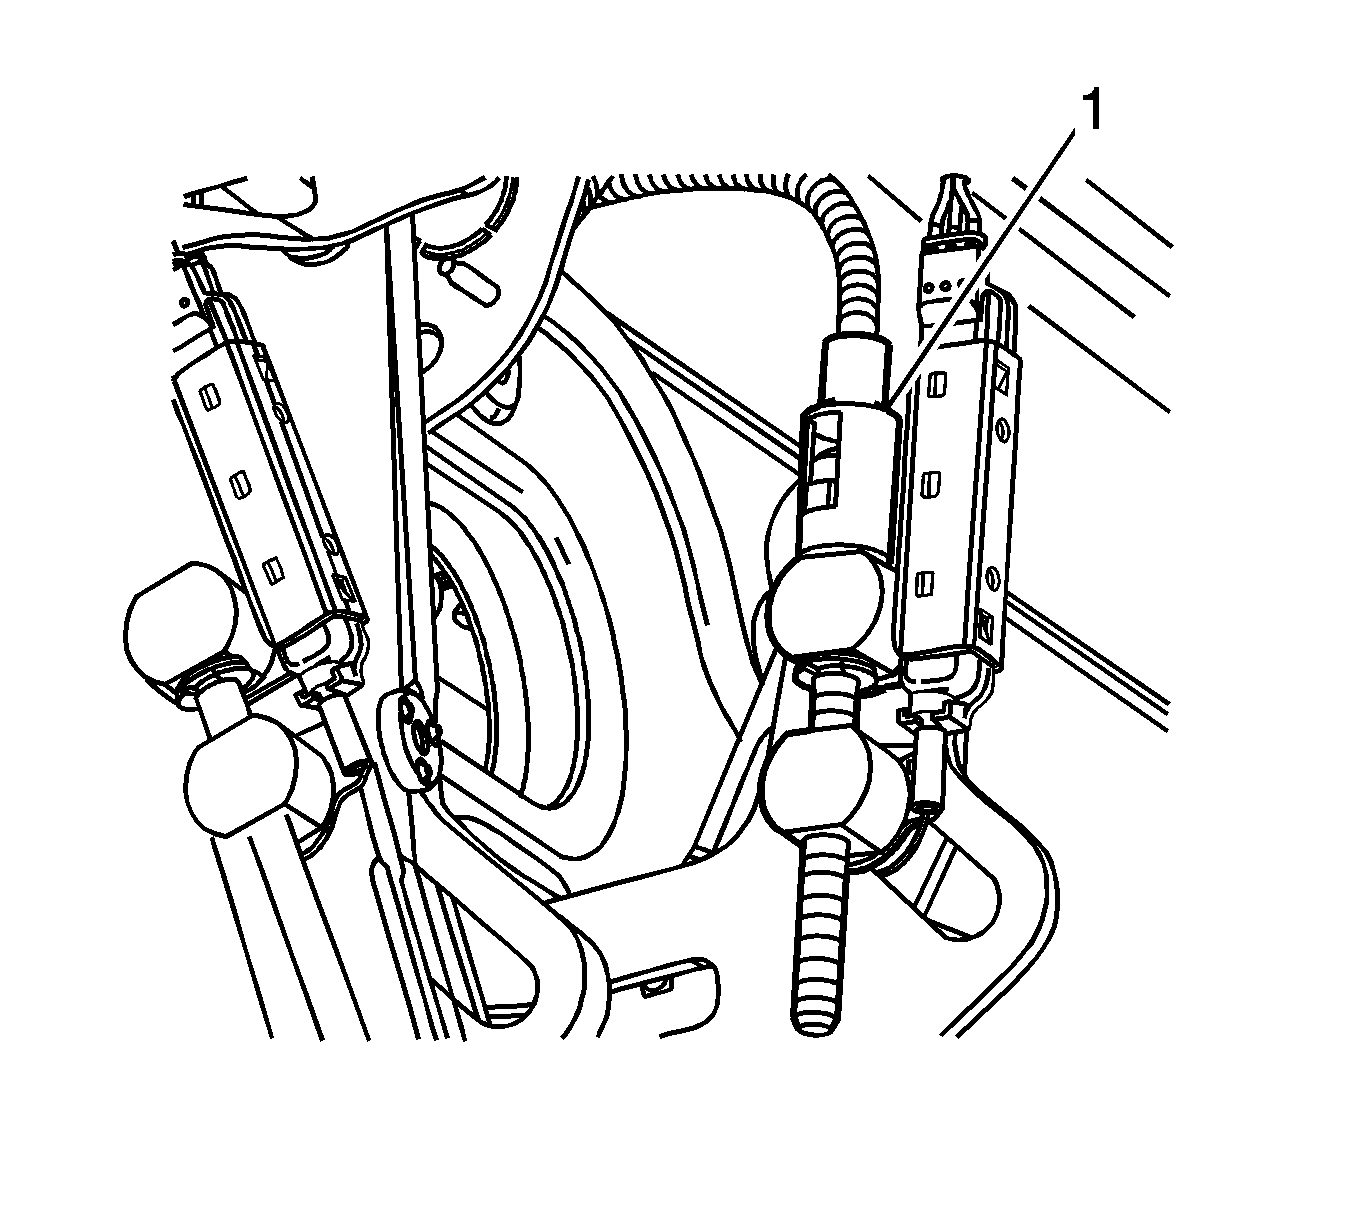
- Carefully lift the retaining tabs on the end of the accelerator pedal cable (1) using 2 thin-bladed tools.
- Disconnect the adjustable accelerator pedal cable (1) from the pedal assembly.
- Remove the accelerator pedal assembly from the vehicle.
Installation Procedure
Note: Ensure that the adjustable accelerator pedal and adjustable brake pedal are synchronized in the full forward, front of vehicle position.
Note: During the synchronization procedure, do not exceed 0.5 N·m (4.43 lb in) of torque while adjusting the pedals with the use of the cable, or the square drive.
- Synchronize the pedals to the full forward position.
- Synchronize the brake pedal to the full forward position. Use the instrument panel switch, the Tech II, or manually move the brake pedal as follows:
| 2.1. | Use an adjustable wrench on the accelerator pedal end of the accelerator pedal cable (1). |
| 2.2. | Slowly rotate the accelerator cable to move the brake pedal to the full forward, front of vehicle position. |
| 2.3. | Remove the wrench from the vehicle. |
- The new accelerator pedal assembly should already be synchronized to the full forward position. If the pedal is not synchronized, proceed as follows before installation:
| 3.1. | Install a square drive tool into the accelerator pedal where the cable attaches. |
| 3.2. | Carefully rotate the tool to move the adjustable pedal to the full forward position. |
| 3.3. | Remove the square drive tool. |
- Connect the adjustable accelerator pedal cable (1) to the pedal assembly.
- Ensure that the adjustable accelerator pedal cable retaining feature is locked in place by carefully pulling on the cable.
- Connect the electrical connector to the linear position sensor.
- Connect the electrical connector to the electronic throttle control sensor (3).
- Install the accelerator pedal assembly to the mounting studs.
Caution: Refer to Fastener Caution in the Preface section.
- Install the accelerator pedal assembly mounting nuts (4).
Tighten
Tighten the accelerator pedal assembly mounting nuts to 9 N·m (80 lb in).
- Install the knee bolster bracket. Refer to
Driver Knee Bolster Bracket Replacement.
- Perform the adjustable pedal calibration procedure. Refer to
Adjustable Pedal System Calibration.
