For 1990-2009 cars only
Special Tools
| • | J 22928-B Bearing Race Installer . |
| • | J 42572 Drive Shaft Seal Clamp Pliers . |
Disassemble Procedure
- Remove the rear wheel drive shaft from the vehicle. Refer to Rear Wheel Drive Shaft Replacement.
- Install the wheel drive shaft in a soft jawed vise.
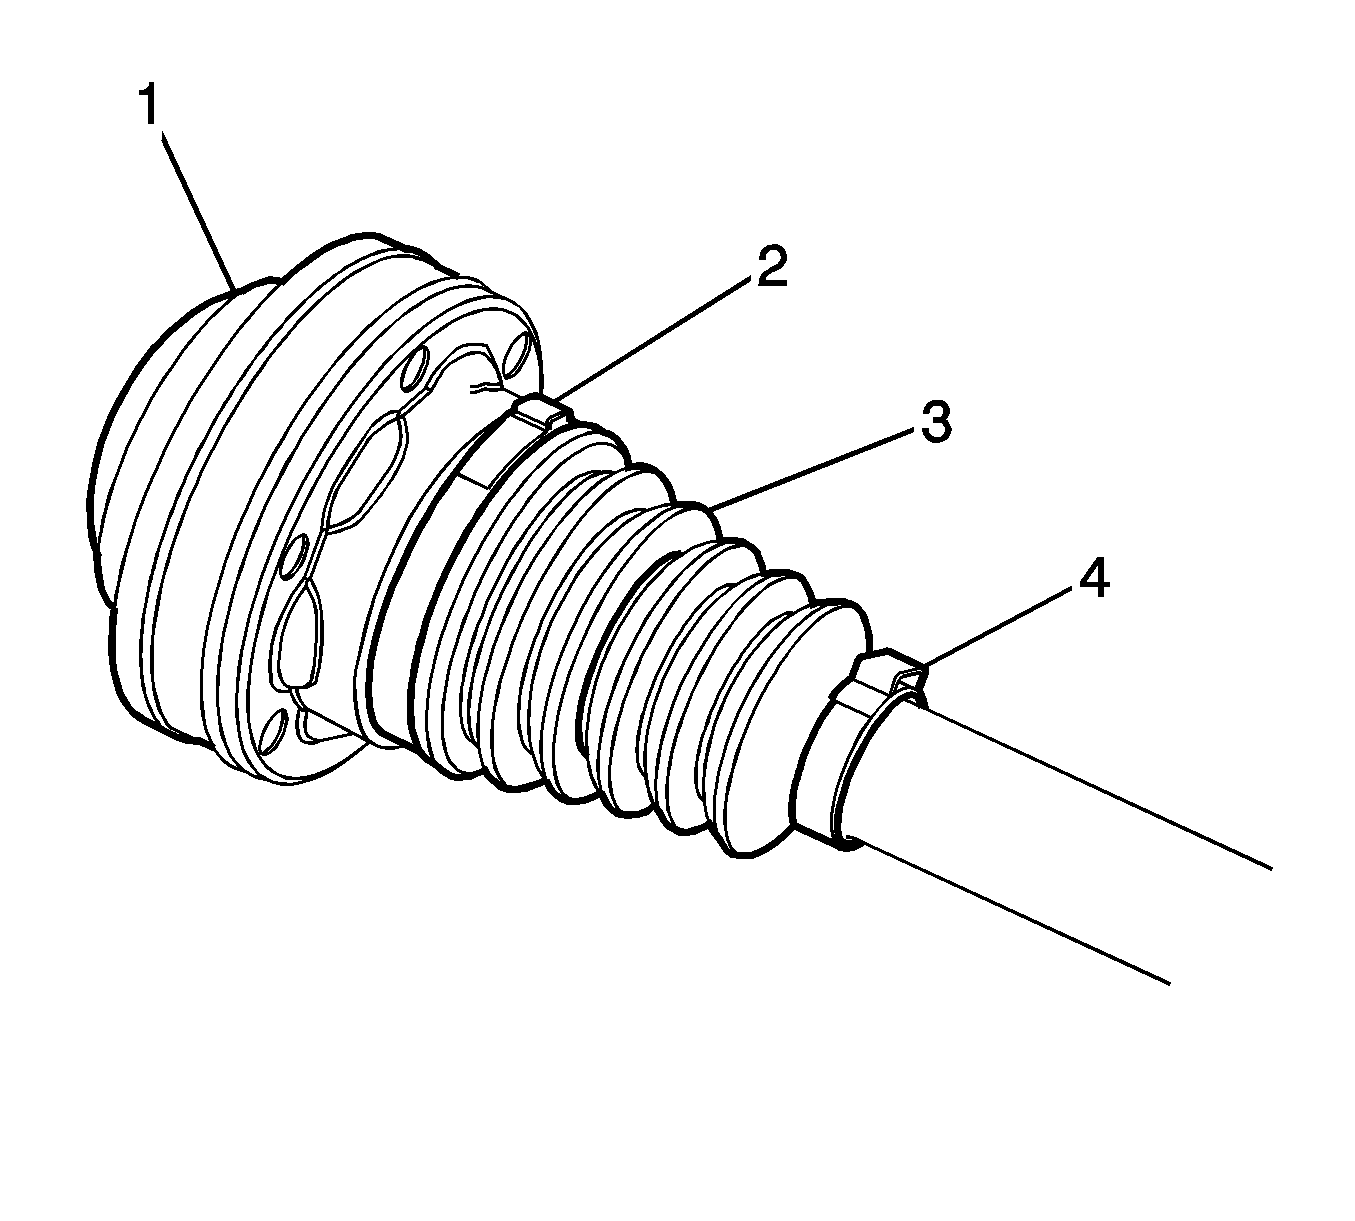
- Using a side cutter or other suitable tool, remove and discard the boot clamps (2) and (4) from the boot (3).
- Remove the boot (3) from the CV joint (1) and wheel drive shaft.
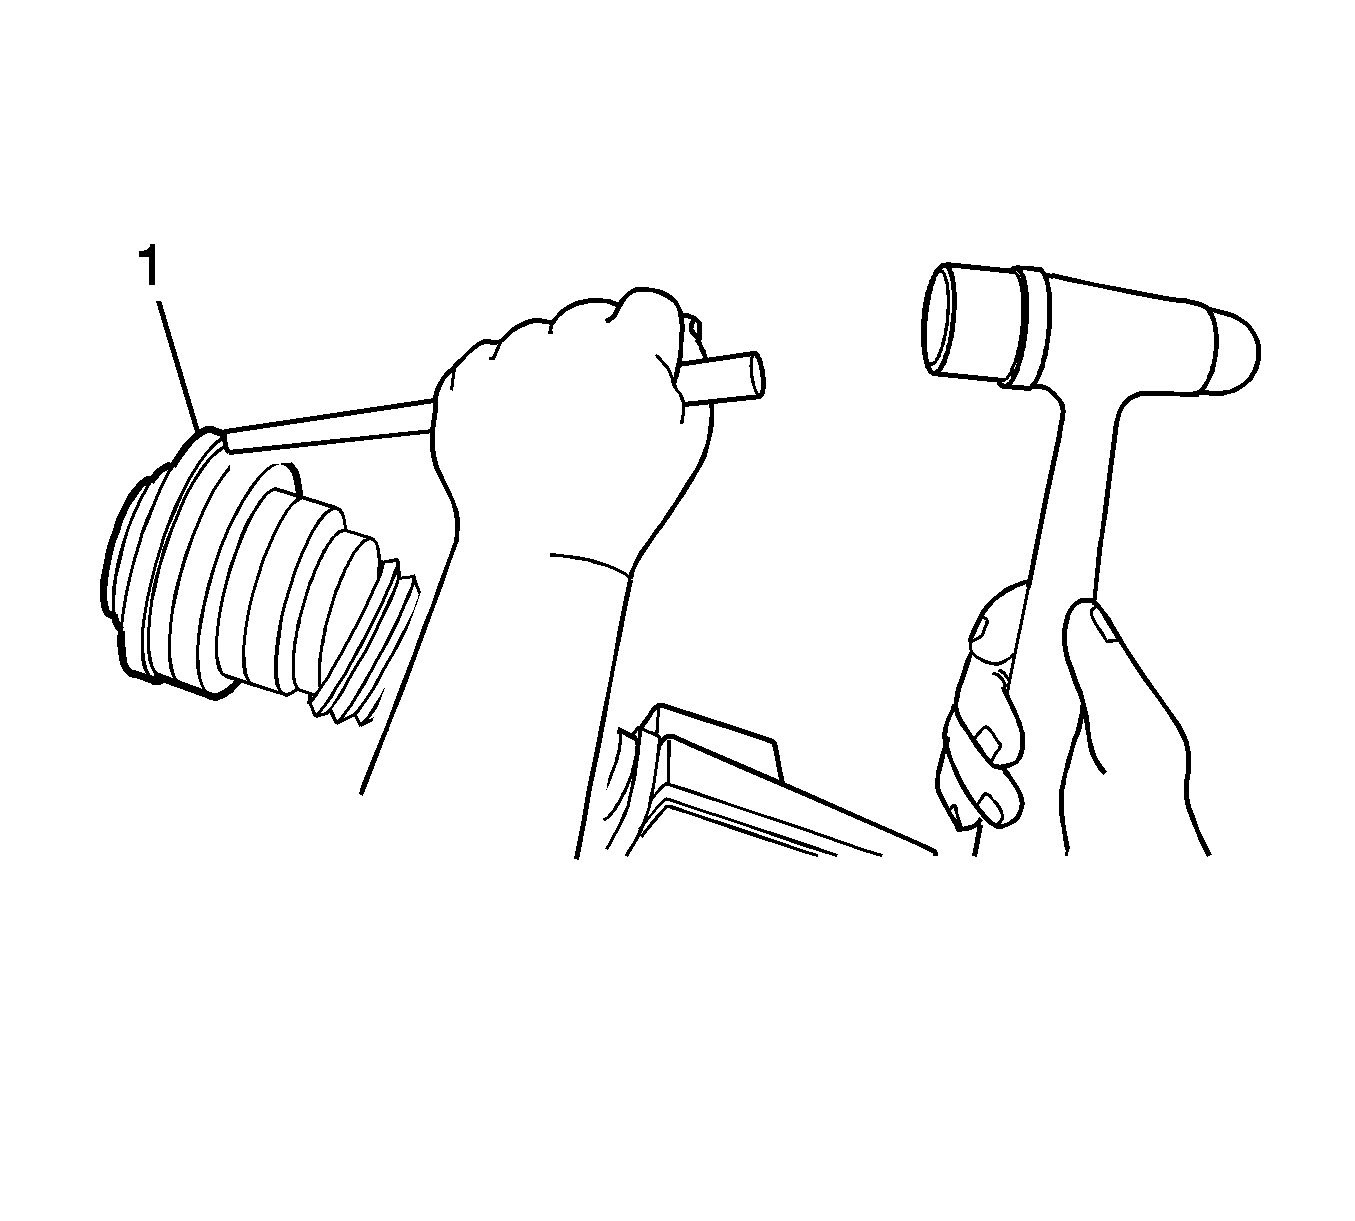
- Using a hammer and a punch, remove and discard the cap (1) from the CV joint.
- Remove the grease from the face of the joint inner race, cage, balls, etc.
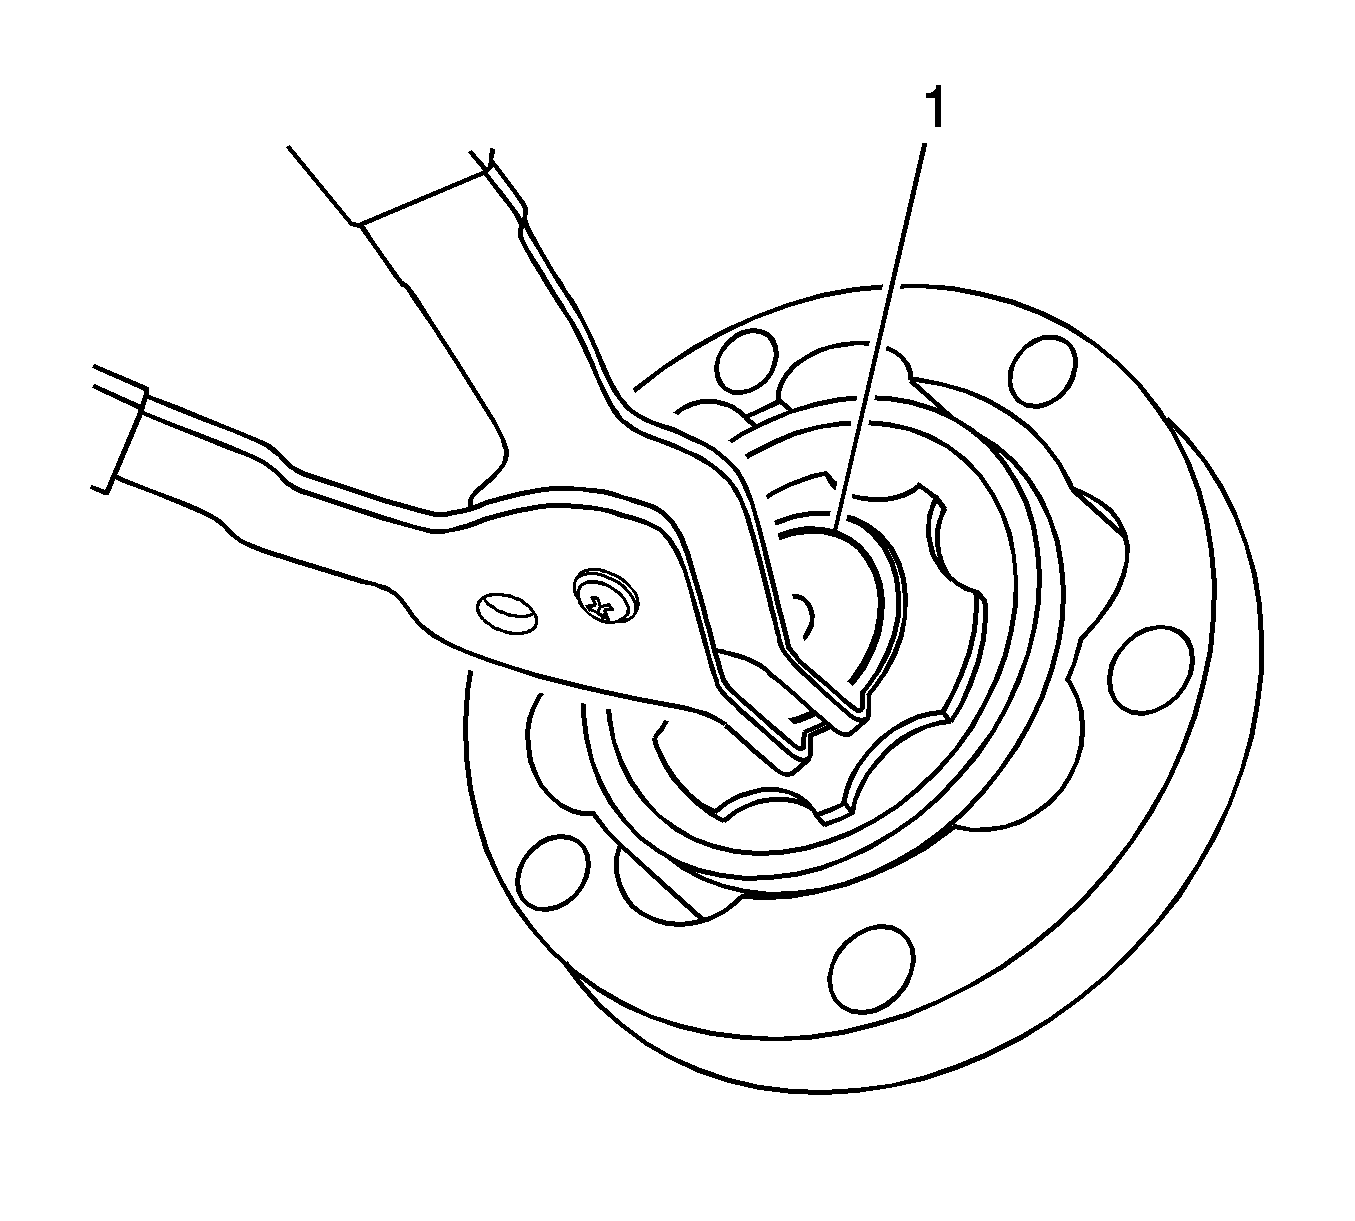
- Using snap ring pliers, remove the joint race retaining ring (1).
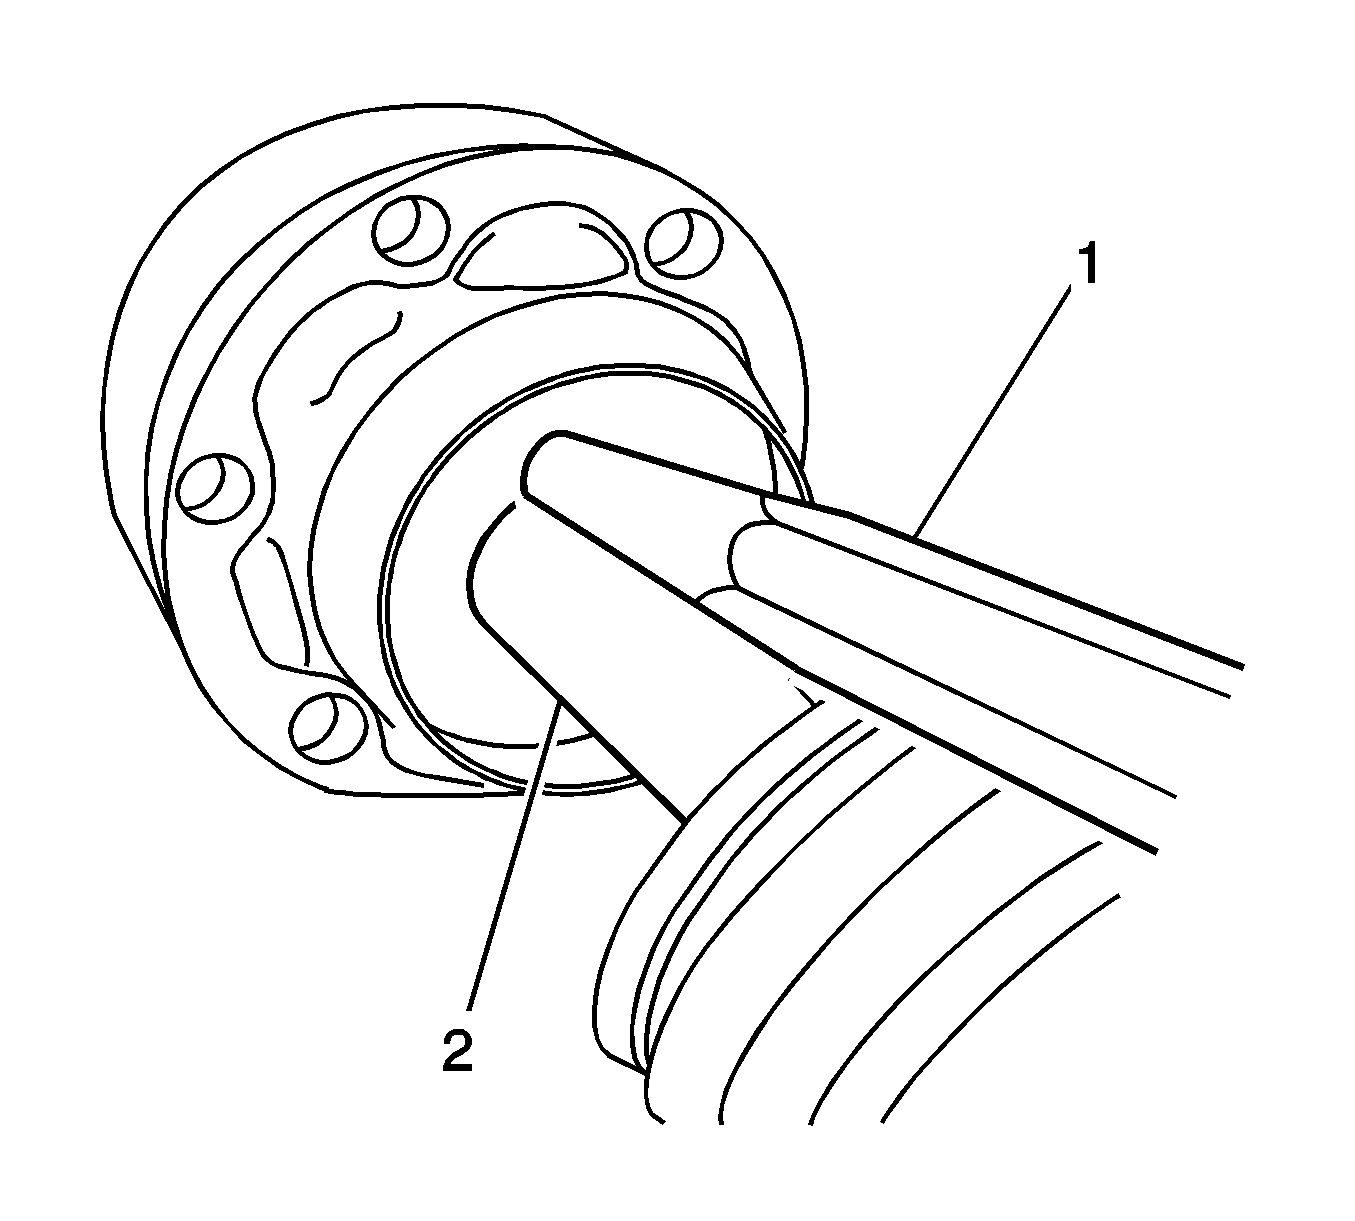
- Using a hammer and a brass drift, remove the inner CV joint assembly (2).
- Remove the boot from the wheel drive shaft.
- Inspect the inner CV joint. Refer to Wheel Drive Shaft Inner Joint Inspection.

Caution: Do not cut through the wheel drive shaft inboard or outboard boot during service. Cutting through the boot may damage the sealing surface of the housing and the tripot or the constant velocity joint bushing. Damage to the sealing surface may lead to water and dirt intrusion and premature wear of the constant velocity joint.
Note: If water or any other contaminates are found to be in the inner components and the ball bearings have a dull or pitted finish to them, replace the rear wheel drive shaft assembly. None of the inner components are serviced.
Assemble Procedure
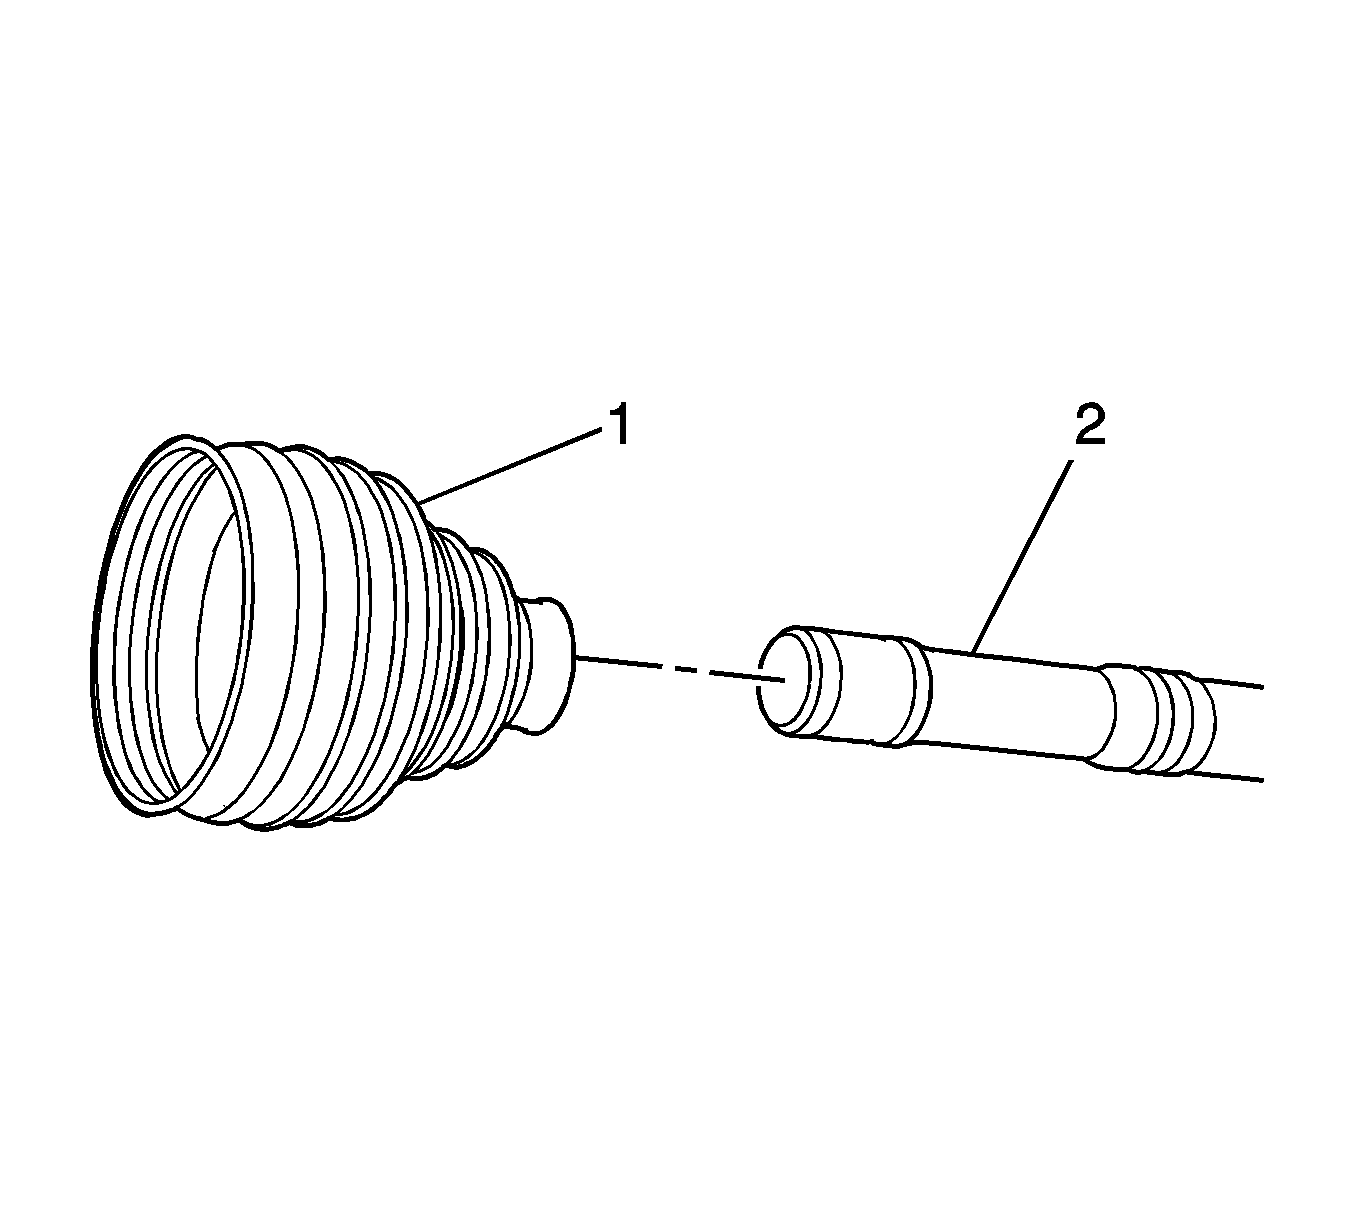
- Install the inner boot and clamp (1) and the wheel drive shaft (2).
- Apply part amount of lubricant from the service pack in the boot.
- Ensure that the boot (1) is properly seated in the grooved (2) wheel drive shaft (3).
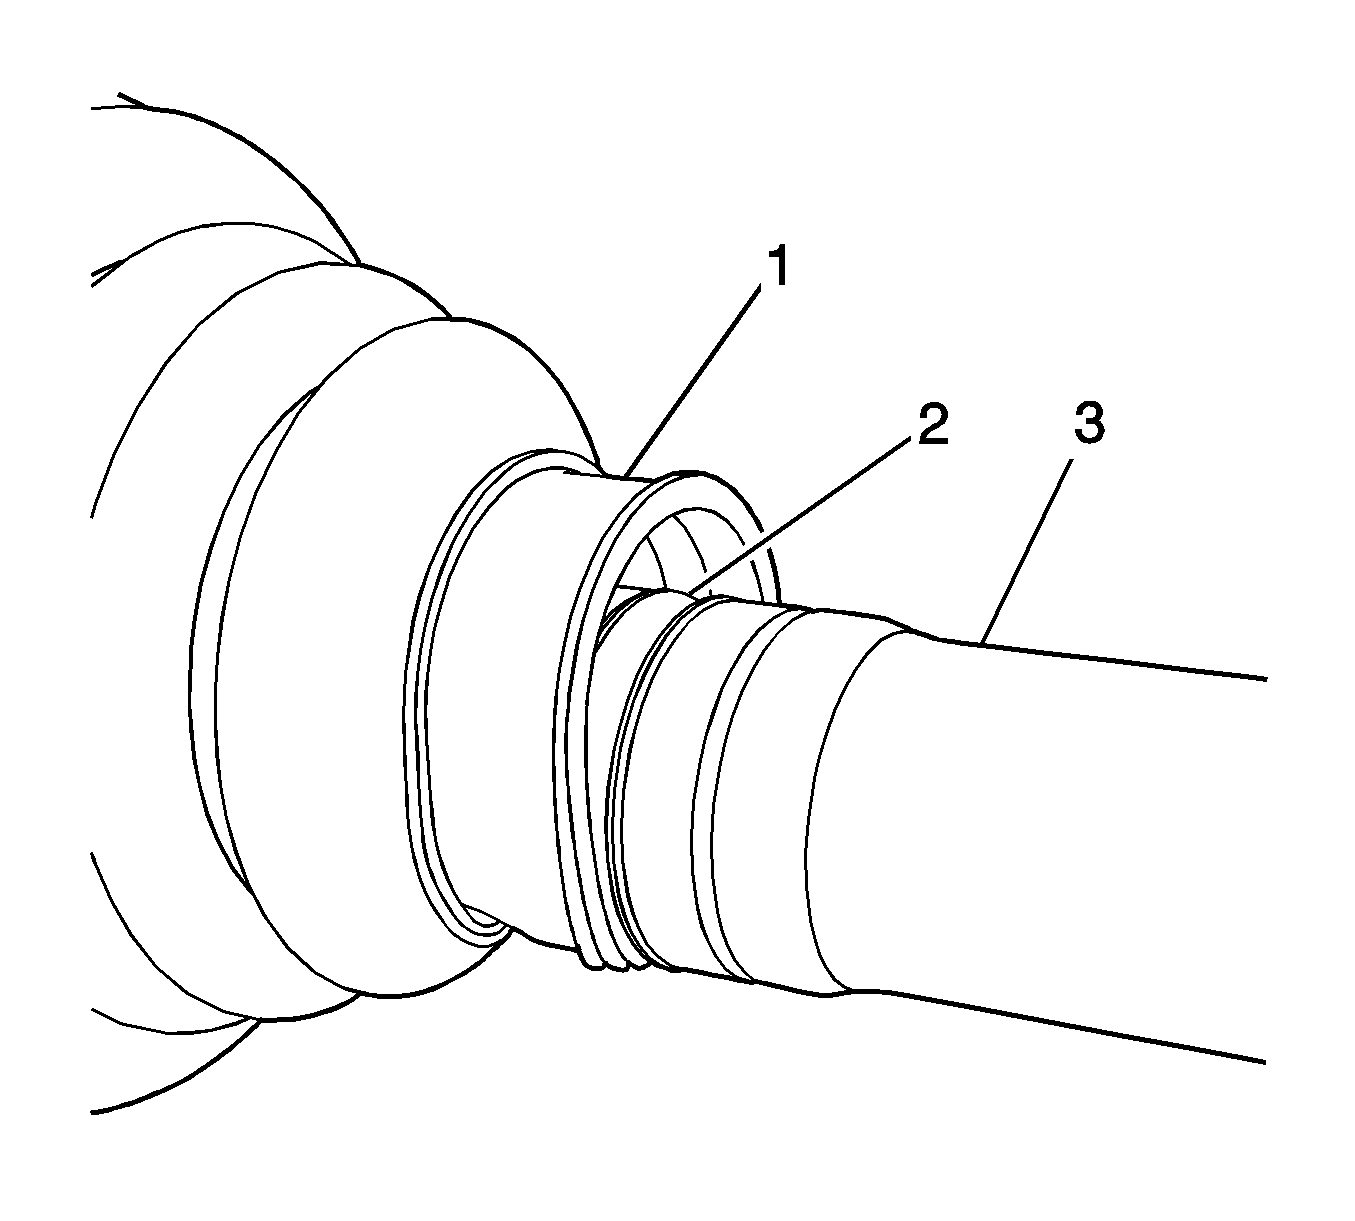
- Using a block of wood or a brass drift, install the CV joint on the wheel drive shaft.
- Using a pair of snap ring pliers, install the new retaining ring (1) for the CV joint.
- Apply the remaining lubricant in the ball bearings and the cage of the CV joint.
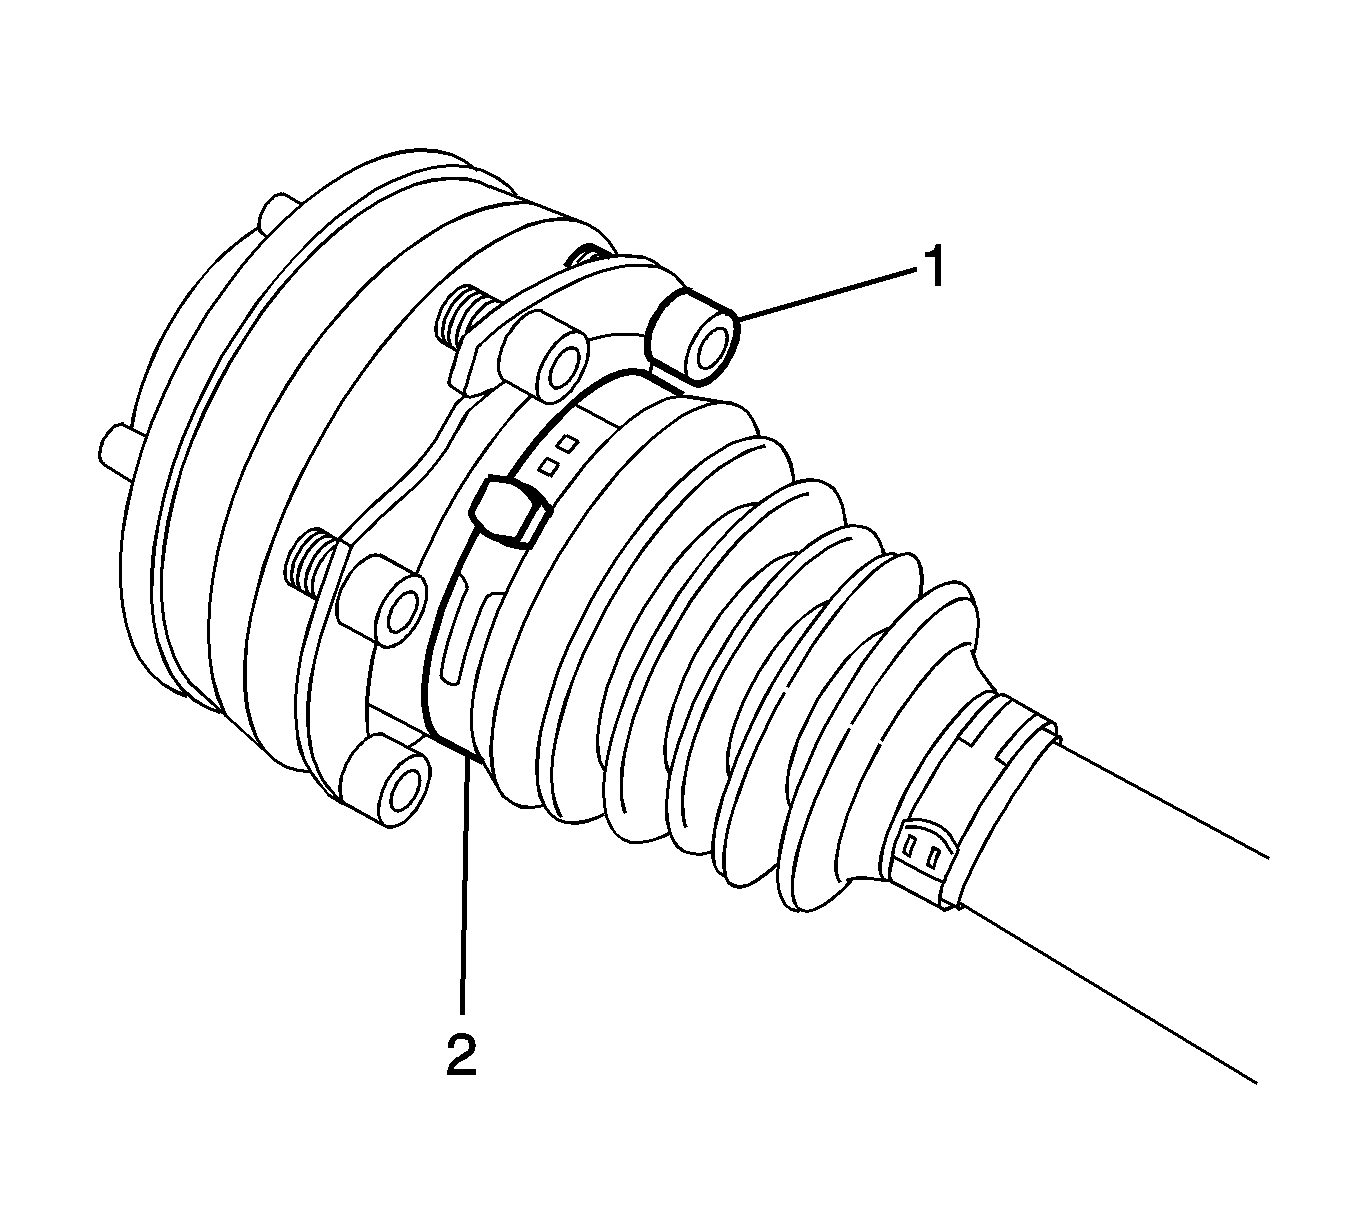
- Before crimping the clamp (2), position the clamp between the bolts and washers (1) to allow for the bolt installation and removal.
- Inspect the boot for the proper shape. If the boot is not shaped correctly, equalize the pressure in the boot by lifting the boot edge slightly and reshape the boot properly by hand.
- Inspect the boot for damage. If the boot was damaged during assembly, replace the boot.
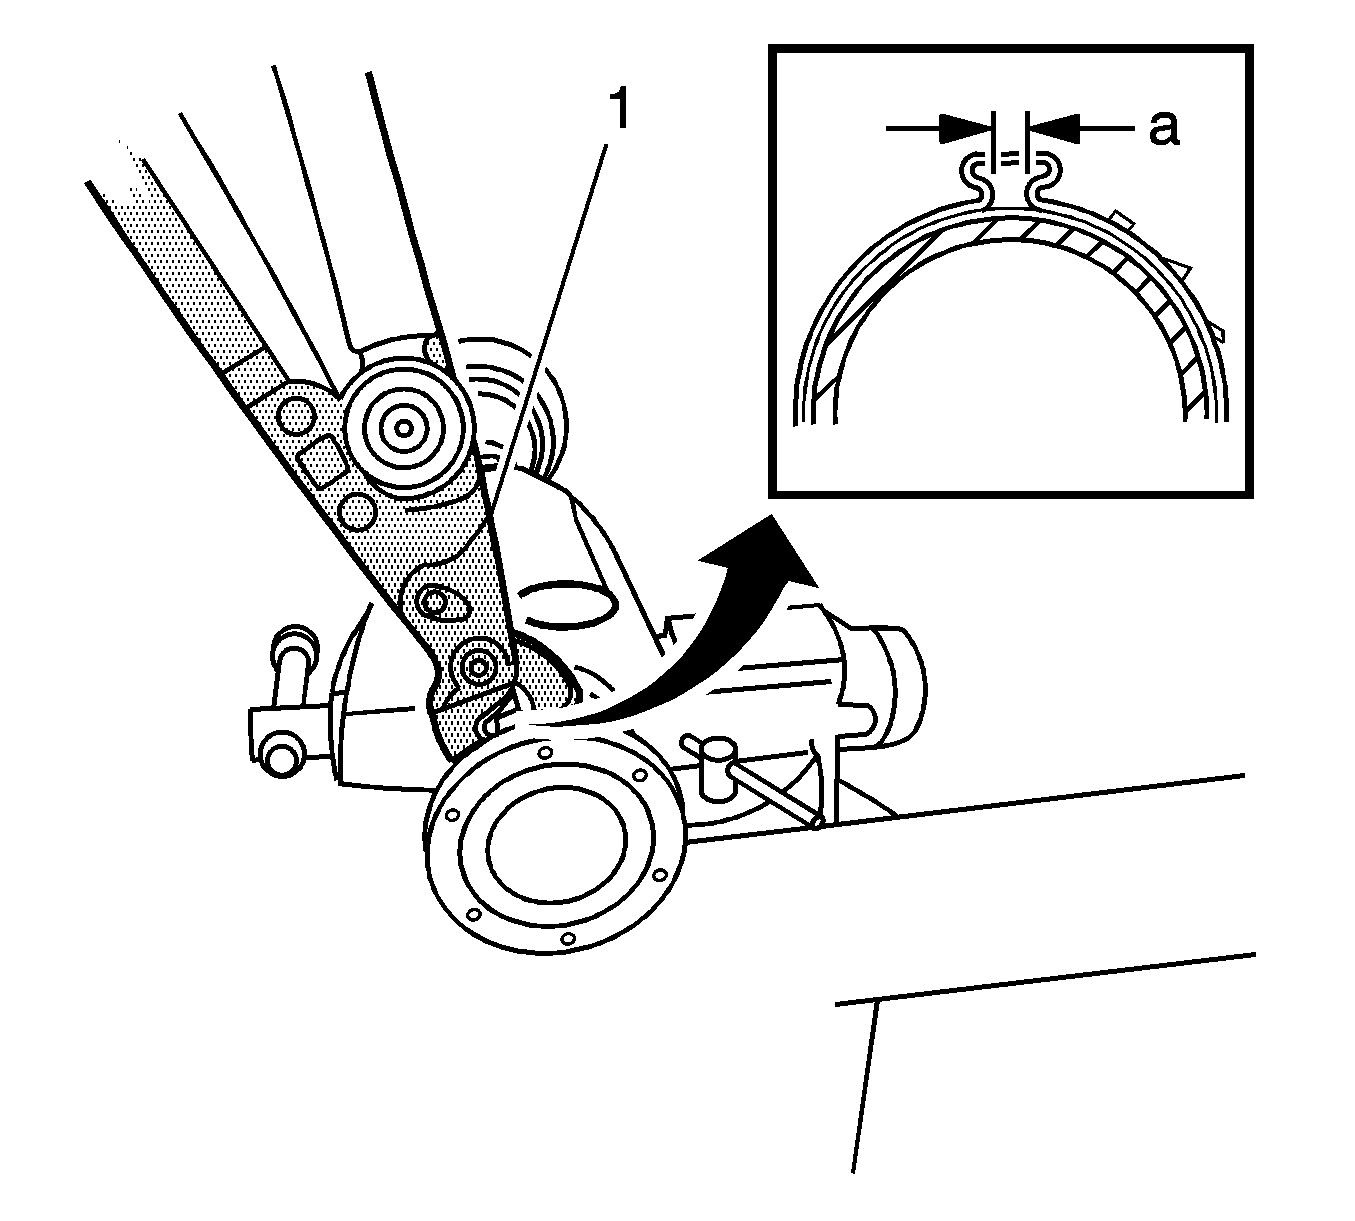
- Using the J 42572 pliers (1), close the inner and outer boot clamps until the gap (a) in the clamp measures 1.0 (0.040 in).
- Using an alcohol based solvent, remove any lubricant or sealant from the cap and allow to air dry.
- Apply a 3 mm (0.118 in) on the inside diameter of the of the CV joint face. Refer to Adhesives, Fluids, Lubricants, and Sealers.
- Using the J 22928-B installer (1), install the CV joint cap (2).
- Rotate the inner joint 4 or 5 times in a circular motion to distribute the lubricant and check the operation of the joint.
- remove any excess lubricant from the wheel drive shaft assembly.
- Install the wheel drive shaft. Refer to Rear Wheel Drive Shaft Replacement.
Note: Ensure that all of the internal components are lubricated.
Note: Align the holes for the mounting fasteners in the cap and the CV joint.
