Driver or Passenger Seat Cushion Heater Replacement Driver Seat
Repair Procedure
Important: Before installing the new heat element to the seat trim cover, verify that the seat assembly heat function operates properly with the new heat element connected.
Important: Not more than one service heater element can be stacked on the original heater element. The old service element must be removed before installing the new service heater element.
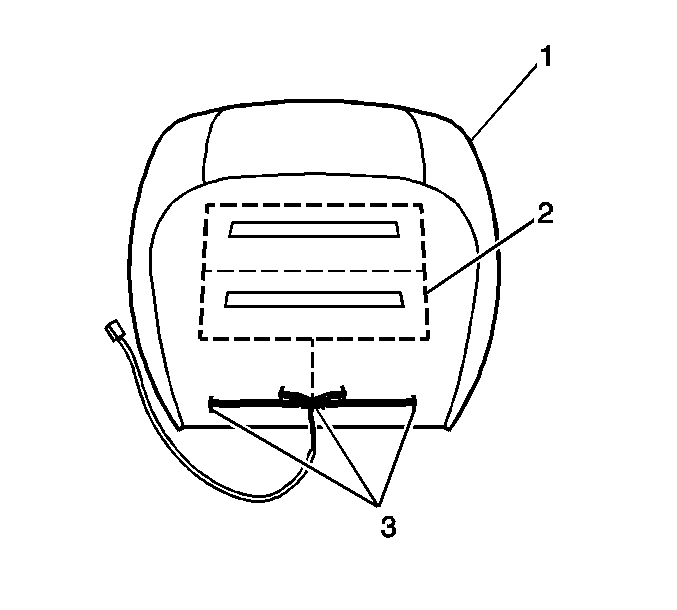
- Remove the front seat cushion trim cover (1). Refer to Front Seat Cushion Cover and Pad Replacement .
- Place the seat trim cover on a clean flat surface with the inside facing out.
- Use a marker to draw in the cut-lines (2) on the seat cover (1), approximately 12.7 mm (0.5 inch) from the sew line on either heater element.
- Remove the wiring harness from the non-functioning factory heat element.
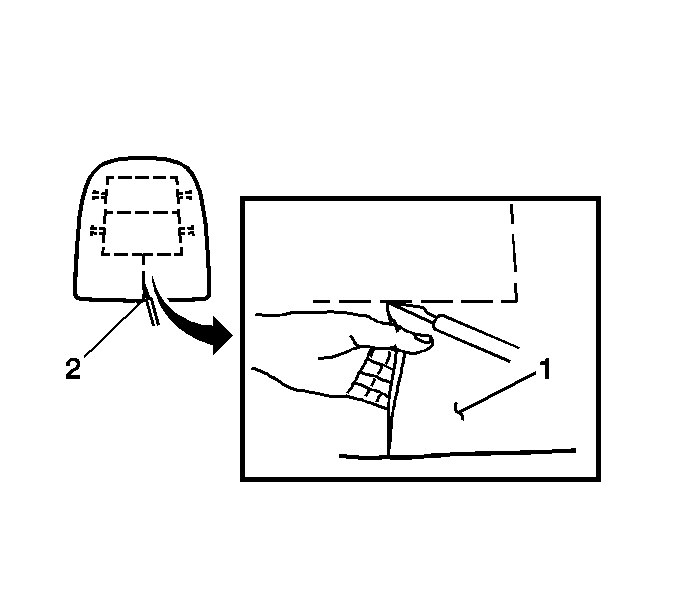
- At the trim cover edge (2) using a razor blade or an equivalent sharp tool, slice through the factory heat element material along the cut-line until a hole is created depending on which mat is being replaced.
- Insert your fingers through the hole and lift the factory heat element material (1) away from the trim cover material.
- Using scissors and/or a razor blade, continue to cut the material along the cut-lines.

Important: DO NOT attempt to remove the factory heat elements from the seat trim cover. The new heat element is to be installed between the factory heat element and the seat trim cover.
| 4.1. | At the location (3), pull back the tape covering the harness wires. |
| 4.2. | Use a pair of diagonal side cutters to cut the harness wires as close to the factory heat element material as possible. |

Important: DO NOT start the cut with a jab or poke.
Important: DO NOT cut through seams.
Installation Procedure
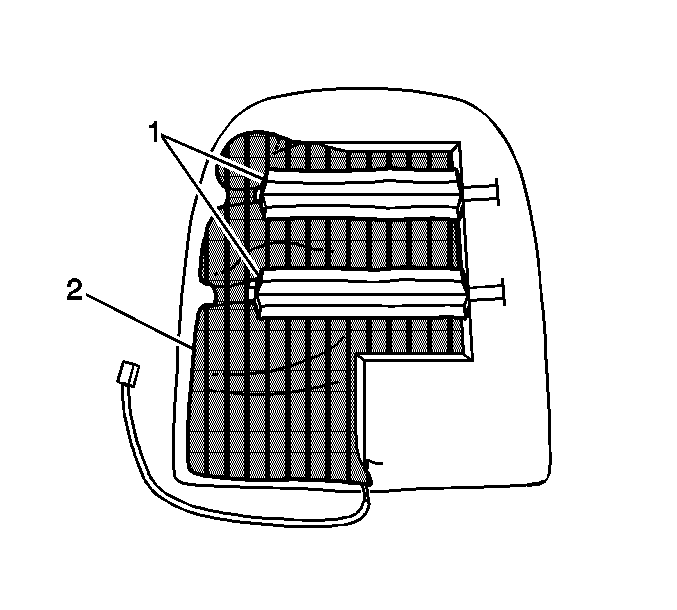
- Open the material along the cut in the factory heat element material. Insert the service heat element (2), with the backing paper side up, between the trim cover material and the factory heat element material.
- Carefully remove the backing paper from the new heat element. Ensure the new heat element is laying flat.
- Unfold the centers (1) of the factory heat element material.
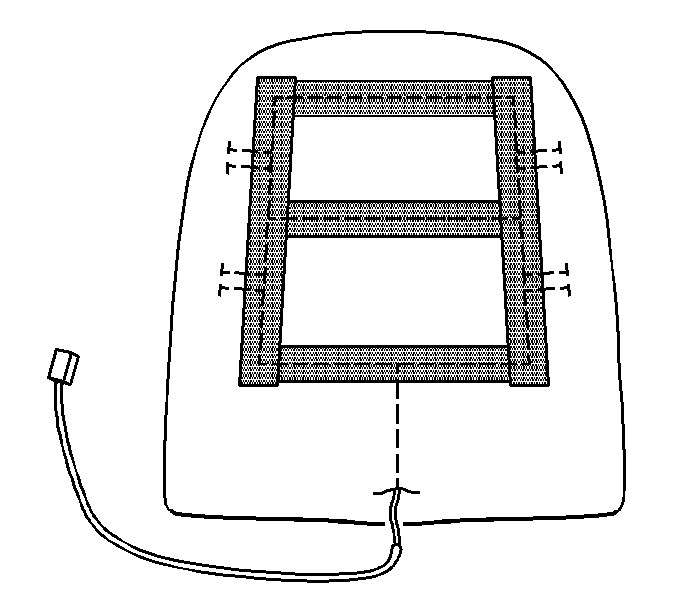
- Match the edges of the factory heat element material and cover the cut-lines with 3M Highland Cloth Duct Tape, or equivalent. Ensure the new and factory heat elements are laying flat. If the location of the new harness causes the trim plus the pad to bunch, trim material from and around the harness. The service heater element harness may need to be routed through another hole in the cushion.
- Install the front seat cushion trim cover. Refer to Front Seat Cushion Cover and Pad Replacement .


Driver or Passenger Seat Cushion Heater Replacement Passenger Seat
Repair Procedure
Warning: To avoid personal injury, perform a preload test on the passenger presence system whenever you remove or replace the seat cushion trim. Failure to do so may cause the system to malfunction.
Note: Before installing the new heat element to the seat trim cover, verify that the seat assembly heat function operates properly with the new heat element connected.
Note: Not more than one service heater element can be stacked on the original heater element. The old service element must be removed before installing the new service heater element. On the passenger seat, replace only the heater element section that has failed.
- Remove the front seat cushion trim cover (1). Refer to Front Seat Cushion Cover and Pad Replacement.
- Place the seat trim cover on a clean flat surface with the inside facing out.
- Use a marker to draw in the cut-lines (2) on the seat cover (1), approximately 12.7 mm (0.5 inch) from the sew line on either heater element.
- Remove the wiring harness from the non-functioning factory heat element.
- At the trim cover edge (2) using a razor blade or an equivalent sharp tool, slice through the factory heat element material along the cut-line until a hole is created depending on which mat is being replaced.
- Insert your fingers through the hole and lift the factory heat element material (1) away from the trim cover material.
- Using scissors and/or a razor blade, continue to cut the material along the cut-lines.

Note: DO NOT attempt to remove the factory heat elements from the seat trim cover. The new heat element is to be installed between the factory heat element and the seat trim cover.
| 4.1. | At the location (3), pull back the tape covering the harness wires. |
| 4.2. | Use a pair of diagonal side cutters to cut the harness wires as close to the factory heat element material as possible. |

Note: DO NOT start the cut with a jab or poke.
Note: DO NOT cut through seams.
Installation Procedure
- Open the material along the cut in the factory heat element material. Insert the service heat element (2), with the backing paper side up, between the trim cover material and the factory heat element material.
- Carefully remove the backing paper from the new heat element. Ensure the new heat element is laying flat.
- Unfold the centers (1) of the factory heat element material.
- Match the edges of the factory heat element material and cover the cut-lines with 3M Highland Cloth Duct Tape, or equivalent. Ensure the new and factory heat elements are laying flat. If the location of the new harness causes the trim plus the pad to bunch, trim material from and around the harness. The service heater element harness may need to be routed through another hole in the cushion.
- Install the front seat cushion trim cover. Refer to Front Seat Cushion Cover and Pad Replacement.
- Preload Test the inflatable restraint passenger presence system. Refer to Control Module References.


