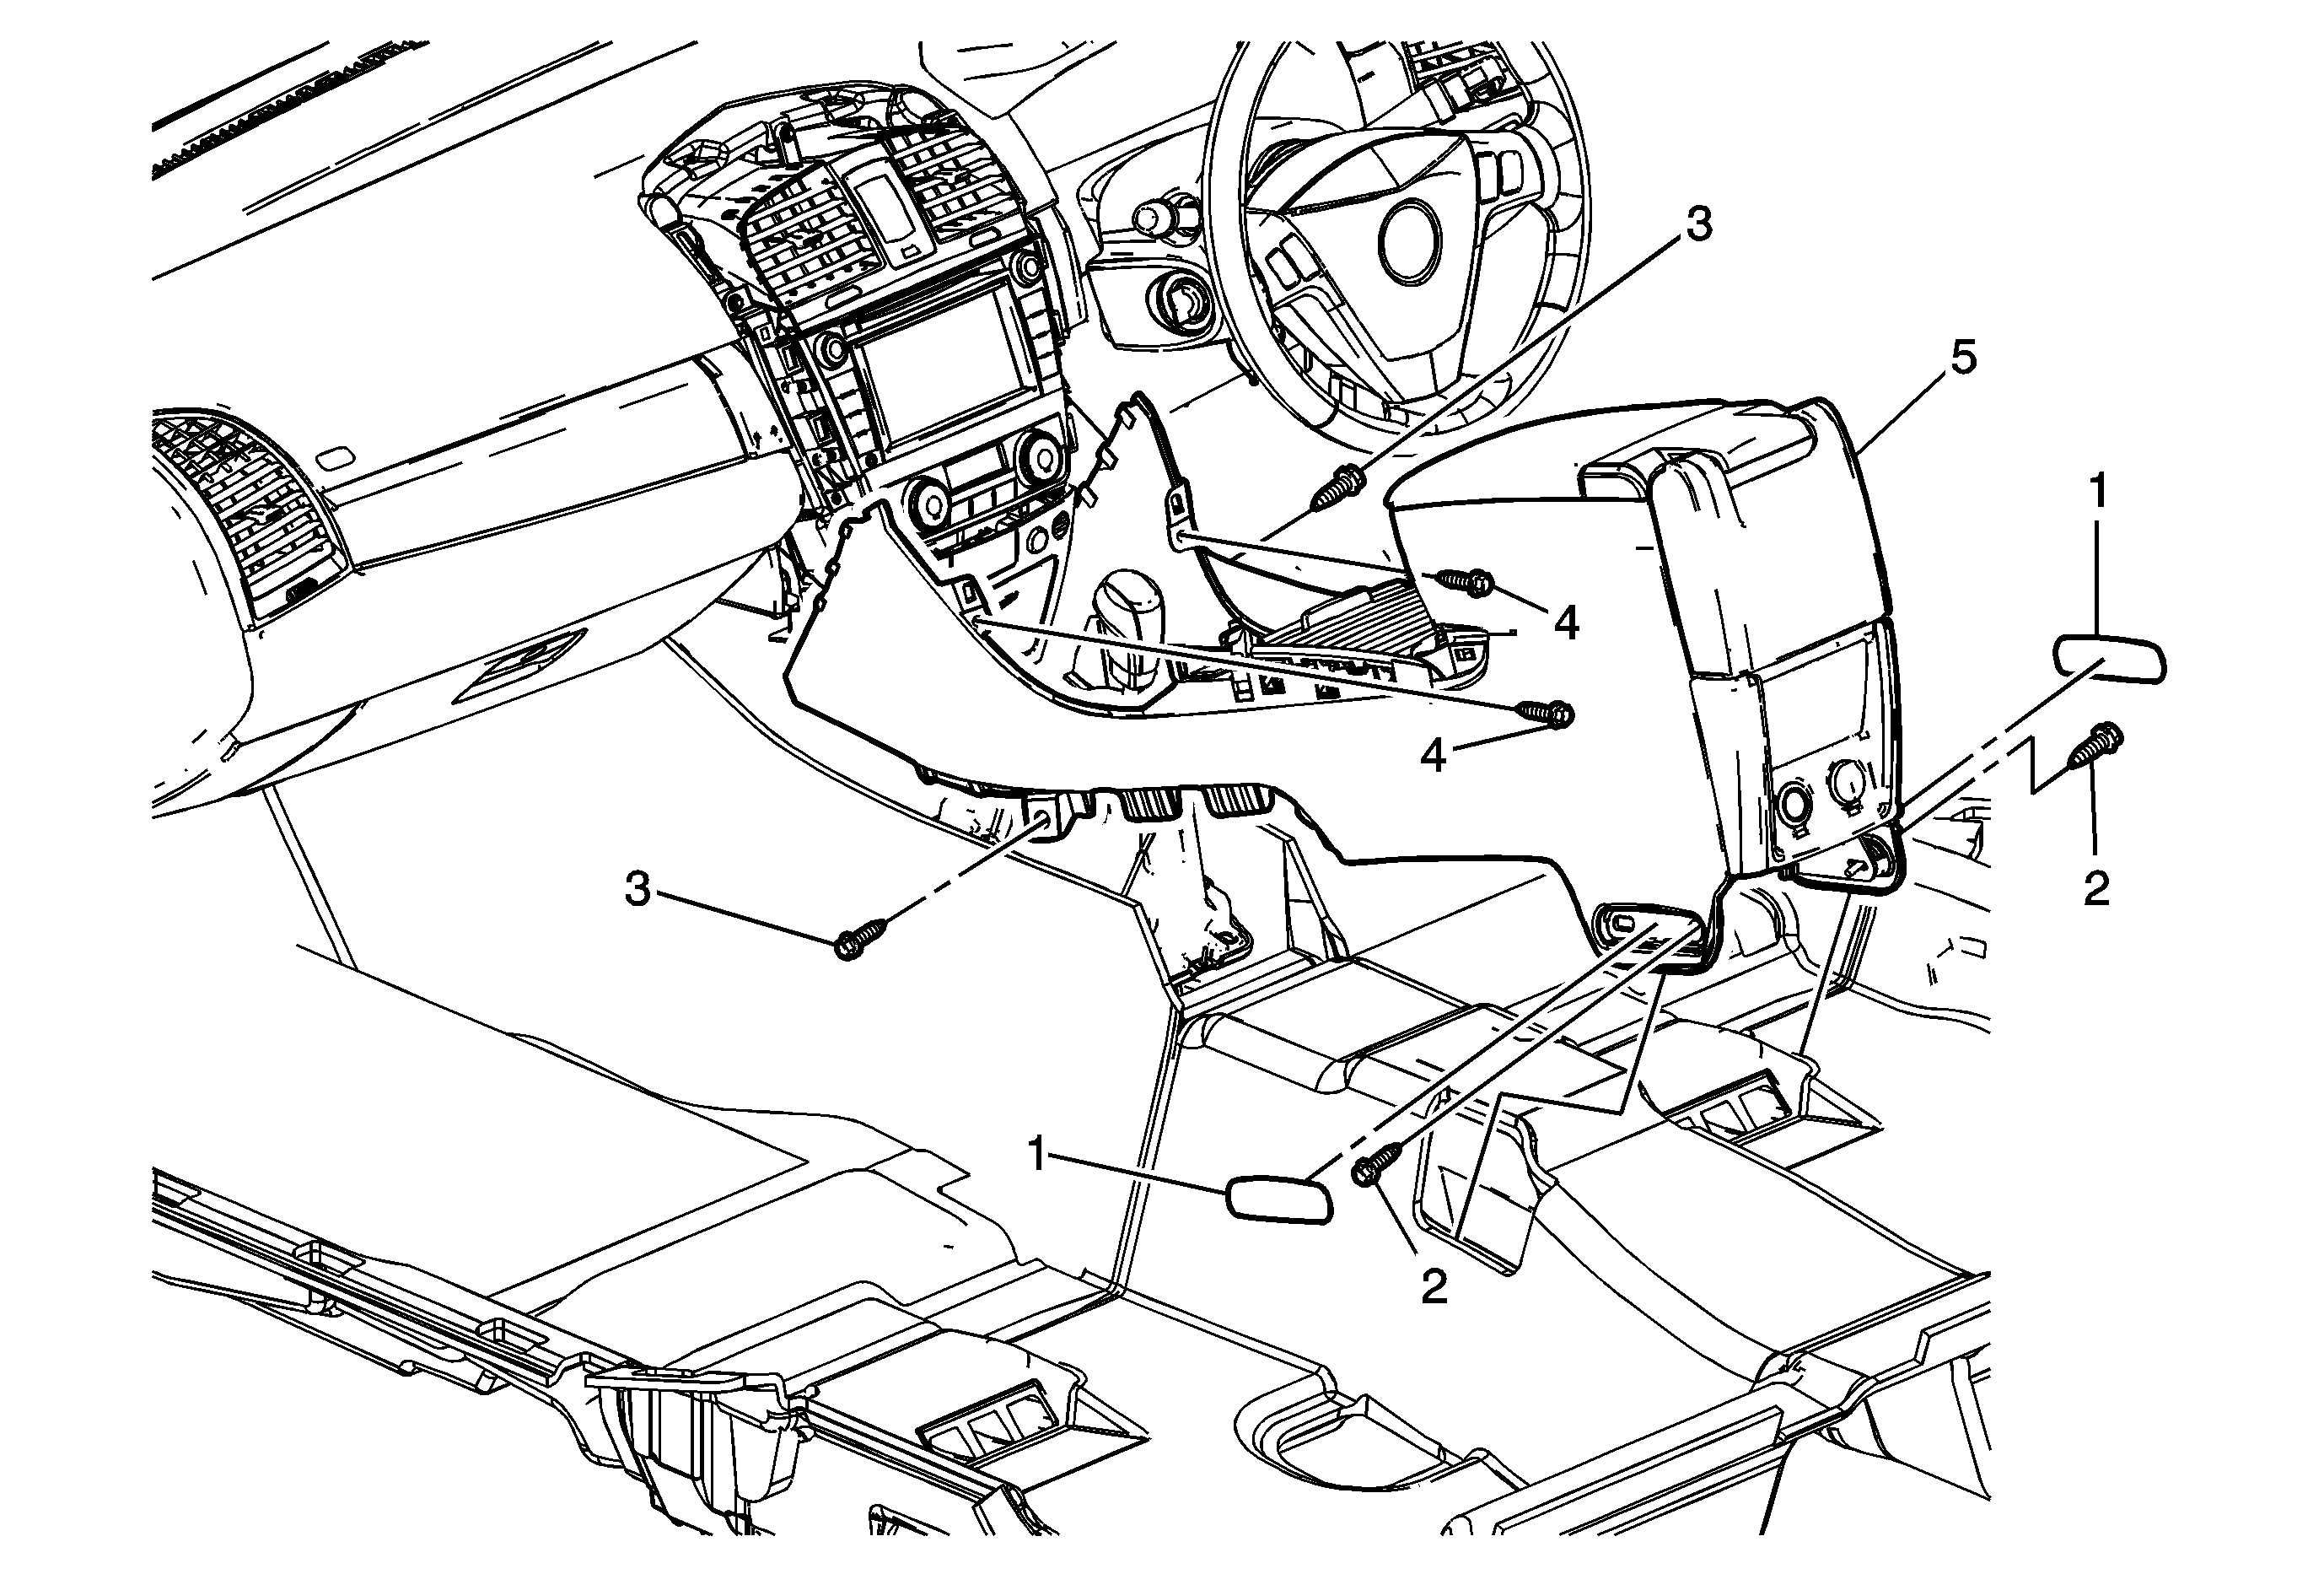
Front Floor Console Replacement Right Hand Drive

Callout | Component Name |
|---|---|
Preliminary Procedures
| |
1 | Console Bolt Cover (Qty: 2) ProcedureUse a flat-bladed plastic trim tool to remove the covers. |
2 | Console Rear Bolt (Qty: 2) Caution: Refer to Fastener Caution in the Preface section. ProcedureMove the front seats to the full forward position to access the rear bolts. Tighten |
3 | Console Front Bolt (Qty: 2) Tighten Procedures
|
4 | Console Screws (Qty: 2) Tighten |
5 | Console Assembly Procedures
|
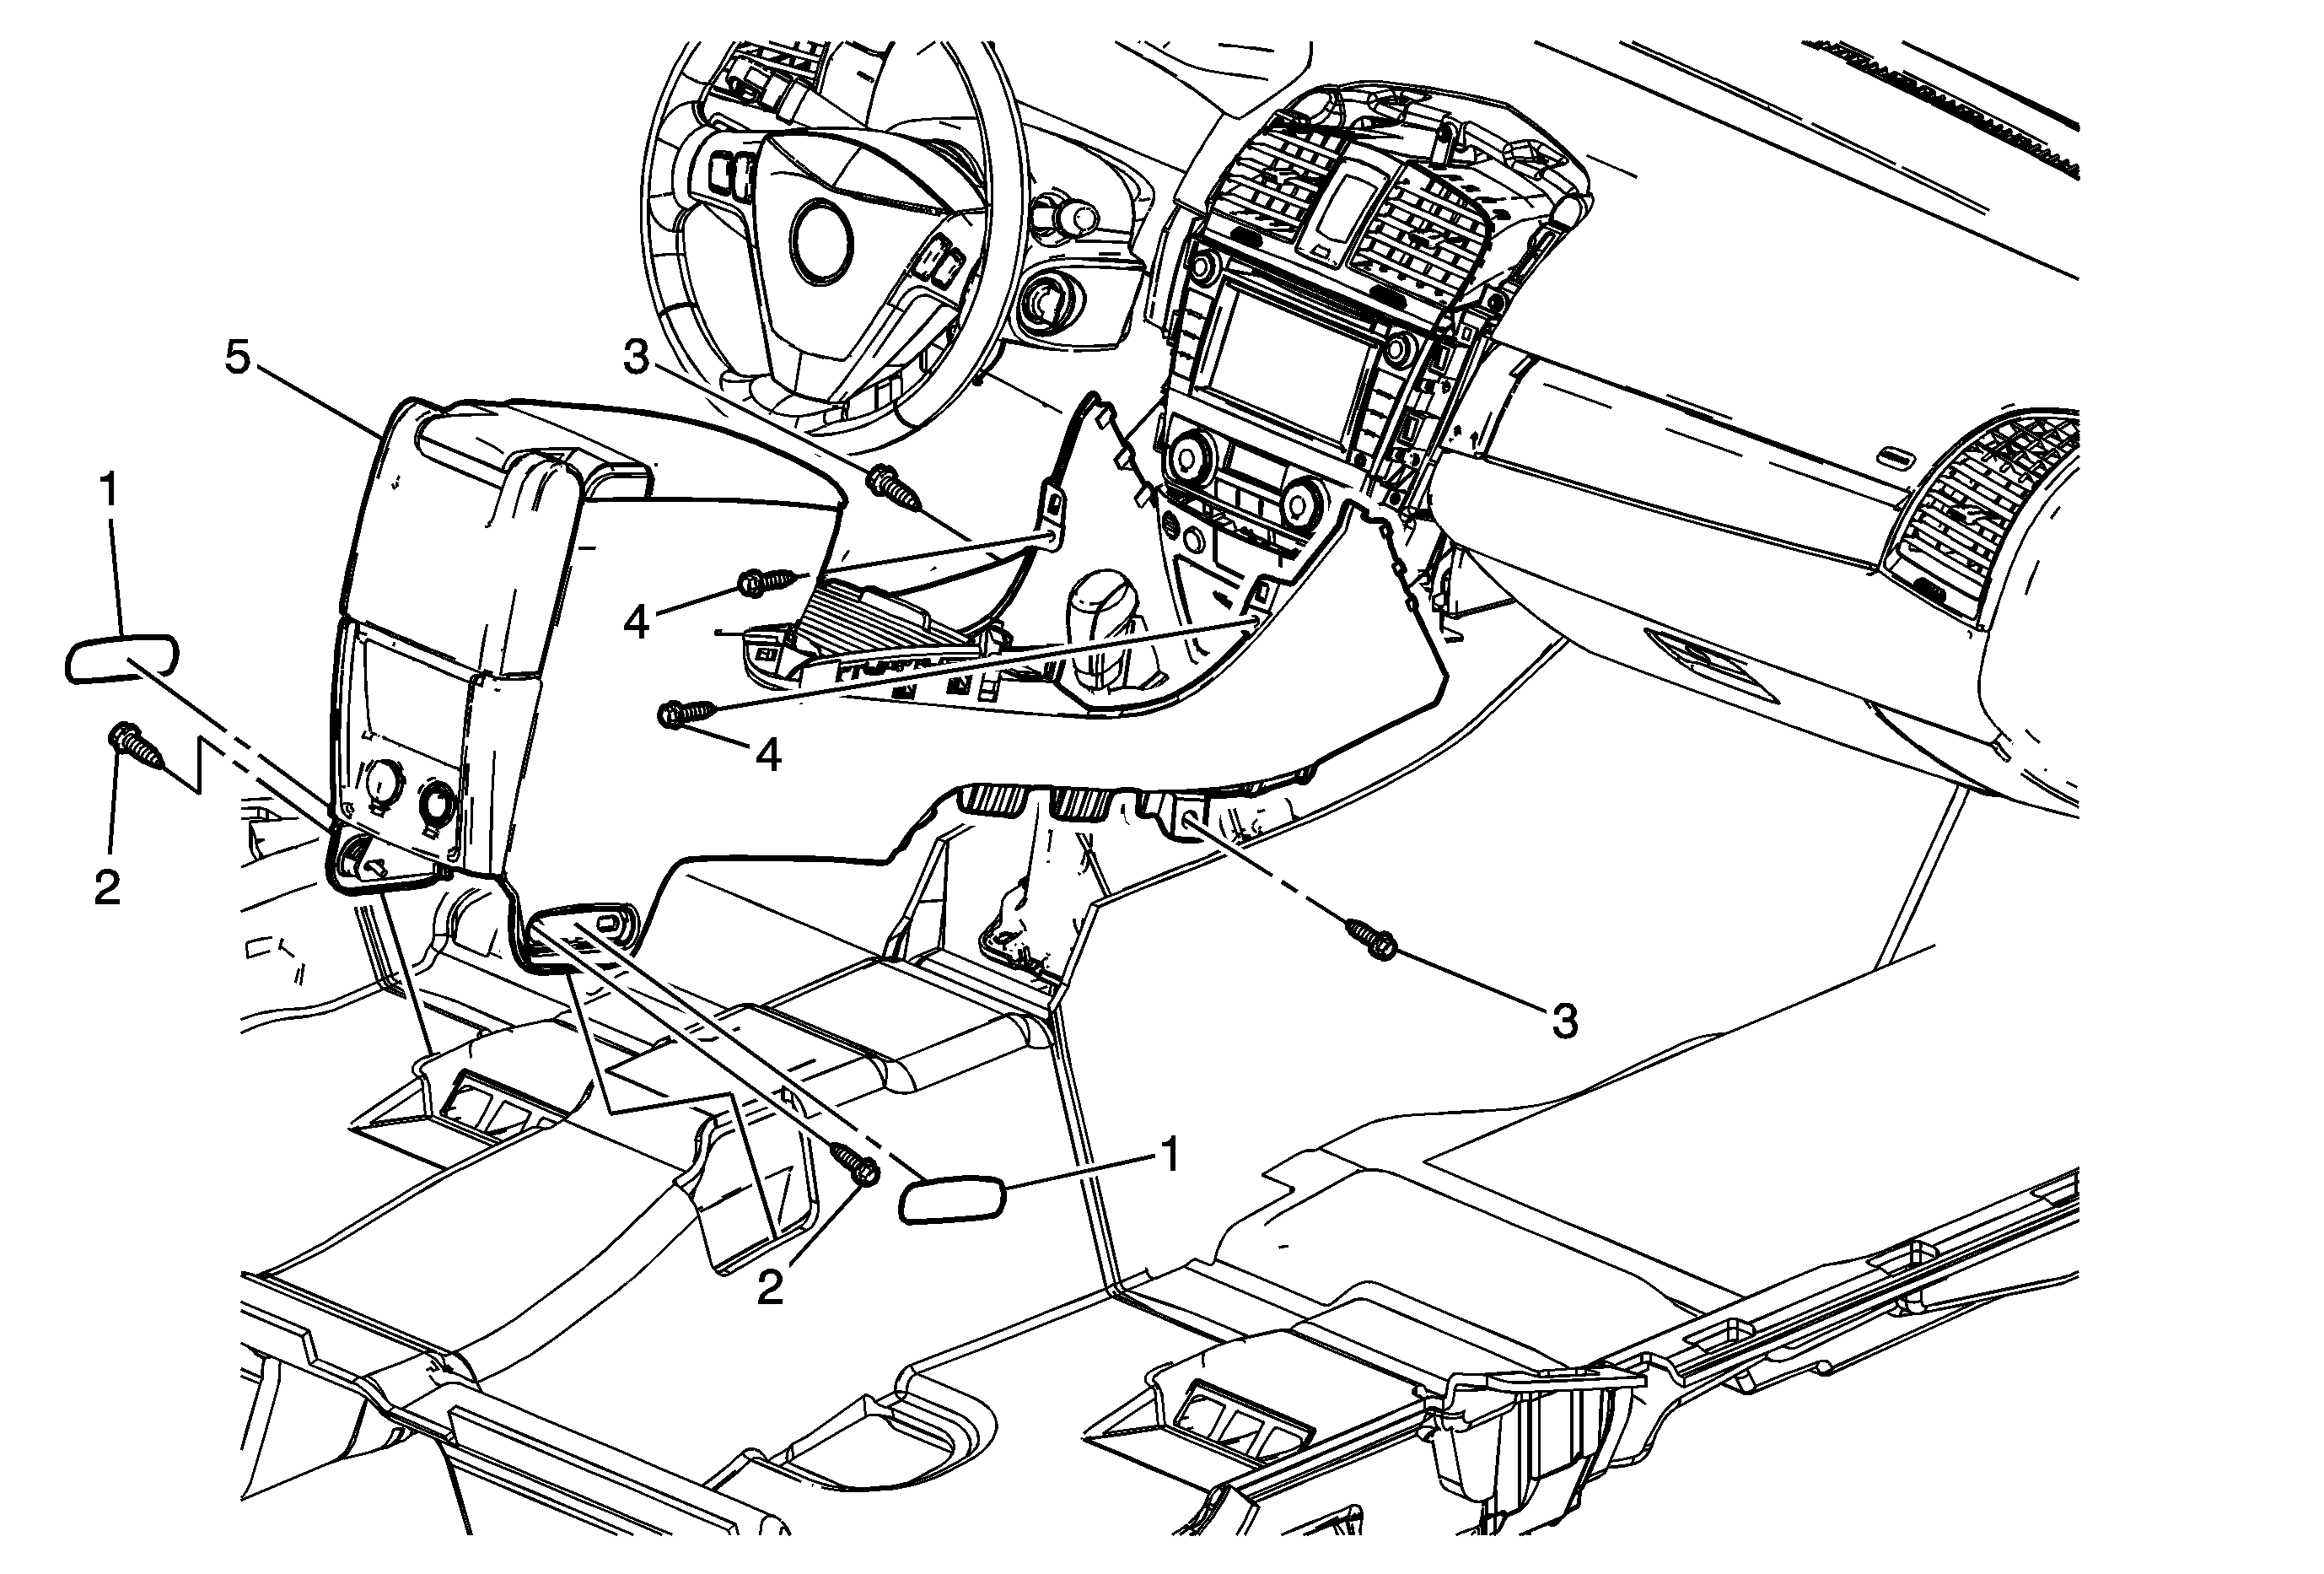
Front Floor Console Replacement Left Hand Drive

Callout | Component Name |
|---|---|
Preliminary Procedures
| |
1 | Console Bolt Cover (Qty: 2) ProcedureUse a flat-bladed plastic trim tool to remove the covers. |
2 | Console Rear Bolt (Qty: 2) Caution: Refer to Fastener Caution in the Preface section. ProcedureMove the front seats to the full forward position to access the rear bolts. Tighten |
3 | Console Front Bolt (Qty: 2) Procedure
Tighten |
4 | Console Screw (Qty: 2) Tighten |
5 | Console Assembly Procedures
|
