Press the ROUTE key to access the Destination Entry screen. From this screen, you can choose from several options to plan a route by entering destination points.
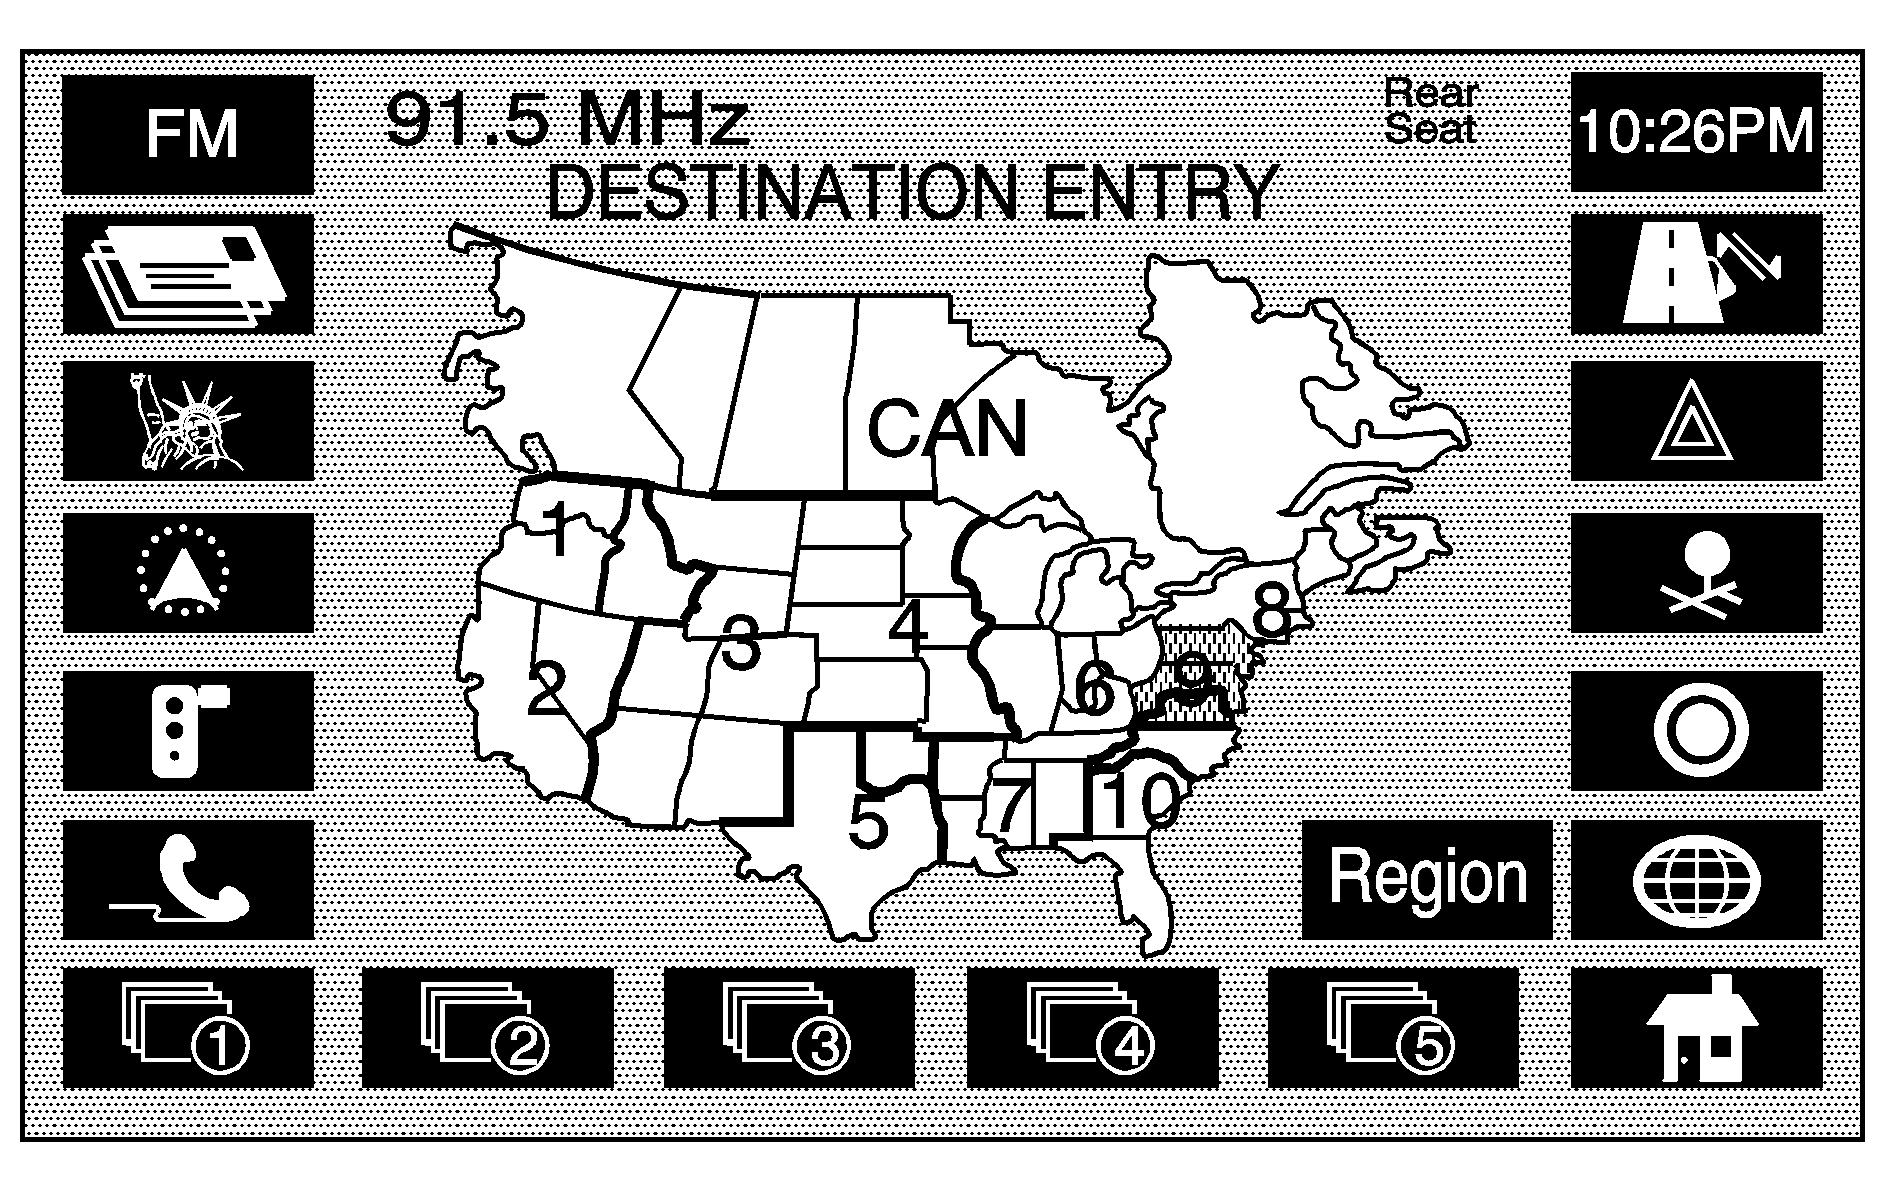
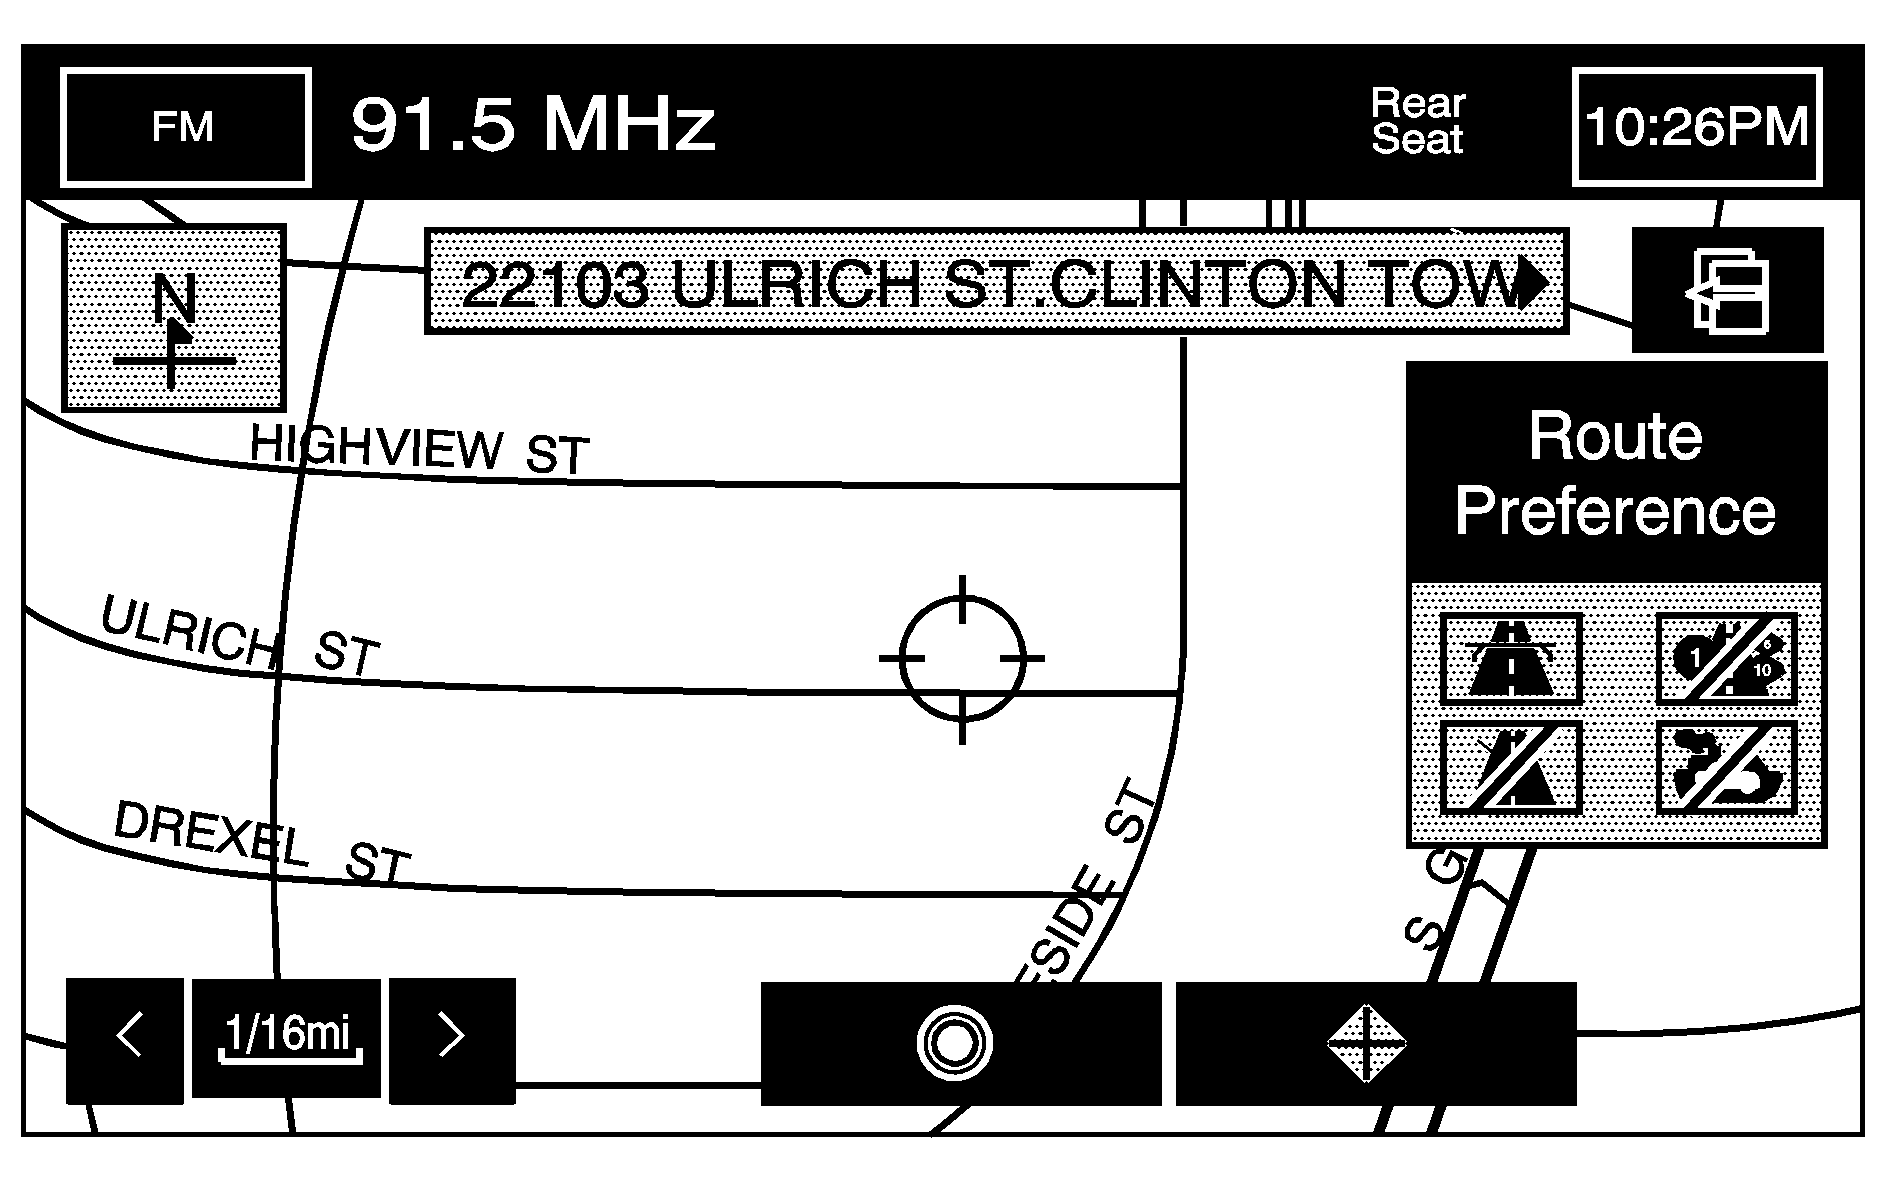
Once your destination entry is complete, regardless of which method of entry you used, a map screen with the destination previewed will be displayed. You can change route preferences, route options, map appearances, or add a way point at this time. You may also set the destination without making any further changes. See "Getting Started on Your Route" following in this section for more information on your choices once a destination has been entered.
Region
The DESTINATION ENTRY screen displays a map of the 48 contiguous United States and a part of Canada divided into 11 regions.
Before selecting a method of destination entry, review the search area map to make sure your destination is located in the highlighted region.
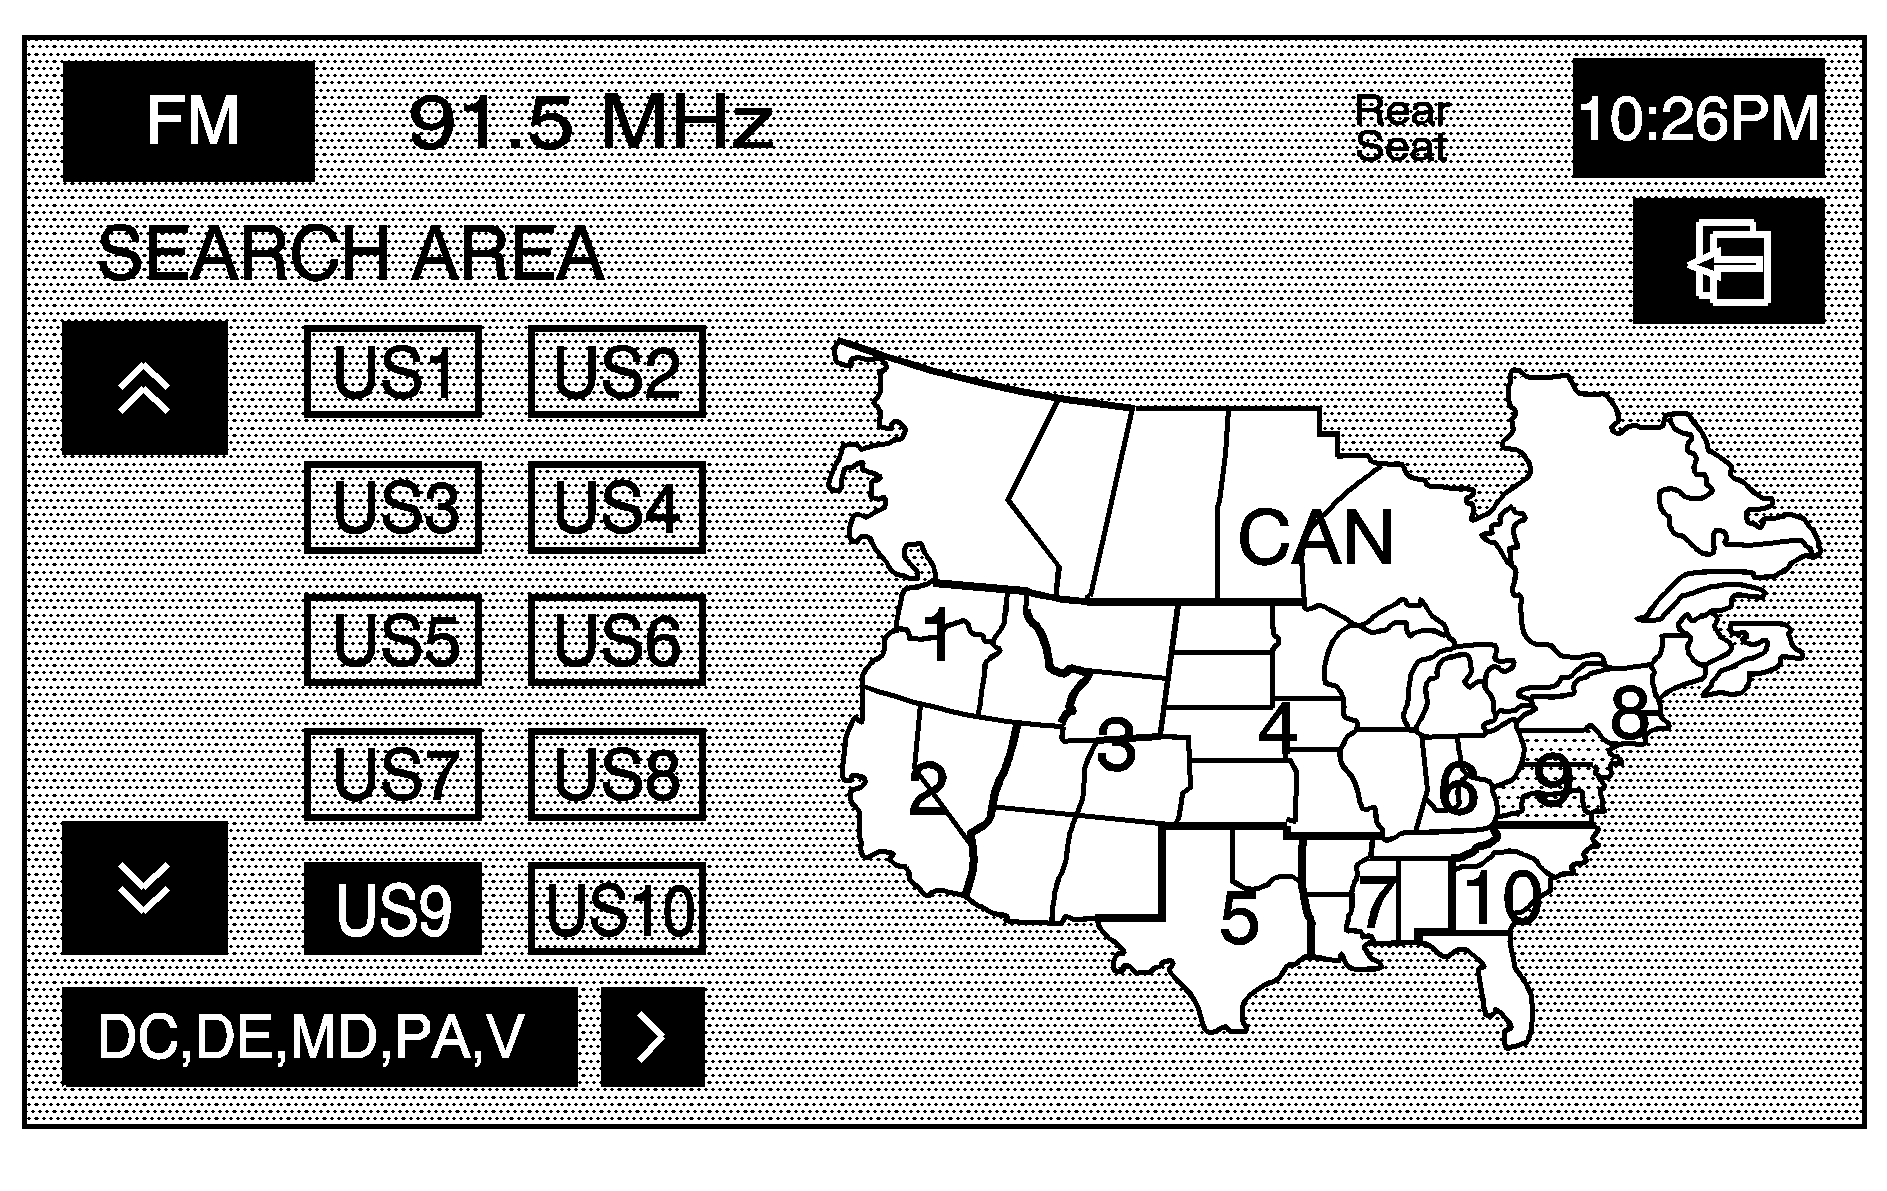
Touch the REGION screen button from the DESTINATION ENTRY screen to see a list of states included in the highlighted region, or to change the region. The SEARCH AREA screen will display. Touch the numbered screen button to the left of the search area map that corresponds with the numbered region you wish to select or to view a list of states included in the region. Touch the down arrow to select CAN (Canada). Once the region has been selected, the region will be highlighted on the map. Touch the back key to return to the DESTINATION ENTRY screen. The new selection will be stored once you select the back screen button.
Address
The address destination entry method allows you to input an address by providing the system with a house number, street name, and city.
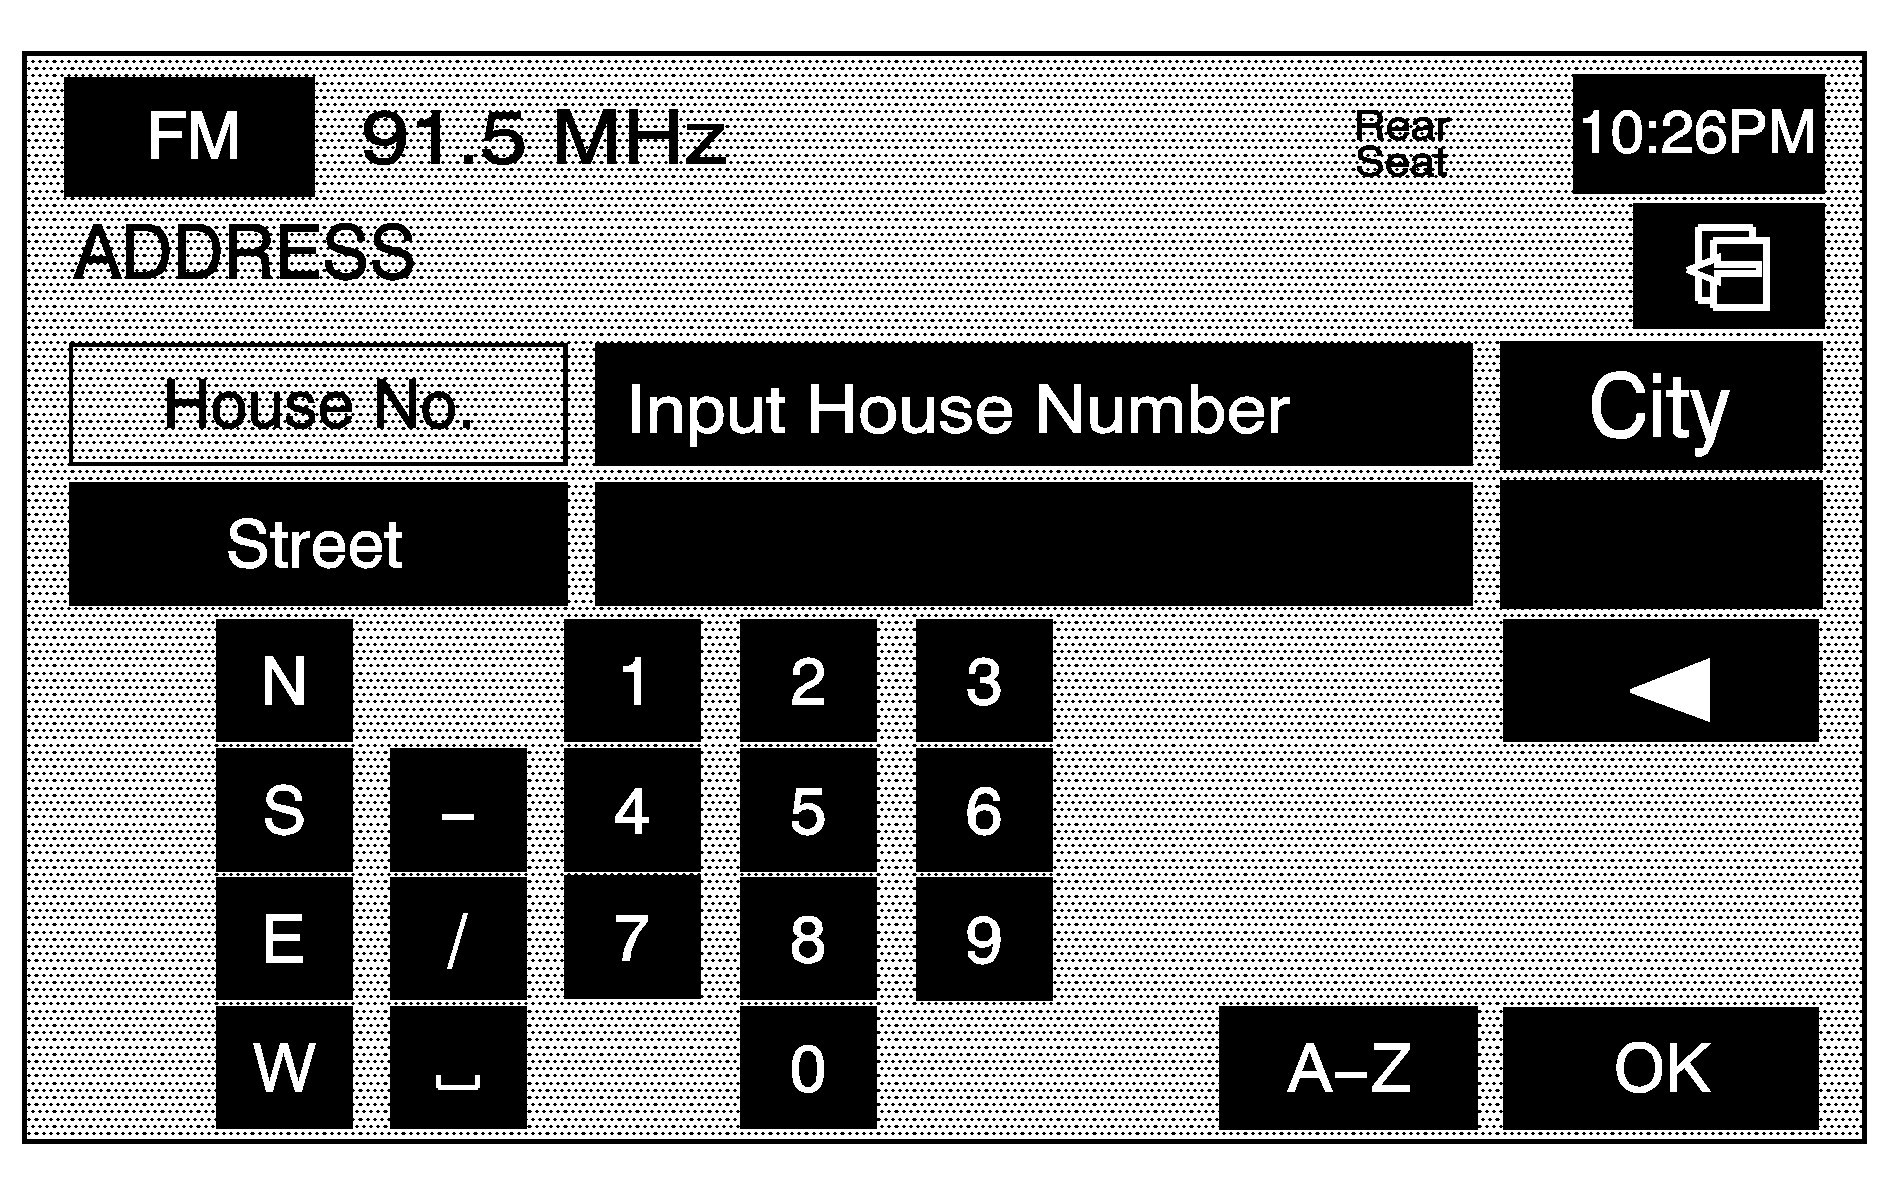
(Address): Touch this screen button to access the ADDRESS screen. At this point you can choose to enter the address one of three ways, either house number first, street first, or city first.
To use the house number first destination entry method, do the following:
- Touch the numeric keypad to input the house number.
- Touch the Street button to enter the street name using the alpha keypad.
- A list of available street names will be displayed if there are less than five items available. Select the List screen button at any time to view the available list. Select the correct street with the correct prefix from the list.
- The system will either display a list of available cities or go to the map screen directly based on the input.
- Select the desired city name on the list.
- Select the (destination) symbol screen button to calculate the route.
- Select the Guide screen button to start route guidance.
A map screen will appear with the destination marked.
See "Getting Started on Your Route" later in this section for more information.
To use the street name first destination entry method, do the following:
- Touch the Street screen button from the address menu and start entering the street name using the alpha keypad. A list of available street names will be displayed if there are less than five items available. Select the List screen button at any time to view the available list.
- Select the desired street name with the correct prefix from the list (Dr., Ln., St., etc.).
- The system will display a list of available cities. Select the correct city from the list.
- The numeric keypad will be displayed, allowing you to enter the house number.
- Press OK.
- Select the (destination) symbol screen button to calculate the route.
- Select the Guide screen button to start route guidance.
A map screen will appear with the destination marked.
See "Getting Started on Your Route" later in this section for more information.
To use the city name first destination entry method, do the following:
- Touch the City button.
- Select from the choices shown on the city screen; Any City, 5 near cities, Input City Name, or from the Last 5 Cities used.
- If using the alpha keypad, finish entering the city name and then touch the List screen button to display a list of available cities. Choose a city from the list. If choosing from one of the prior mentioned lists, select the city from the list displayed.
- The House number screen will be displayed. Enter the house number using the numeric keypad.
- Select the Street screen button from the address menu and start entering the street name using the alpha keypad. A list of available street names will be displayed if there are less than five items available. Select the List screen button at any time to view the available list.
- Select the desired street name with the correct prefix (Dr., Ln, St., etc.) from the list
- Select the (destination) symbol screen button to calculate the route.
- Select the Guide screen button to start route guidance.
| • | Any City -- The system will take you back to the house number first entry method. Select a city from the list. |
| • | 5 near cities -- The system will display the 5 cities nearest your current position. Select a city from the list. |
| • | Input City Name -- The keypad will display for inputting the city name. Input the city name and then select the city from the list. |
| • | Last 5 Cities -- The city names of the last five cities that were stored as a previous destination will display. Select a city from the list. |
A map screen will appear with the destination marked.
See "Getting Started on Your Route" later in this section for more information.
Point of Interest (POI)
The Point of Interest (POI) destination entry method allows you to choose a destination from the POI list.
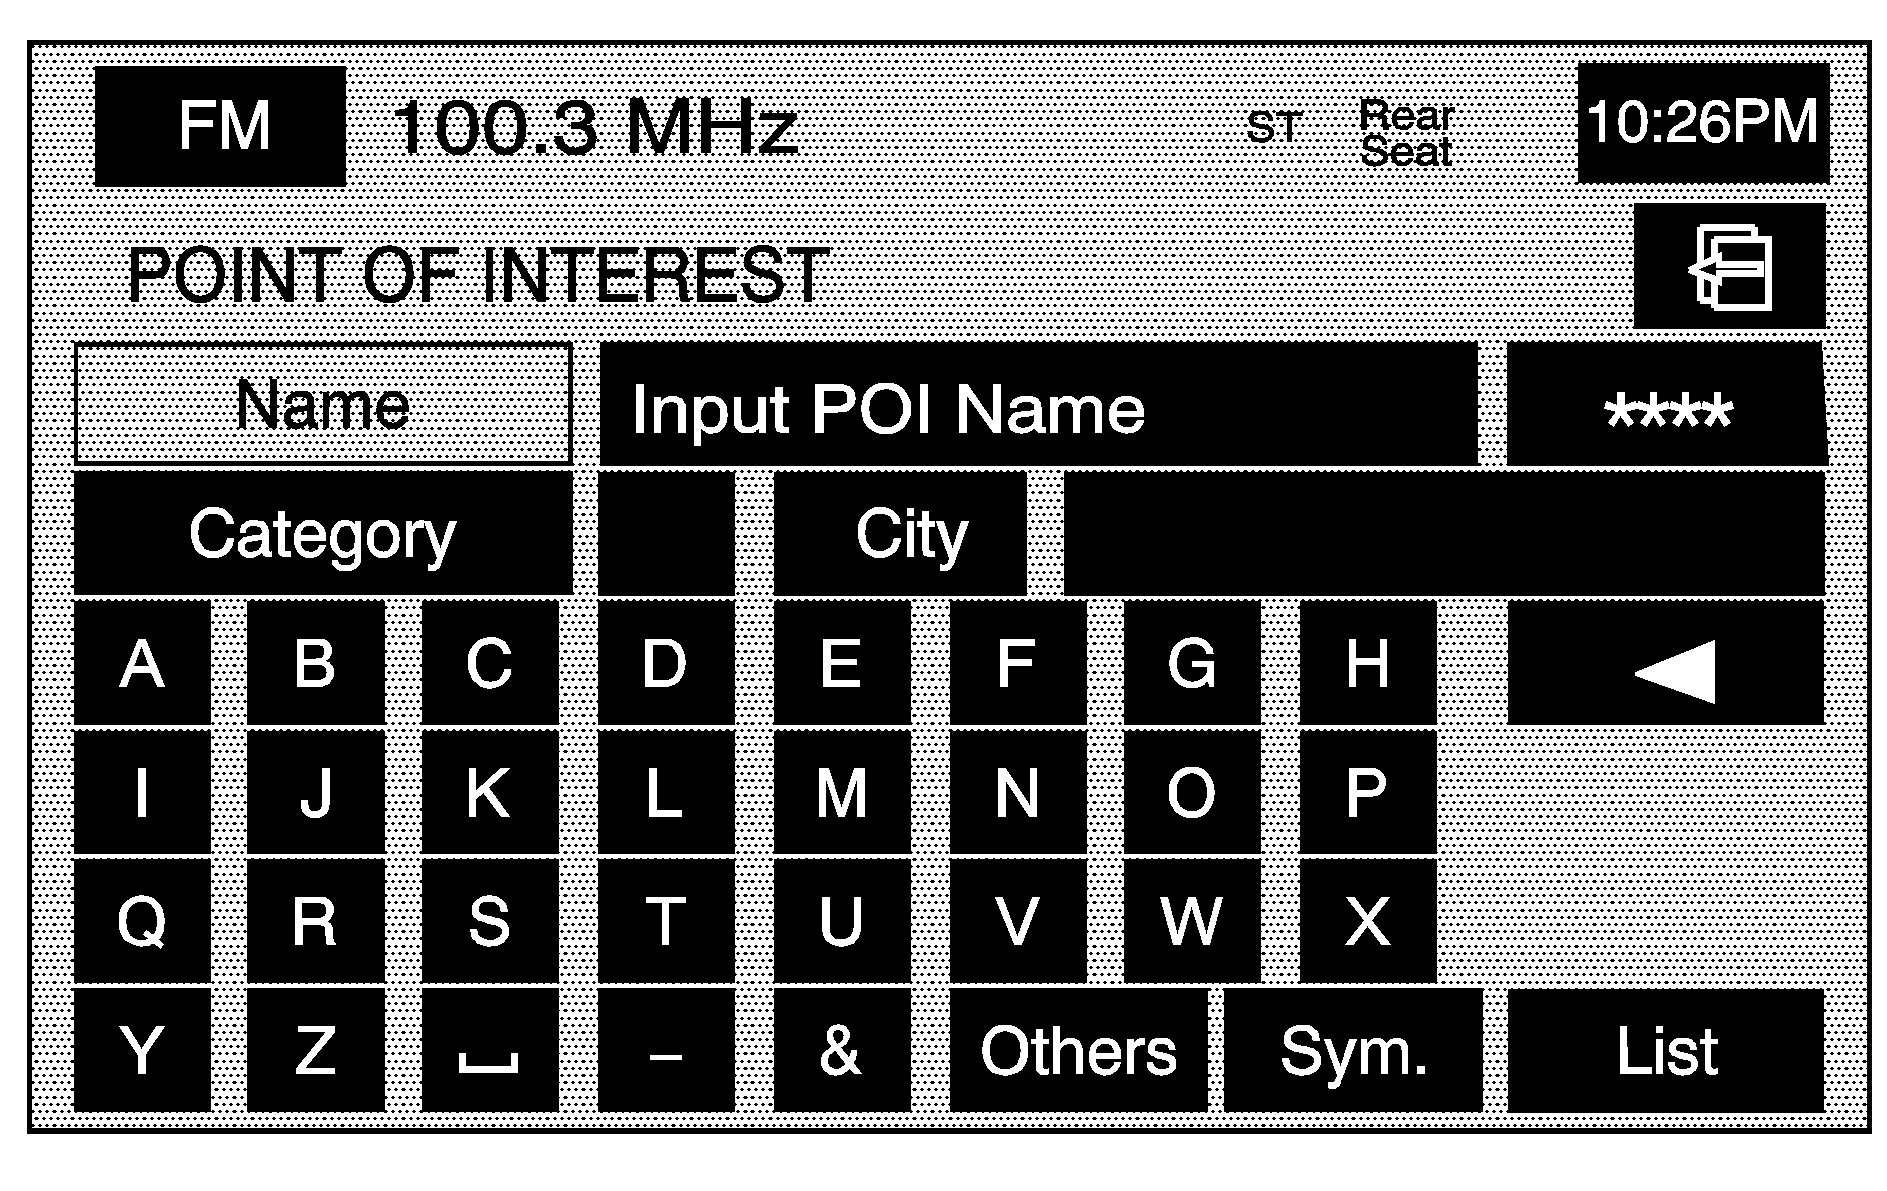
(Point of Interest): Touch this screen button to access the POINT OF INTEREST screen. From this screen you have three options to select/enter your destination. Either input the name using the keypad, select a category from the category list, or select the city by selecting the city screen button.
To input the POI name, do the following:
- Use the alpha keypad to enter the POI name.
- Select the desired POI from the list.
- Select the (destination) symbol screen button to calculate the route.
- Select the Guide screen button to start route guidance.
Touch Sym. (symbol) to select symbols and numbers for the POI, touch Others to select special characters for the POI, or touch A - Z to return to the alpha keypad.
A list of POIs will appear using the information from the alpha keypad input. A list of available POIs will display if there are less than five POIs available. Touch the List screen button at any time to view the available POIs.
A map screen will appear with the destination marked.
See "Getting Started on Your Route" later in this section for more information.
To select a POI from a category, do the following:
- Touch the Category screen button from the POINT OF INTEREST screen to view a list of POI categories.
- Select a category, and then a sub-category.
- The system will display available POIs names in the selected sub-category or if the list is too long the system will display the alpha keypad.
- If the alpha keypad is displayed, input the POI name until a list of available POIs appear. You may also select the List screen button when it becomes available.
- Select the POI from the list.
- Select the (destination) symbol screen button to calculate the route.
- Select the Guide screen button to start route guidance.
A map screen will then appear with the destination marked.
See "Getting Started on Your Route" later in this section for more information.
To select a POI by inputting a city name, do the following:
- Select the city screen button, then select; Any City, 5 near cities, Input City Name, or from the Last 5 Cities used.
- Use the alpha keypad to enter the POI name.
- A list of POIs will appear using the information from the alpha keypad input. A list of available POIs will display when there are less then five POIs available. Touch the List screen button at any time to view available POIs.
- Select the desired POI from the list.
- Select the (destination) symbol screen button to calculate the route.
- Select the Guide screen button to start route guidance.
| • | Any City -- The system will take you back to the house number first entry method. Select a city from the list. |
| • | 5 near cities -- The system will display the 5 cities nearest your current position. Select a city from the list. |
| • | Input City Name -- The keypad will display for inputting the city name. Input the city name and then select the city from the list. |
| • | Last 5 Cities -- The city names of the last five cities that were stored as a previous destination will display. Select a city from the list. |
Touch Sym. (symbol) to select symbols and numbers for the POI, touch Others to select special characters for the POI, or touch A - Z to return to the alpha keypad.
A map screen will appear with the destination marked.
See "Getting Started on Your Route" later in this section for more information.
Map
The map destination entry method allows you to choose a destination by scrolling on the map.
(Map): Touch this screen button from the DESTINATION ENTRY screen to enter the map destination entry method, then do the following:
- Touch the map for the desired area you wish to set as your destination.
- Use the zoom in/out function to view the direction of the desired area.
- Pressing/holding and dragging on the map will activate fast scrolling. Press/touch once on the area to which you would like to move the current position mark.
- Touch the destination screen button or the way point screen button to save the address as a destination or way point.
Once the scroll symbol is on the location, the address information will display on the map screen.
| • | If select this position as a waypoint, the point will be stored as a waypoint. The system will display the STORED LOCATIONS screen. See "Memory Points" under Navigation Menu for more information. |
| • | If select the (destination) symbol screen button the system will calculate the route. Select the Guide screen button to start route guidance. See "Getting Started on Your Route" later in this section for more information. |
Intersection
The intersection destination entry method allows you to set two intersecting streets as your destination.
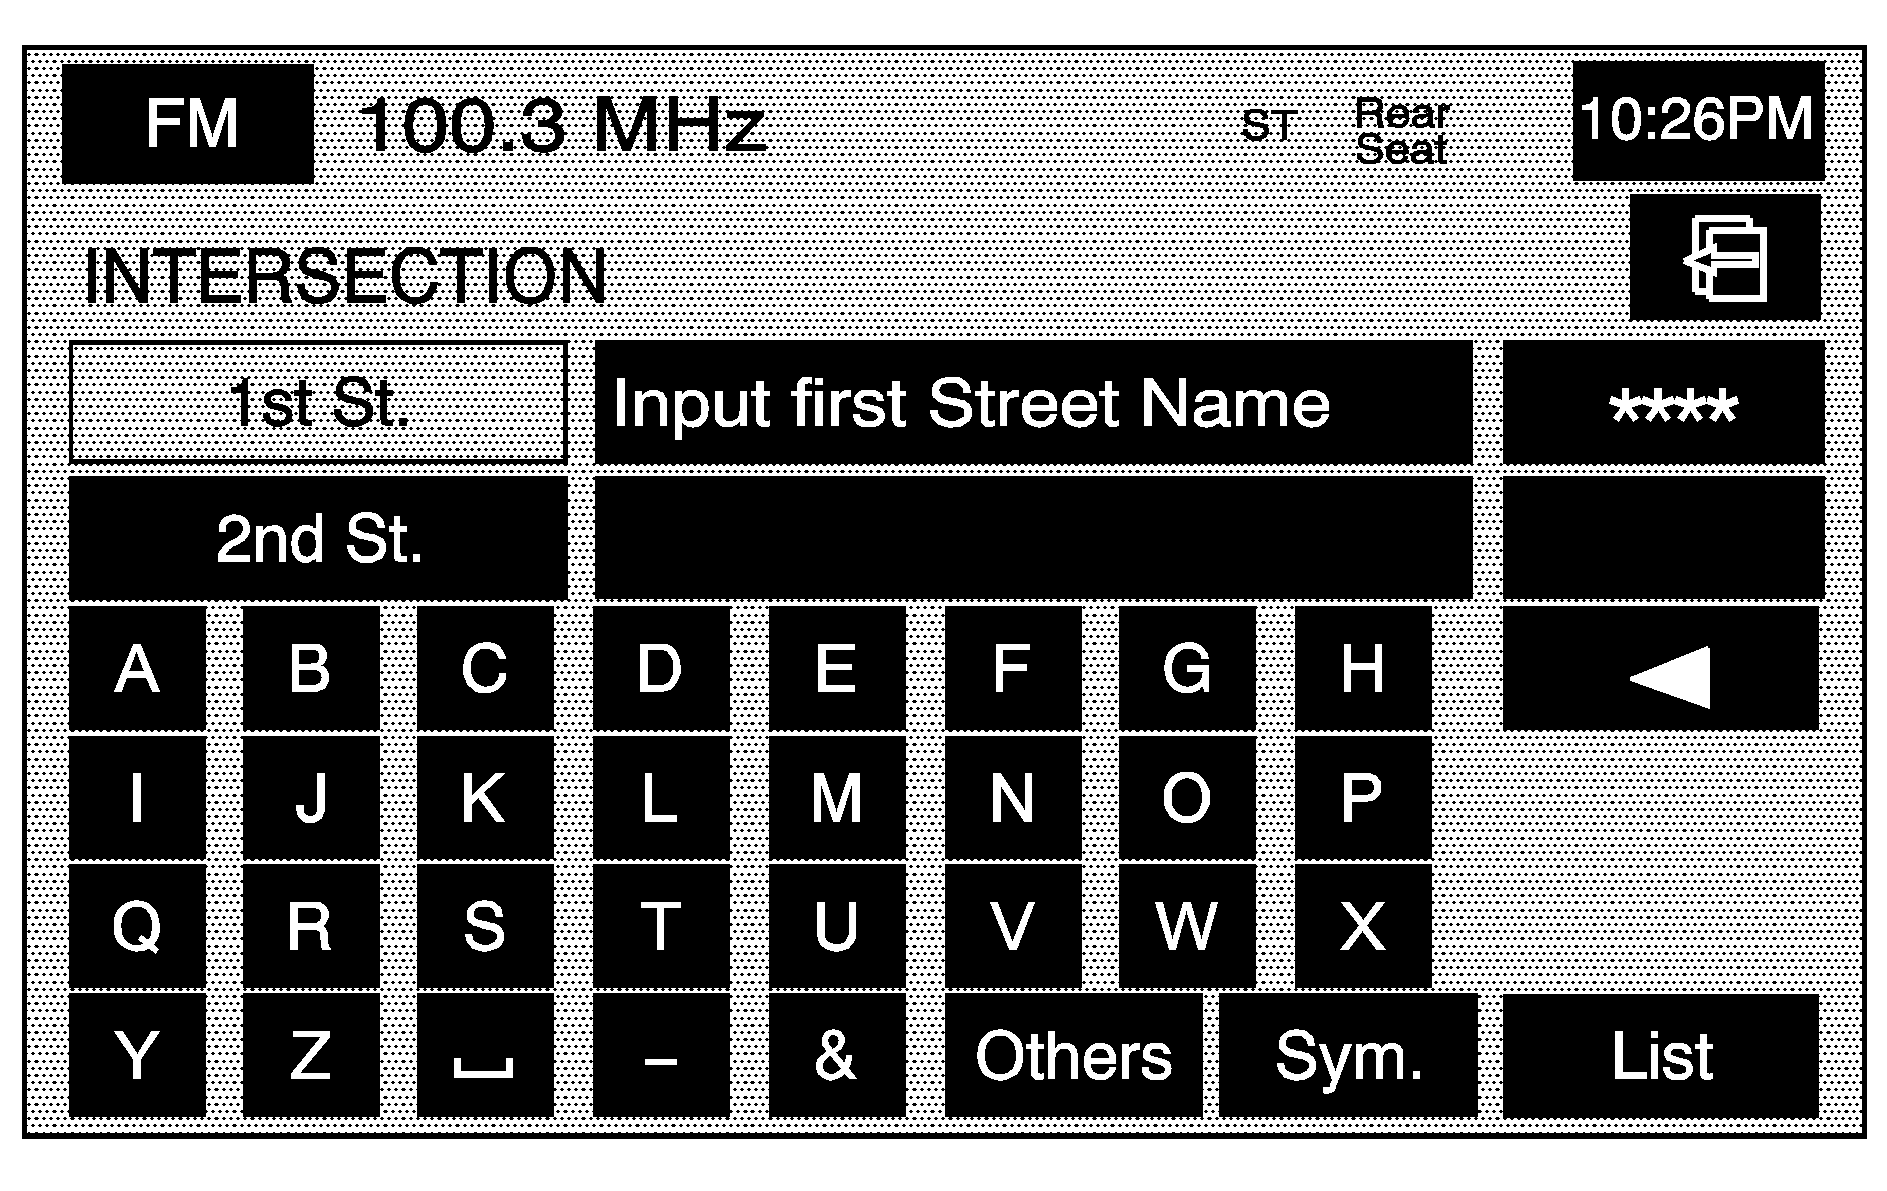
(Intersection): Touch this screen button to access the INTERSECTION screen.
To use the intersection destination entry method, do the following:
- Enter the first of two streets in the intersection. The List option may become available.
- You may now choose a street from the list, or continue to spell the street name to further reduce the number of available items. Select the street with the correct prefix (Dr., Ln., St., etc.).
- After the first street has been chosen, enter the second street name. The List option may again become available.
- You may now choose the second street from the list, or continue to spell the street name to further reduce the number of available items. Select the street with the correct prefix (Dr., Ln., St., etc.).
- Select the (destination) symbol screen button to calculate the route.
- Select the Guide screen button to start route guidance.
After both streets have been chosen, a map screen will then appear with the destination marked.
See "Getting Started on Your Route" later in this section for more information.
Phone Number
The phone number destination entry method allows you to choose a destination by entering a phone number. The phone number must be in the list of POIs, that is contained on the map DVD, in order for the system to retrieve the destination.
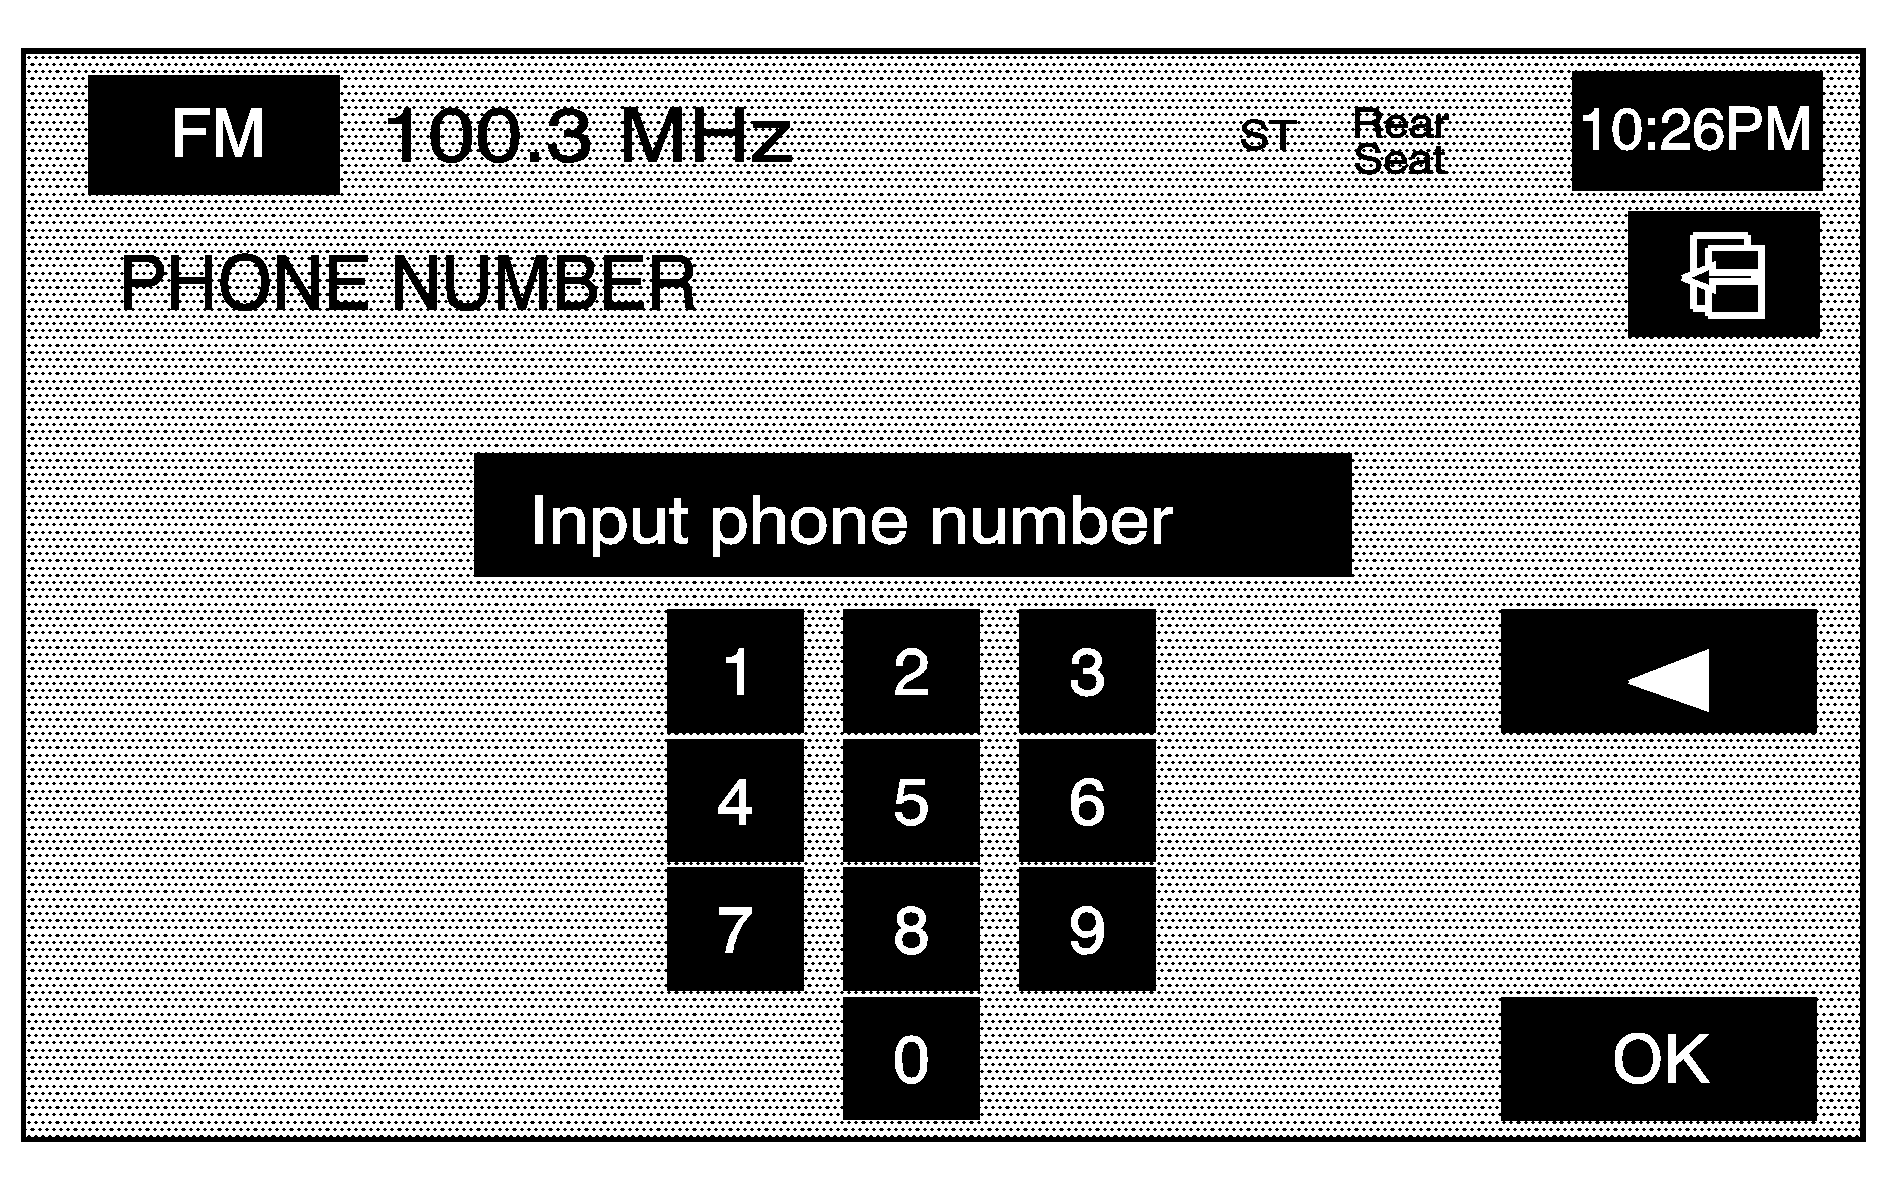
(Phone Number): Touch this screen button to access the PHONE NUMBER screen.
To use the phone number destination entry method, do the following:
- Input the area code and phone number of a POI using the numeric keypad. Only business phone numbers can be entered.
- If the phone number can be found on the map DVD, a map screen will then appear with the destination marked.
- Select the (destination) symbol screen button to calculate the route.
- Select the Guide screen button to start route guidance.
See "Getting Started on Your Route" later in this section for more information.
Freeway Entrance/Exit
The freeway entrance/exit destination entry method allows you to choose a destination by entering a freeway entrance or exit point.
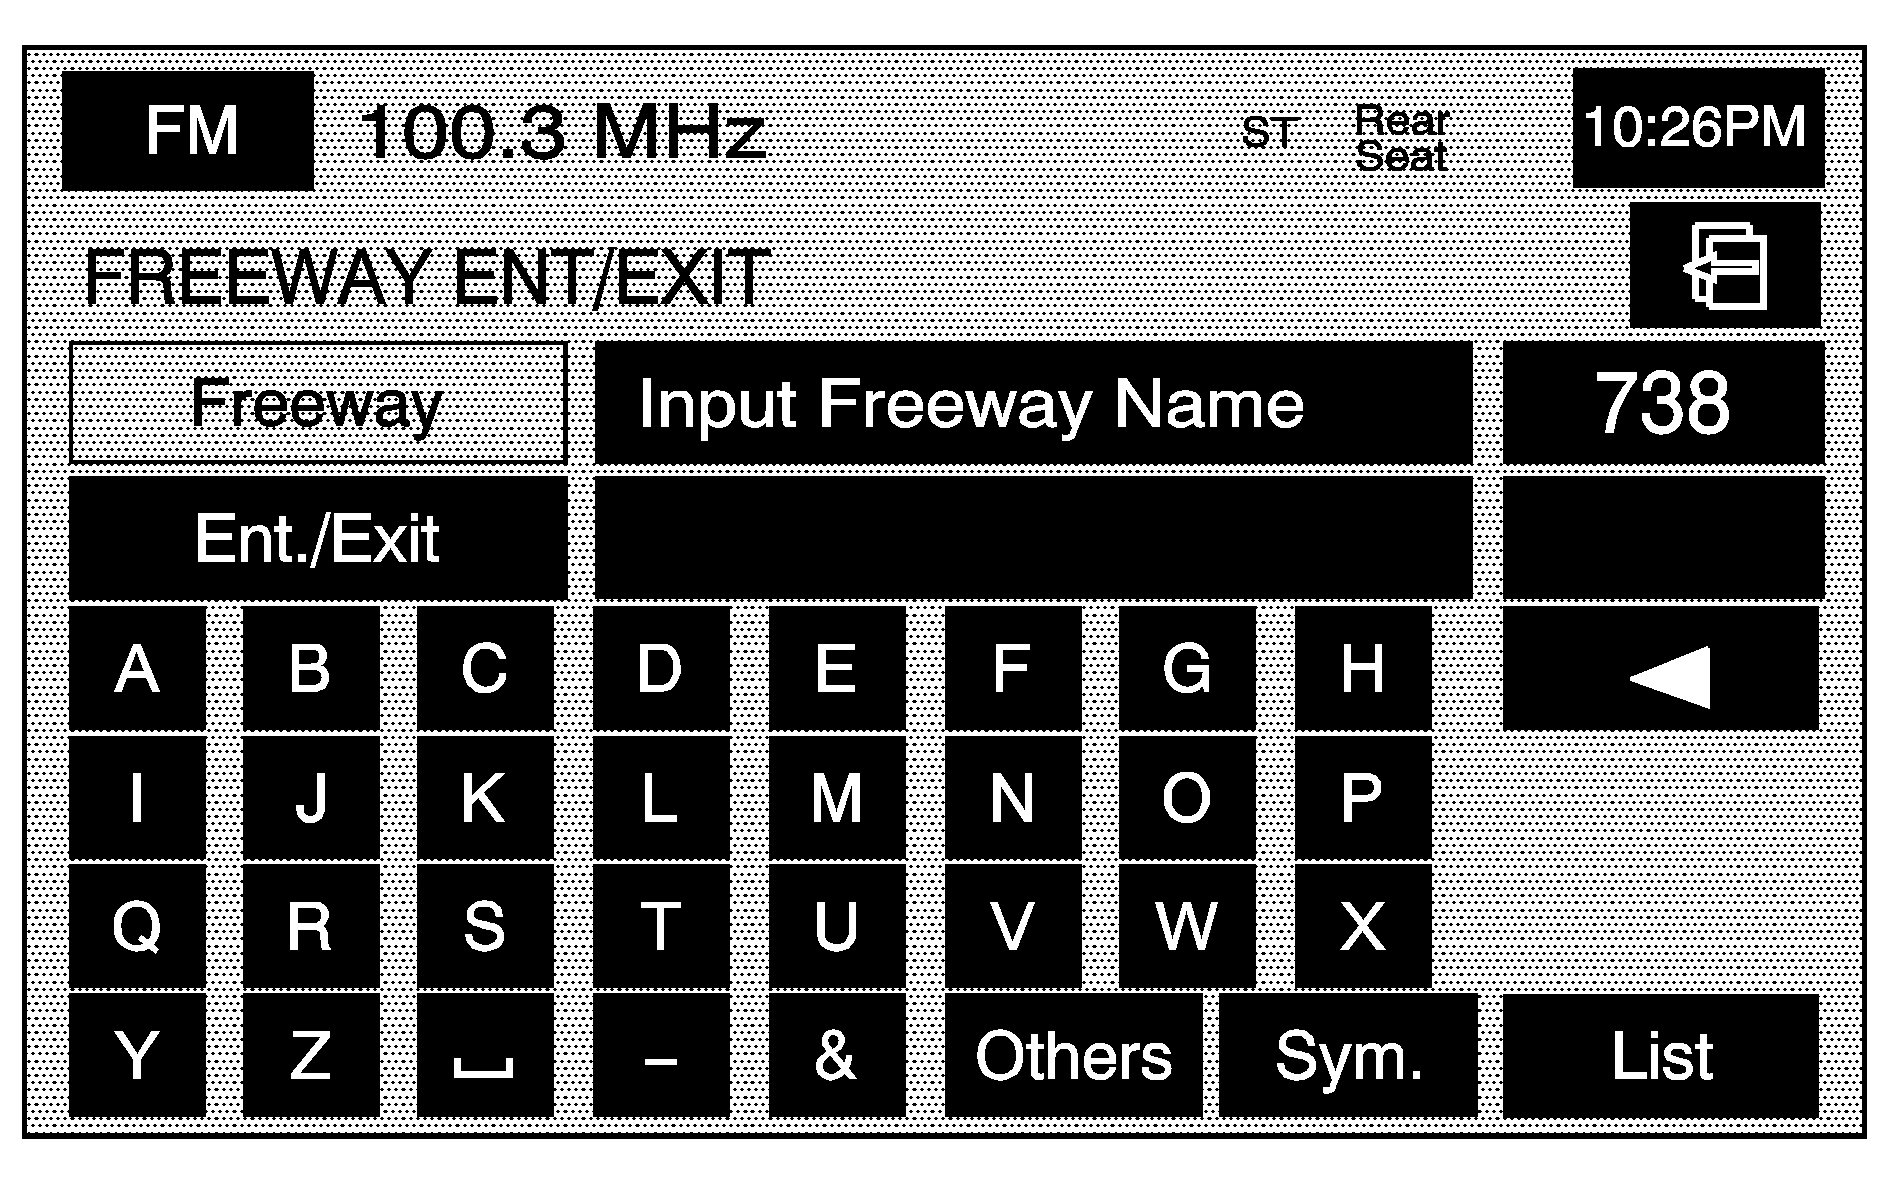
(Freeway Entrance/Exit): Touch this screen button to access the FREEWAY ENT/EXIT screen.
To use the freeway entrance/exit destination entry method, do the following:
- Touch the Freeway screen button and enter the freeway name. Be sure to use abbreviations, such as I - 75, rather than spelling out Interstate.
- Choose a freeway from the list, and then touch the Entrance or Exit screen button to choose a point.
- Select the (destination) symbol screen button to calculate the route.
- Select the Guide screen button to start route guidance.
Touch Sym. to view a list of symbols to add when entering a freeway name, touch Others to view a list of special characters you can choose from, or touch A - Z to return to the alpha keypad.
A list of freeways will appear.
You can choose an exit/entrance point from the list of names that will appear.
You can input the exit/entrance by name. Touch the Input Name screen button. If you choose to input the freeway exit or entrance name, the alpha keypad will be displayed. Touch the alpha keypad to enter the freeway exit or entrance name.
You can sort the list by distance or name. Touch the Name Sort screen button to sort the list by name. Touch the Dist. Sort screen button to have the list sorted by distance. The distance sort list is based on the current position of your vehicle.
After choosing a point from the list, a map screen will then appear with the destination marked.
See "Getting Started on Your Route" later in this section for more information.
Emergency
The emergency destination entry method allows you to enter a destination by choosing from three categories.
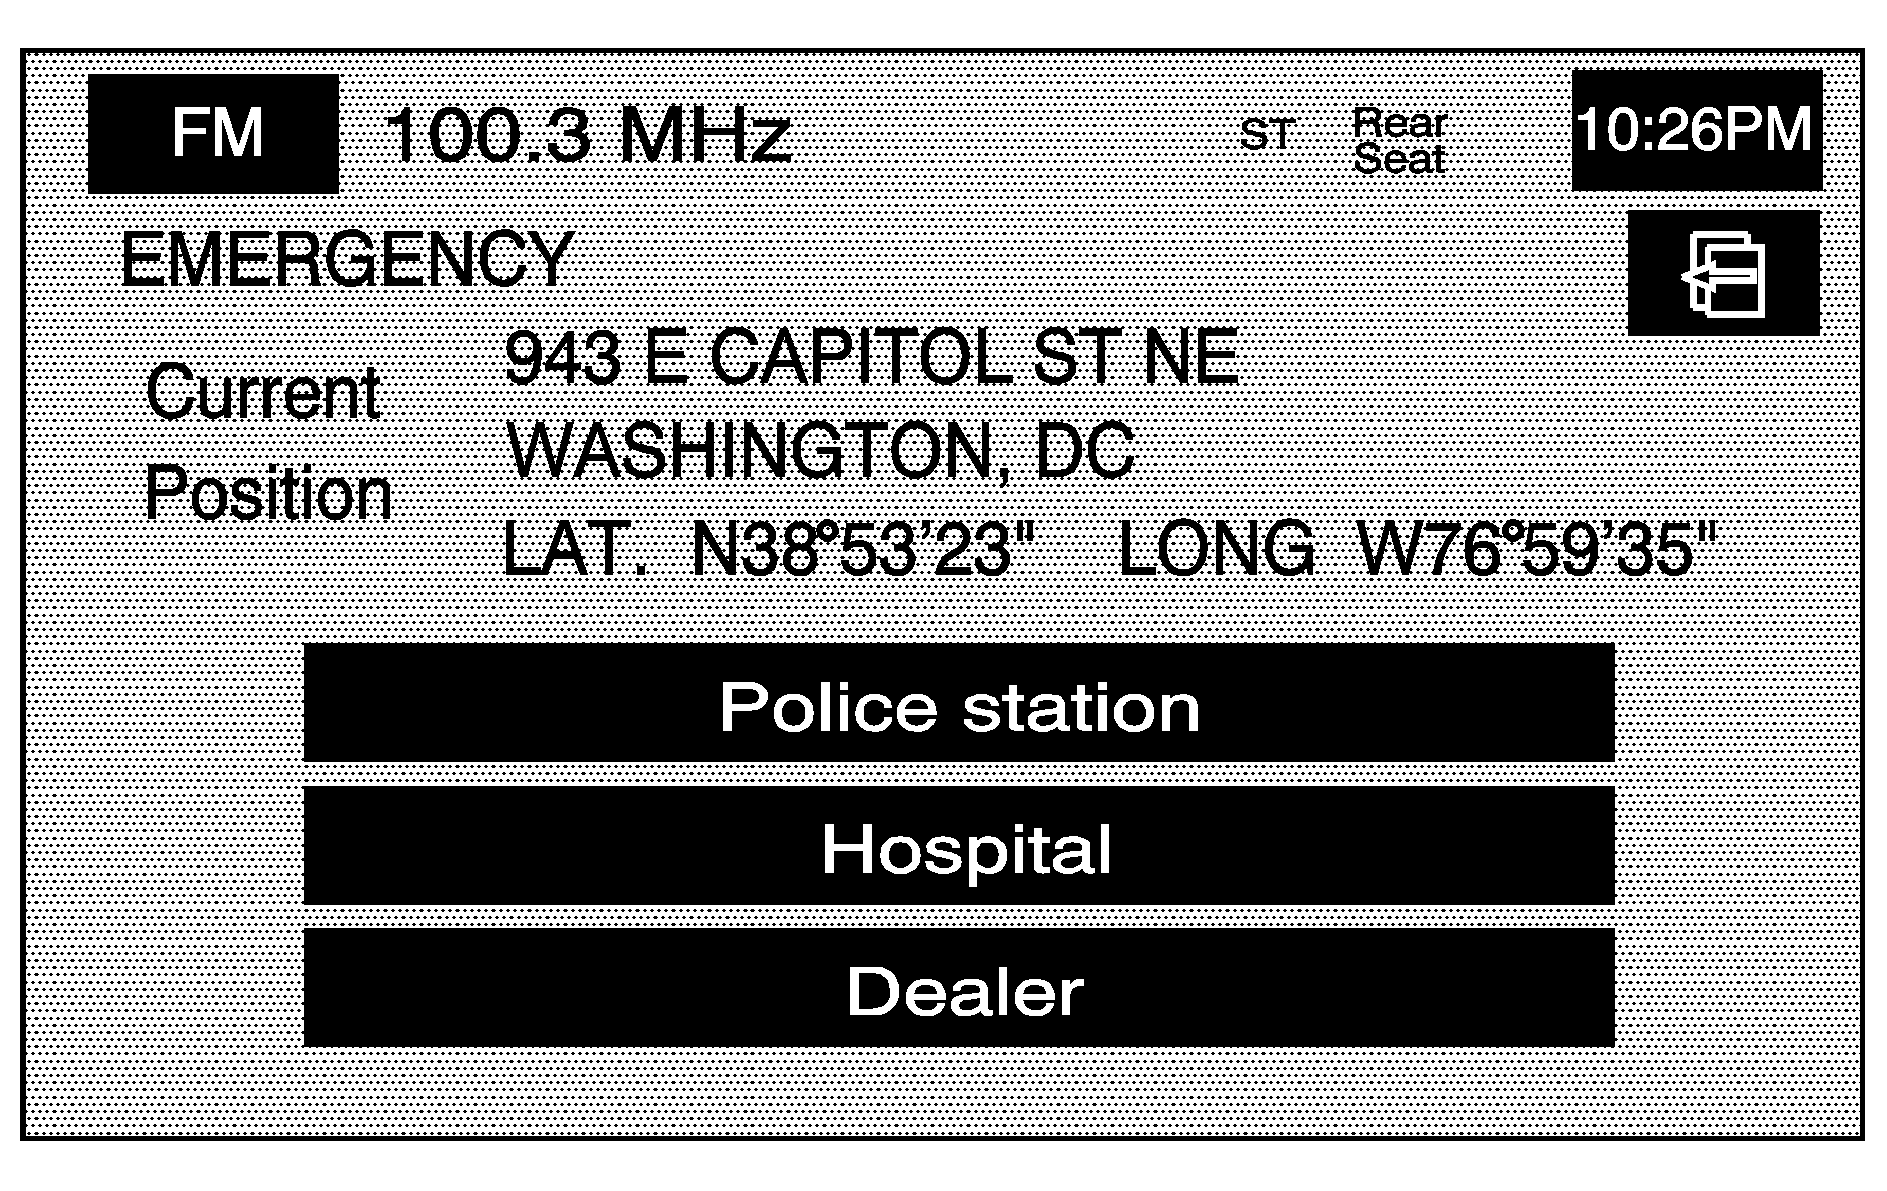
(Emergency): Touch this screen button to access the EMERGENCY screen. When in this screen, the system will display your current position address and the longitude and latitude information.
To use the emergency destination entry method, when no route has been planned, do the following:
- Select a category.
- Select a destination point from the list. Touch the Name Sort screen button to sort the list by name, or Dist Sort to sort the list by distance from the vehicle's current position.
- Select the (destination) symbol screen button to calculate the route.
- Select the Guide screen button to start route guidance.
After selecting a destination from the list, a map screen will appear with the destination marked.
See "Getting Started on Your Route" later in this section for more information.
To use the emergency destination entry method, when a route has been planned, do the following:
- Select a category.
- The system will automatically change the current planned route destination to include the nearest emergency category that has been selected.
- Select the (destination) symbol screen button to calculate the route.
- Select the Guide screen button to start route guidance.
See "Getting Started on Your Route" later in this section for more information.
Memory Points
The memory points destination entry method allows you to choose a destination from a list of points that you have previously stored.
(Memory Point): Select this screen button from the DESTINATION ENTRY screen to access the MEMORY POINTS screen.To use this destination entry method, do the following:
- Select the category/folder in which the memory point has been stored. Select from PERSONAL, BUSINESS, ENTERTAINMENT, or MARKED POINT folders.
- Select the desired memory point.
- Select the (destination) symbol screen button to calculate the route.
- Select the Guide screen button to start route guidance.
Sort the list by distance, icon, name, or date stored.
A map screen will appear with the destination marked.
See "Getting Started on Your Route" later in this section for more information.
Previous Destination
The previous destination entry method allows you to choose a destination from a list of previous destination points.
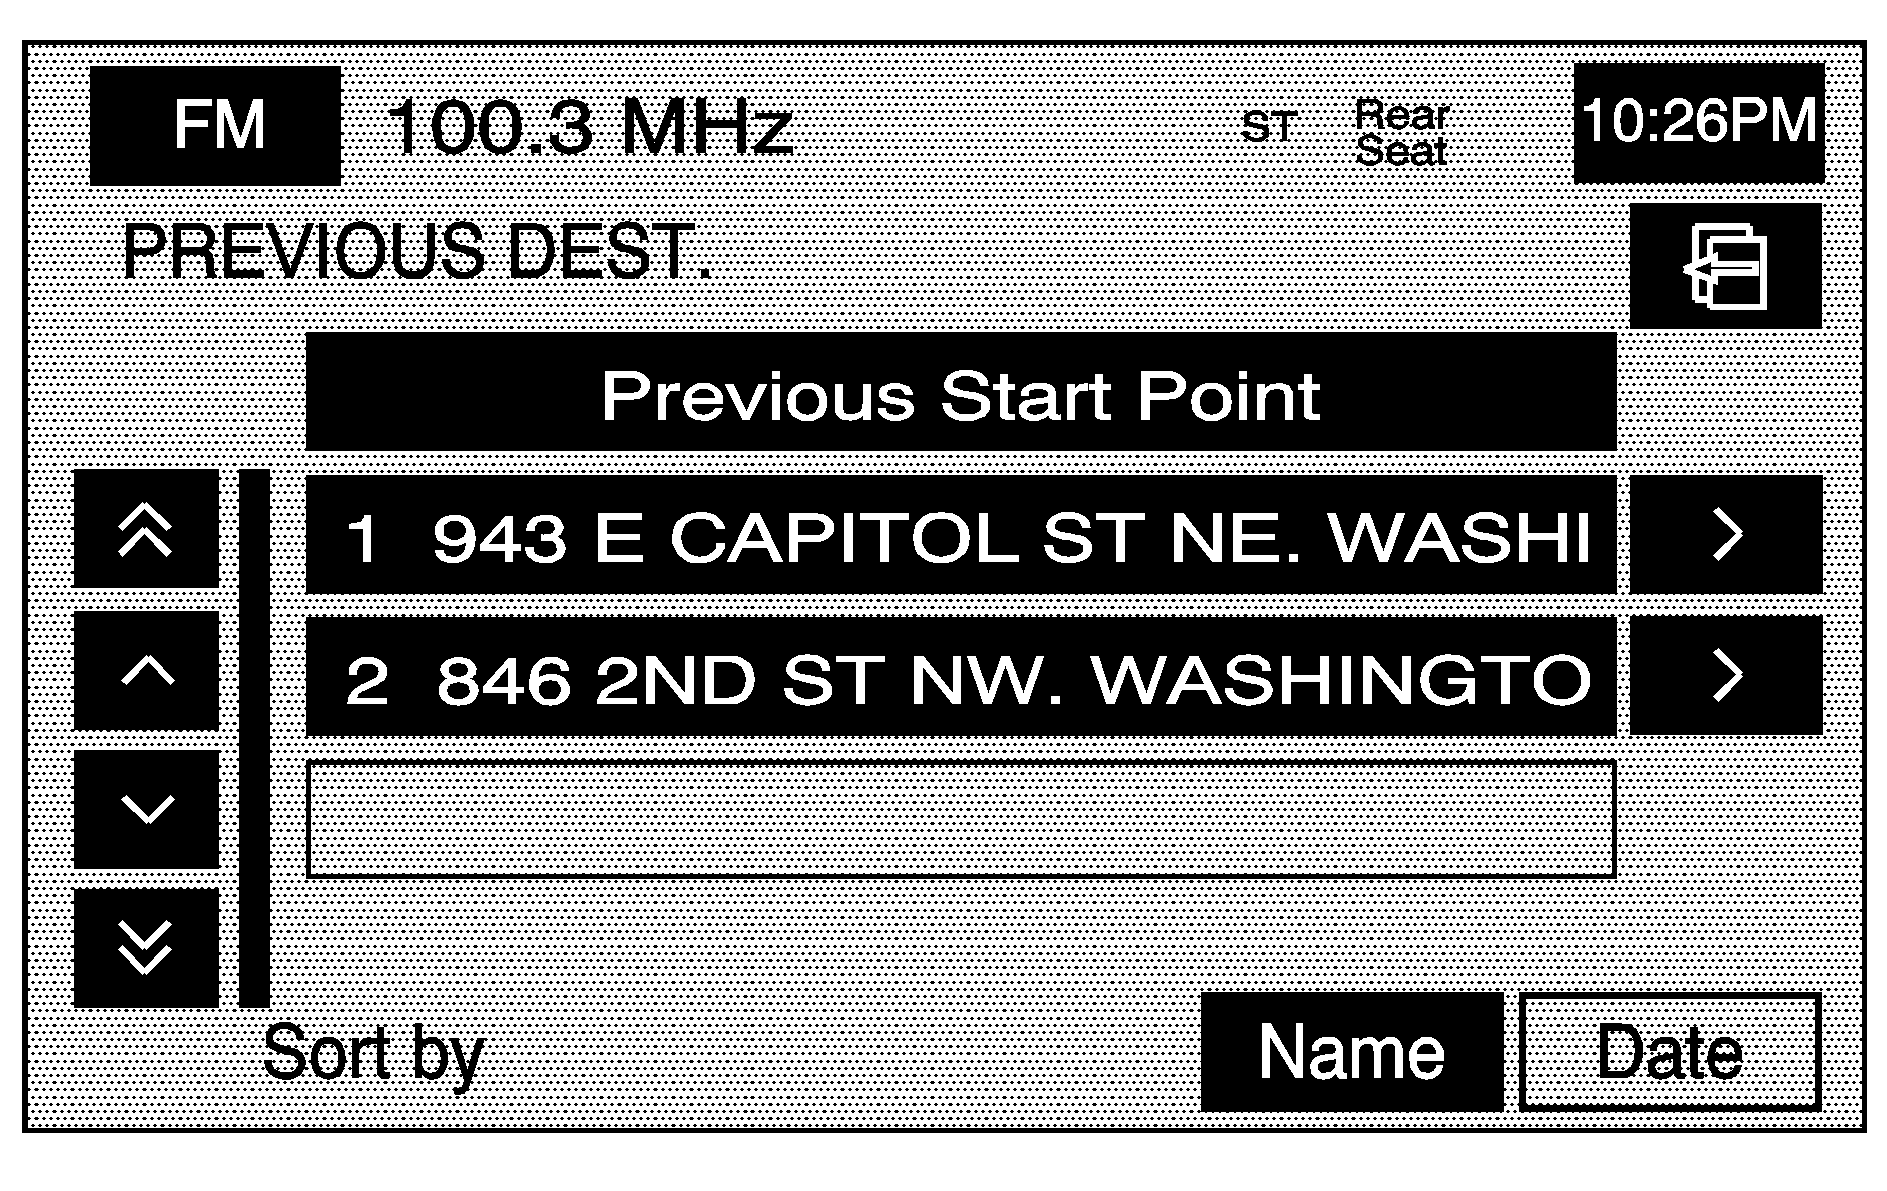
(Previous Destination): Touch this screen button to access the PREVIOUS DEST. screen. The system will store up to 100 points that have been previously entered. As new destinations are entered, the system will automatically delete the oldest destinations and add the new destination.
To use the previous destination entry method, do the following:
- Choose a previous destination from the list. Use the arrow to the right of the destination to view the entire destination name as necessary.
- Select the (destination) symbol screen button to calculate the route.
- Select the Guide screen button to start route guidance.
A map screen will appear with the destination marked.
See "Getting Started on Your Route" later in this section for more information.
Date: Touch this screen button to sort the list by the date the destination has been entered. The list will be in order by the latest to the oldest destinations that have been entered.
Previous Start Point: Touch this screen button for the system to plan a route to the previous point you were at when a route was entered. This option is available while the vehicle is moving.
Coordinates
The coordinates destination entry method allows you to choose a destination by entering latitude and longitude coordinates.
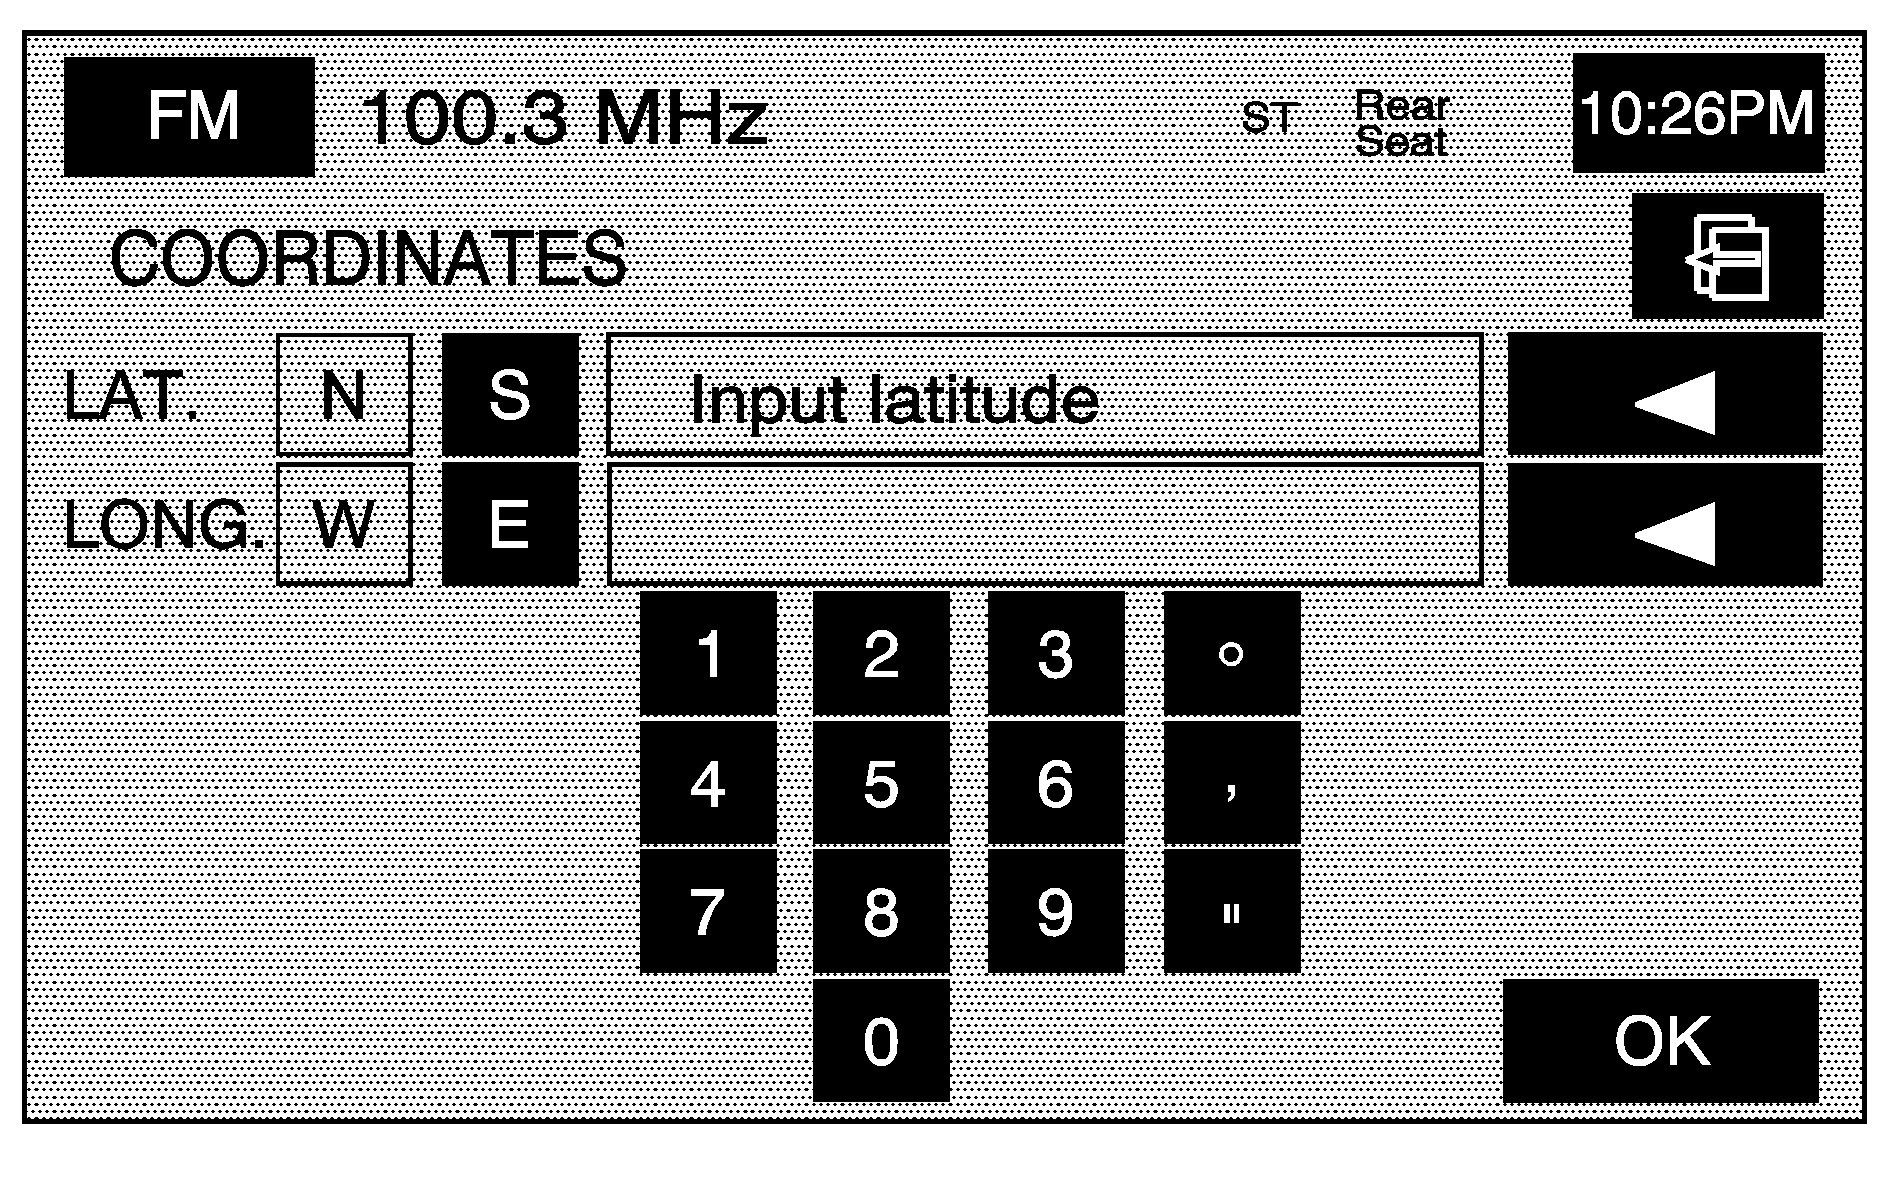
(Coordinates): Touch this screen button to access the COORDINATES screen.
To use the coordinates destination entry method, do the following:
- Touch N or S next to LAT. to enter the direction of the latitude coordinate.
- Input the numeric portion of the latitude coordinate using the keypad.
- Touch E or W next to LONG. to enter the direction of the longitude coordinate.
- Input the numeric portion of the longitude coordinate using the keypad.
- Once both coordinates are entered, touch the OK screen button.
- Select the (destination) symbol screen button to calculate the route.
- Select the Guide screen button to start route guidance.
A map screen will then appear with the destination marked.
See "Getting Started on Your Route" later in this section for more information.
Preset Destination
(Preset Destination): The preset destination entry method allows you to set a destination by choosing from one of five previously stored destinations. Besides home, these are the only destinations available to set while the vehicle is moving or by voice recognition. If a destination is not set for one of the screen buttons, the button will be dimmed and will not be available. See "Memory Points" under Navigation Menu for more information.
To use the preset destination entry method, do the following:
- Select the desired preset destination from the DESTINATION ENTRY screen. The screen buttons are numbered 1 - 5.
- Select the (destination) symbol screen button to calculate the route.
- Select the Guide screen button to start route guidance.
A map screen will appear with the destination marked and the number of the preset destination.
See "Getting Started on Your Route" later in this section for more information.
Home
(Home): This feature allows you to plan a route to one previously stored destination that you have selected as home. If a home destination is not stored, the home button will not be available. In addition to preset destinations one through five, this destination is available to set while the vehicle is moving or by voice recognition.To use this destination entry method, do the following:
- Select the home screen button from the DESTINATION ENTRY screen.
- Select the (destination) symbol screen button to calculate the route.
- Select the Guide screen button to start route guidance.
A map screen will appear with the destination marked.
See "Getting Started on Your Route" later in this section for more information.
Getting Started on Your Route
Once you have entered a destination, you can perform one of the following options:

(Destination): Touch the destination symbol to set the entered destination as it is, without further adjustment.
(Waypoint): Touch the way point symbol to enter this point as a way point along the route. See Dest. & Way Pt. under "Stored Locations" under Navigation Menu for more information.
Route Preference: Touch this screen button to access the Route Preference screen and adjust the route preferences. The current setting is displayed in the Route Preference section of the Map screen. See "Change Route" later in this section for more information. If any of these features are turned off, there will be a diagonal red line through its icon.
Once the route preference has been set, select the destination symbol and the system will automatically calculate your route.
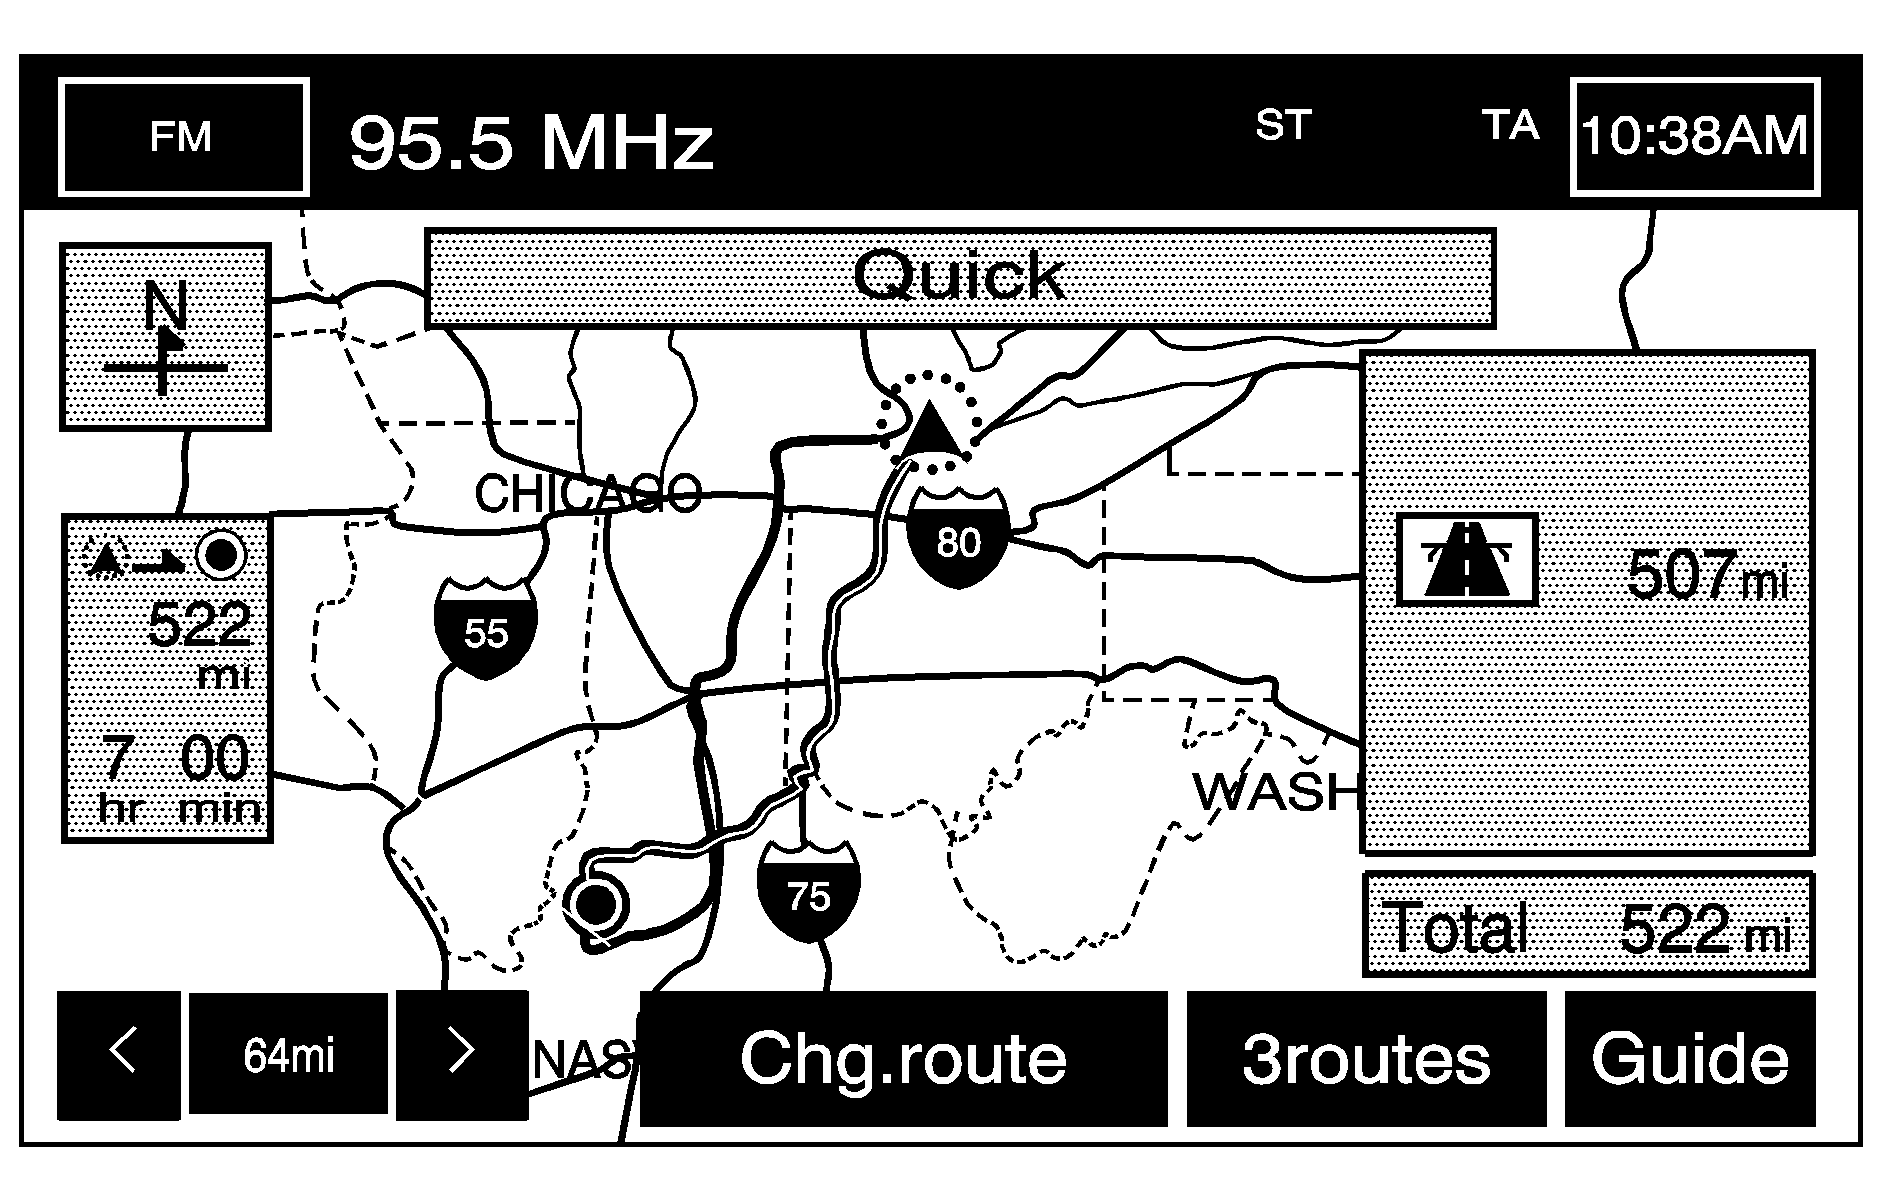
From this screen you can select Guide to start your route guidance or select 3routes if available to select between Quick, Normal, or Short route options. You can also select the Chg. Route screen button to go to the ROUTE OPTIONS menu and select from the available options.
Three Routes
To access this screen, touch the 3routes button on the map screen while planning a destination.
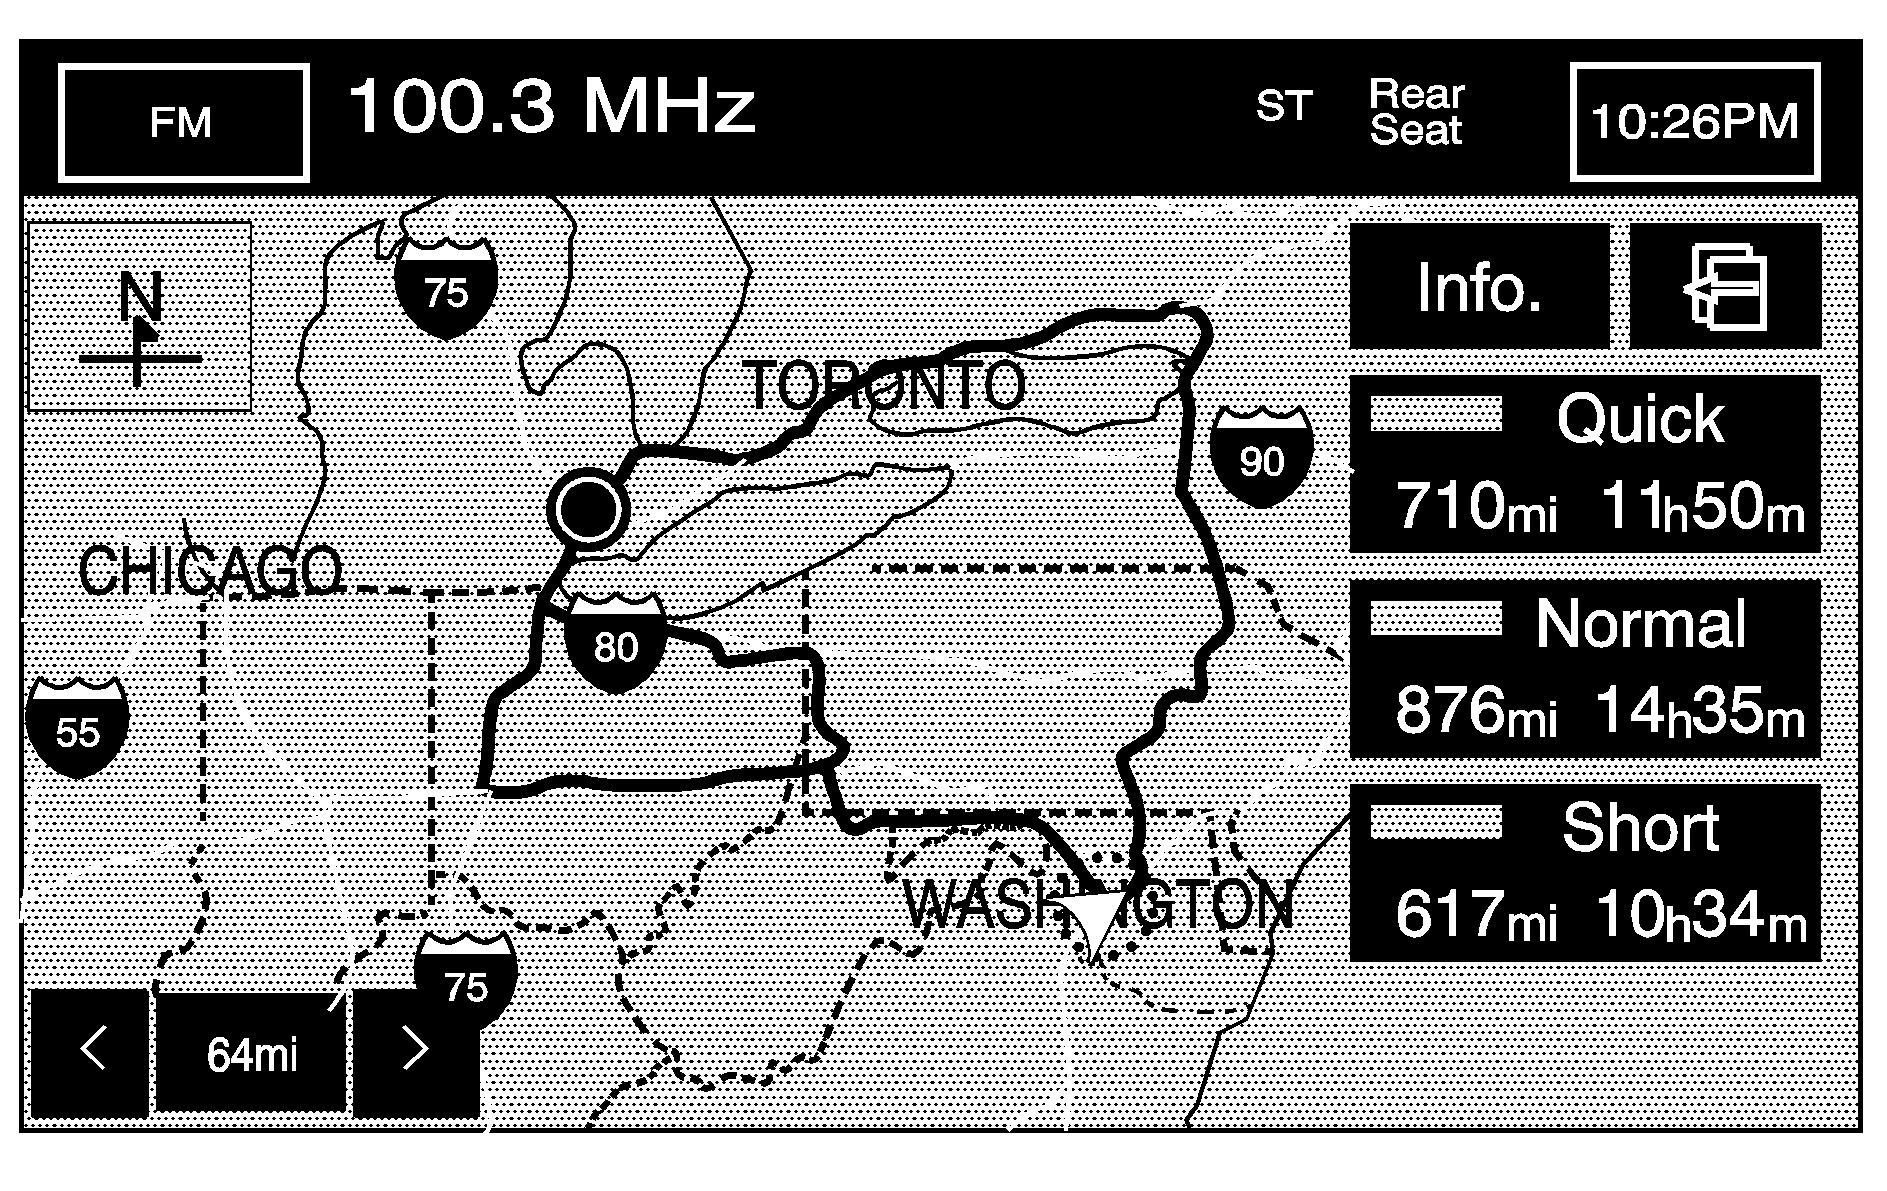
When applicable, the system will calculate up to three different versions of your current route in three different colors: Quick, Normal, and Short. The routes are shown with distance to destination and estimated travel time. The quickest route may not be the shortest, and vice versa. When an optional route is selected it is shown on the map in another color.
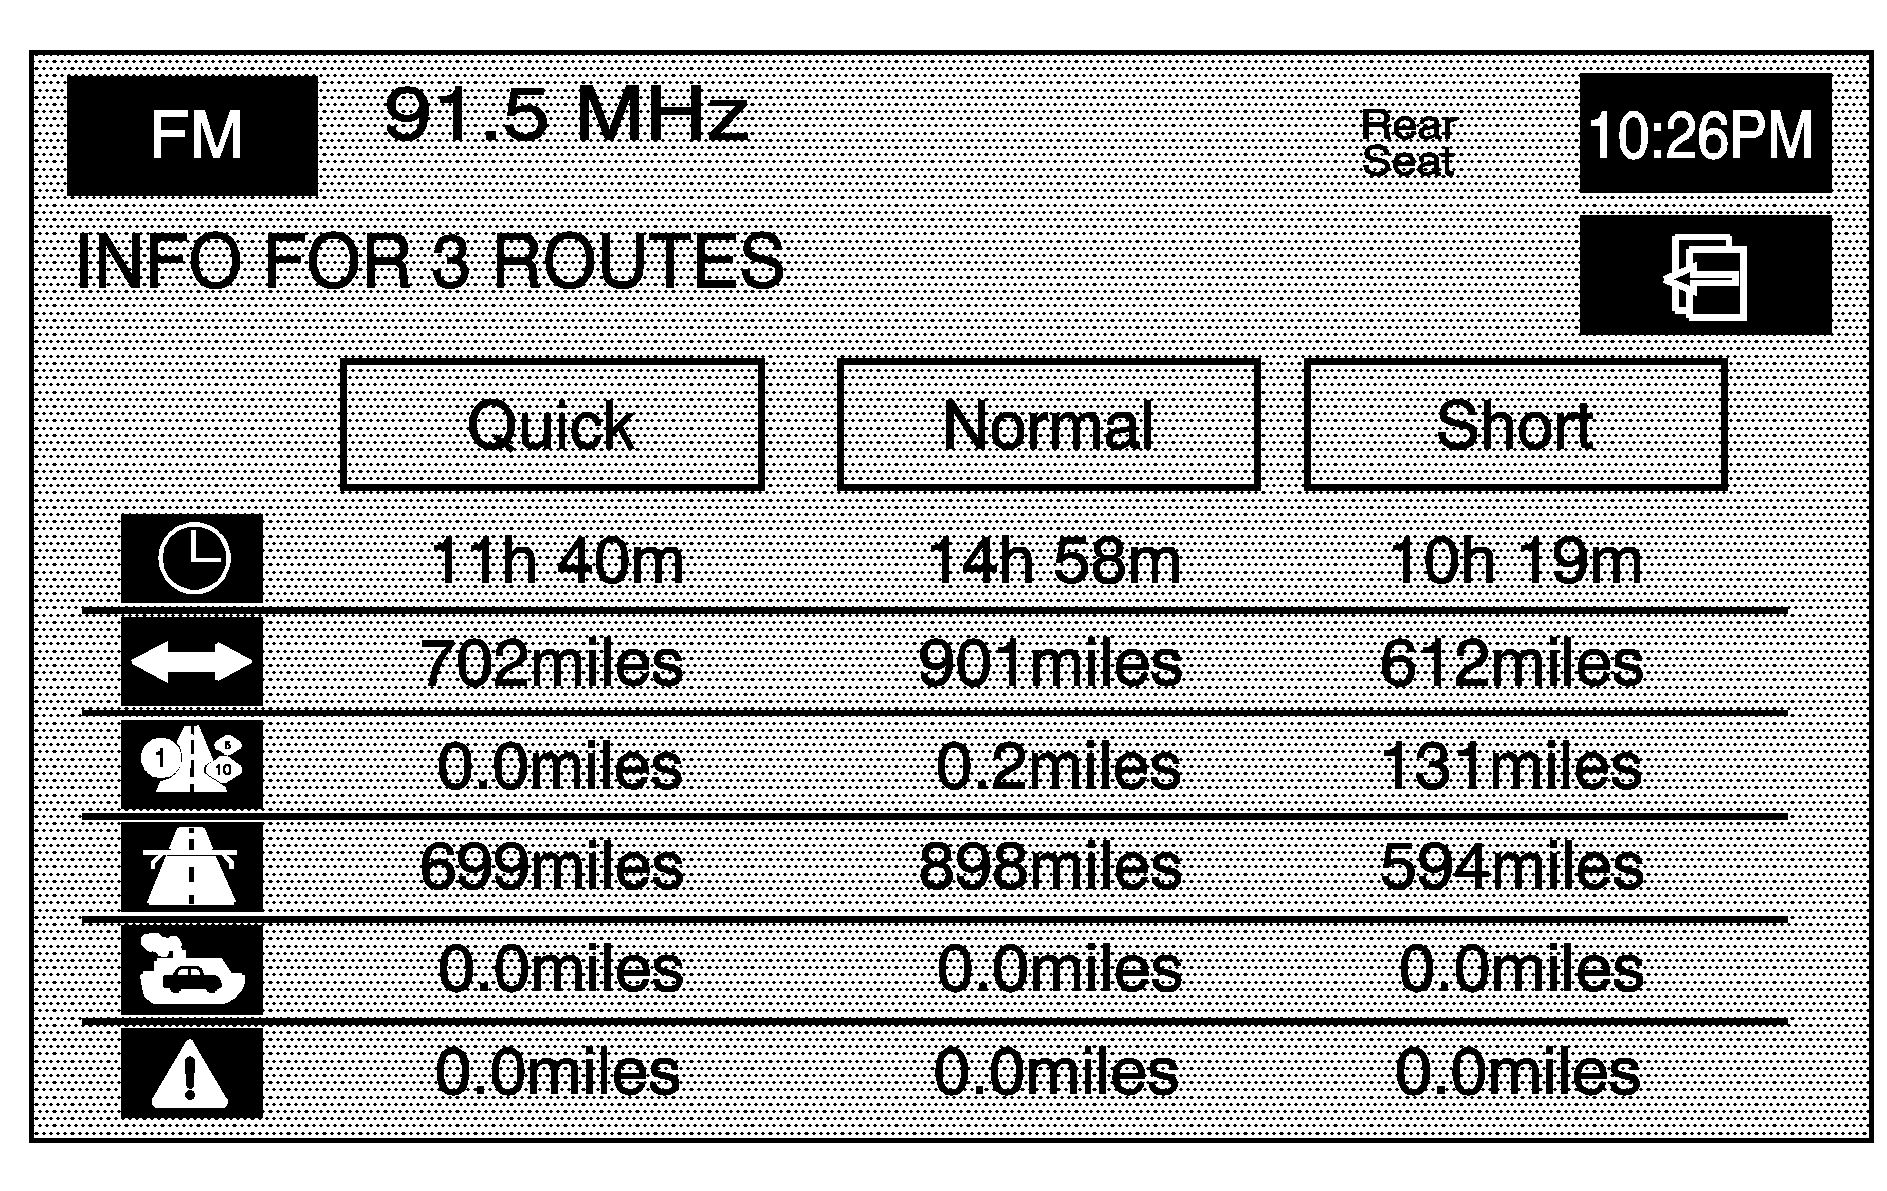
Touch Info on the three routes screen to access the INFO FOR 3 ROUTES screen. From this screen, you can view the following information for the different planned routes:
(Estimated Travel Time): This icon shows the route's estimated time of travel.(Straight-Line Distance): This icon shows the route's straight-line distance to destination.
(Toll Road): This icon shows the route's toll road distance information.
(Freeway Travel): This icon shows the route's freeway distance information.
(Ferry): This icon shows the route's ferry distance information.
(Time-Restricted Roads): This icon shows the route's time-restricted road information.
