Customer Satisfaction - Rainsense Feature Inoperative

| Subject: | 04102A - Rainsense™ Feature Inoperative |
| Models: | 2005 Cadillac STS |
| Equipped with Rainsense™ Feature (CE1) |
THE PART INFORMATION SECTION IN THIS BULLETIN HAS BEEN REVISED. THE HARNESS THAT WAS TO BE ORDERED FROM THE WPC IS NO LONGER AVAILABLE. DEALERS ARE NOW REQUIRED TO MAKE THE HARNESS. THE PARTS REQUIRED ARE LISTED IN THIS BULLETIN AND THE SERVICE PROCEDURE HAS BEEN REVISED WITH INSTRUCTIONS FOR MAKING THE HARNESS. THE LABOR TIME HAS ALSO BEEN REVISED TO INCLUDE TIME FOR MAKING THE HARNESS. PLEASE DISCARD ALL COPIES OF BULLETIN 04102, ISSUED DECEMBER 2004.
Condition
On certain 2005 Cadillac STS vehicles, the Rainsense™ feature (CE1) may be inoperative due to an incorrect wiring harness. If conditions require wipers, the vehicle's wiper system will operate properly when manually activated.
Correction
Dealers are to install the missing circuit harness.
Vehicles Involved
Involved are certain 2005 Cadillac STS vehicles equipped with Rainsense™ (CE1) and built within these VIN breakpoints:
Year | Division | Model | From | Through |
|---|---|---|---|---|
2005 | Cadillac | STS | 50136253 | 50158177 |
Important: Dealers should confirm vehicle eligibility through GMVIS (GM Vehicle Inquiry System) prior to beginning program repairs. [Not all vehicles within the above breakpoints may be involved.]
For dealers with involved vehicles, a Campaign Initiation Detail Report containing the complete Vehicle Identification Number, customer name and address data has been prepared and will be loaded to the GM DealerWorld, Recall Information website. Dealers that have no involved vehicles currently assigned will not have a report available in GM DealerWorld.
The Campaign Initiation Detail Report may contain customer names and addresses obtained from Motor Vehicle Registration Records. The use of such motor vehicle registration data for any purpose other than follow-up necessary to complete this program is a violation of law in several states/provinces/countries. Accordingly, you are urged to limit the use of this report to the follow-up necessary to complete this program.
Parts Information
The wire required to complete this recall is to be obtained from General Motors Service Parts Operations (GMSPO). Please refer to your "involved vehicles listing" before ordering parts. Normal orders should be placed on a DRO = Daily Replenishment Order. In an emergency situation. parts should be ordered on a CSO = Customer Special Order.
The Terminal Repair Kit can be obtained from SPX Kent-Moore at 1-800-468-6657.
Part Number | Description | Quantity/Vehicle |
|---|---|---|
88953215 | Wire, Lead (Wire, 50' Spool, 20 GA, White, Reduced Wall X-Link, TXL) (will service 3 vehicle) | 4.55 mm (15 ft) |
J 38125 | GM Terminal Repair Kit Components: P/N 12191812, Terminal A (located in Tray 19) P/N 7114-4720-02, Terminal B (located in Yazaki Tray 14) | 1 1 |
Service Procedure
Harness Fabrication
Important: If required, refer to terminal repair instructions in SI and terminal installation instructions in the GM Terminal Repair Kit, J 38125.
- Cut 4.55 m (15 ft) of wire from the spool.
- Install terminal A (female terminal) at one end of the wire.
- Install terminal B (male terminal) at the other end of the wire.
- Proceed to section below titled, "Harness Installation".
Harness Installation
The following procedure provides instructions for installing a missing wiring circuit (#243) for the Rainsense™ windshield wiper system. The wire being installed goes from the right side of the instrument panel (I/P) to the right side "C" pillar.
Important: For additional information on interior trim or seats, refer to the appropriate section of the Service Manual.
- Push in and pull up on the front of the rear seat cushion to release the retainers.
- With the seat cushion raised up, disconnect the electrical connector and remove the seat cushion from the vehicle.
- Open the trunk.
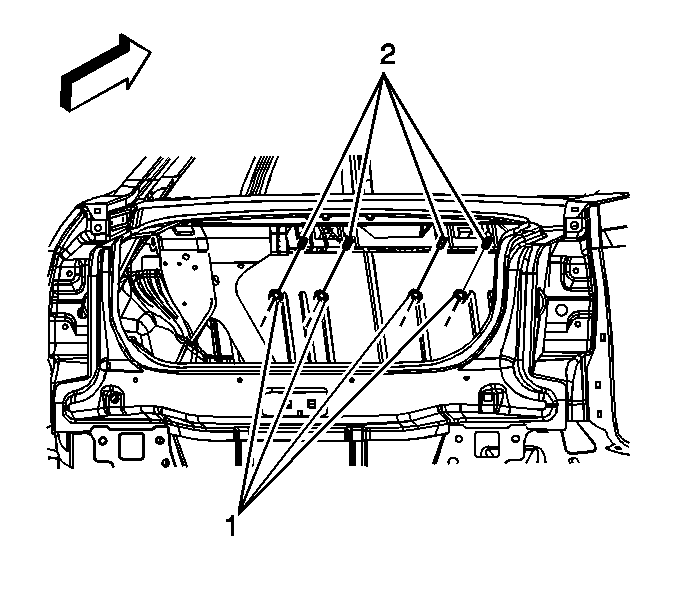
- From inside of the trunk, release the hook and loop fasteners for the upper trim at the rear upper seat back attachment to the body.
- From inside of the trunk, remove the two upper outer nuts (1) on each side (four nuts total). Do not remove the inner three nuts.
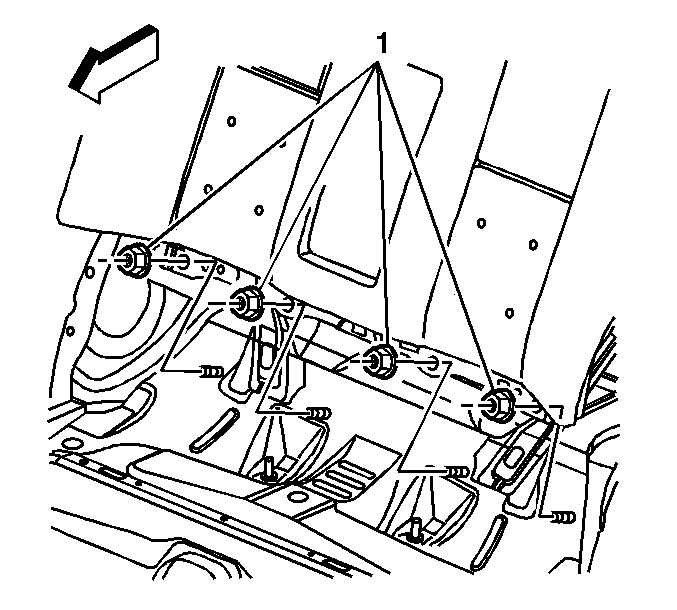
- From inside of the vehicle, remove the four lower nuts (1) that attach the bottom of the seat back to the body.
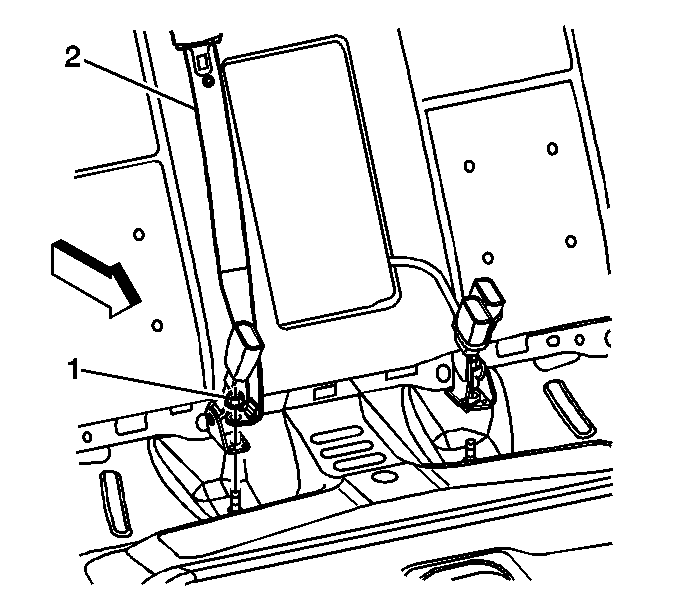
- Remove the nut (1) attaching the center shoulder belt to the floor.
- Move the seat back forward and disconnect the electrical connector.
- Remove the seat back from the vehicle.
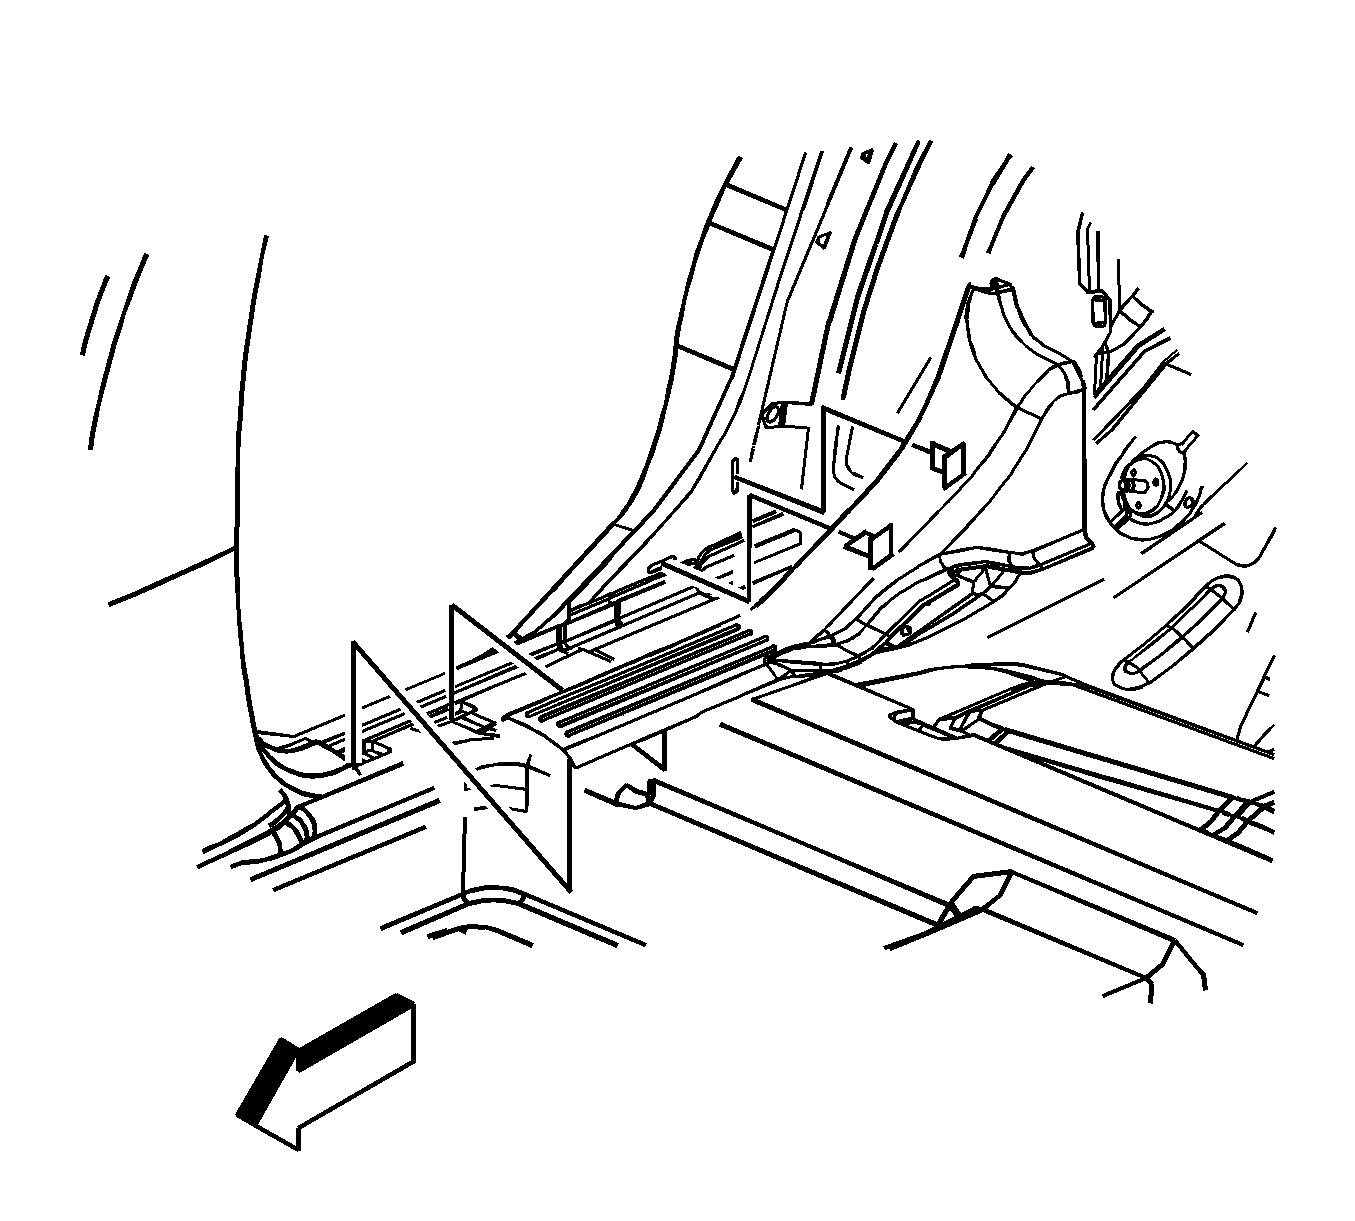
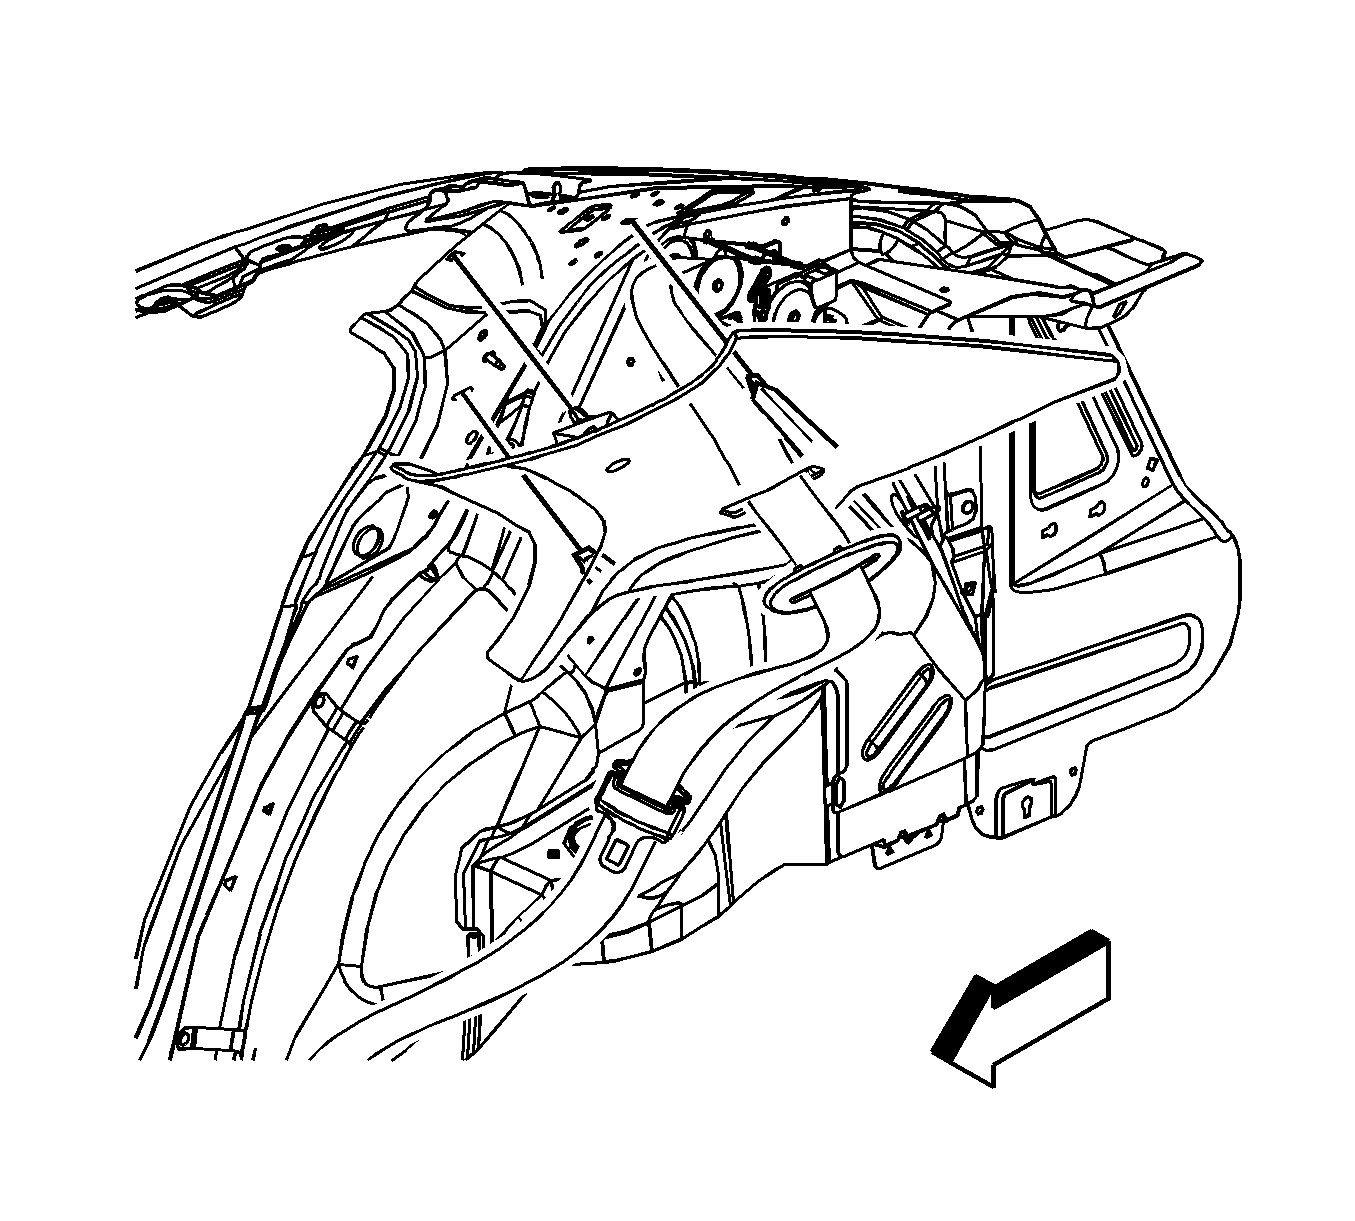
- Carefully release the retaining clips and remove the right rear carpet retainer.
- Locate the two fuse centers under the rear carpeting, just forward of the rear seat cushion area.
- Remove the covers from both fuse centers and remove the AIR BAG fuse from each fuse center.
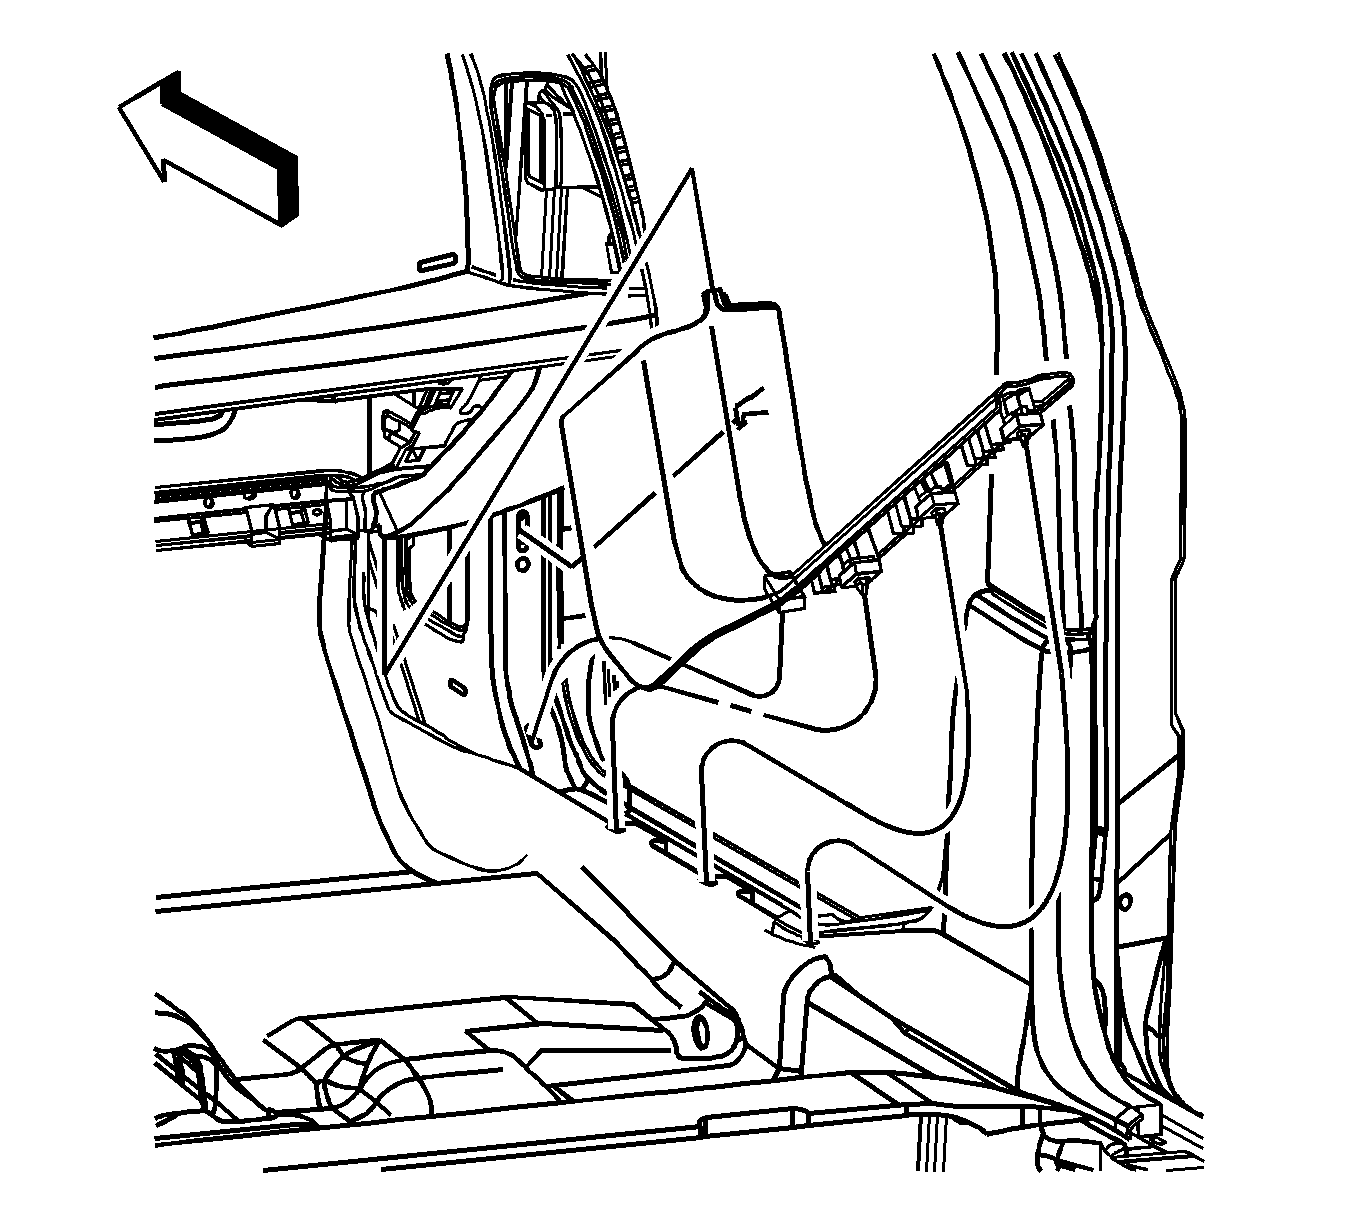
- Carefully remove the small plastic cover from the "C" pillar trim (sail) panel.
- Remove the screw attaching the trim panel and reposition the panel so there is access to the electrical connectors mounted behind it.
- Carefully release the retaining clips and remove the right front carpet retainer.
- Carefully release the retaining clips and remove the lower "B" pillar trim panel (3).
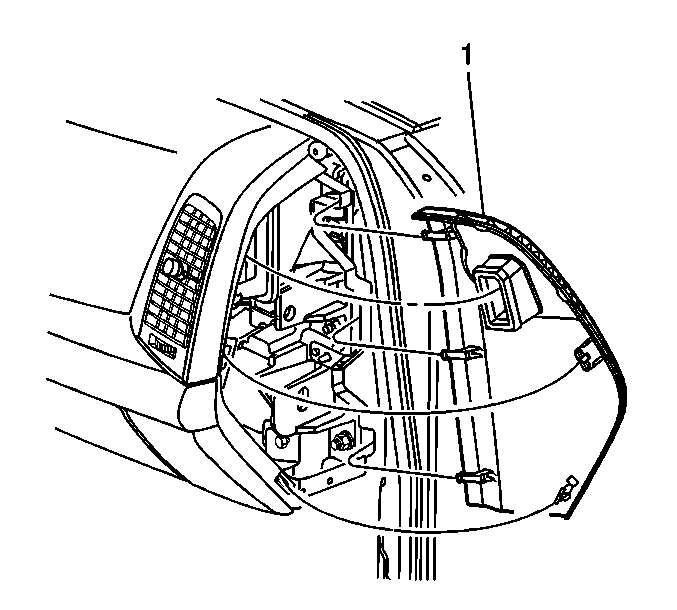
- Carefully release the retaining clips and remove the right side outer trim cover (1) from the instrument panel.
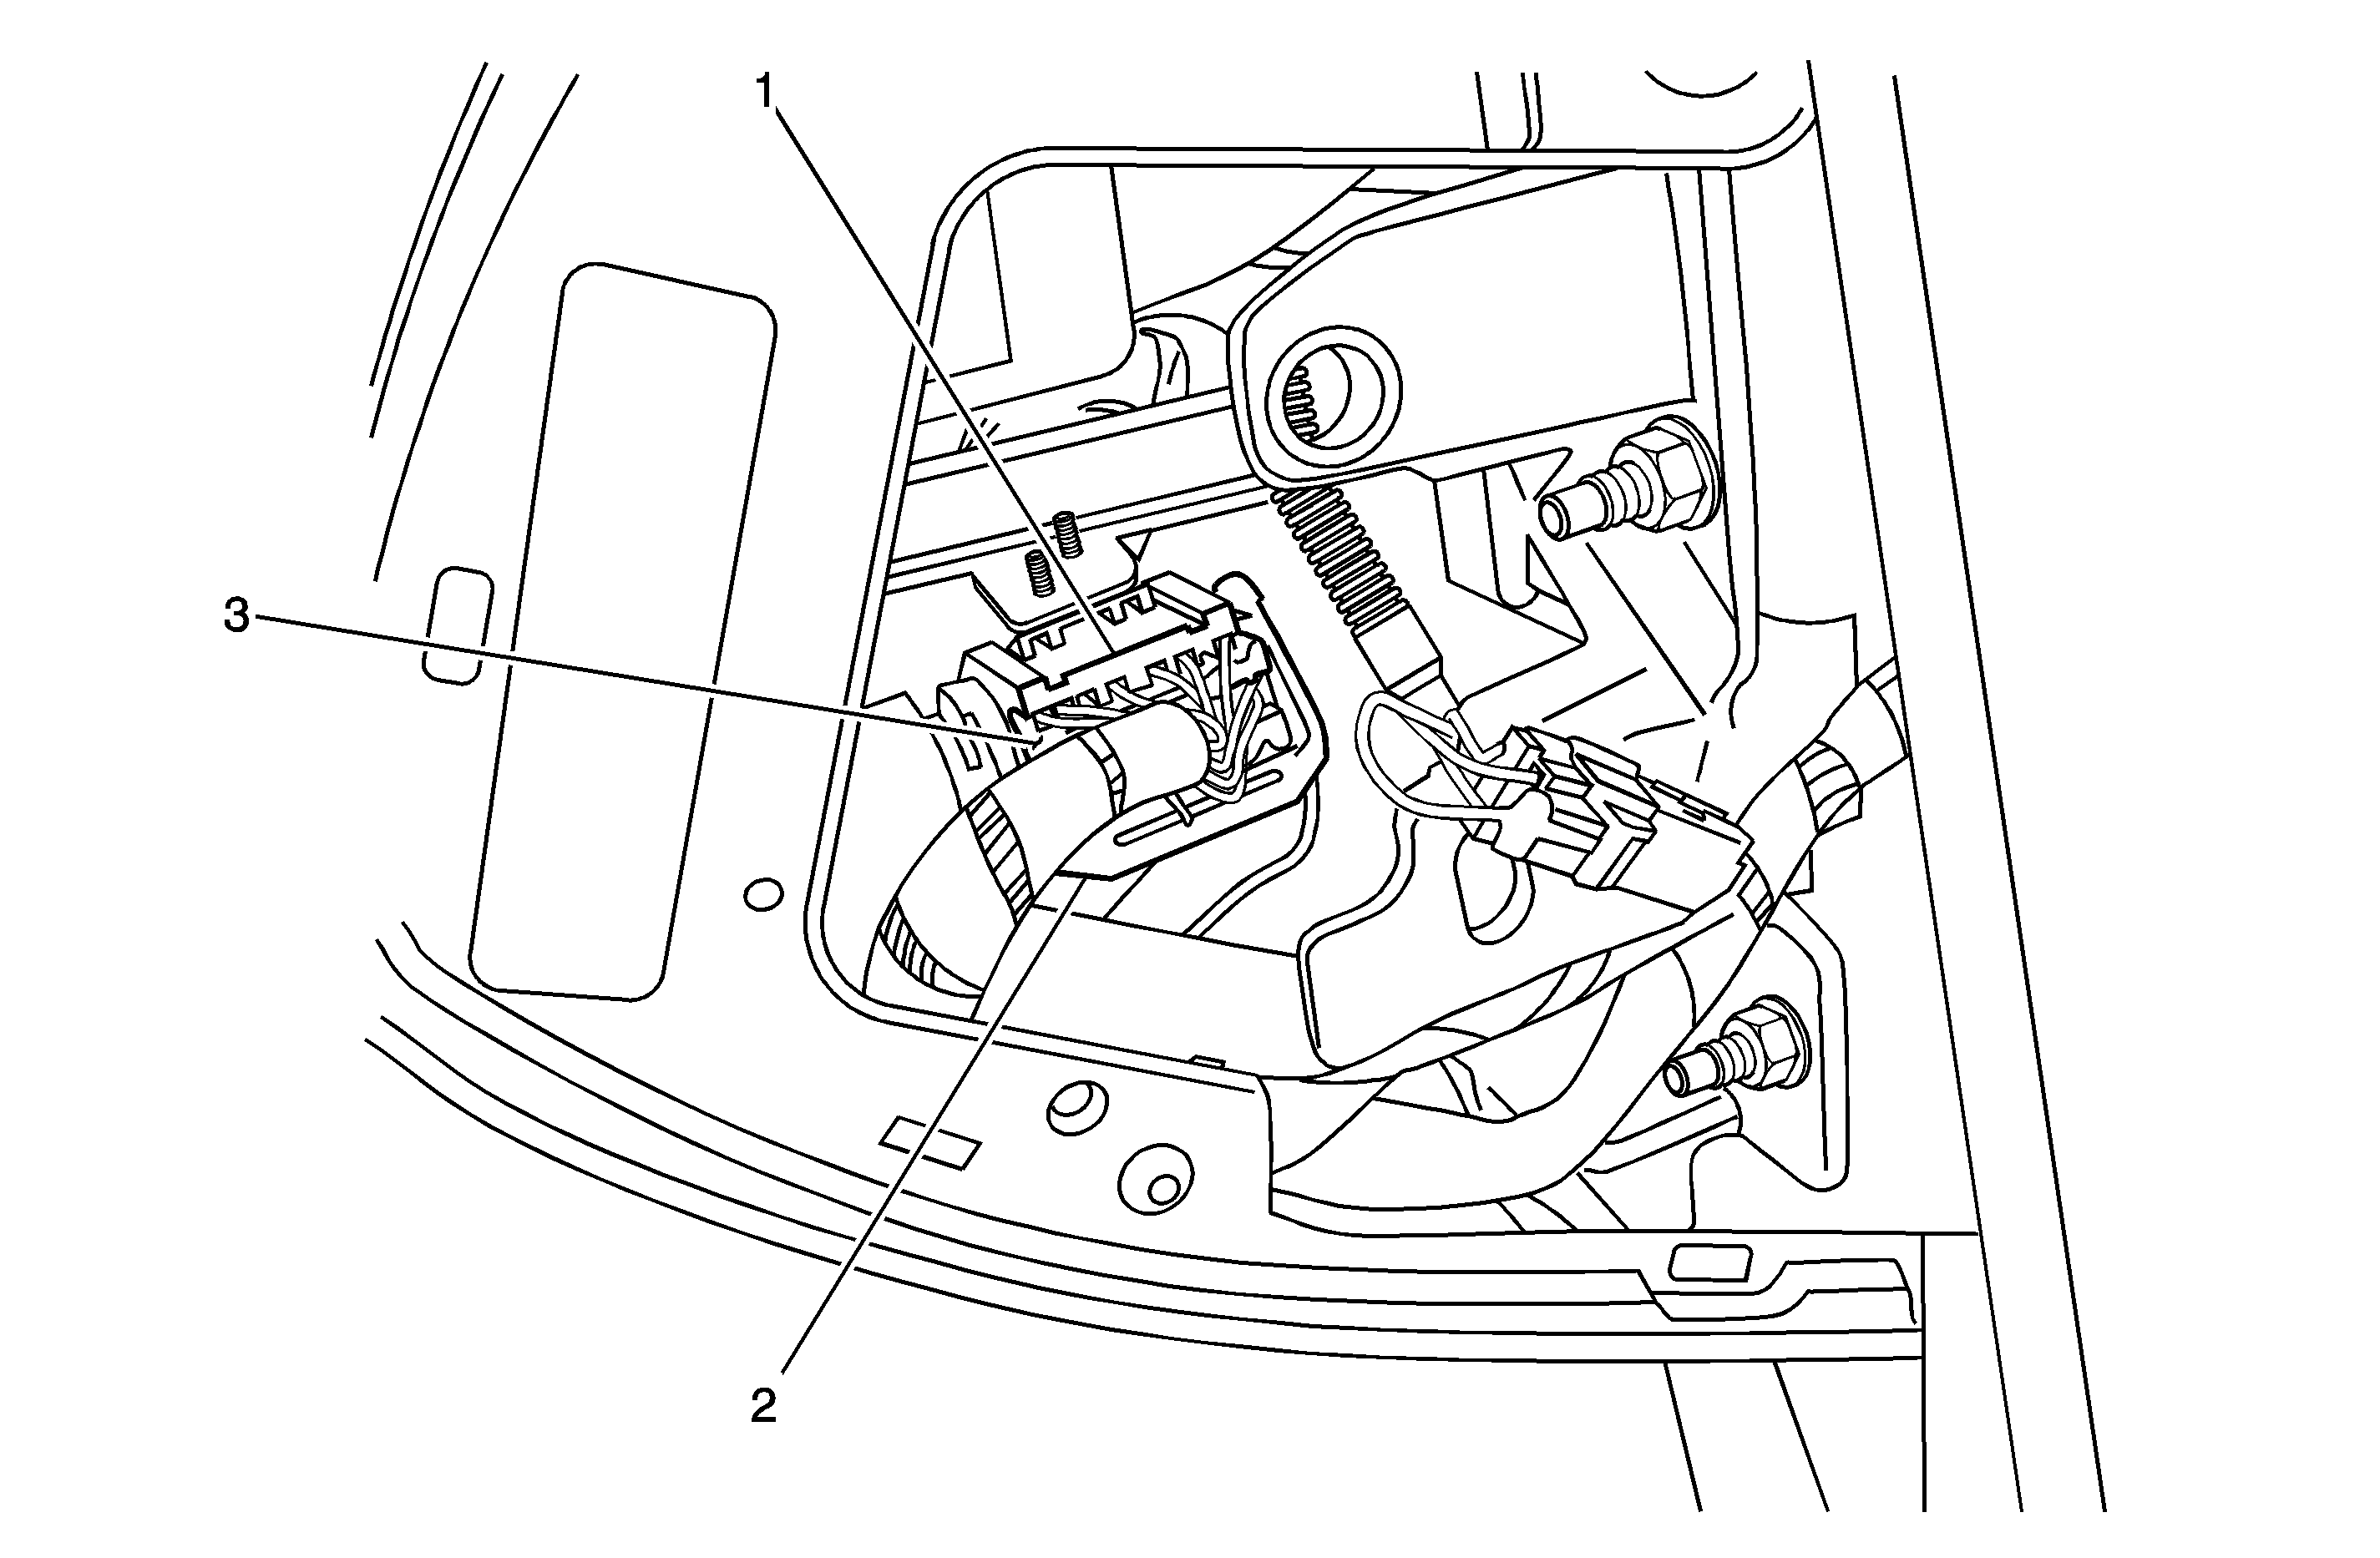
- Locate the 40-way "C200" electrical connector (1).
- Release the connector lock (2) by rotating it downwards and disconnect the connector.
- On the connector for the body harness, remove the blue terminal position assurance (TPA) (3) from the row containing cavity D1 (circuit 243).
- Insert the appropriate end of the new wire (circuit 243) into cavity D1.
- Reinstall the blue TPA into the connector.
- Route the new wire through the I/P, following the existing body harness.
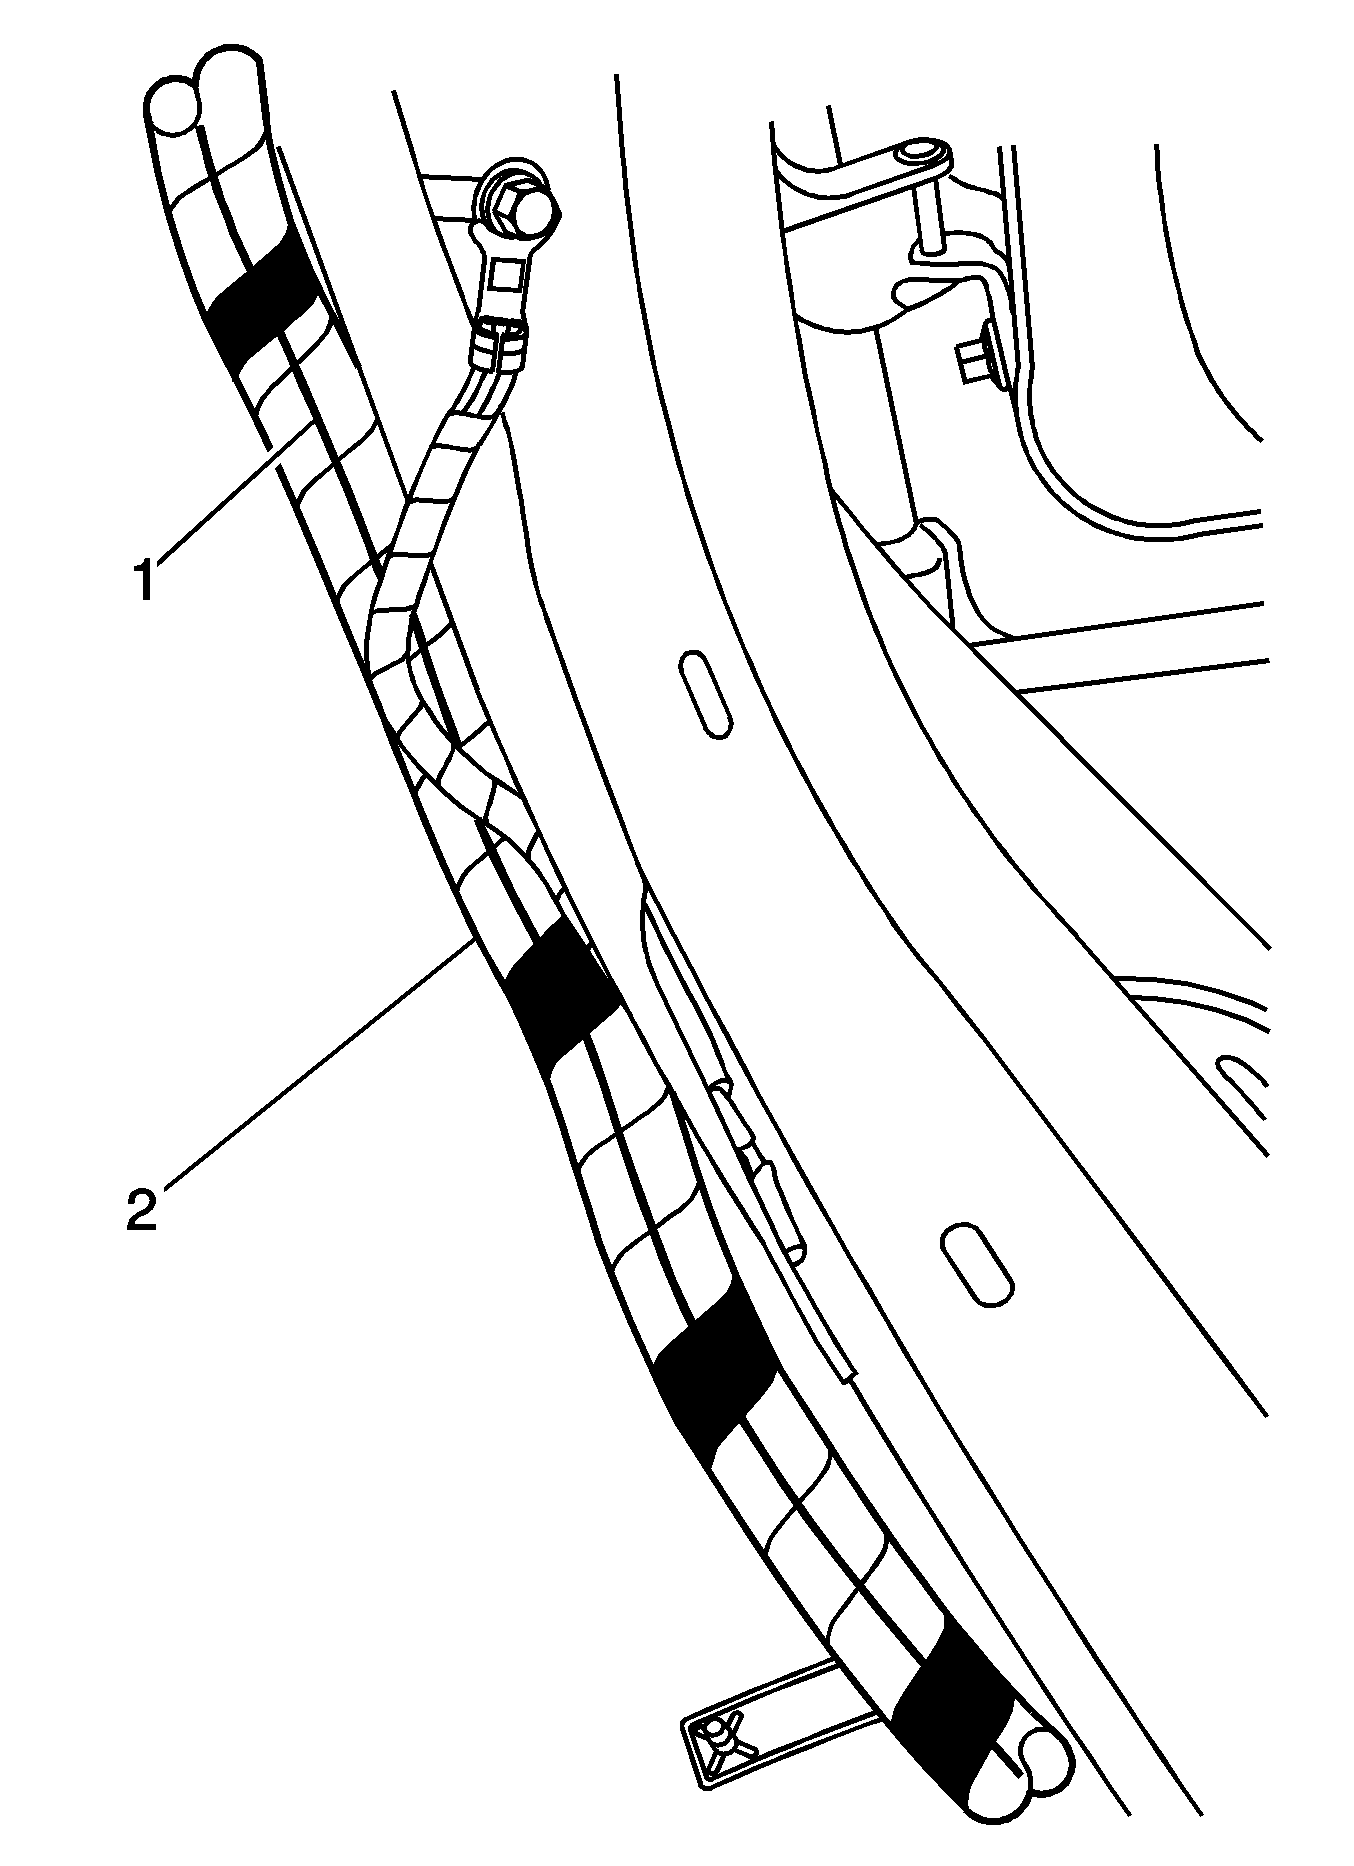
- Use black electrical tape to secure the new wire to the outside of the existing harness.
- Continue attaching the new wire (1) to the outside of the existing harness (2) down along the floor pan.
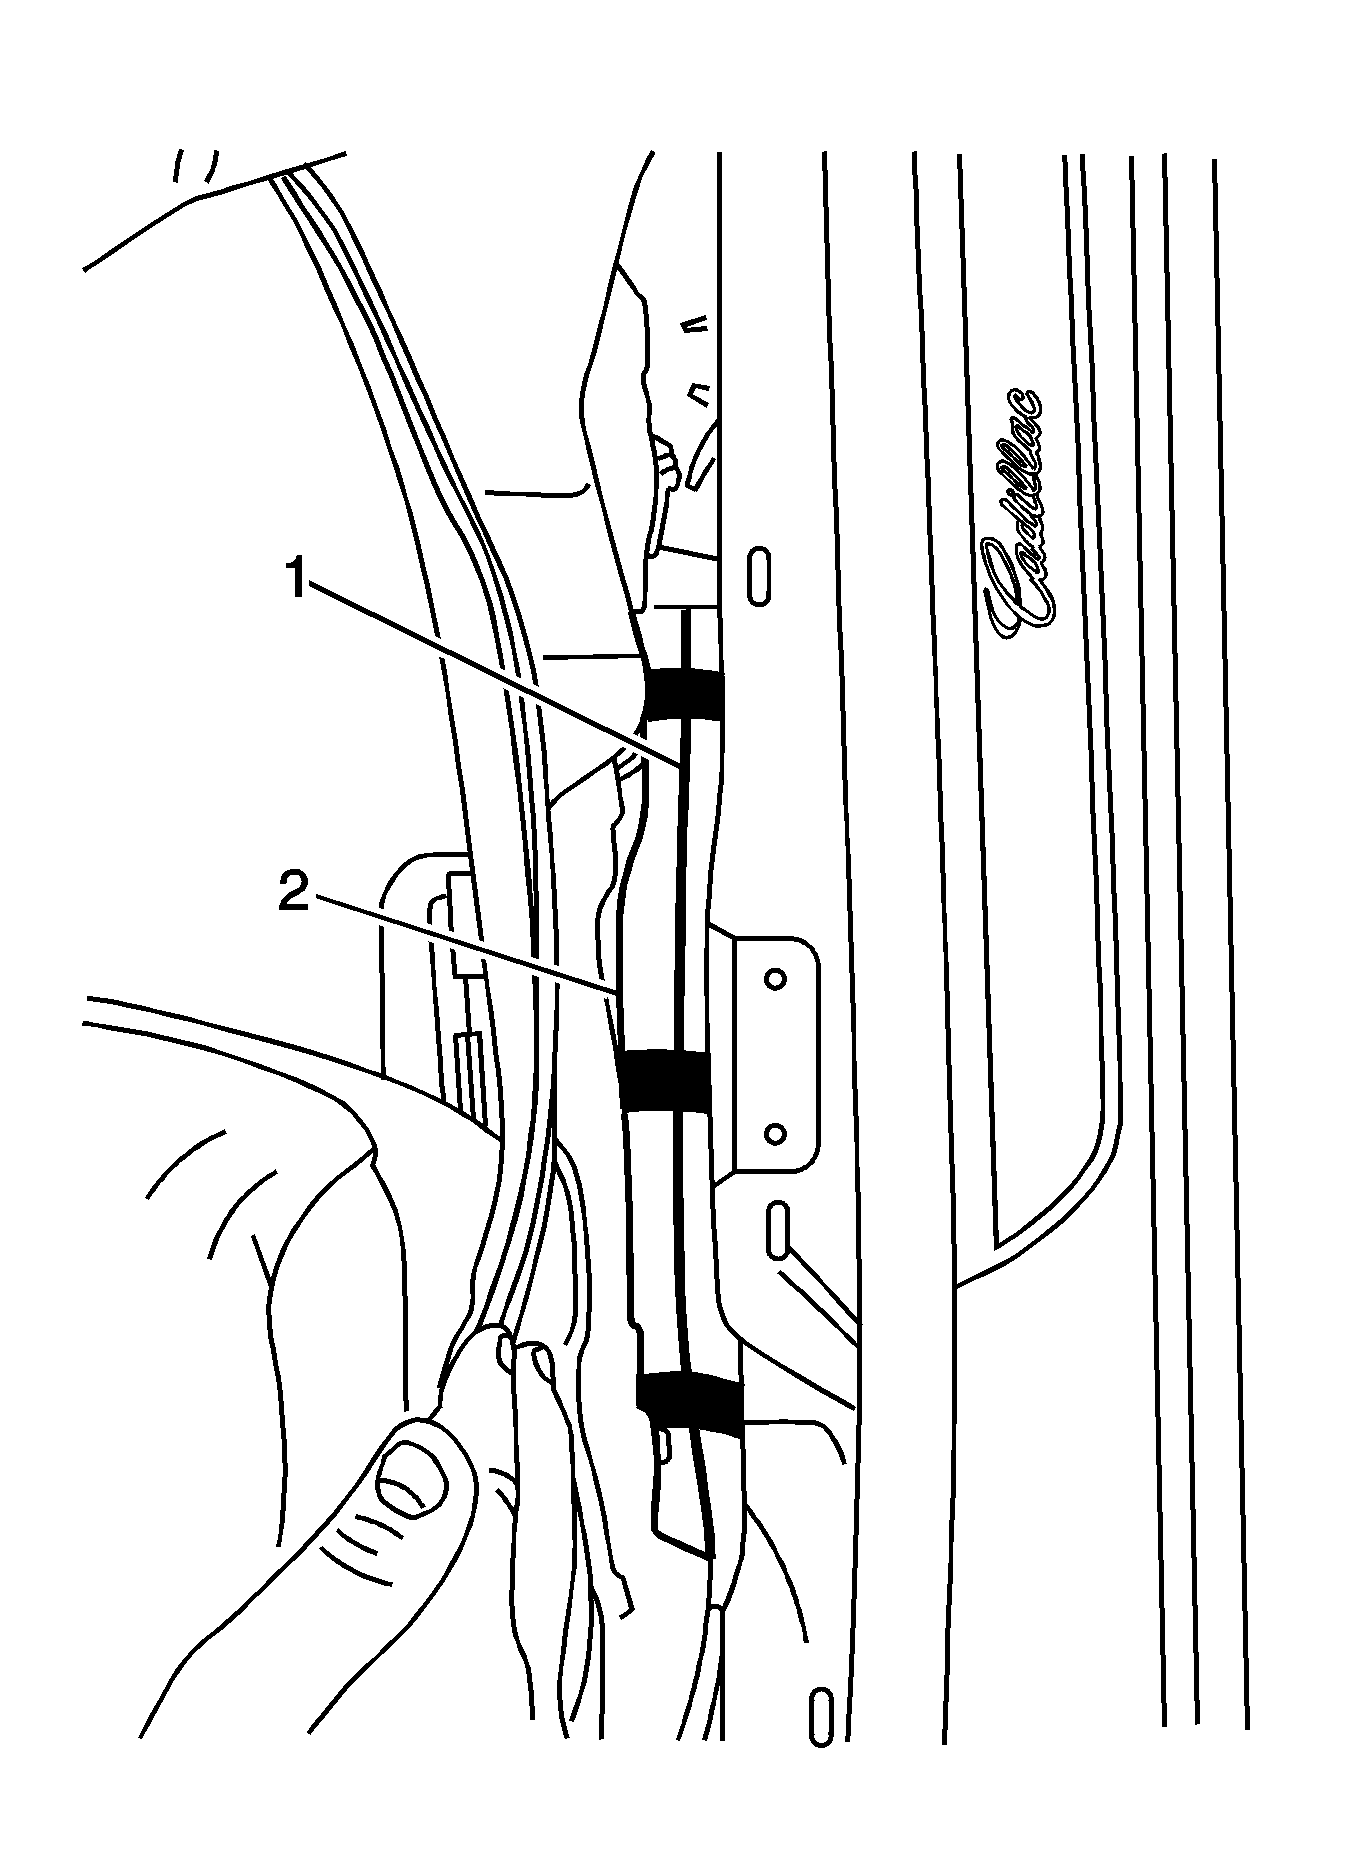
- At the black plastic conduit located between the front seat and the rocker panel, route and secure the wire (1) to the top of the conduit (2) with tape. Continue along the top of the conduit until the conduit ends in the rear floor pan area.
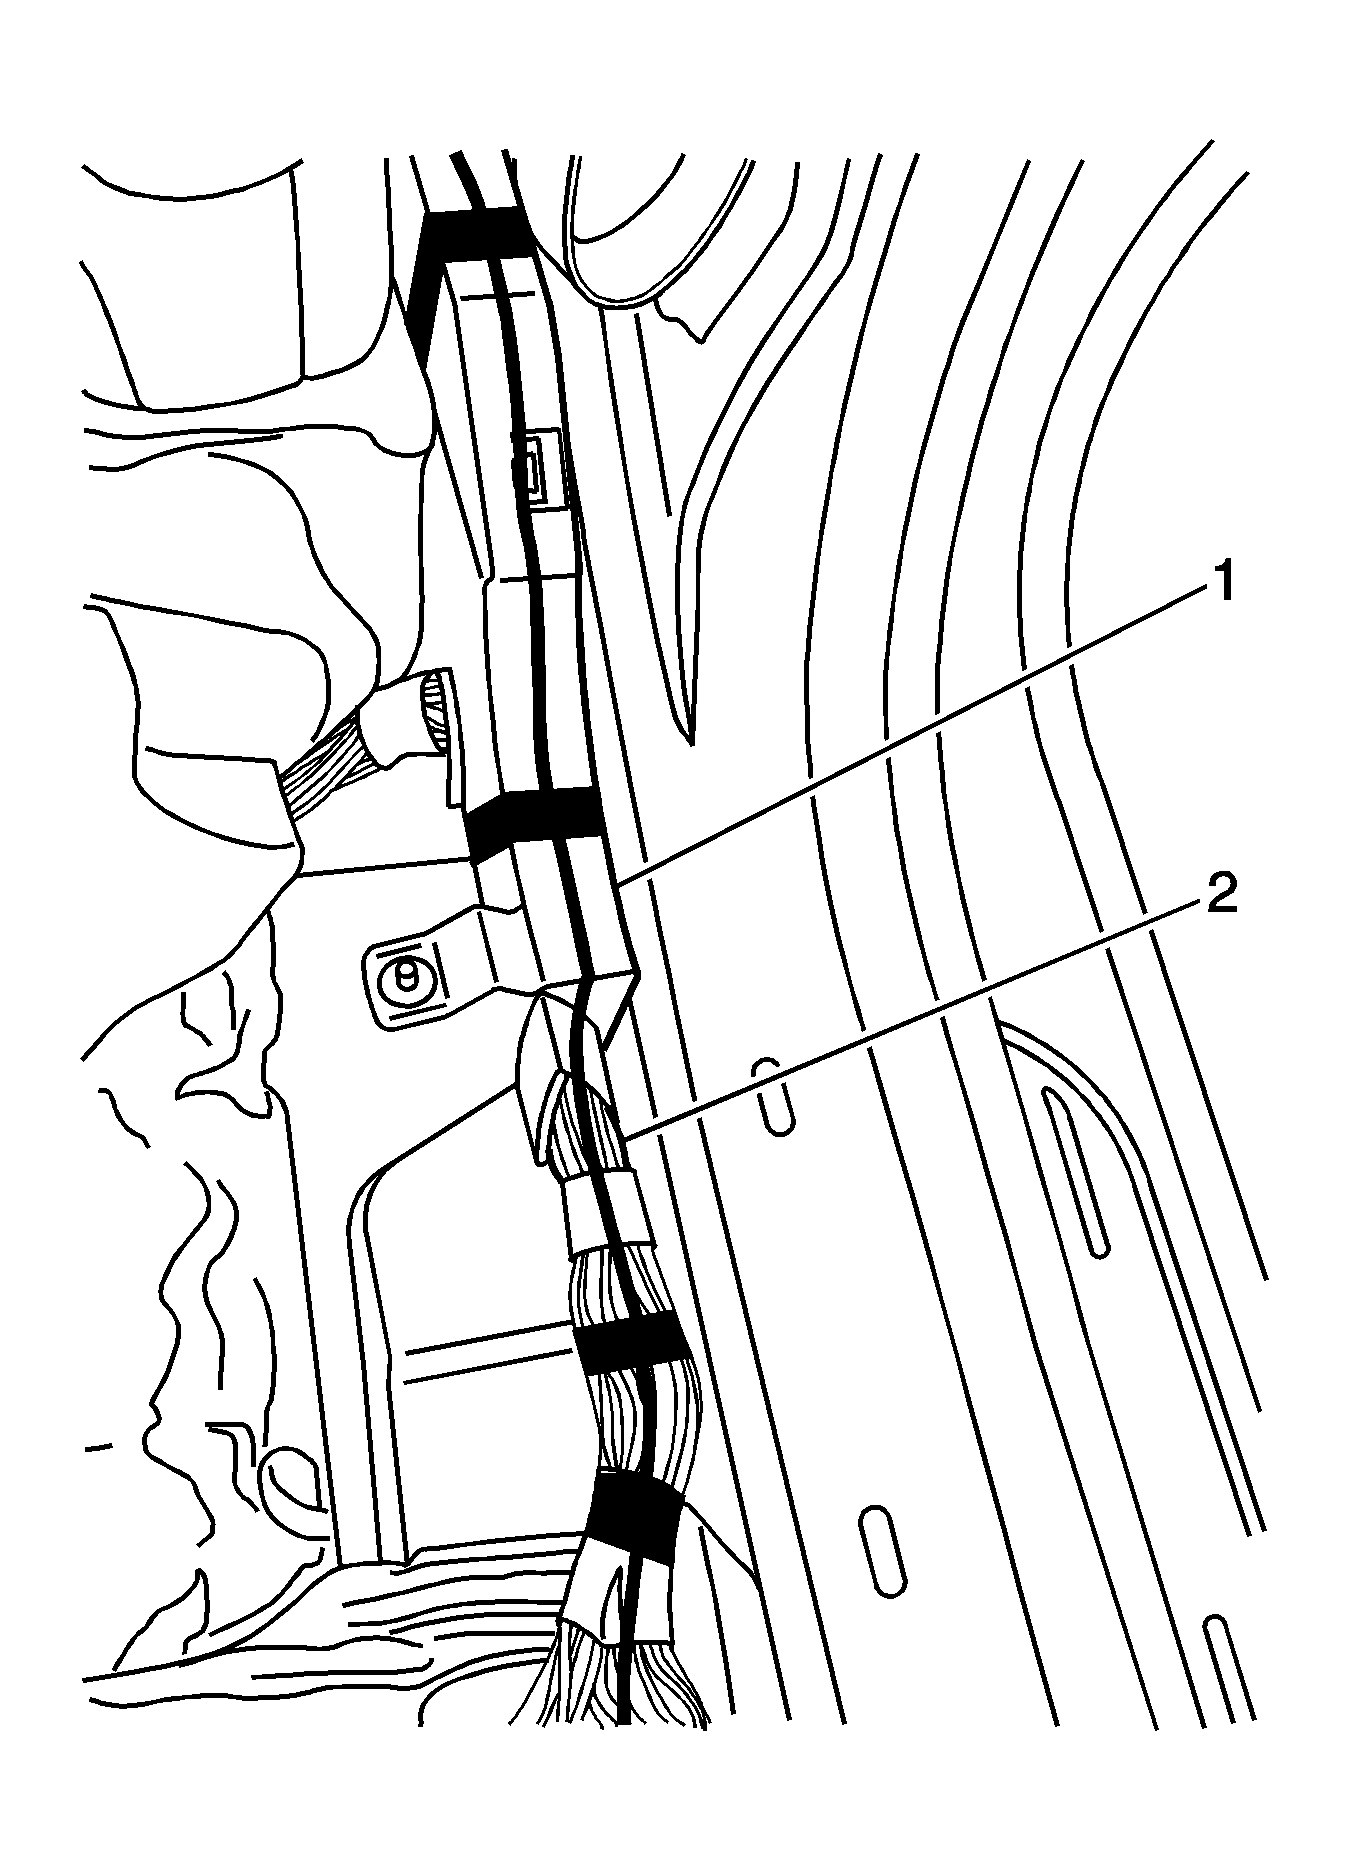
- When the harness (2) exits the conduit (1) in the rear floor pan area, continue routing and taping the new wire to the outside of the existing harness.
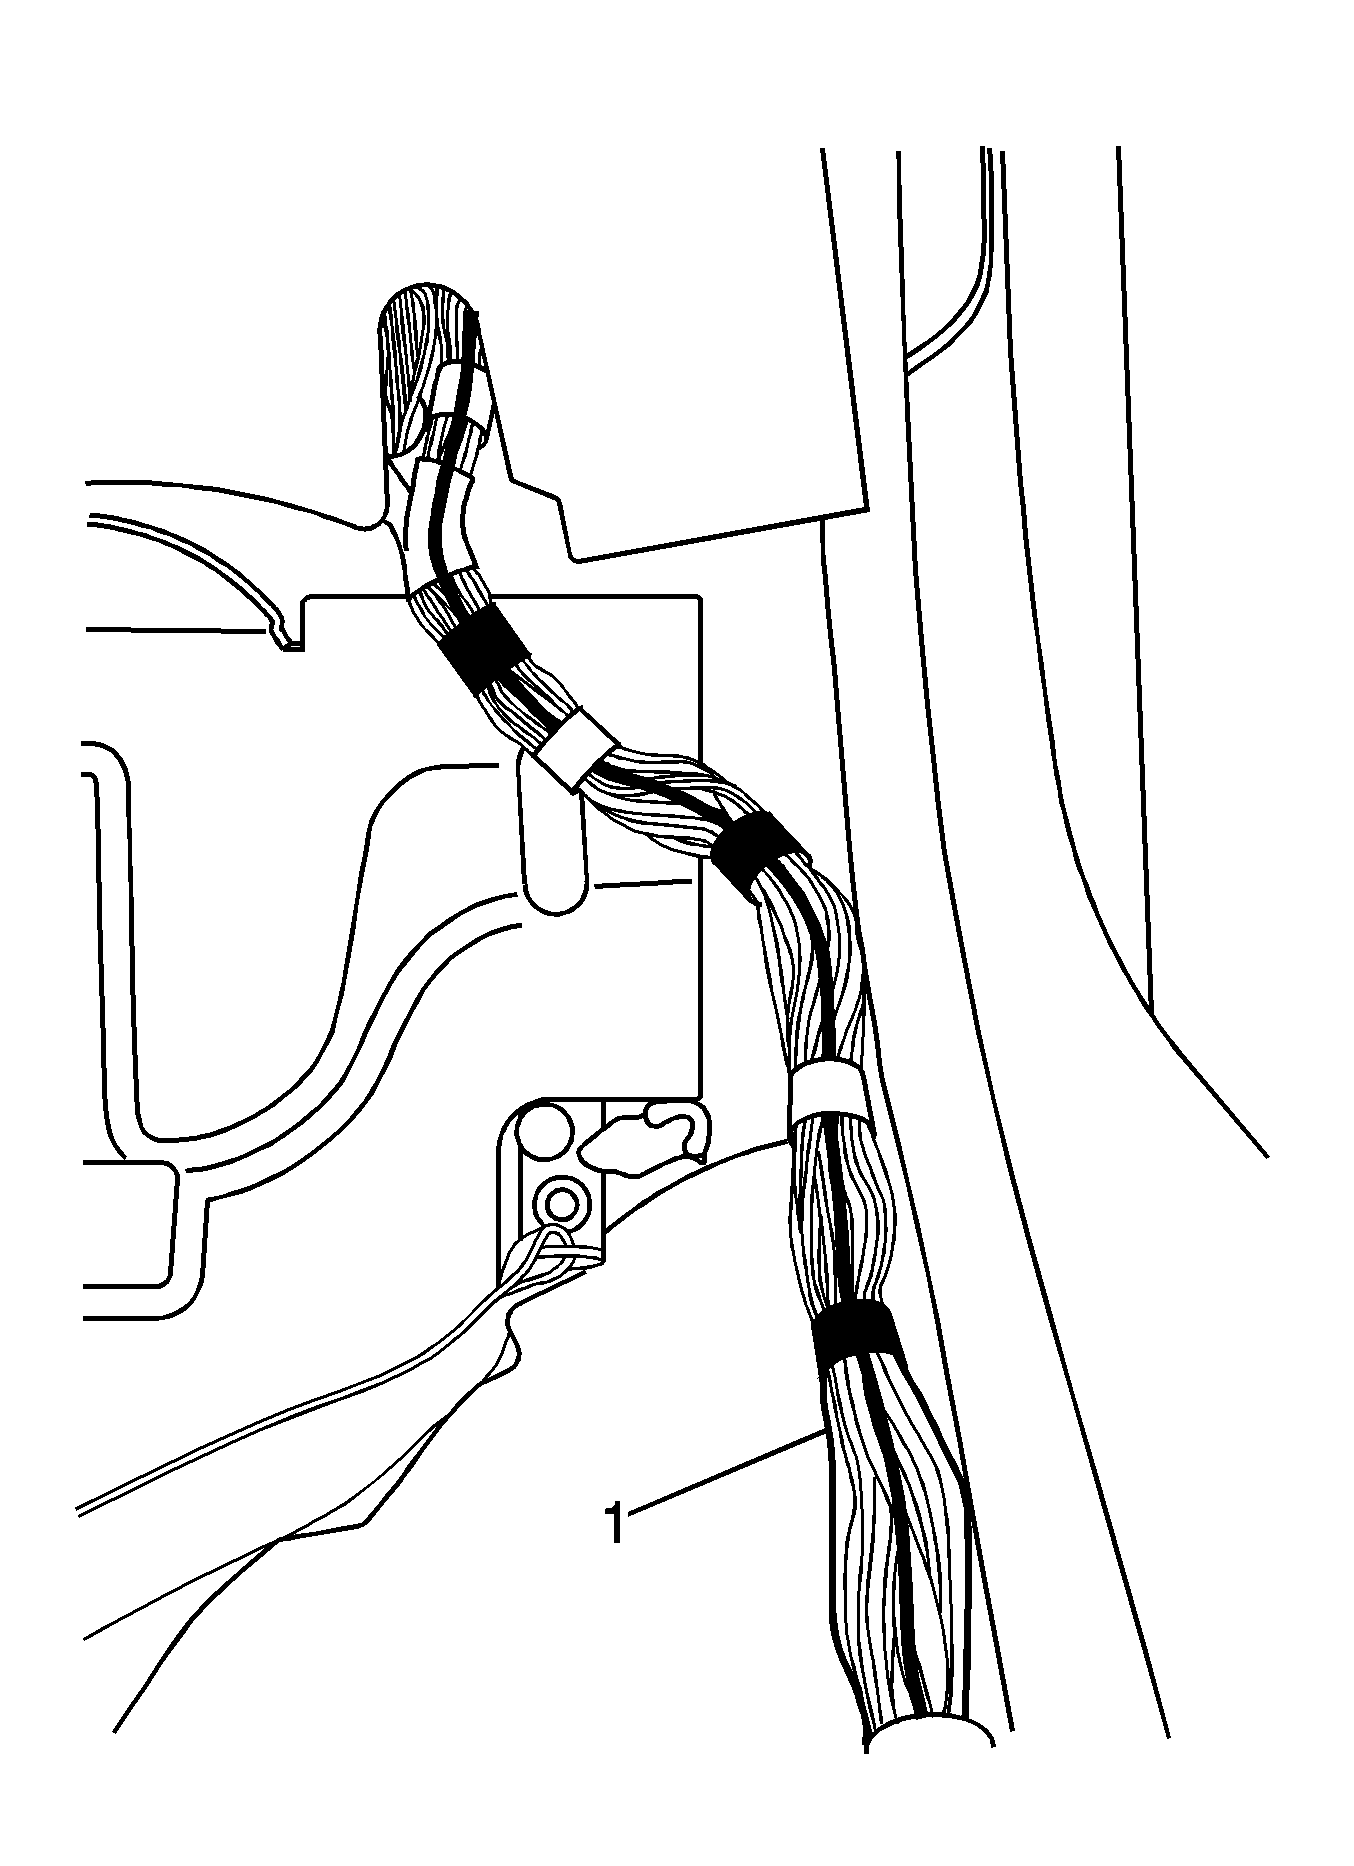
- Continue taping the new wire to the harness (1) as it goes up to the "C" pillar area.
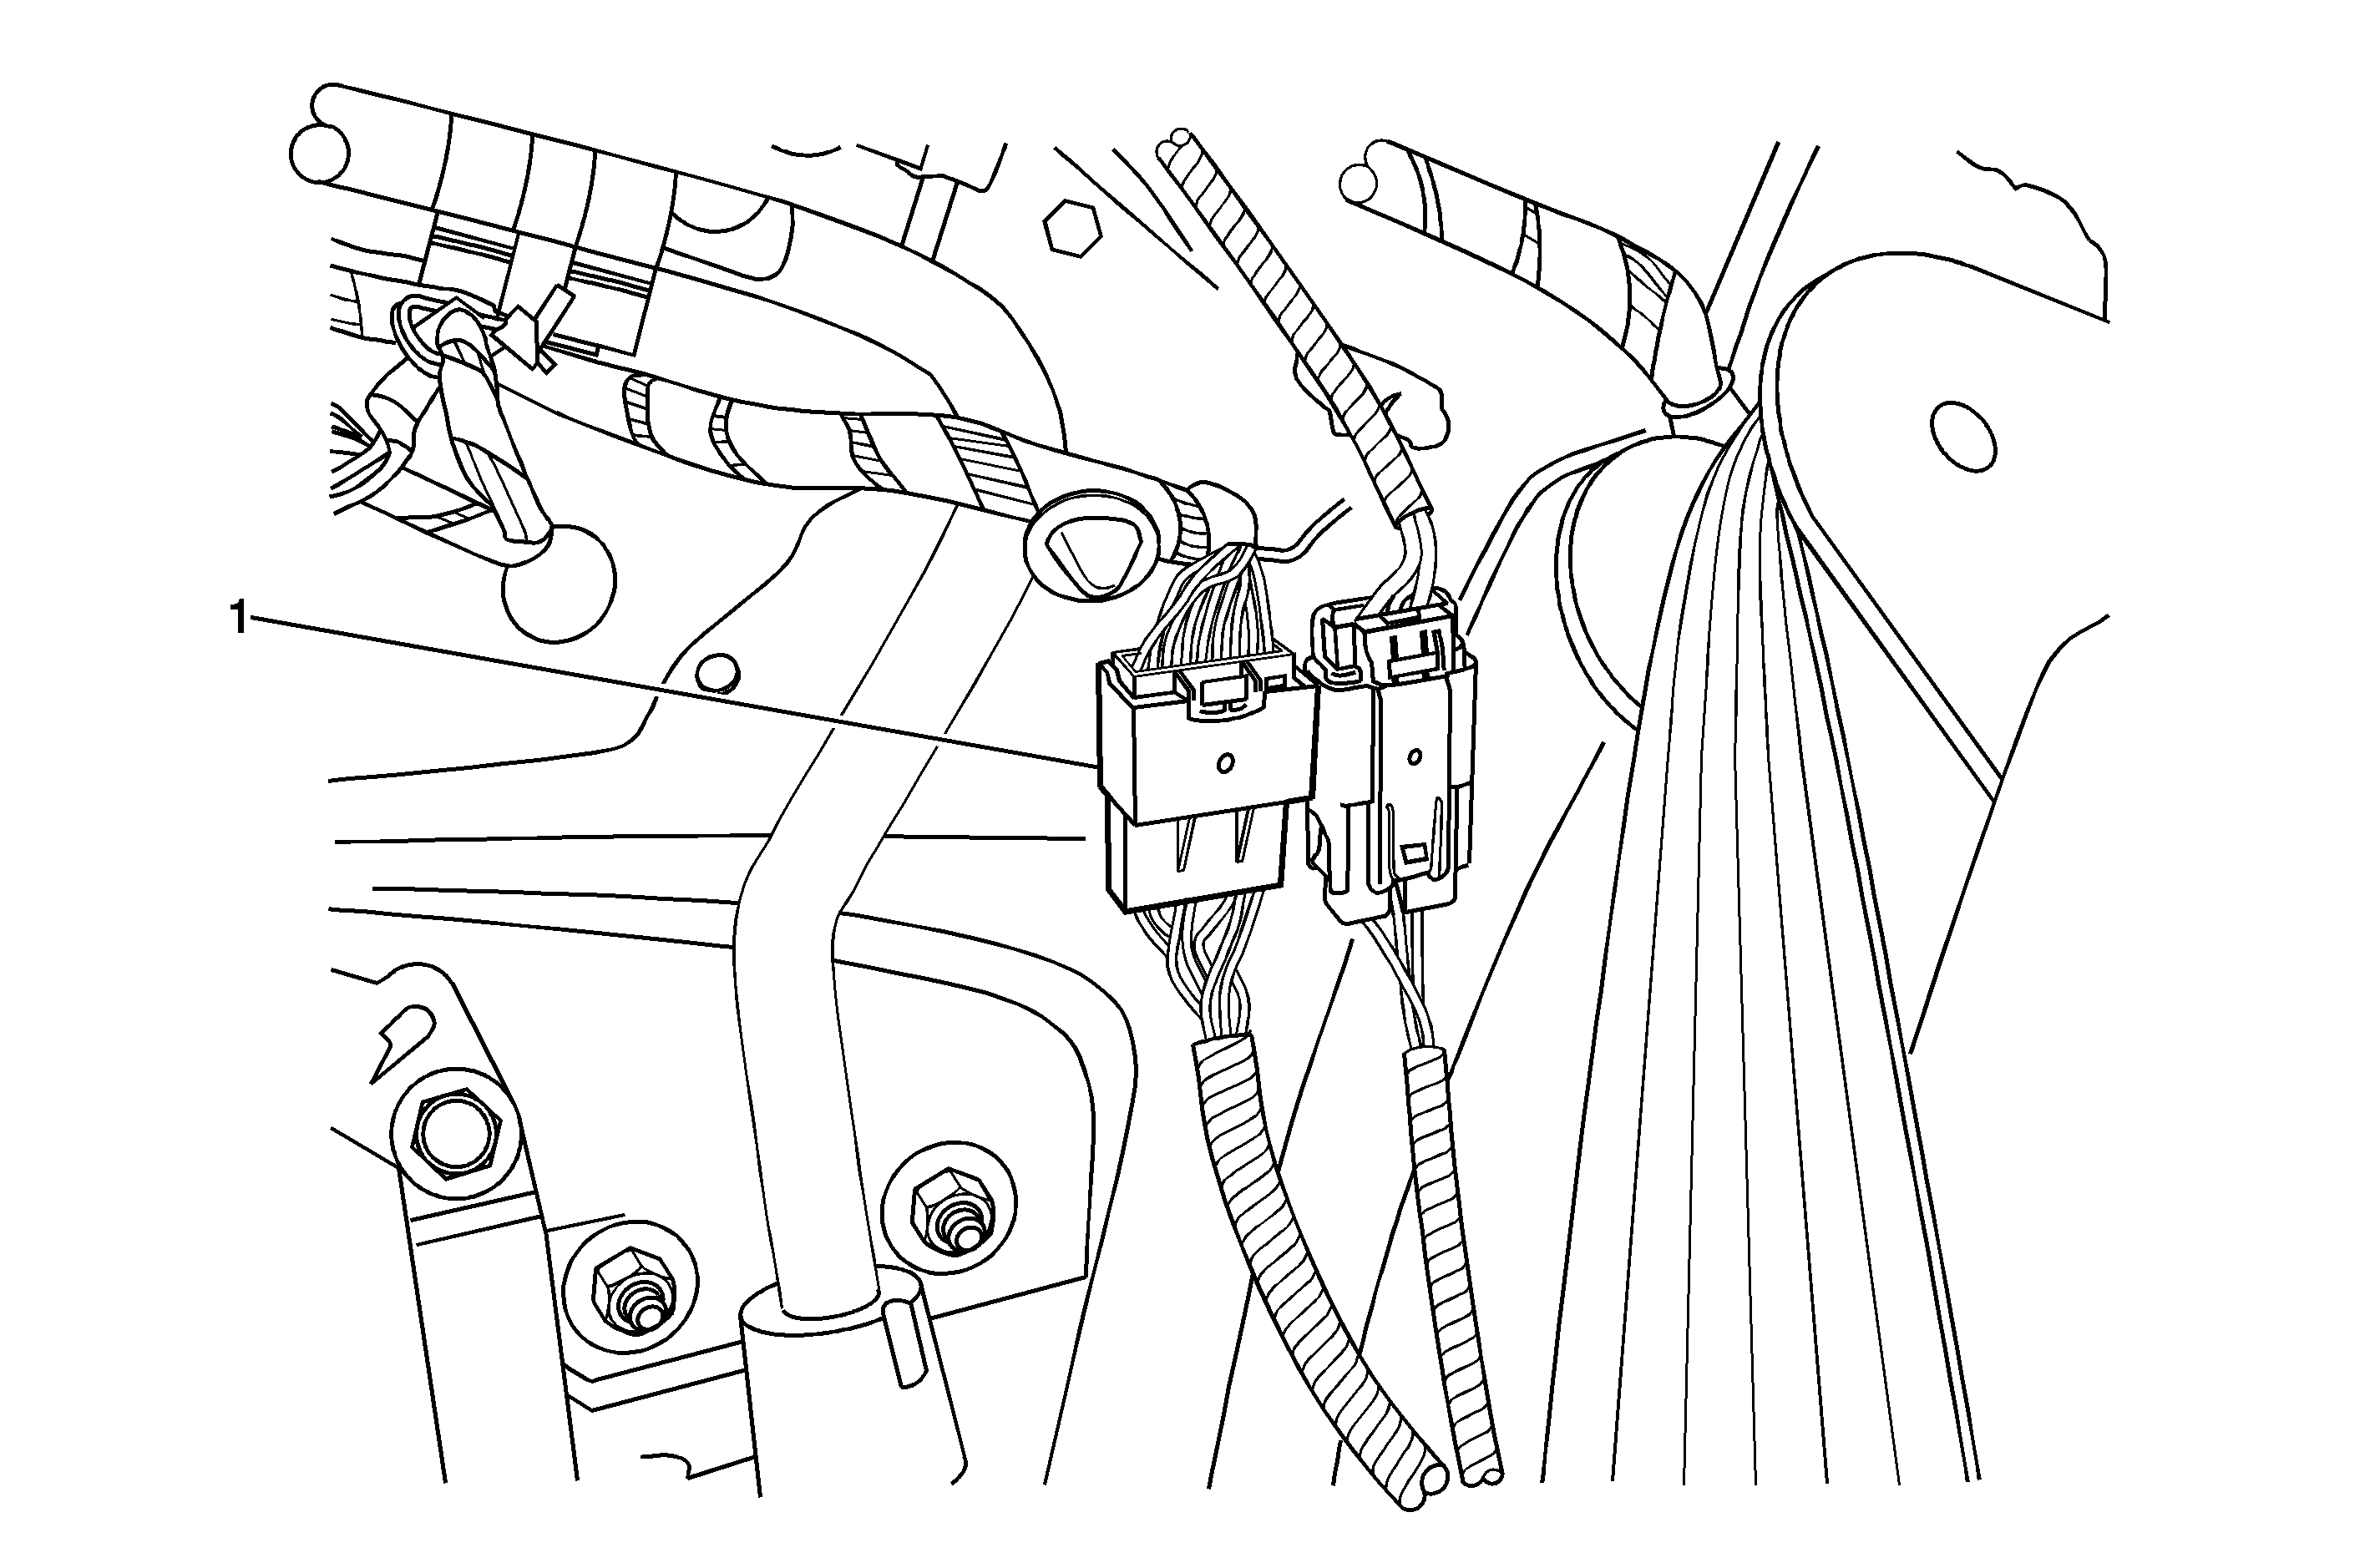
- Remove the larger gray connector (1) that is attached to the "C" pillar.
- Disconnect the electrical connector.
- Remove the blue TPA from the row containing cavity #13 (circuit 243).
- Insert the terminal on the new wire into cavity #13 and reinstall the TPA.
- Connect the electrical connectors and reattach it to the "C" pillar.
- Finish taping the new wire to the existing harness as necessary.
- At the I/P, connect electrical connector C200 and rotate the locking feature to lock the connector together.
- Position the right side outer trim cover to the I/P and engage the retaining clips.
- Reposition the front and rear carpet to the original position.
- Position the lower "B" pillar trim panel and engage the retaining clips.
- Position the front carpet retainer and engage the retaining clips.
- Position the "C" pillar trim panel.
- Install the retaining screw.
- Install the cover over the retaining screw.
- Install the AIR BAG fuses in the fuse centers and install the covers.
- Position the rear carpet retainer and engage the retaining clips.
- Install the rear seat back to the vehicle and connect the electrical connector.
- Install the four lower attaching nuts.
- Position the center shoulder belt to the floor and install the nut.
- From inside of the trunk, install the four upper seat back attaching nuts.
- Position and secure the hook and loop fasteners on the trunk trim.
- Close the trunk.
- Place the rear seat cushion in the vehicle and connect the electrical connector.
- Position the rear seat cushion and engage the retainers.
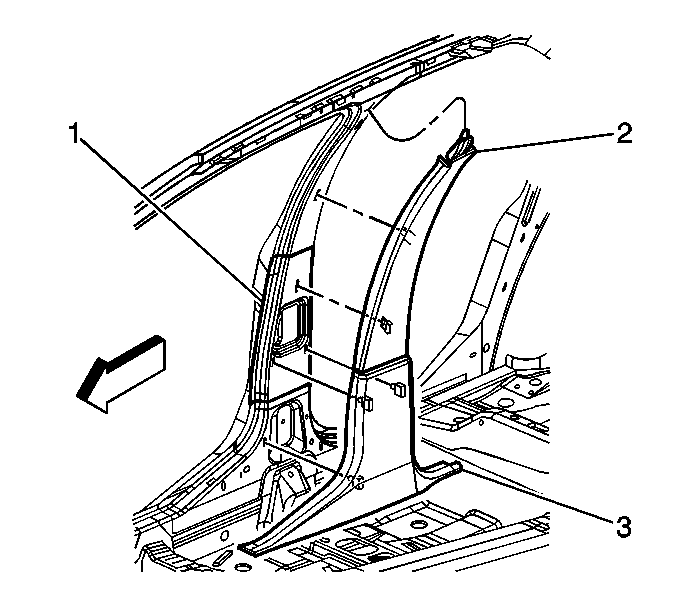
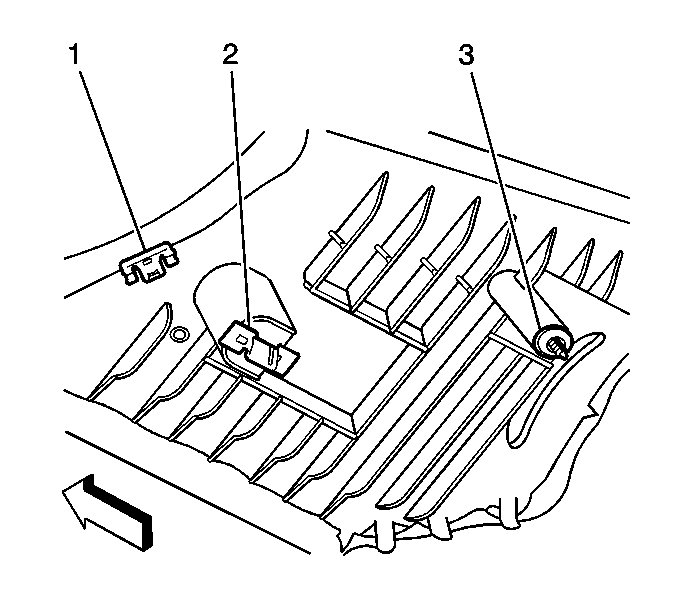
| 40.1. | Insert the upper metal integral clip (1) on the trim panel to the slot located in the headliner. |
| 40.2. | Insert the lower metal integral clip (2) to the sheet metal. |
| 40.3. | Position the plastic push-in retainer (3) to the hole in the sheet metal. |
| 40.4. | Press inward at the plastic retainer in order to secure. |
Tighten
Tighten the retaining screw to 2 N·m (18 lb in).
Tighten
Tighten the four lower attaching nuts to 9 N·m (80 lb in).
Tighten
Tighten the nut to 30 N·m (22 lb ft).
Tighten
Tighten the four attaching nuts to 9 N·m (80 lb in).
Courtesy Transportation
The General Motors Courtesy Transportation program is intended to minimize customer inconvenience when a vehicle requires a repair that is covered by the New Vehicle Limited Warranty. The availability of courtesy transportation to customers whose vehicles are within the warranty coverage period and involved in a product recall is very important in maintaining customer satisfaction. Dealers are to ensure that these customers understand that shuttle service or some other form of courtesy transportation is available and will be provided at no charge. Dealers should refer to the General Motors Service Policies and Procedures Manual for Courtesy Transportation guidelines.
Claim Information
Submit a Product Recall Claim with the information indicated below.
Repair Performed | Part Count | Part No. | Parts Allow | CC-FC | Labor Op | Labor Hours | Net Item |
|---|---|---|---|---|---|---|---|
Install Rainsense™ Circuit Harness | 0 | N/A | N/A | MA-96 | Y0021 | 0.9 | * |
Courtesy Transportation | N/A | N/A | N/A | MA-96 | ** | N/A | *** |
* -- The amount identified in the "Net Item" column should represent the sum total of the current GMSPO Dealer net price plus applicable Mark-Up for the actual amount of electrical tape, wire and two terminals needed to perform the required repairs, not to exceed $8.32. ** -- Submit courtesy transportation using normal labor operations for courtesy transportation as indicated in the GM Service Policies and Procedures Manual. *** -- The amount identified in the "Net Item" column should represent the actual dollar amount for courtesy transportation. | |||||||
Refer to the General Motors WINS Claim Processing Manual for details on Product Recall Claim Submission.
Customer Notification
General Motors will notify customers of this program on their vehicle (see copy of customer letter included with this bulletin).
Dealer Program Responsibility
All unsold new vehicles in dealers' possession and subject to this program MUST be held and inspected/repaired per the service procedure of this program bulletin BEFORE customers take possession of these vehicles.
Dealers are to service all vehicles subject to this program at no charge to customers, regardless of mileage, age of vehicle, or ownership, from this time forward.
Customers who have recently purchased vehicles sold from your vehicle inventory, and for which there is no customer information indicated on the dealer listing, are to be contacted by the dealer. Arrangements are to be made to make the required correction according to the instructions contained in this bulletin. This could be done by mailing to such customers a copy of the customer letter accompanying this bulletin. Program follow-up cards should not be used for this purpose, since the customer may not as yet have received the notification letter.
In summary, whenever a vehicle subject to this program enters your vehicle inventory, or is in your dealership for service in the future, you must take the steps necessary to be sure the program correction has been made before selling or releasing the vehicle.
December 2004Dear General Motors Customer:
This notice is sent to inform you that Cadillac is conducting a customer satisfaction program that affects certain 2005 Cadillac STS vehicles equipped with the Rainsense™ feature.
We have learned that the Rainsense™ feature on your vehicle may be inoperative due to an incorrect wiring harness. However, if you encounter conditions that require wipers, the vehicle's wiper system will operate properly when manually activated.
What We Will Do
To correct this condition, your Cadillac dealer will install the missing circuit harness. This service will be performed for you at no charge.
What You Should Do
We recommend that you contact your dealer to arrange a service date. Presenting the enclosed customer reply form to your dealer will assist in making the necessary correction in the shortest possible time. If you no longer own this vehicle, please check the appropriate box and provide the new owner information, if available.
Customer Reply Form
The enclosed customer reply form identifies your vehicle. Presentation of this form to your dealer will assist in making the necessary correction in the shortest possible time. If you no longer own this vehicle, please let us know by completing the form and mailing it back to us.
If you have any questions or need any assistance, just contact your dealer or the appropriate Customer Assistance Center at the number listed below. The Customer Assistance Center’s hours of operation are from 8:00 AM to 11:00 PM, EST, Monday through Friday.
Division | Number | Text Telephones (TTY) |
|---|---|---|
Cadillac | 1-866-982-2339 | 1-800-833-2622 |
Puerto Rico - English | 1-800-496-9992 |
|
Puerto Rico - Español | 1-800-496-9993 |
|
Virgin Islands | 1-800-496-9994 |
|
Guam | 1-671-648-8650 |
|
If your vehicle is within the New Vehicle Limited Warranty your dealer may provide you with shuttle service or some other form of courtesy transportation while your vehicle is at the dealership for this repair. Please refer to your Owner’s Manual and your dealer for details on Courtesy Transportation.
My GMLink Online
This free online service offers vehicle and ownership related information and tools tailored to your specific vehicle. To join, visit www.mygmlink.com , and enter your vehicle's 17-character vehicle identification number (VIN) shown on the enclosed form to get the most personalized information for your vehicle.
We sincerely regret any inconvenience or concern that this situation may cause you. We want you to know that we will do our best, throughout your ownership experience, to ensure that your Cadillac STS provides you many miles of enjoyable driving.
General Motors Corporation
Enclosure
04102
