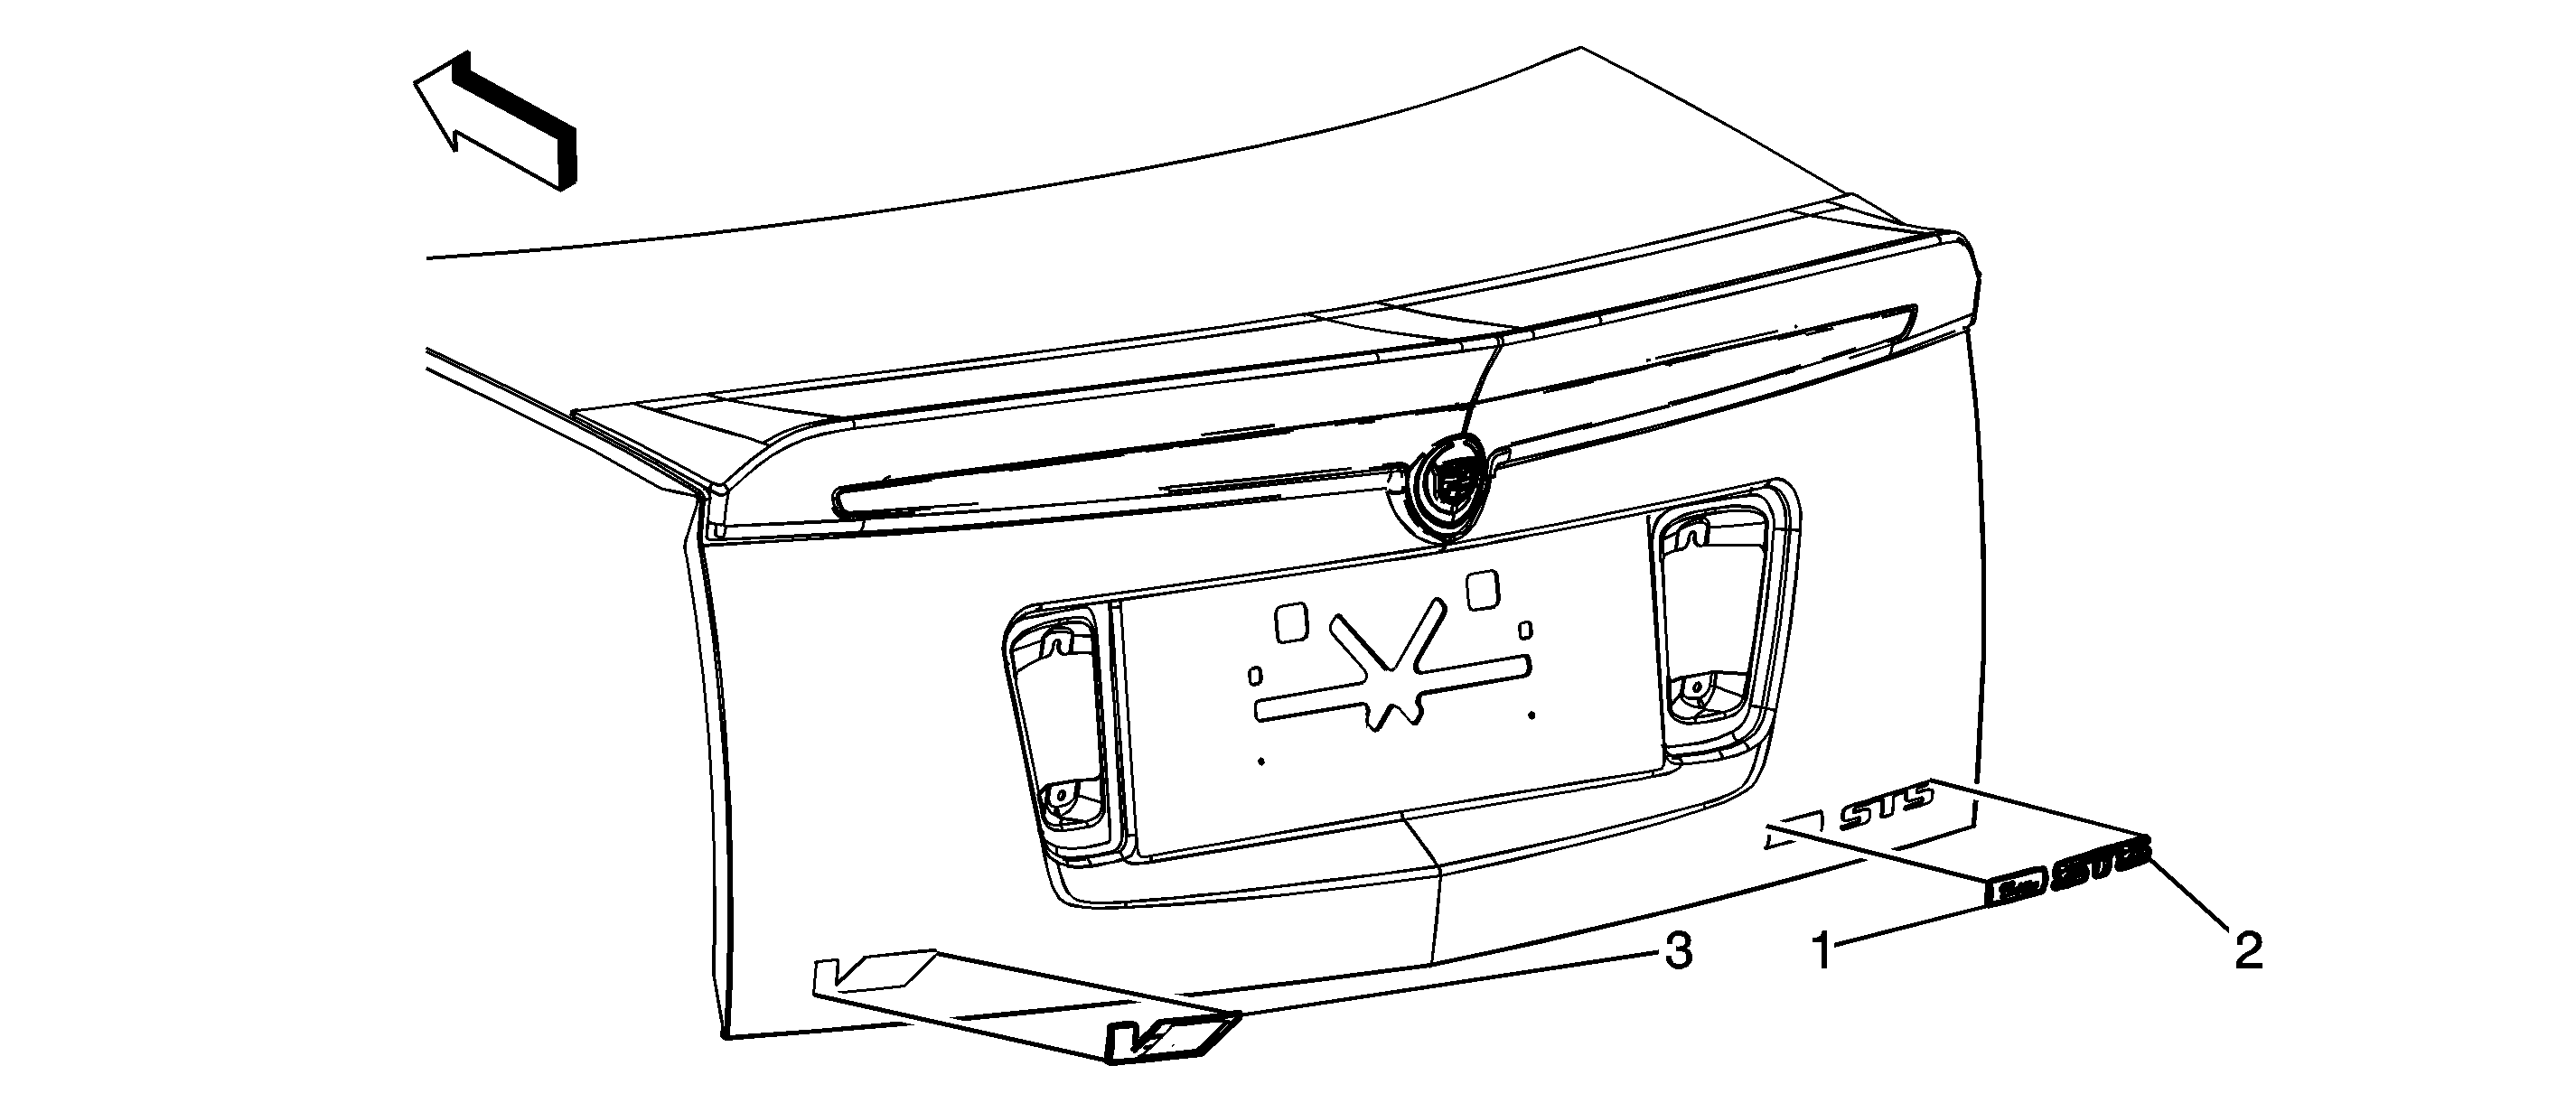
Callout
| Component Name
|
Preliminary Procedure
- Using a
J 25070
in a circular motion, warm the rear compartment lid emblems/nameplates prior to removal. Carefully clean the panel thoroughly prior to bonding the new emblems/nameplates to the
rear compartment lid.
- Ensure the rear compartment lid is in the closed position prior to the installation of the new emblems/nameplates.
Special ToolsJ 25070
Heat Gun
|
1
| Rear Compartment Lid Nameplate Assembly (Cadillac)
Notice: Refer to Exterior Trim Emblem Removal Notice in the Preface section.
Procedure
- Clean the adhesive tape from the surface of the rear compartment lid and dry thoroughly before applying new nameplate.
- Peel protective backing from emblem and ensure no foreign matter or dirt comes in contact with the adhesive backing prior to installation.
- Install the emblem and apply pressure to ensure full adhesion to the rear compartment lid.
|
2
| Rear Compartment Lid Emblem Assembly (STS Emblem)
Procedure
- Clean the adhesive tape from the surface of the rear compartment lid and dry thoroughly before applying the new emblem.
- Peel protective backing from the emblem and ensure no foreign matter or dirt comes in contact with the adhesive backing prior to installation.
- Position the emblem to the rear compartment lid.
- Install the emblem and apply pressure to ensure full adhesion to the rear compartment lid.
|
3
| Rear Compartment Lid Emblem Assembly (V Emblem)
Procedure
- Clean the adhesive tape from the surface of the rear compartment lid and dry thoroughly before applying the new emblem.
- Peel protective backing from the emblem and ensure no foreign matter or dirt comes in contact with the adhesive backing prior to installation.
- Install the emblem and apply pressure to ensure full adhesion to the rear compartment lid.
|

