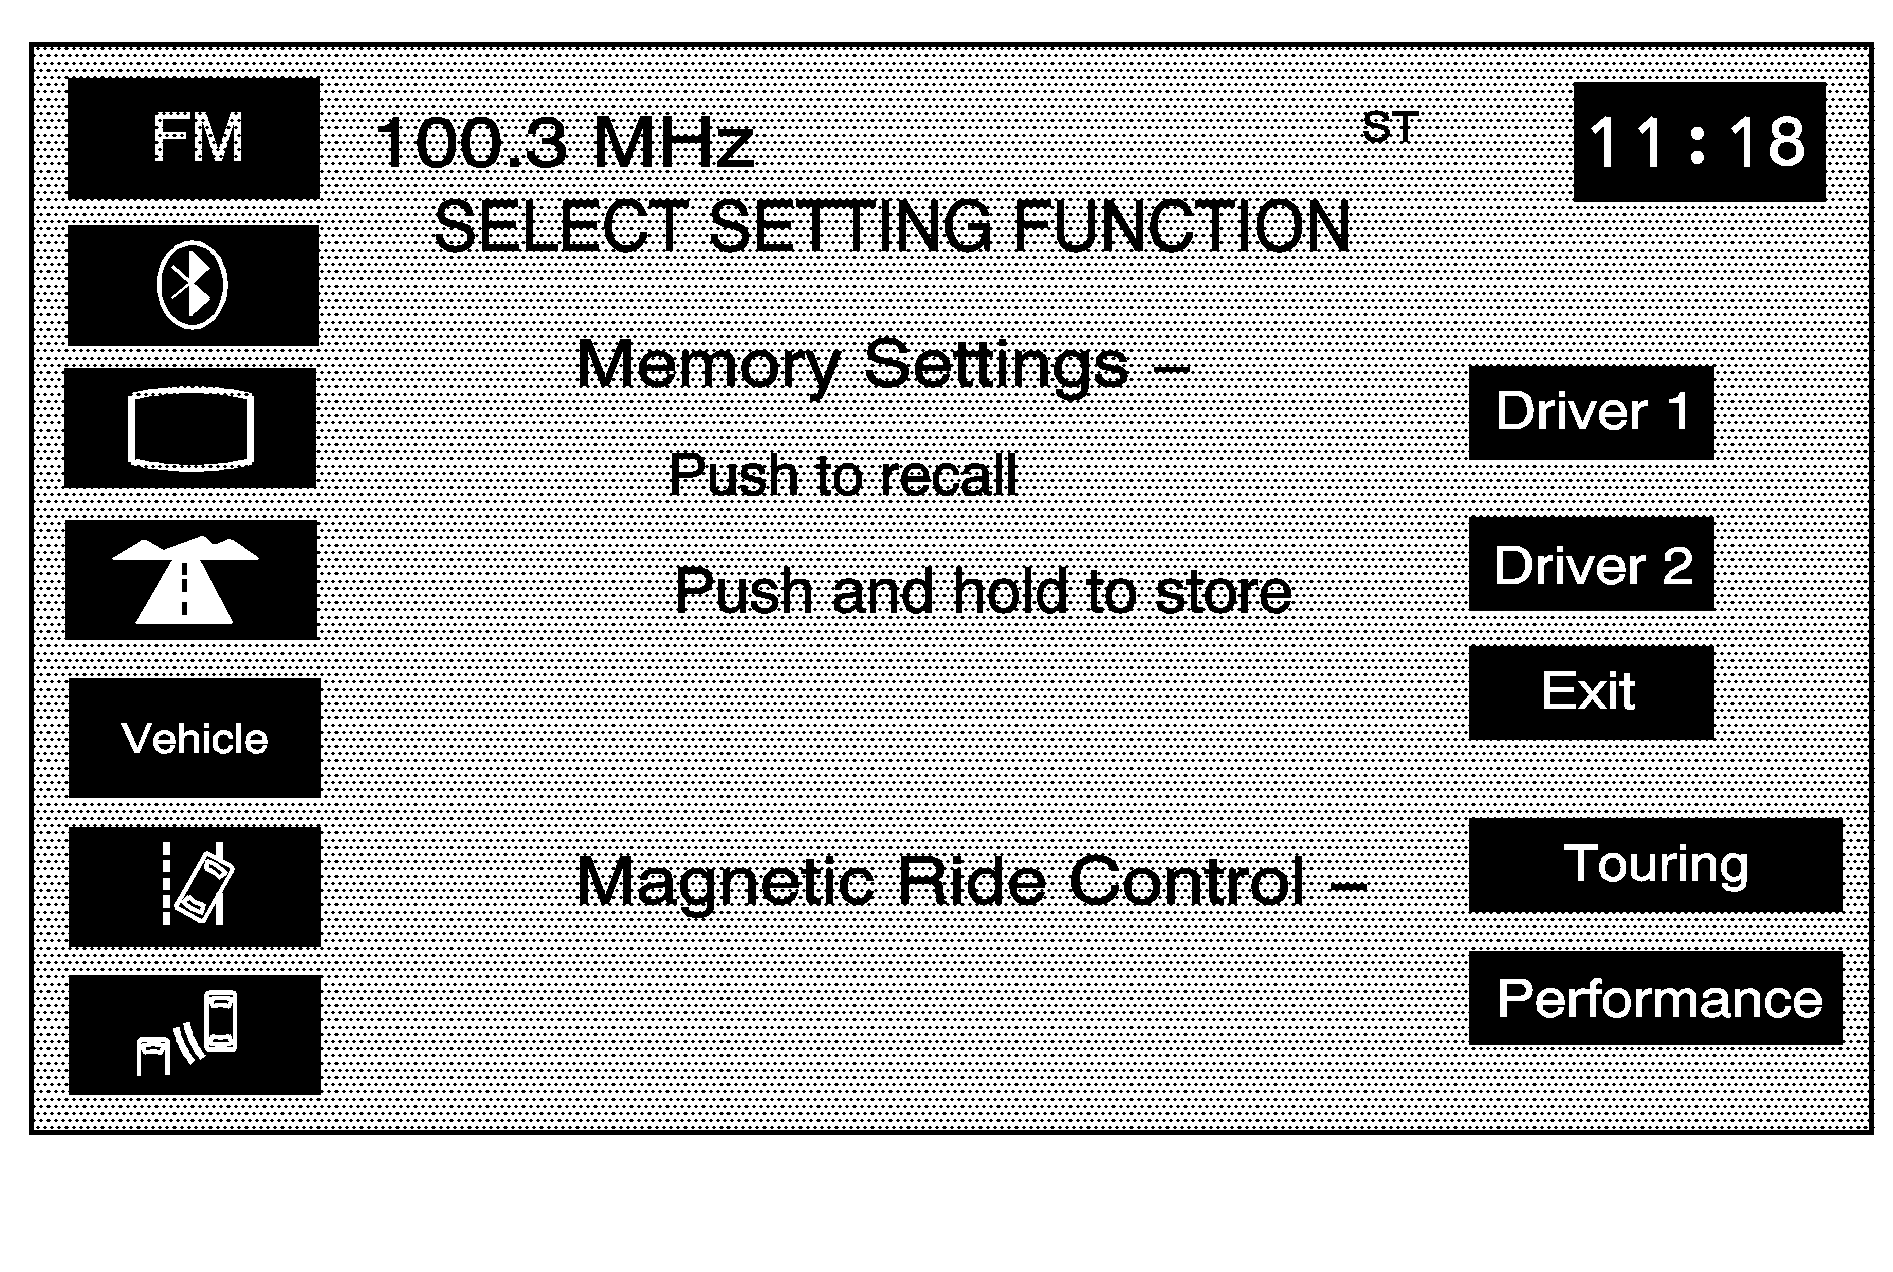
Press the CONFIG hard key to access this menu, allowing adjustment of several of the systems features and preferences.
Bluetooth®
(Bluetooth®): Touch to access the Bluetooth® setup screen. See Bluetooth® Phone for more information on the Bluetooth® system.Screen Appearance
(Screen Appearance): Touch to access the appearance screen menu.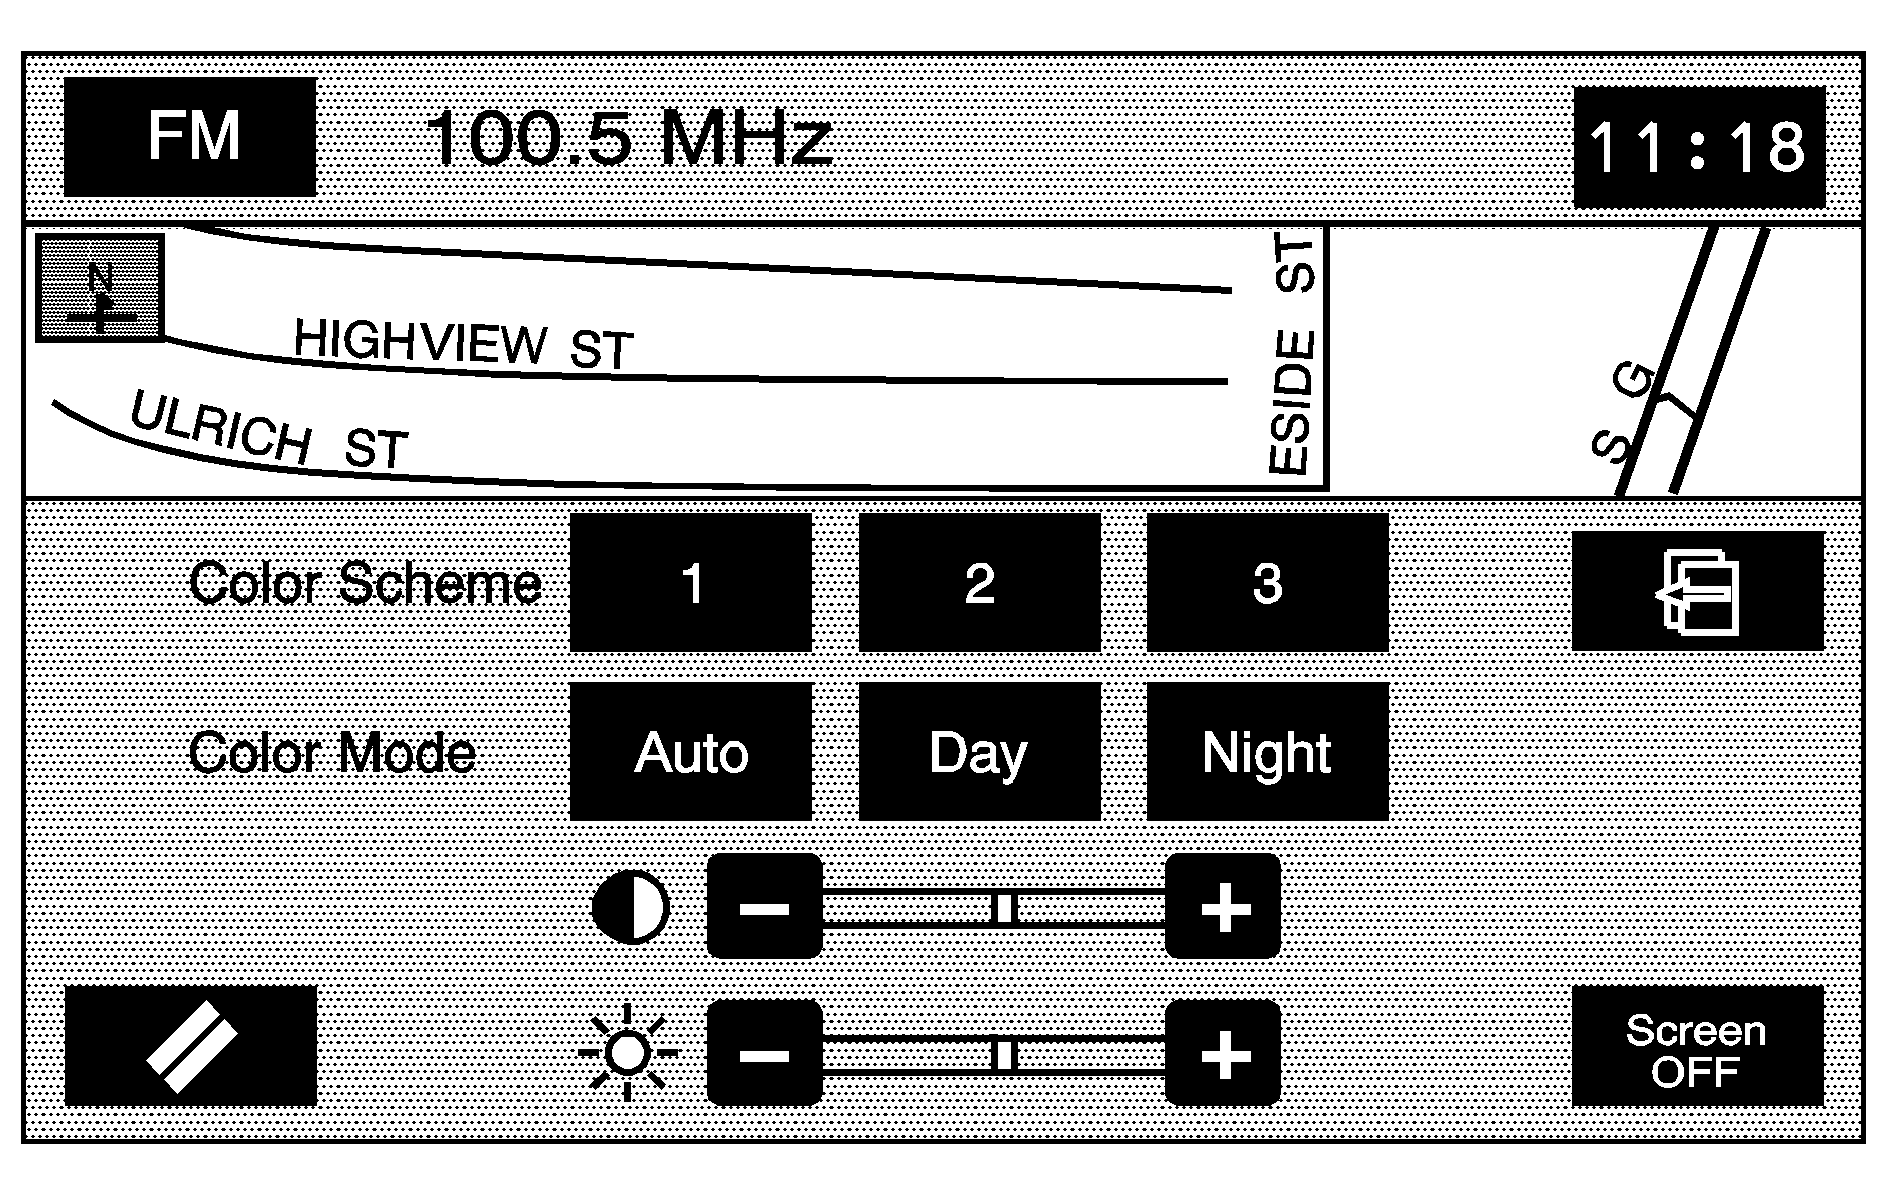
From this menu, several options may be adjusted:
Color Scheme: Choose between three different screen color schemes by touching 1 (blue), 2 (green), or 3 (brown).Color Mode: Adjusts the screen mode between Auto, Day, and Night. Day mode changes the navigation system screen to a lighter background for better viewing in the daytime. Night mode changes the navigation system screen to a darker background for better viewing at night. Auto mode adjusts the screen automatically depending on exterior lighting conditions.
(Contrast): Adjusts the contrast of the navigation screen. Touch the plus (+) or minus (-) signs on either side of the contrast bar graph to increase or decrease the contrast.
(Brightness): Adjusts the brightness of the navigation screen. Touch the plus (+) or minus (-) signs on either side of the brightness bar graph to increase or decrease the brightness.
Screen OFF: Turns the navigation screen off. Touch any hard key to turn the screen back on.
Navigation Set Up
(Navigation Set Up): Touch to access the NAVIGATION SET UP screen.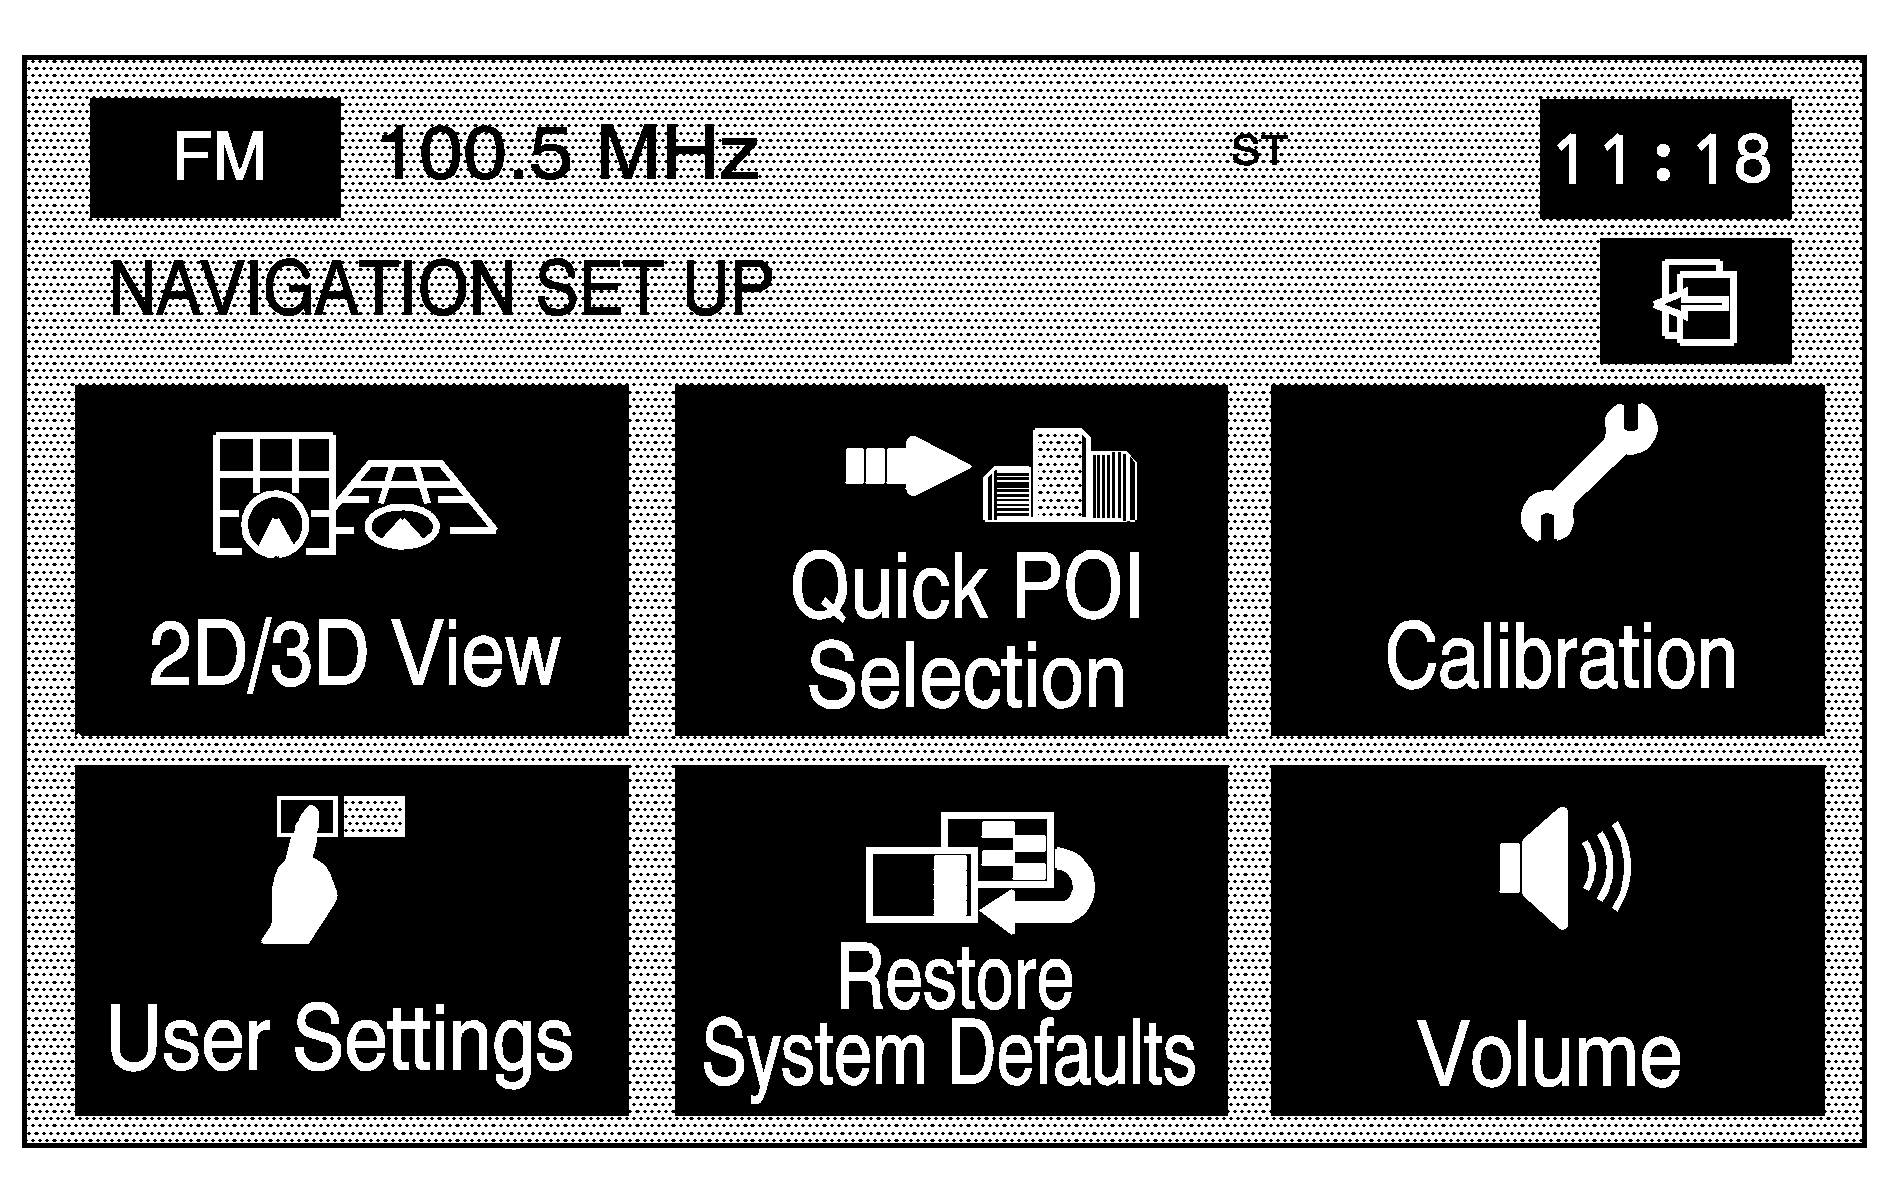
From this menu, several options are available for adjustment:
2D/3D View: Changes the view of the map screen and the guidance screen between a 2-dimensional and 3-dimensional view. When changing the map to the 3-dimensional view, use the up/down arrows to change the angle of the map. Select Default to return to the factory settings (2-dimensional).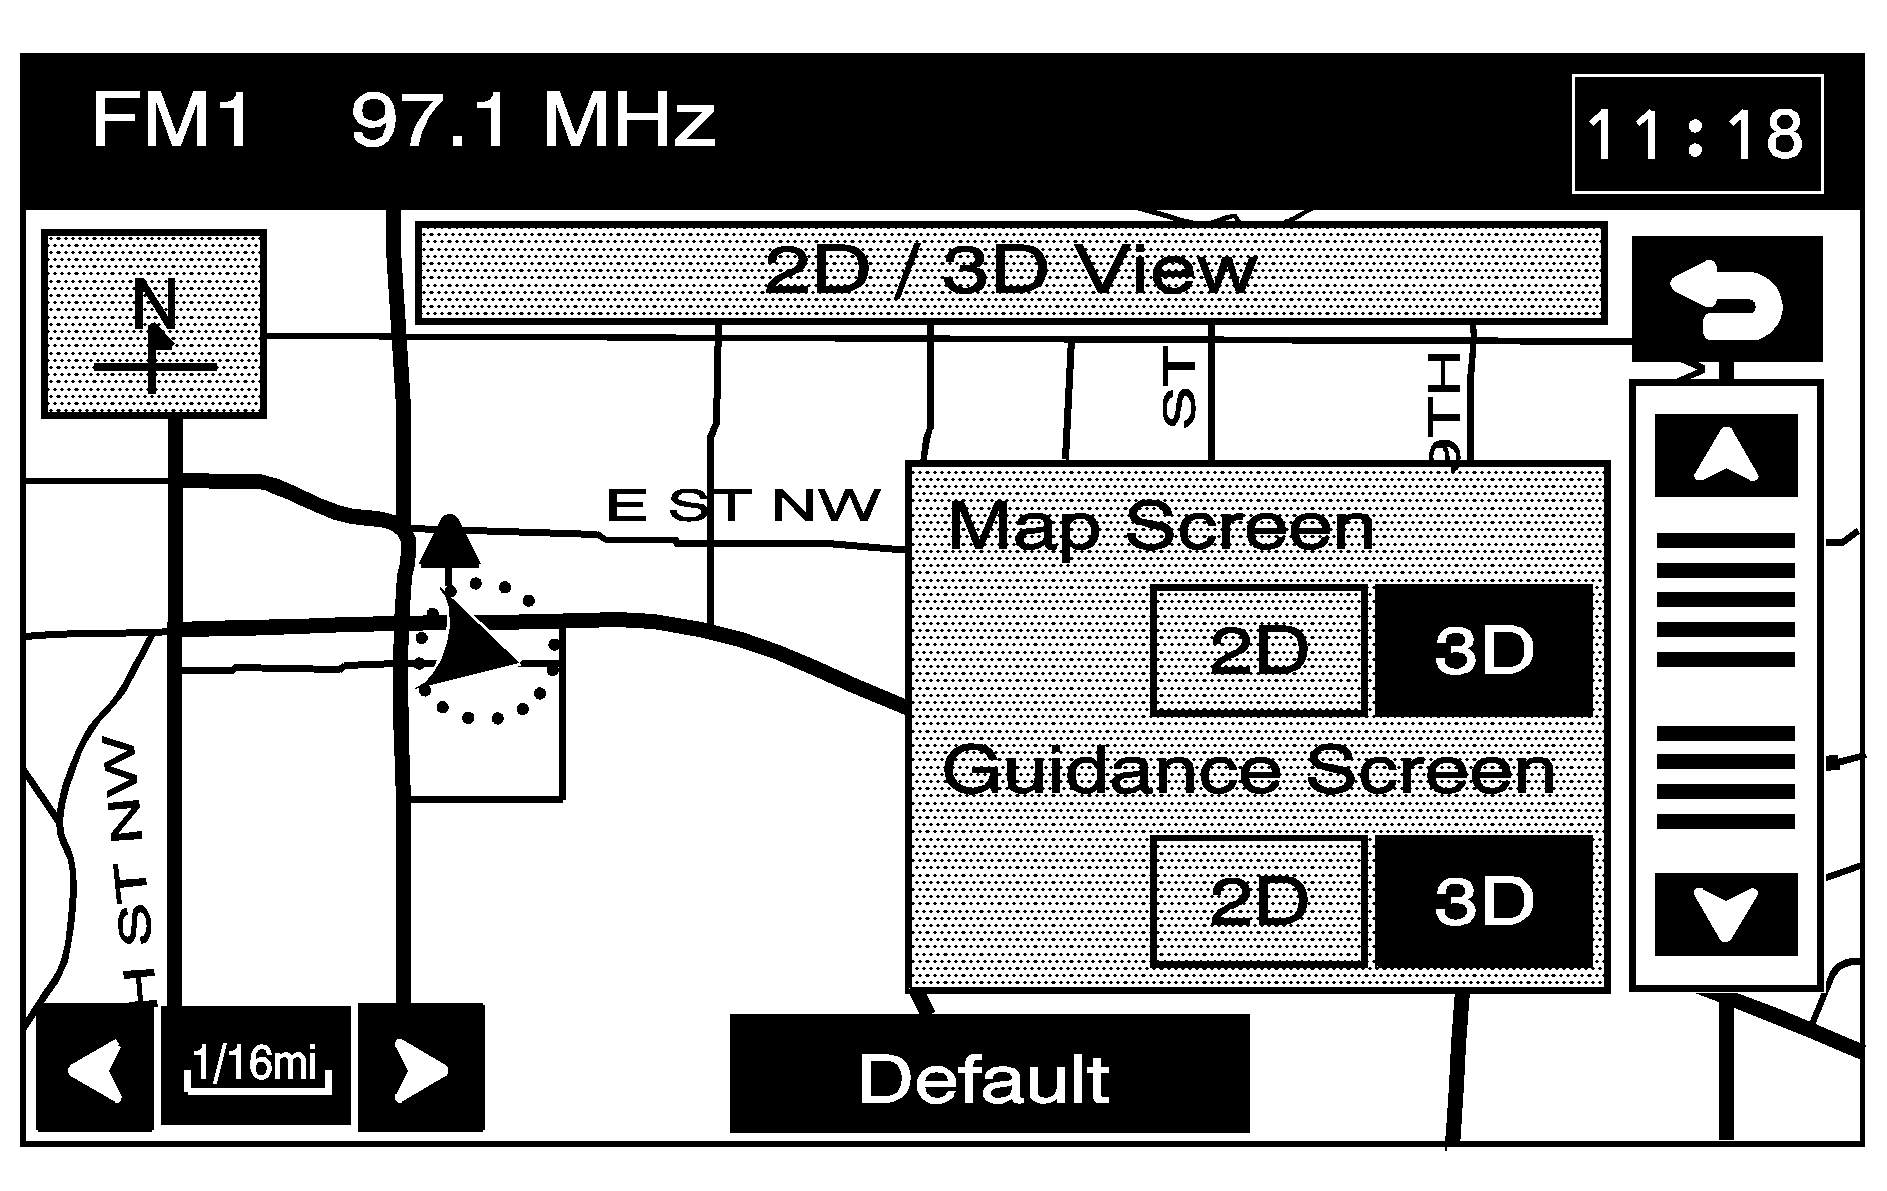
Quick POI Selection: Sets six Point of Interest (POI) categories that can be selected from while driving.
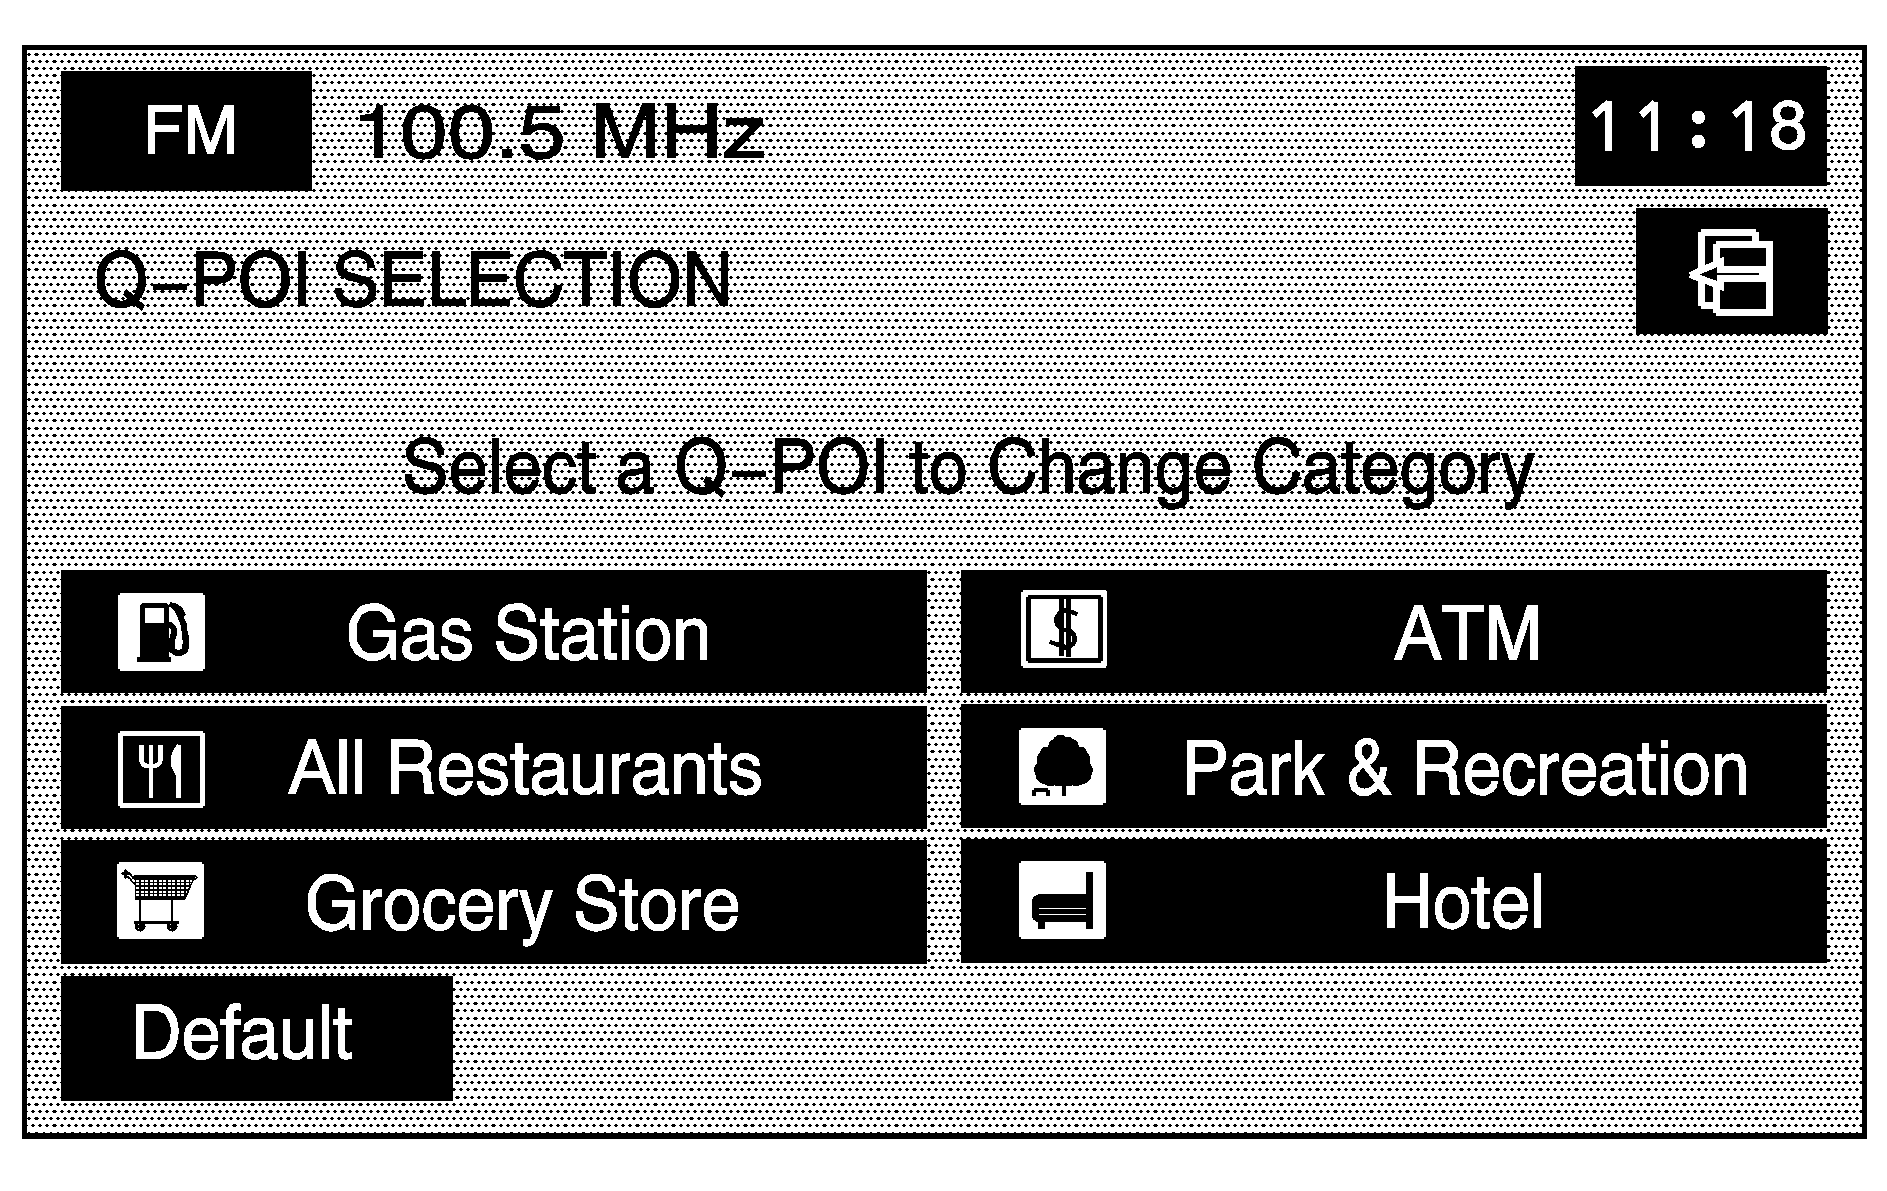
To set the Quick POI selection:
- Select the Quick POI Selection screen button.
- Select the sub-category to be replaced.
- Select a Quick POI category from the Quick POI selection menu list.
- Pick the subcategory from the list that appears.
The system automatically returns to the Quick POI Selection screen. The category changes are now saved.
To change back to the system generated choices, touch the Default screen key.
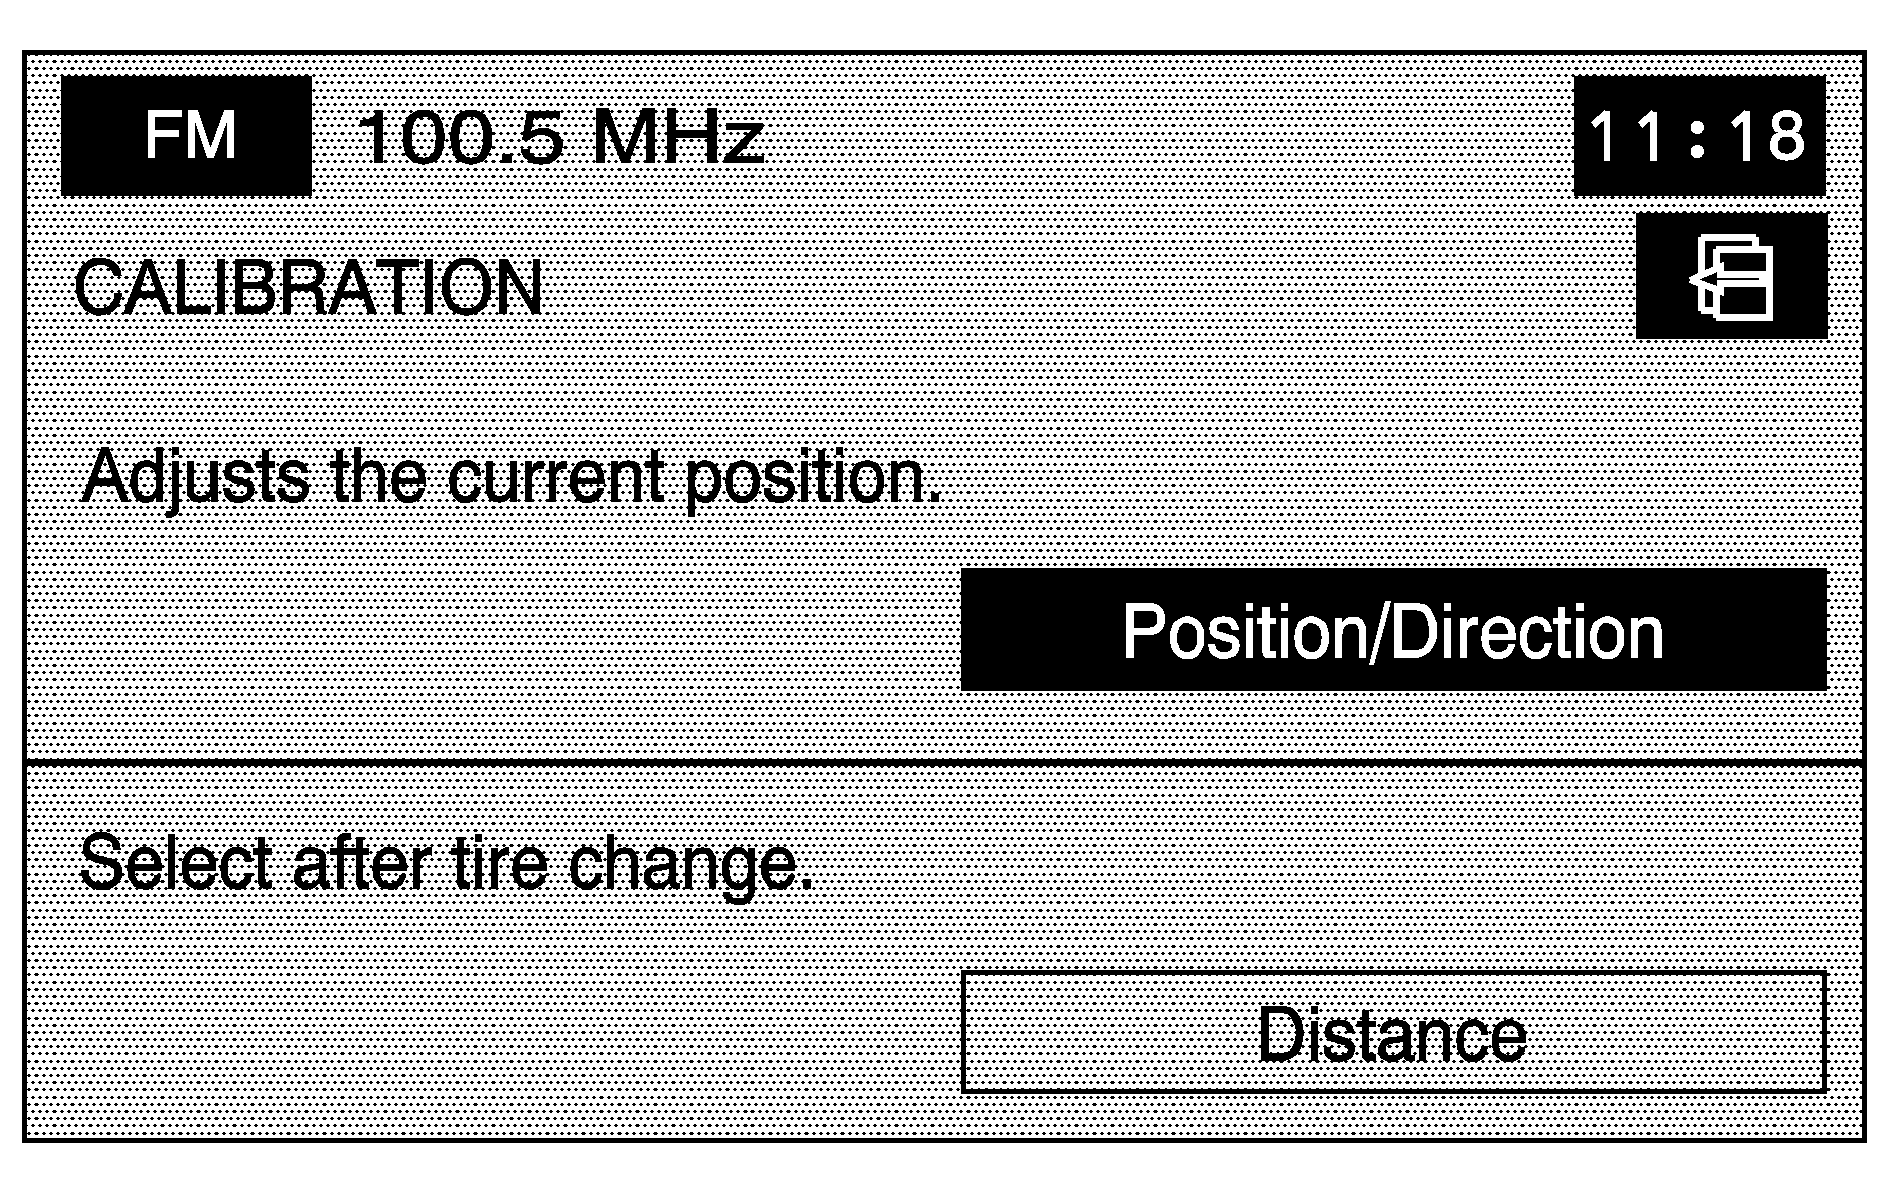
The Calibration screen adjusts the vehicle's position or the vehicle speed signal.
To correct the position of the vehicle on the map (for example, if your vehicle has been shipped) or to change to the current position.
- Select the Position/Direction screen button.
- To change the vehicle's position, touch the map screen.
- Touch the OK screen button once the vehicle is in the current position.
- To change the direction of the vehicle, press either arrow screen button to rotate the vehicle to the correct direction.
- Once the vehicle is facing the correct direction, select the OK screen button.
The map screen displays with the vehicle's current position.
Use the zoom in/out function to view the direction of the desired area.
Pressing/holding and dragging on the map activates fast scrolling. Press/touch once on the area to which you would like to move the current position mark.
If a route had already been set, the map screen displays, select Guide to change the route to the vehicle's new position.
Once the process of changing the vehicle's current position is complete, the map screen displays with rotate arrow screen buttons around the vehicle.
See Problems with Route Guidance for more information.
If there are tire pressure differences or a spare tire is installed, the system automatically recalibrates the system, but it may take longer. To calibrate the vehicle speed signal, touch the Distance screen key. See Vehicle Positioning for more information.
User Settings: Turns several other route guidance setting options on or off.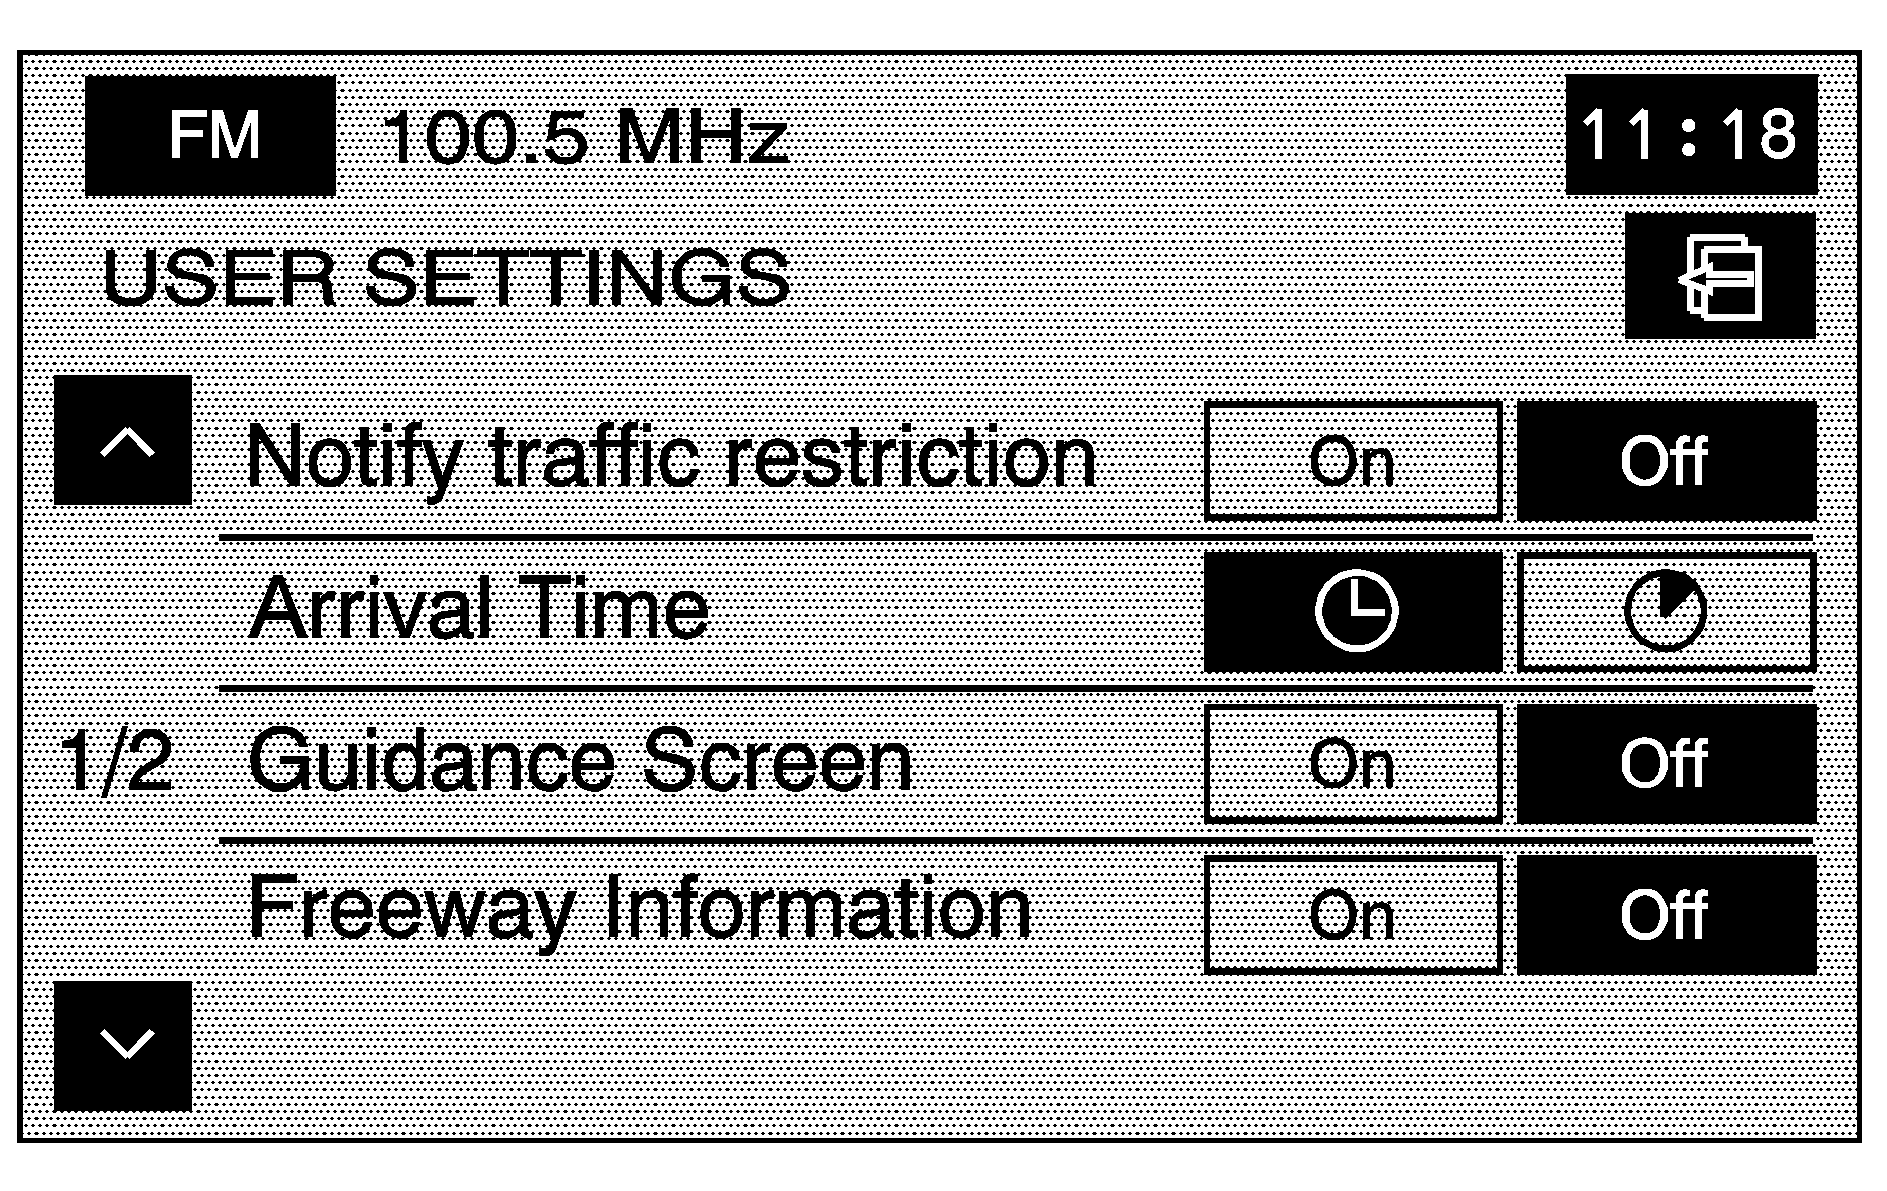
Adjustments from this screen:
Notify traffic restriction: This option instructs the system to notify when the current route has traffic restrictions (e.g. winter time).Arrival Time (Time of Arrival): This option displays the estimated time of arrival to the destination.
Arrival Time (Time to Destination): This option displays how much time remains to reach the destination.
Guidance Screen: This option turns the guidance screen on and off. When the guidance screen option is on, the guidance screen will pop-up when approaching a turn.
Freeway Information: When on, this option automatically displays freeway information in the guidance window while on a freeway during route guidance. Select the Off screen button to not display this guidance window.
Text size on map: Adjusts the text size on the map between Large, Medium, and Small. This option is located on the second page of the USER SETTINGS screen. Touch the down arrow to access this option.
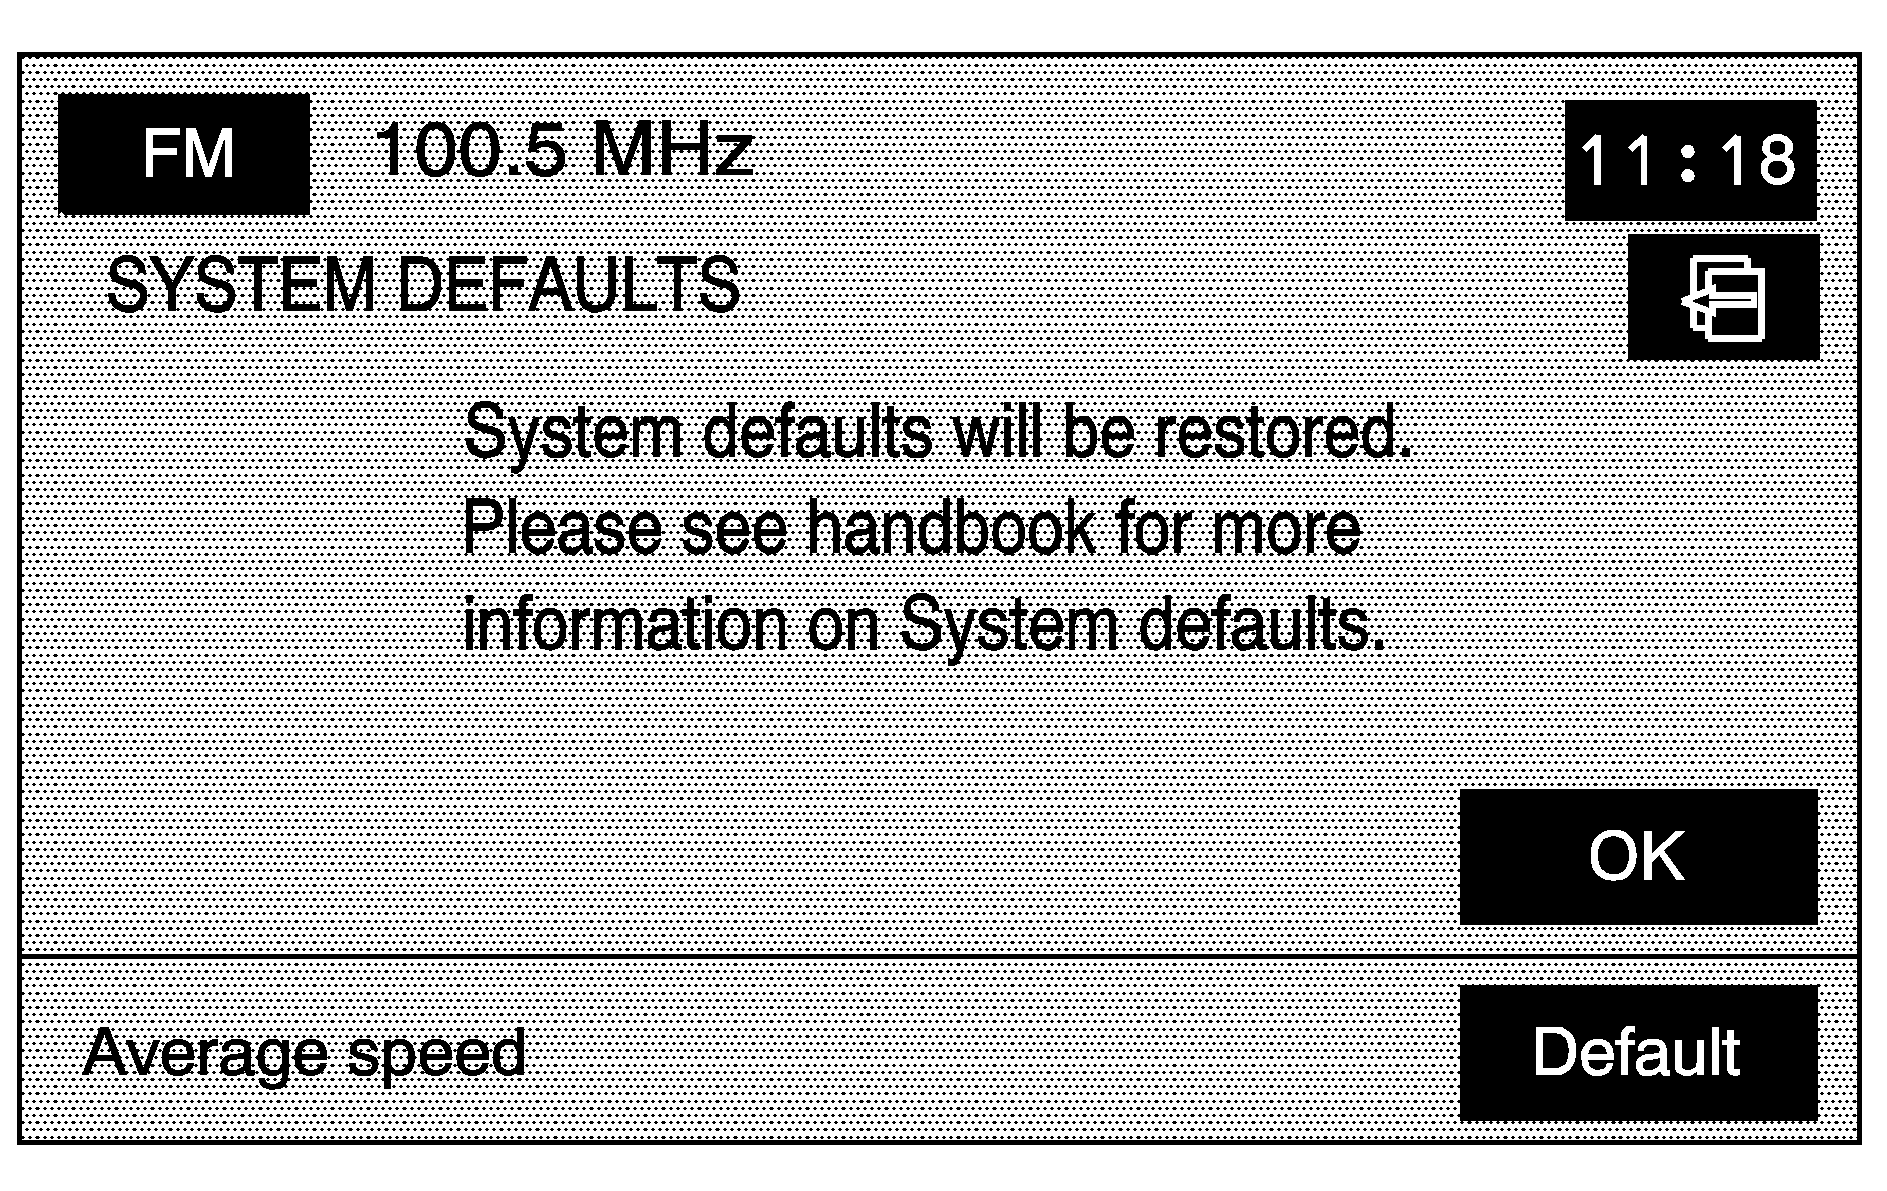
Restore System Defaults: Select this option from the NAVIGATION SET UP screen to change all adjustable system settings to factory defaults.
Average Speed: Sets the average speed to default. The system monitors the speed on different roads and updates the average speed the vehicle travels at. This average speed is used to calculate the time it takes to reach the destination when a route is set.
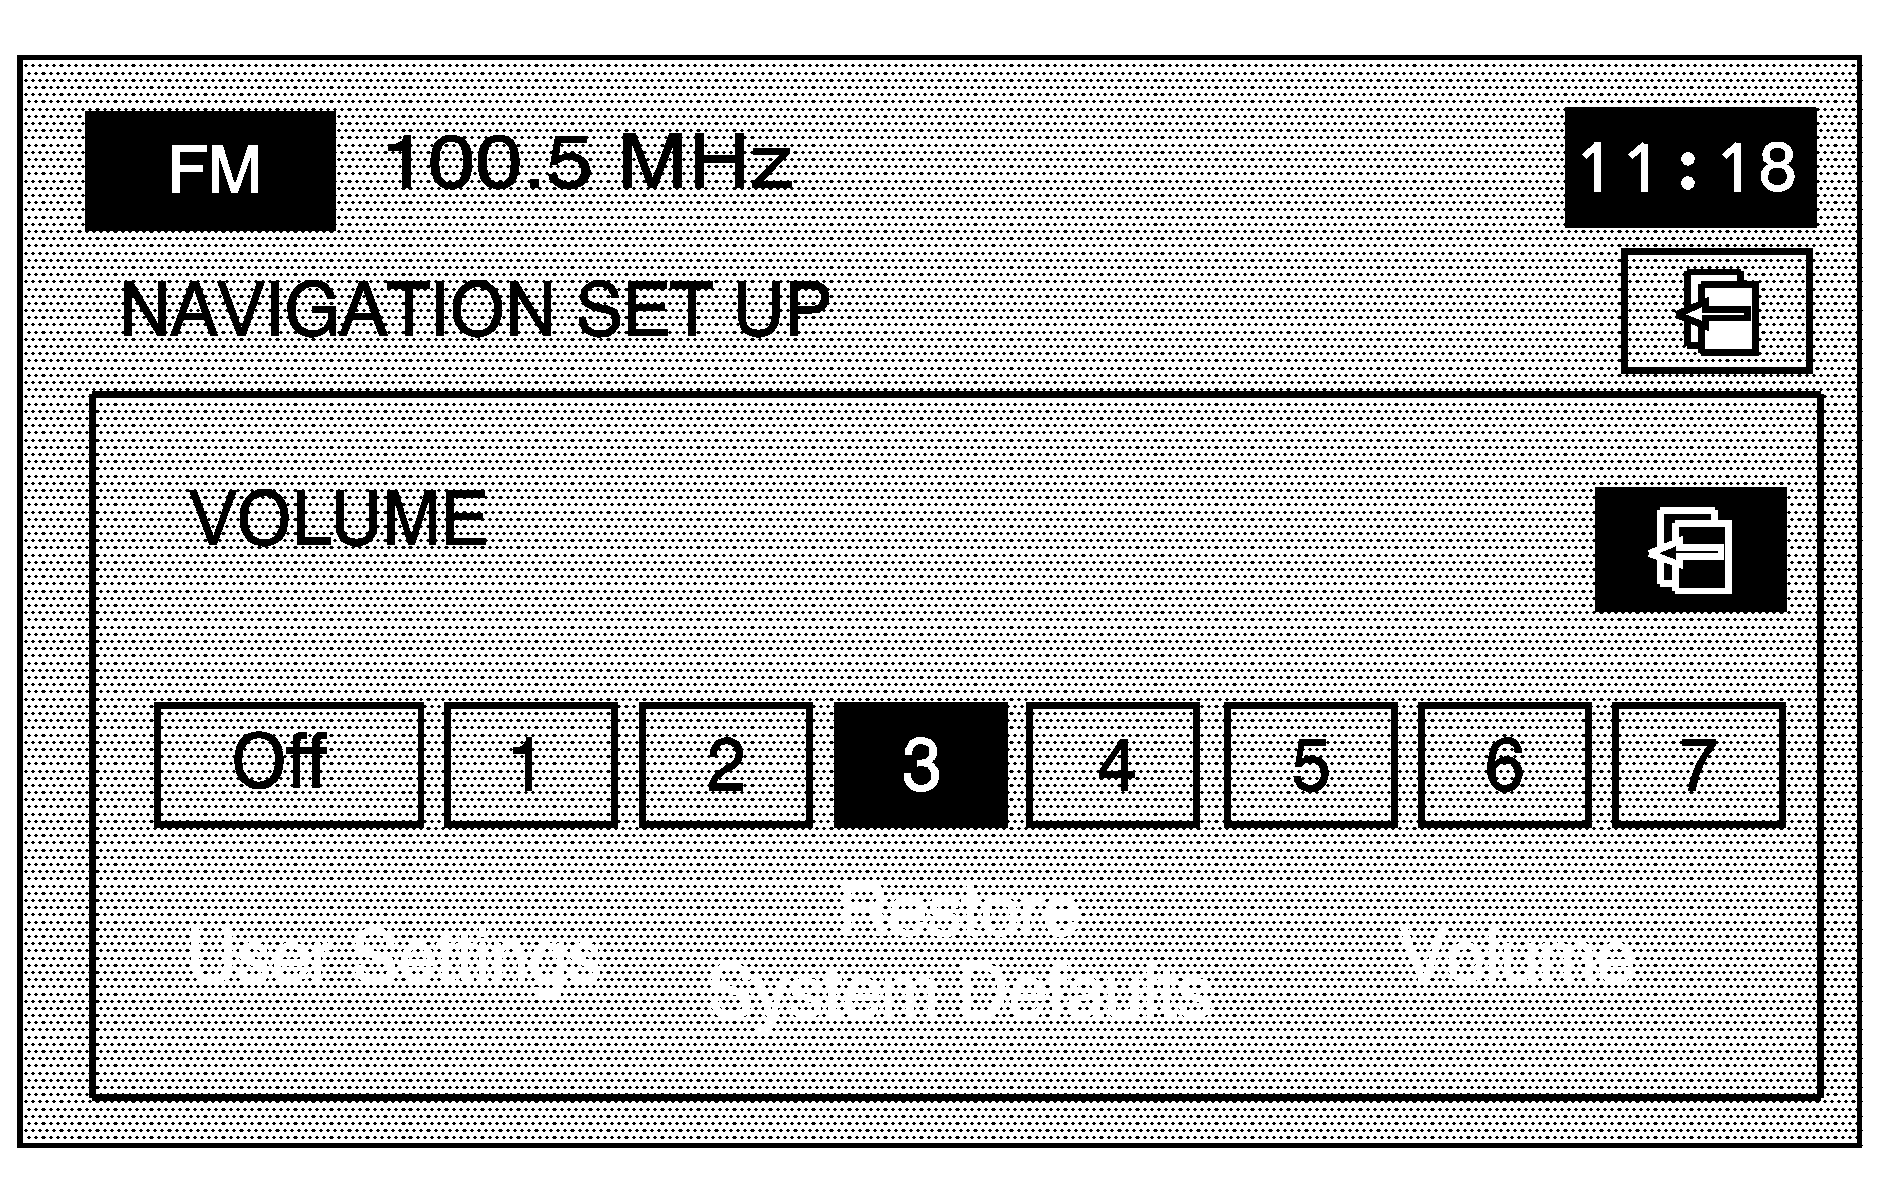
Volume: Adjusts the volume of voice guidance prompts and the voice recognition system. Voice guidance prompts can also be turned off.
Vehicle
Vehicle: Touch to access the vehicle information menu. From this menu, adjust such options as the language, personal settings, and memory options. See Personalization for more information on language and personal settings and see "Memory Settings" later in this section.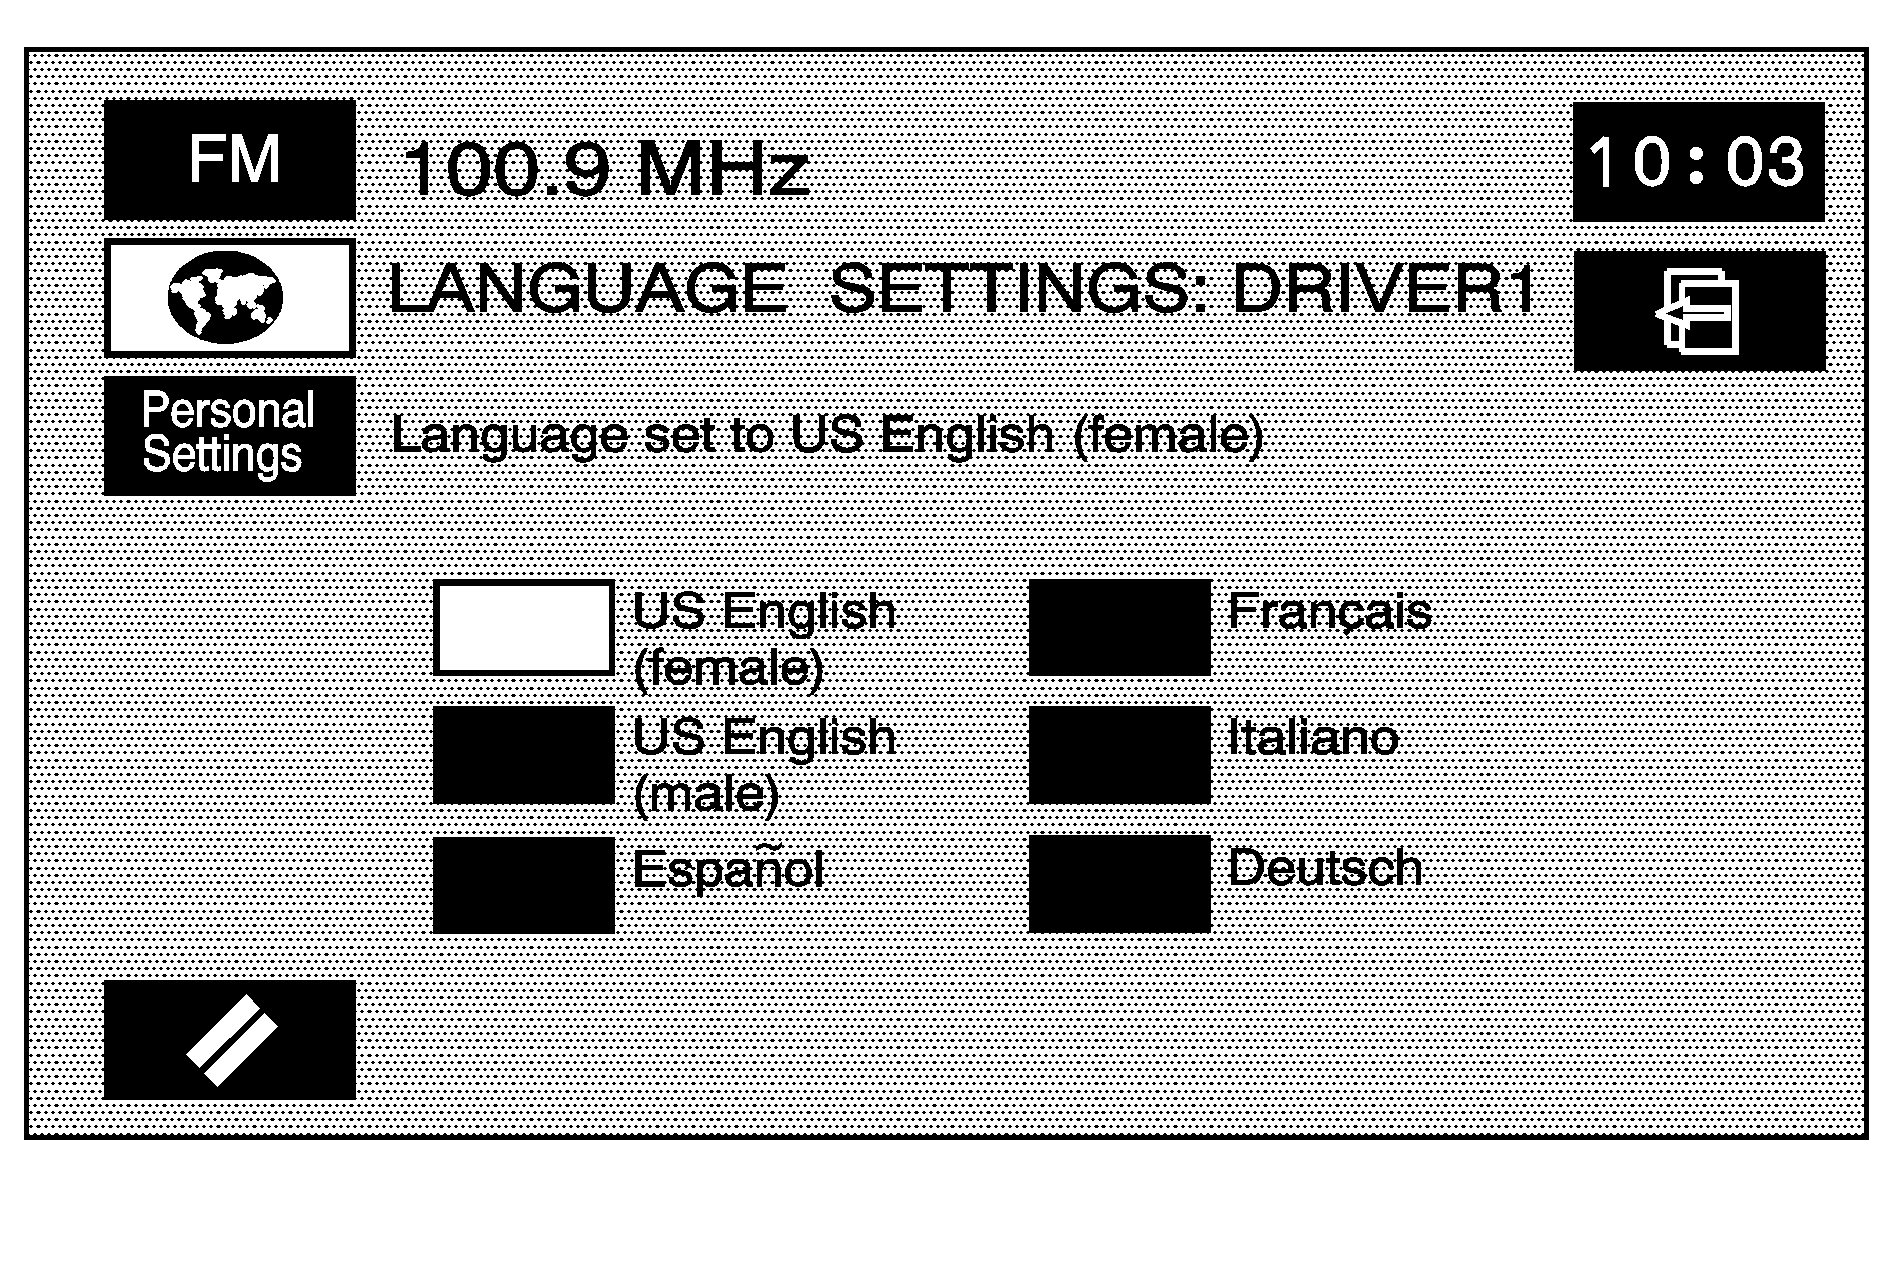
Clock
(Clock Adjust): Touch and hold this screen button in the upper right corner of the screen to access the Clock Adjust screen and adjust several time features.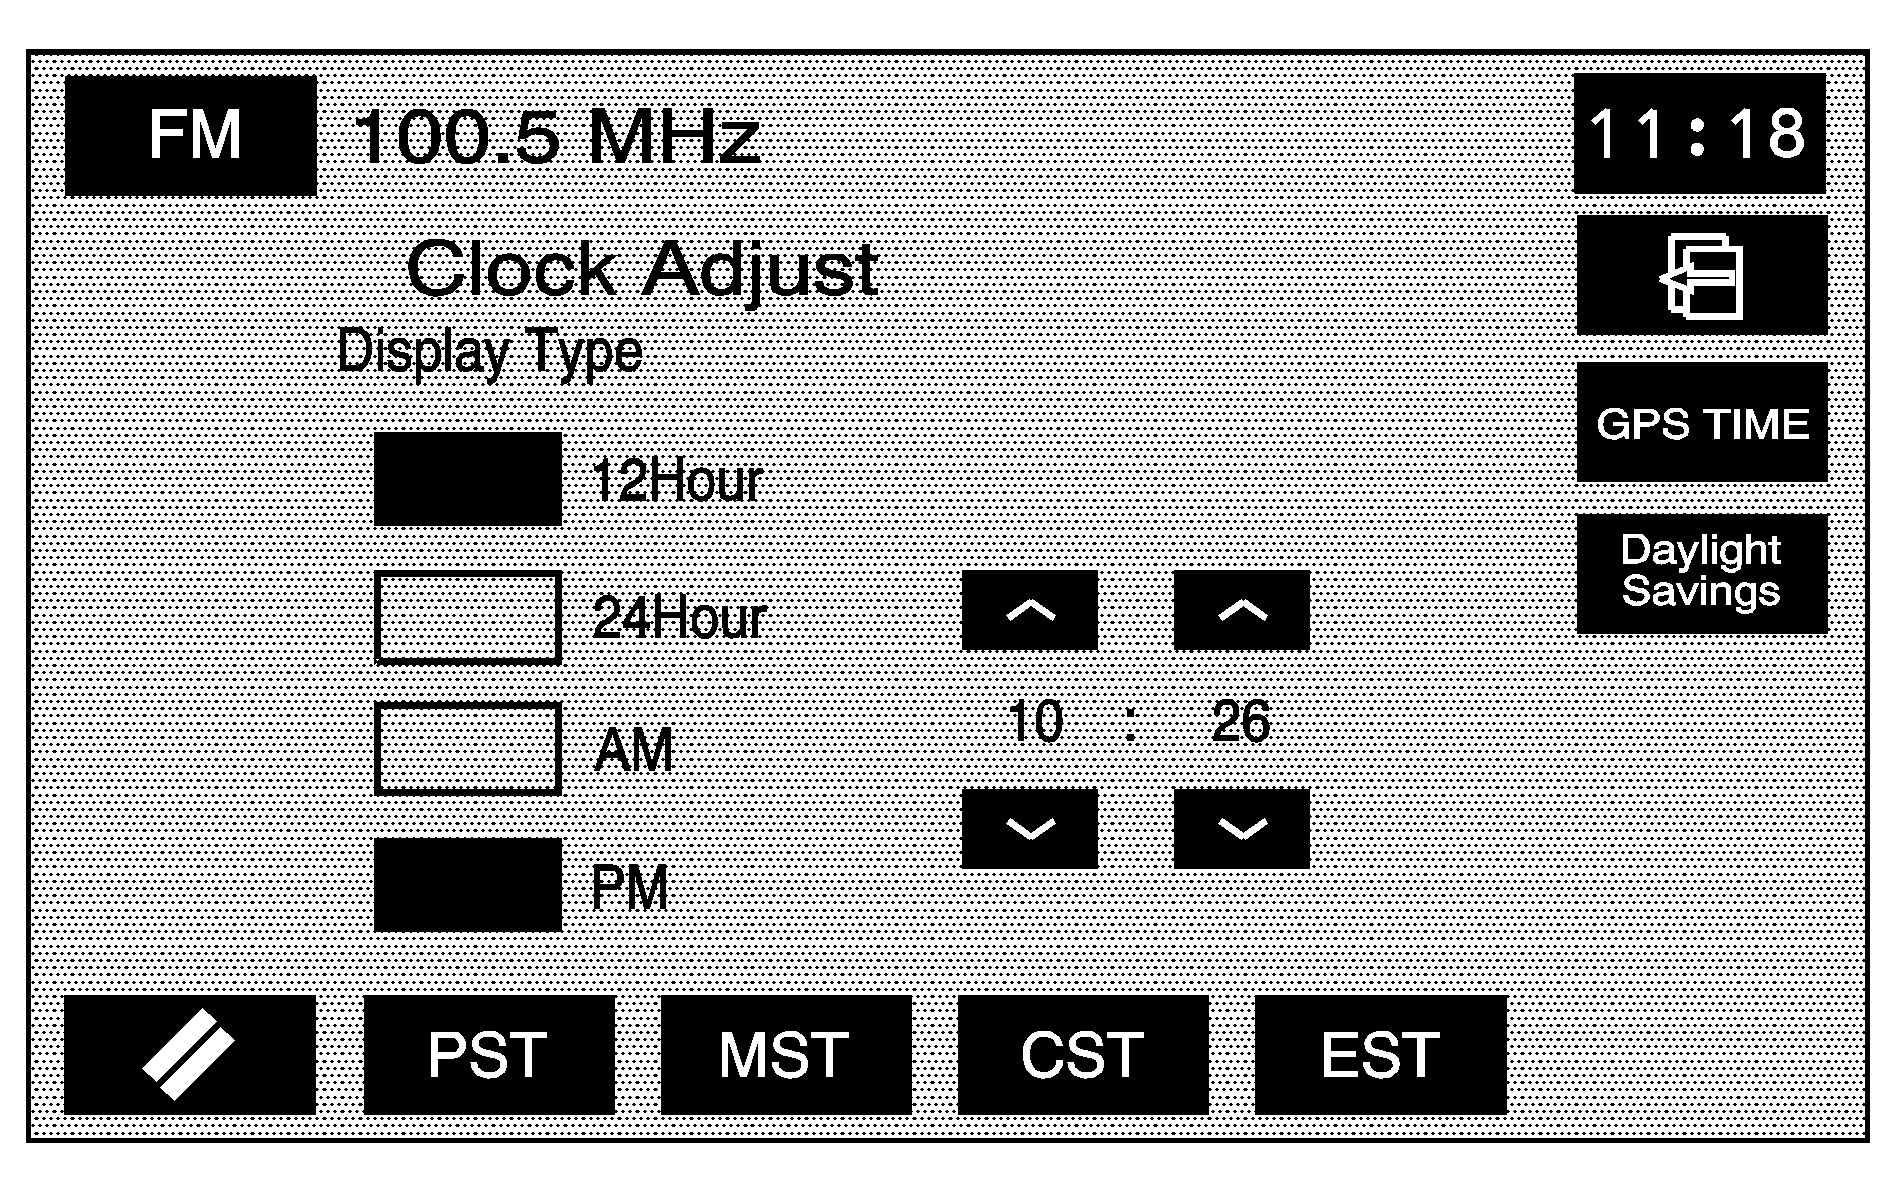
Adjustments from this screen:
12Hour: Touch to display the time in standard AM/PM format.24Hour: Touch to display the time in military format.
AM: Touch when setting the time in AM.
PM: Touch when setting the time in PM.
PST, MST, CST, EST: Touch one of these screen buttons to choose between Pacific Standard Time (PST), Mountain Standard Time (MST), Central Standard Time (CST), and Eastern Standard Time (EST).
GPS TIME: Touch to match the navigation system's time to GPS time.
Daylight Savings: Touch to increase the time by one hour. Touch this screen button again to turn this feature off and decrease the time by one hour.
/ : Touch the up arrow to increase the hour or minutes. Touch the down arrow to decrease the hour or minutes.
Memory Settings
If the vehicle has the memory feature, memory settings for the following features, for up to two drivers, can be programmed and recalled:
| • | The driver seat position. |
| • | The outside rearview mirrors position. |
| • | The telescopic steering column position. |
| • | The language, radio and XM™ presets, tone, volume, playback mode (AM/FM or CD), last displayed stations, and CD position are set automatically. |
| • | The last climate control setting is set automatically. |
| • | The Head-Up Display (HUD) position, if equipped, is set automatically. |
| • | The navigation systems previous destinations, stored memory points, nametags, paired phones, navigation voice prompts, etc. are stored automatically. |
| • | Other personalization settings, for example, remote start settings. |
Memory Infotainment Settings and Presets
These settings and presets are set automatically. They include:
| • | Radio presets |
| • | Navigation |
| • | Address Book |
| • | Language |
| • | HUD display |
| • | Climate control settings |
For more information, see each item in the Index of the vehicle's owner manual.
Memory features are programmed and recalled through the navigation system and the voice recognition system.
Store Memory Settings
Displayed on Configure Menu
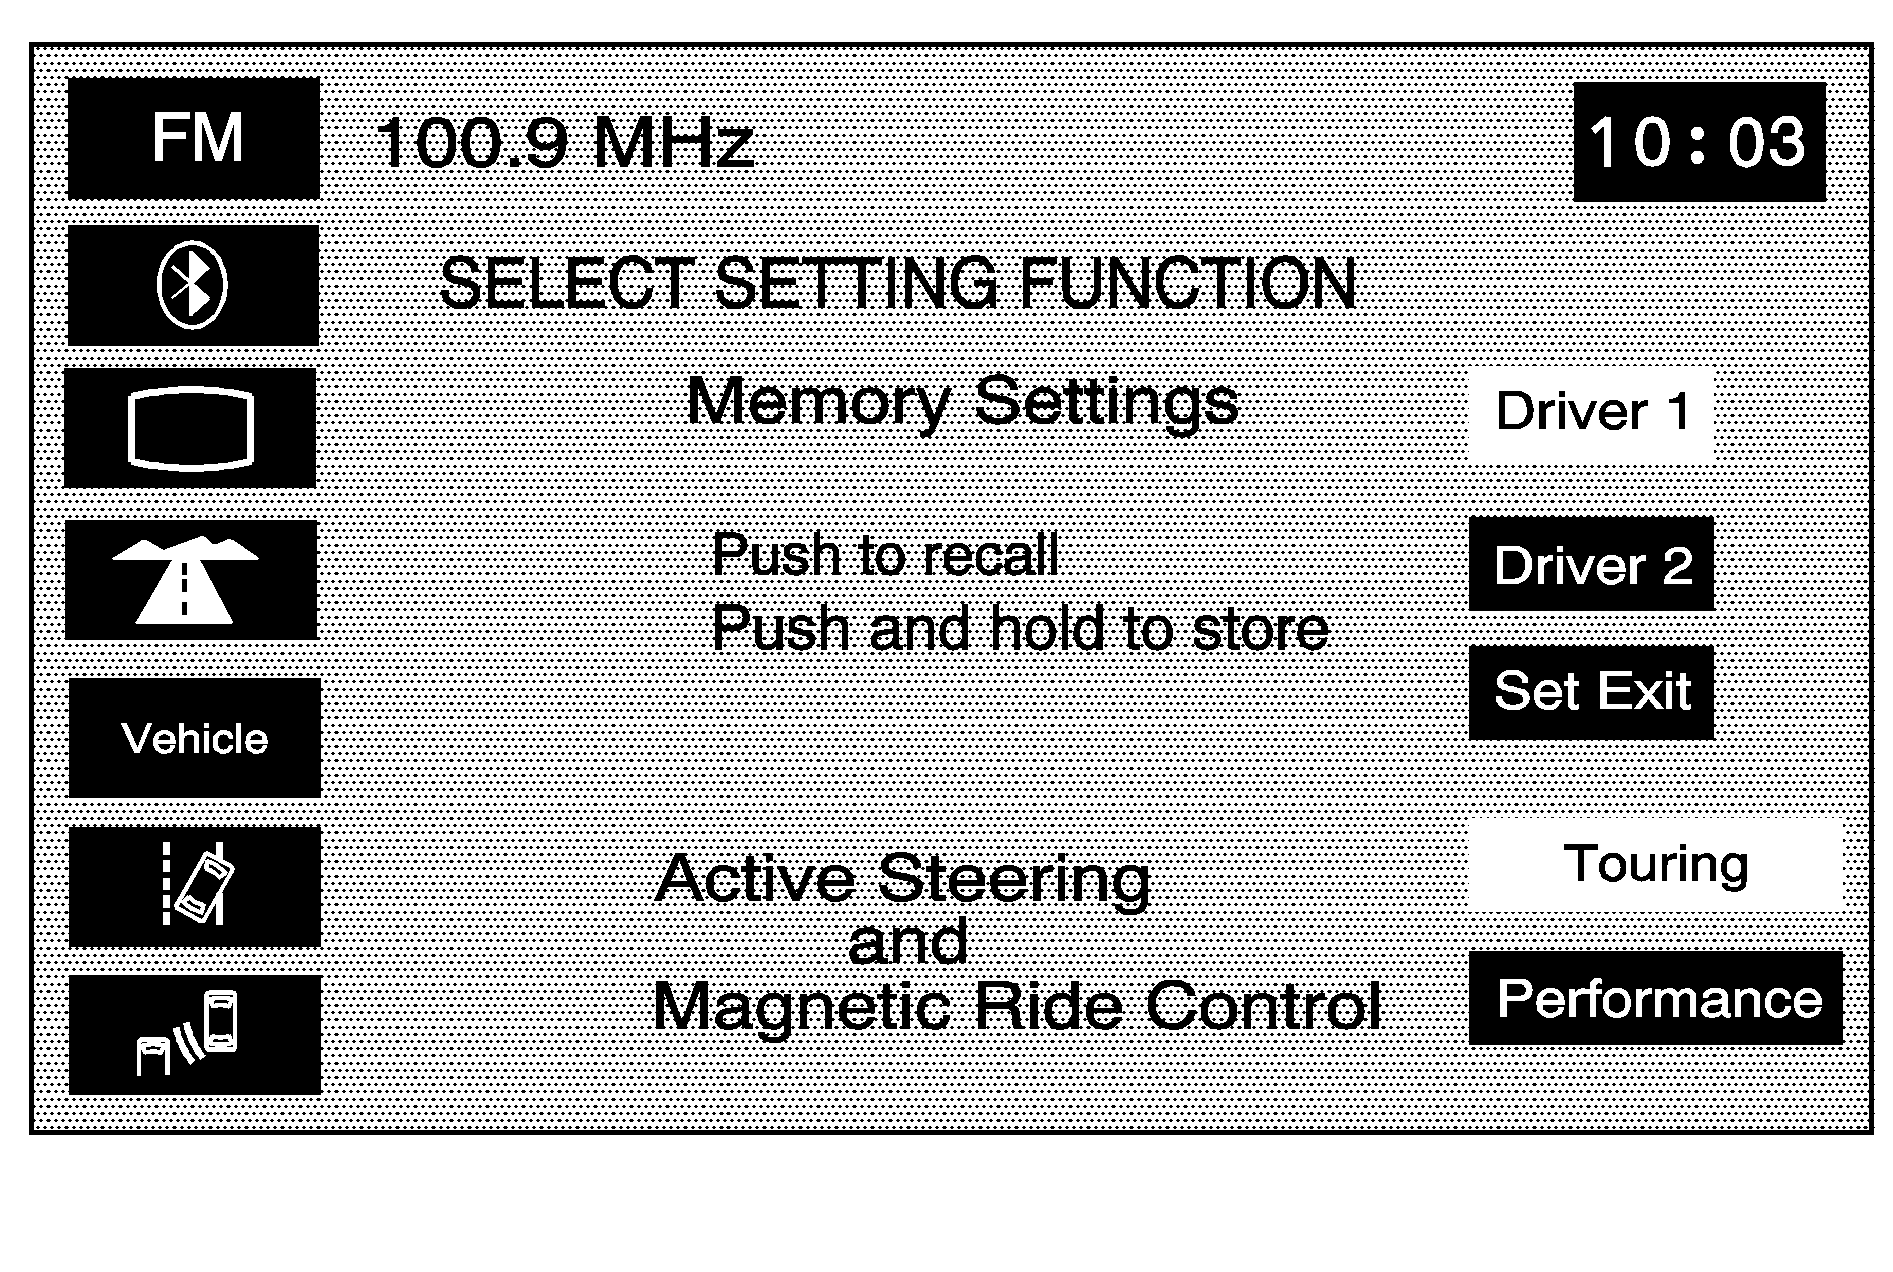
To store memory settings:
- Be sure the ignition is either on, in accessory mode, or in RAP. The vehicle must be stopped and/or the shift lever must be in P (Park).
- Press any button on the appropriate keyless access transmitter to identify yourself as Driver 1 or Driver 2. The numbers on the back of the keyless access transmitters correspond to the driver number.
- Press the CONFIG hard key.
- Adjust the settings for the driver seat, the outside mirrors, and the steering column to a comfortable driving position or exit position.
- Push and hold either the Driver 1 or Driver 2 screen buttons to store the driving positions. Push and hold the Set Exit screen button to store the exit position.
Two beeps are heard to confirm that the driver or exit position is stored.
The memory settings are now programmed. Any changes that are made to the Head-Up Display (HUD), navigation system, and climate controls while driving automatically stores when then ignition is turned off.
Recall Memory Settings
To recall memory settings:
- Be sure the ignition is either on, in accessory mode, or in RAP. The vehicle must be stopped and/or the shift lever must be in P (Park).
- Press the CONFIG hard key.
- Push and release either the Driver 1 or Driver 2 screen buttons to recall the driving positions. Push and release the Set Exit screen button to recall the exit position.
If the vehicle is in P (Park), a beep is heard and your previously saved driving position or exit position is recalled. If the vehicle is not in P (Park), three beeps are heard and your previously saved driving position or exit position will not be recalled.
A memory recall can be stopped by pressing any memory seat or mirror position button. To have the stored driving positions recalled when unlocking the vehicle with the keyless access transmitter or when starting the vehicle, see "Occupant Position" under Personalization for more information.
Magnetic Ride Control (Vehicles without Enhanced StabiliTrak®)
If the vehicle has this feature, select between the following screen buttons:
Touring: Select this screen button for normal city and highway driving. This setting provides a smooth, soft ride.Performance: Select this screen button when road conditions or personal preference demand more control. This setting provides more "feel" or response to road conditions.
Active Steering and Magnetic Ride Control (Vehicles with Enhanced StabiliTrak®)
If the vehicle has this feature, select between the following screen buttons:
Touring: Select this screen button for normal city and highway driving. This setting provides a smooth, soft ride with less sensitive steering and requires lower steering efforts than the Performance Mode. This mode is not available when the Enhanced StabiliTrak® Stability Competitive mode has been selected through the traction control button. See "Enhanced StabiliTrak®" in the Index of the vehicle's owner manual for more information.Performance: Select this screen button when road conditions or personal preference demand more control. This setting provides more "feel" or response to road conditions and quicker steering response.
