Select the Menu screen button, from the map screen, to access the NAV. (Navigation) MENU.
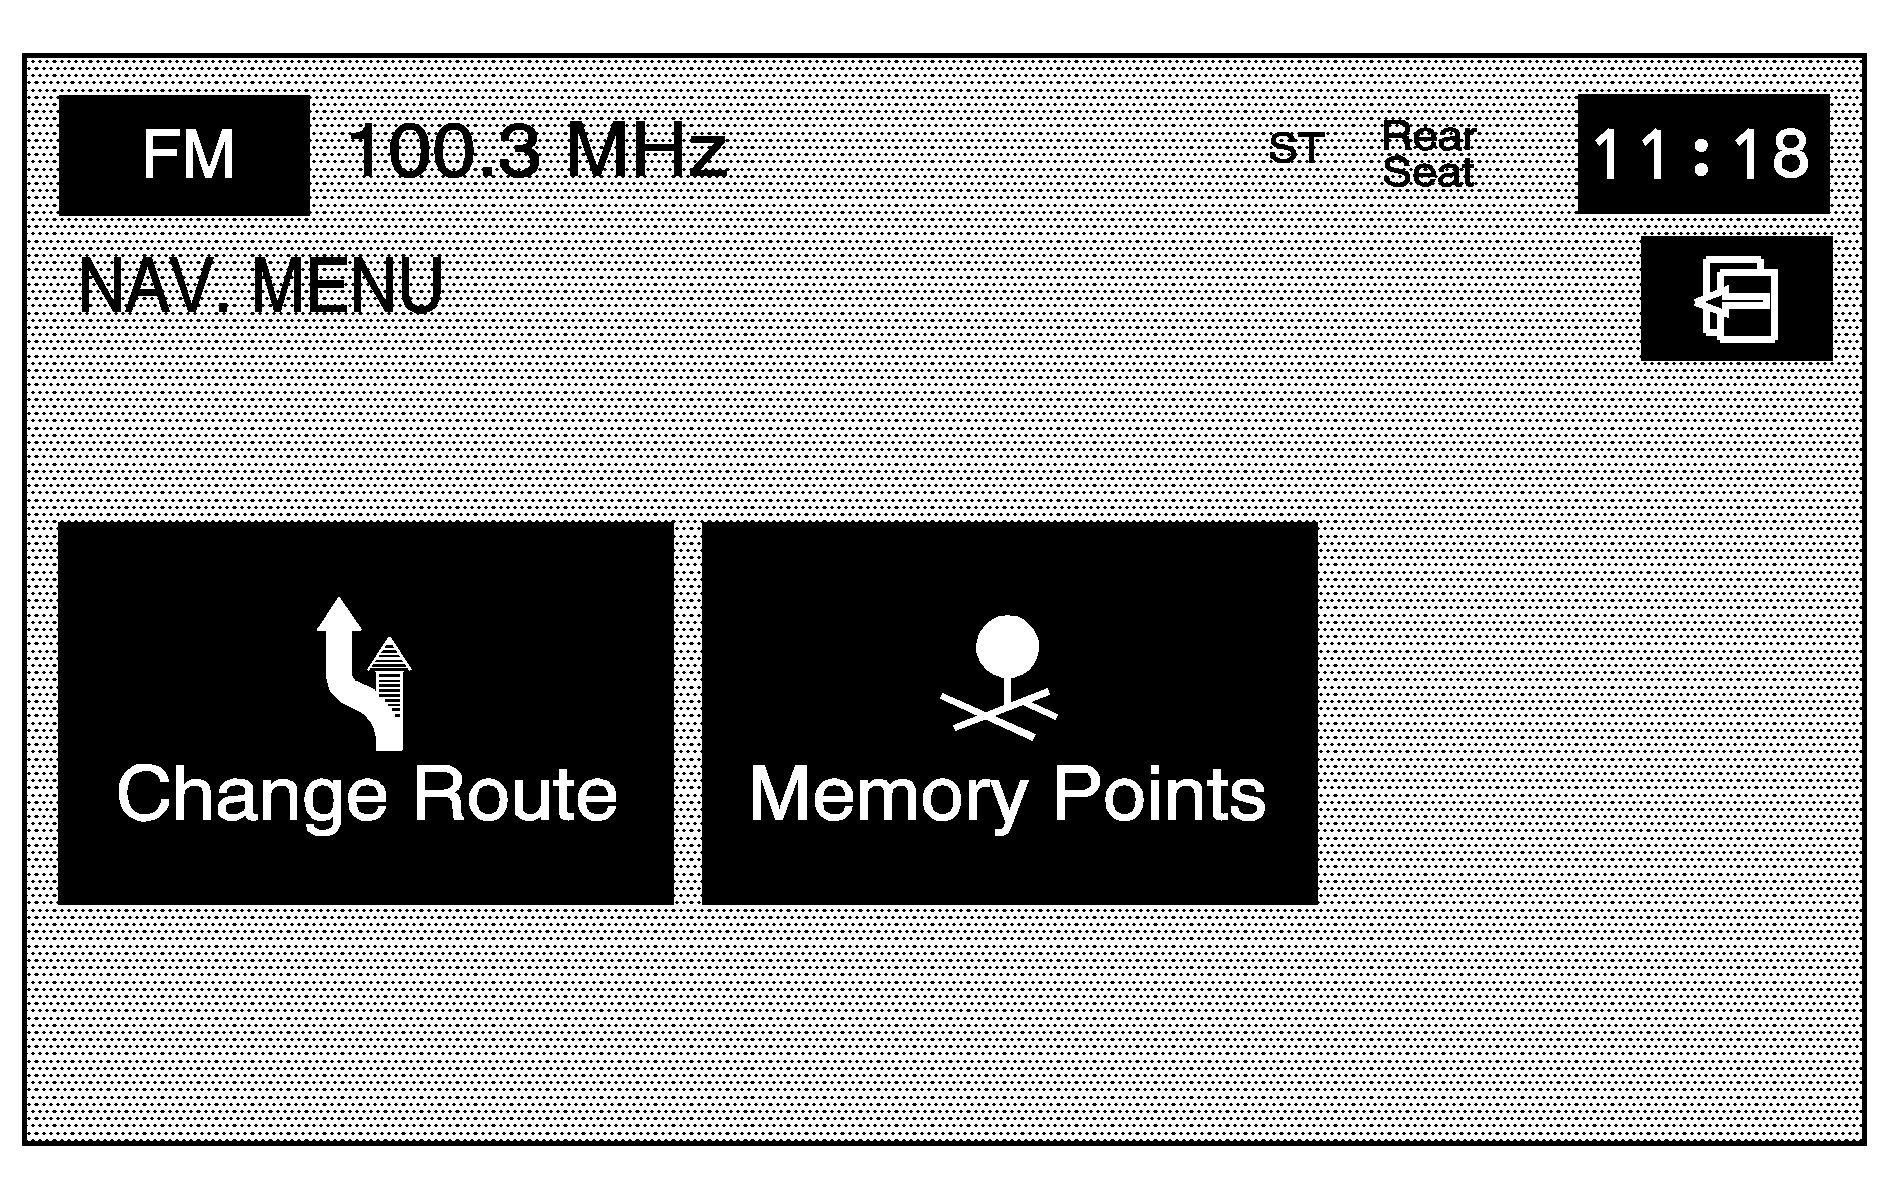
From the NAV. MENU, select Change Route or Memory Points.
Change Route
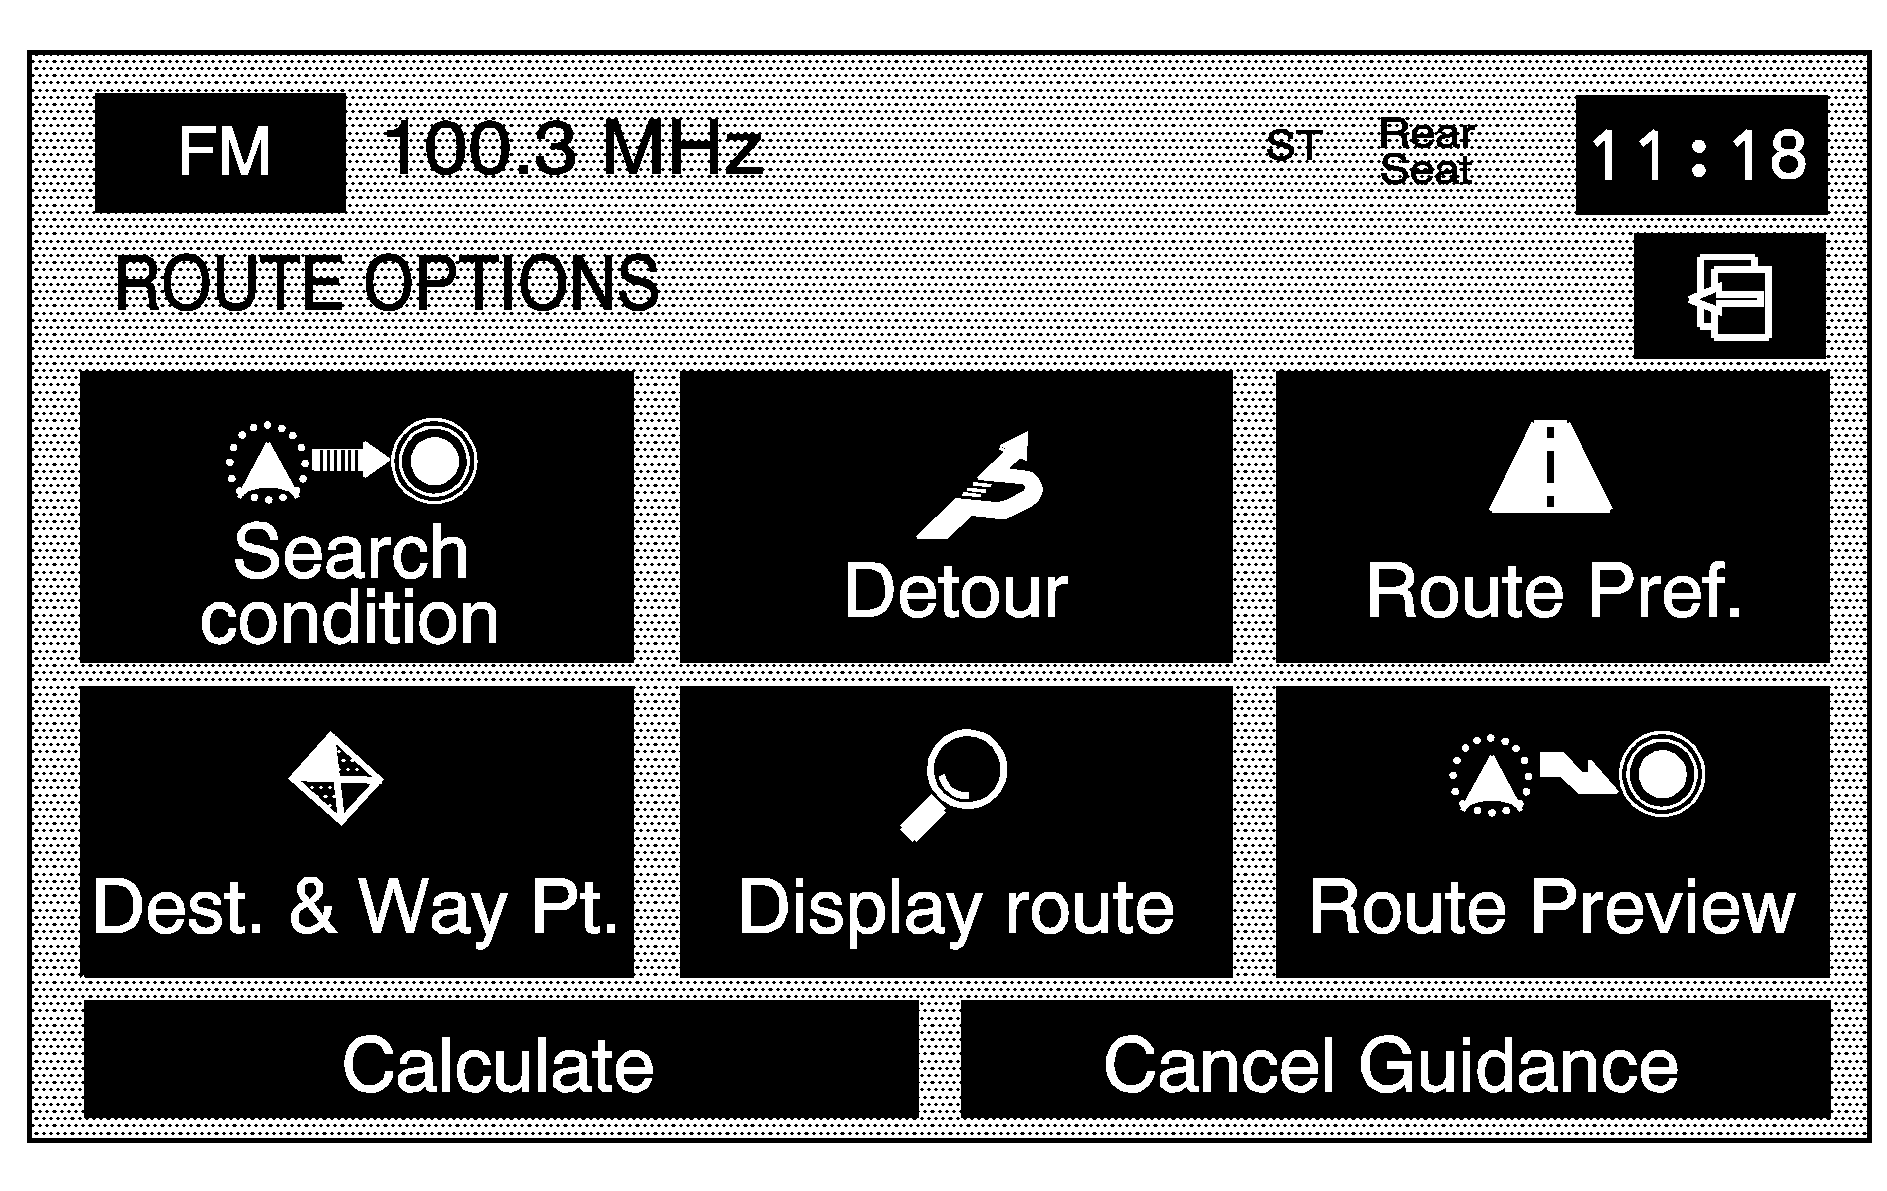
Select Change Route to access the ROUTE OPTIONS menu. The availability of these screens depends on if a route is planned or if you are driving a route. The following functions can be performed from this menu:
Search Condition
Select this screen button from the ROUTE OPTIONS screen to access the SEARCH CONDITION screen.
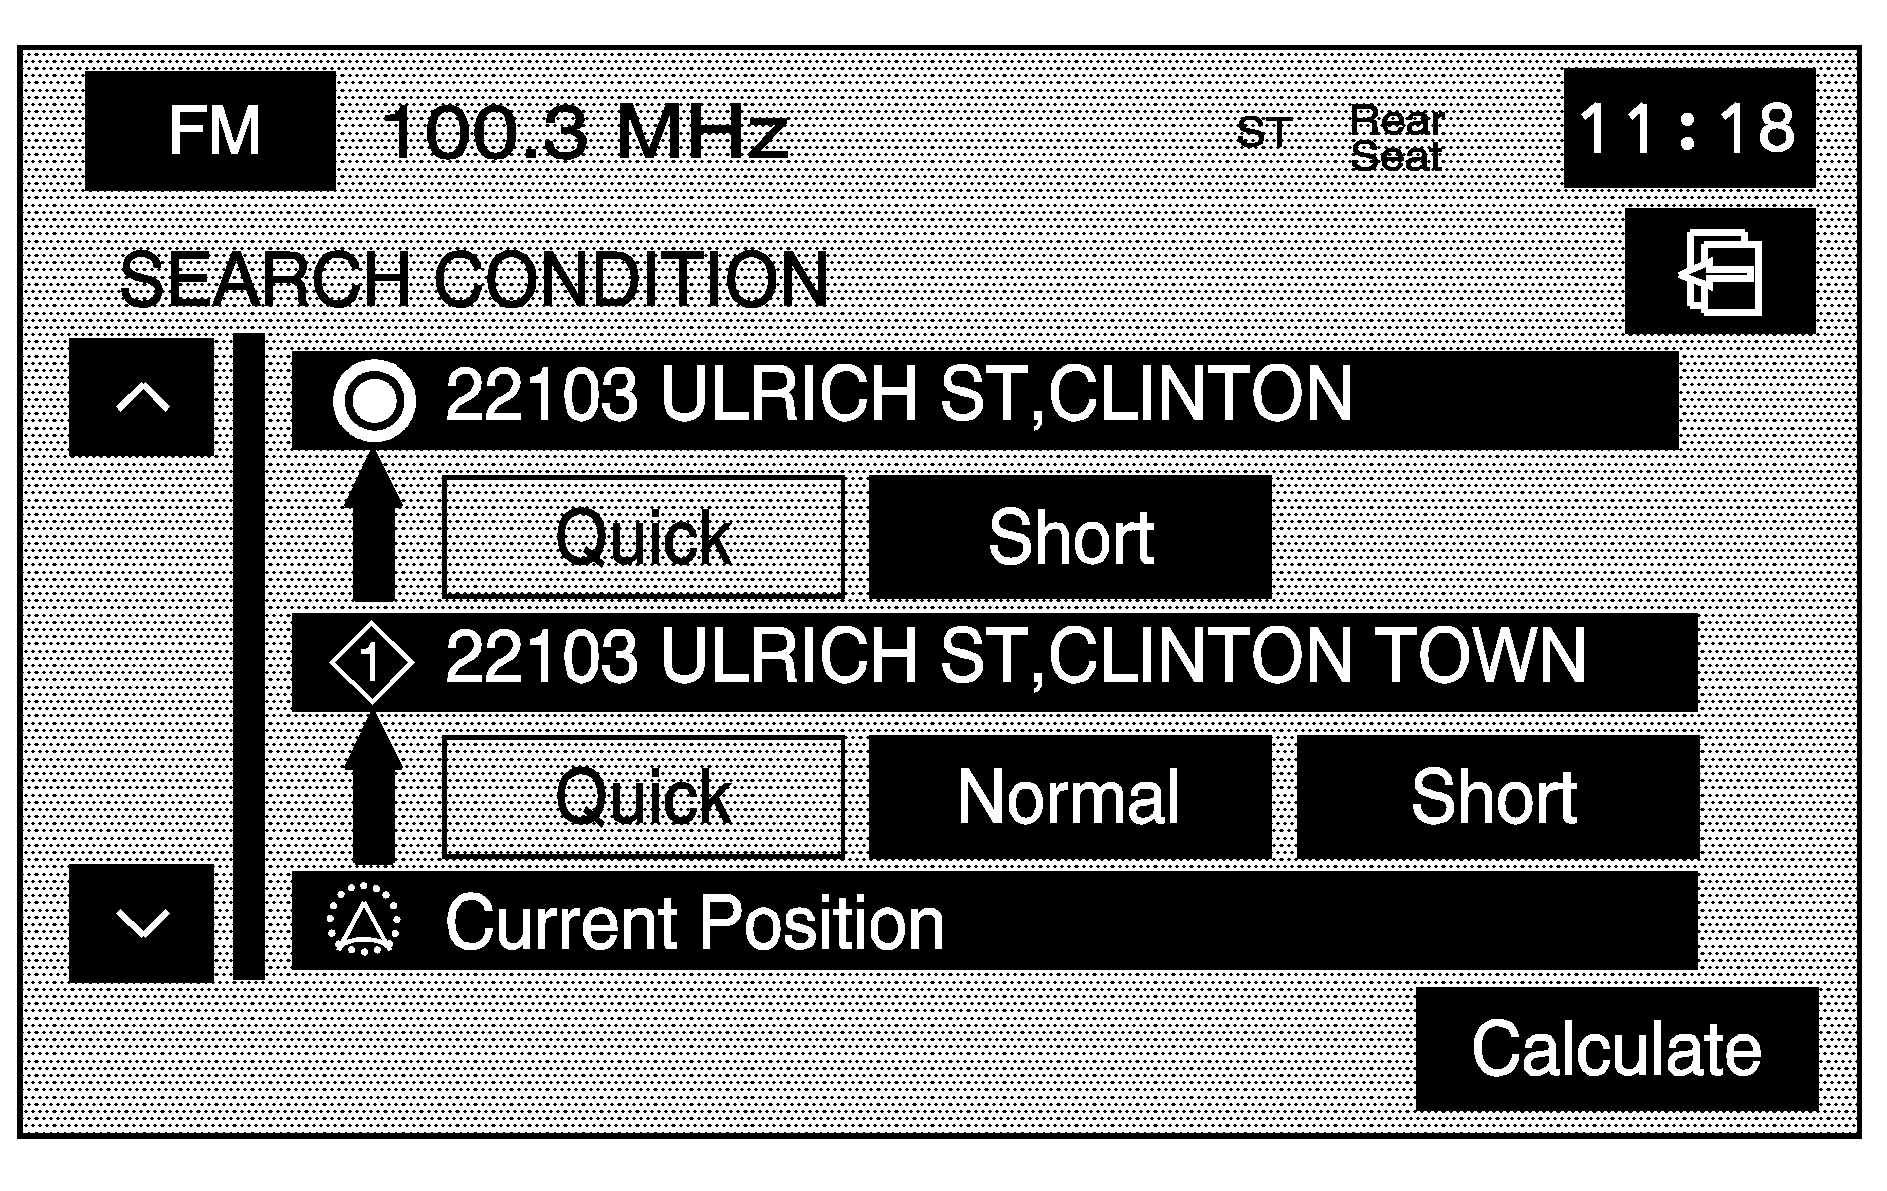
The search condition screen allows viewing of the current destination and to change the planning methods between each destination. Each distance between waypoints and final destination can have an individual setting.
/ (Scroll Arrows): Use the up and down arrows to scroll through your route.Quick/Normal/Short: Select one of the route preference options to change the planning method.
Calculate: After selecting the new methods, select Calculate to plan the route with the changes. The map screen displays.
Detour
Select this screen button from the ROUTE OPTIONS screen to access the DETOUR screen.
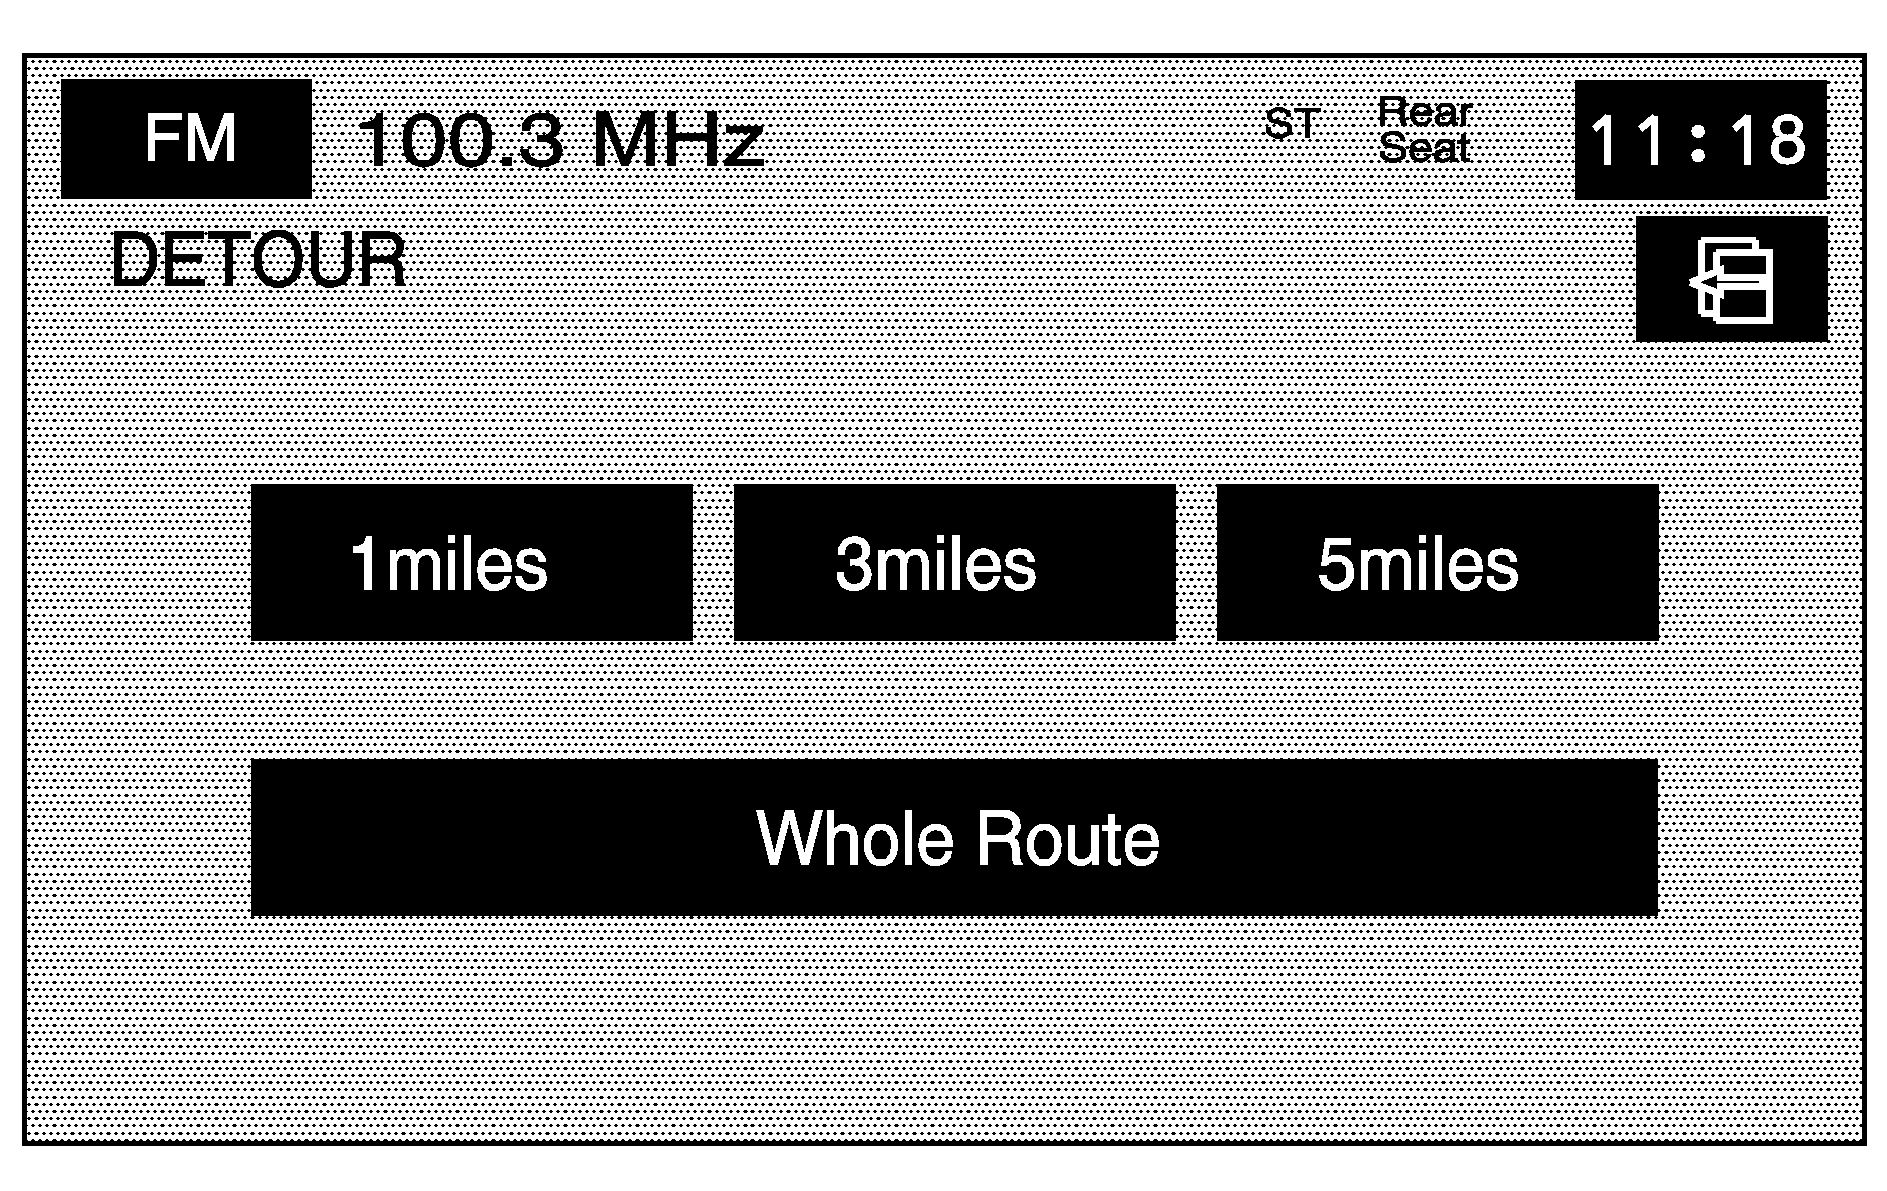
From this screen, choose to detour 1 mile, 3 miles, or 5 miles around the current route. The whole route can be detoured if necessary. This option is only available while driving on a planned route.
Route Pref. (Route Preferences)
Select this screen button from the ROUTE OPTIONS screen to access the ROUTE PREFERENCES screen.
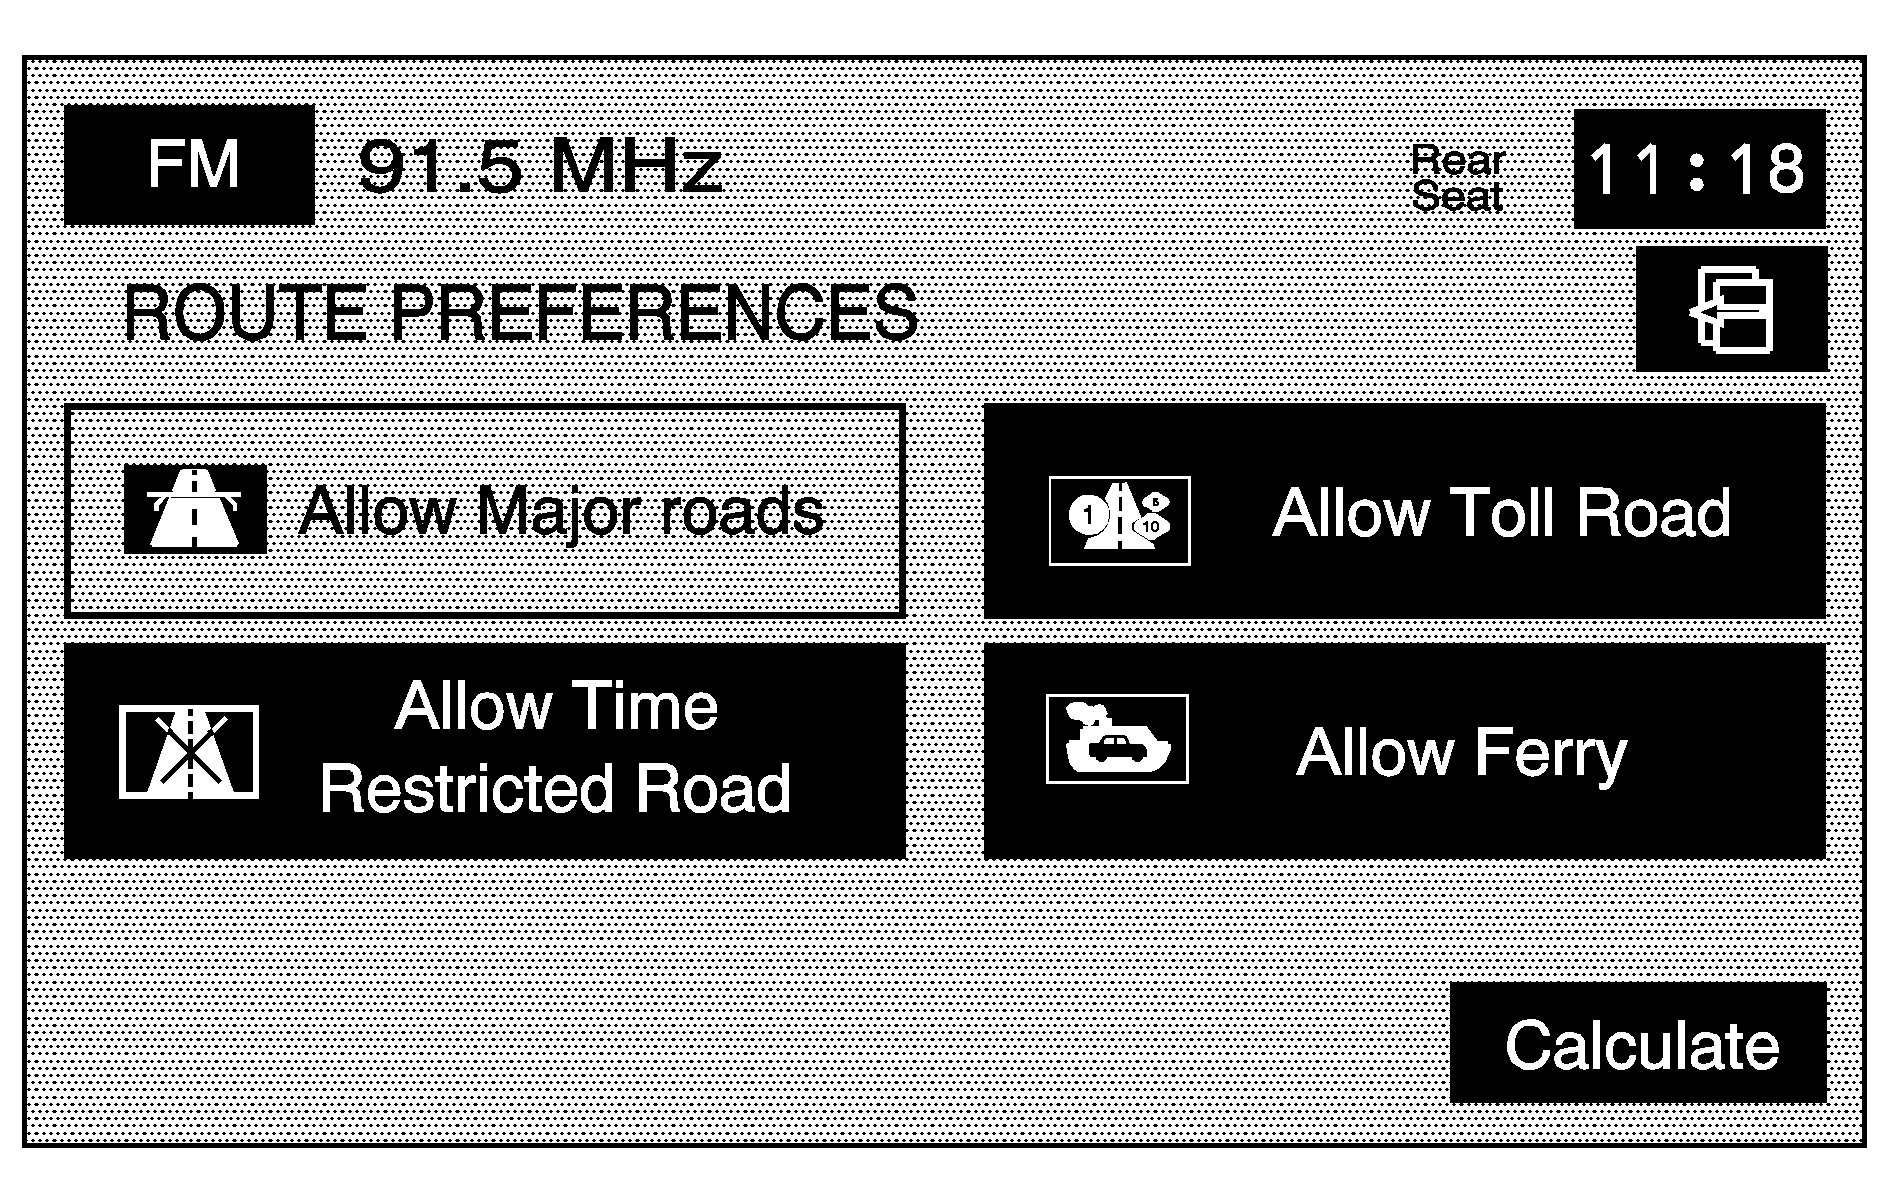
Touch any of the following options to turn them on and off. The system uses the selected settings to plan the route. The selected route preference settings appear when planning a route.
(Allow Major Roads): This feature allows the system to use major roads when calculating a route.(Allow Time Restricted Road): This feature allows the system to use time restricted roads when calculating a route.
(Allow Toll Road): This feature allows the system to use toll roads when calculating a route.
(Allow Ferry): This feature allows the system to use ferries when calculating a route.
Calculate/ (Back): Select either screen button to calculate the route if a destination has been entered.
Dest. & Way Pt. (Destination and Way Point)
Select this screen button from the ROUTE OPTIONS screen to access the DEST. & WAY POINT screen.
Use this screen to plan a destination with waypoints. Five waypoints and one destination can be entered. See Dest. & Way Pt. under "Memory Points" later in this section for more information on how to add, edit, and delete.
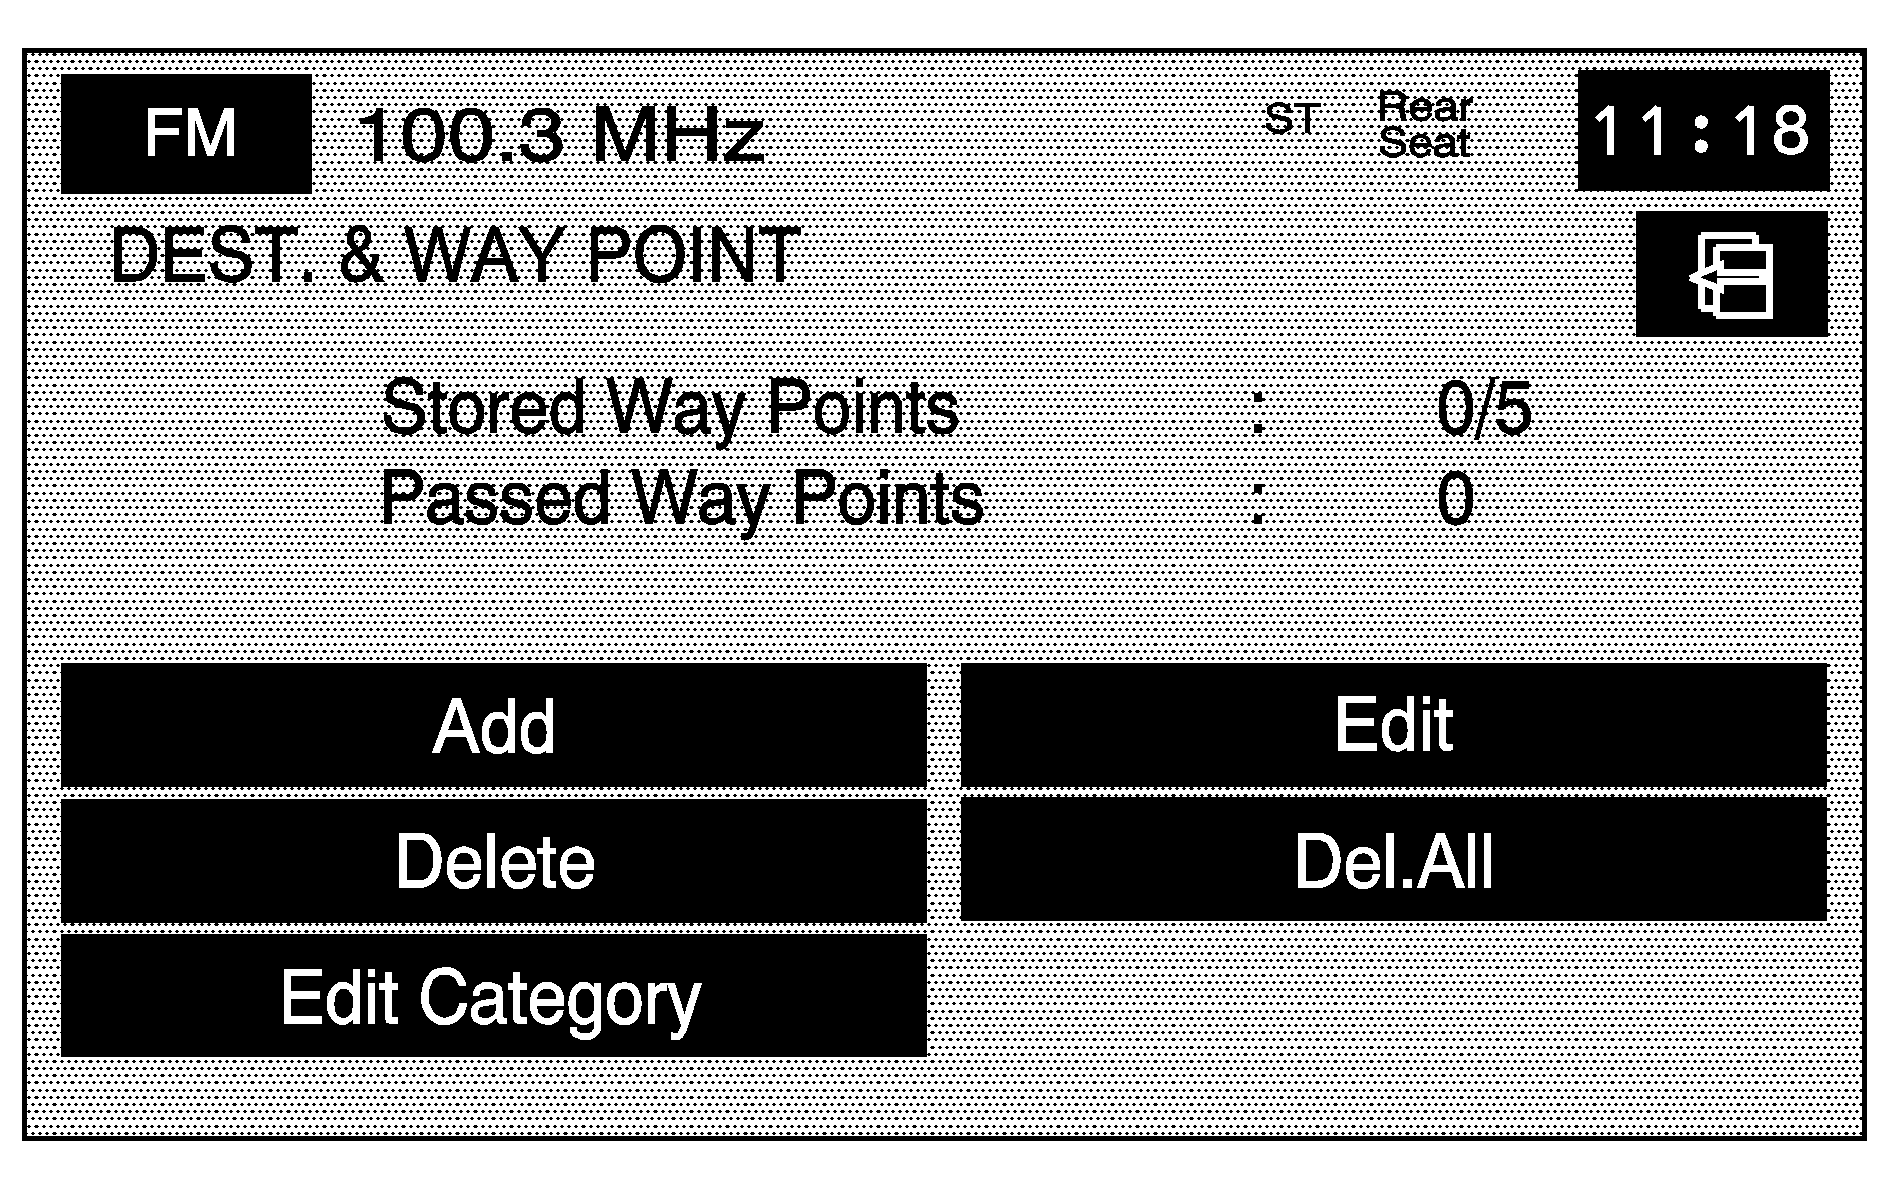
Add: Select to add a waypoint or to change the destination.
Edit: Select to change the order of the stops in the route and to change the location of the stops.
Delete/Del. All: These buttons allow waypoint deletions on the route or to delete the entire route.
Display route
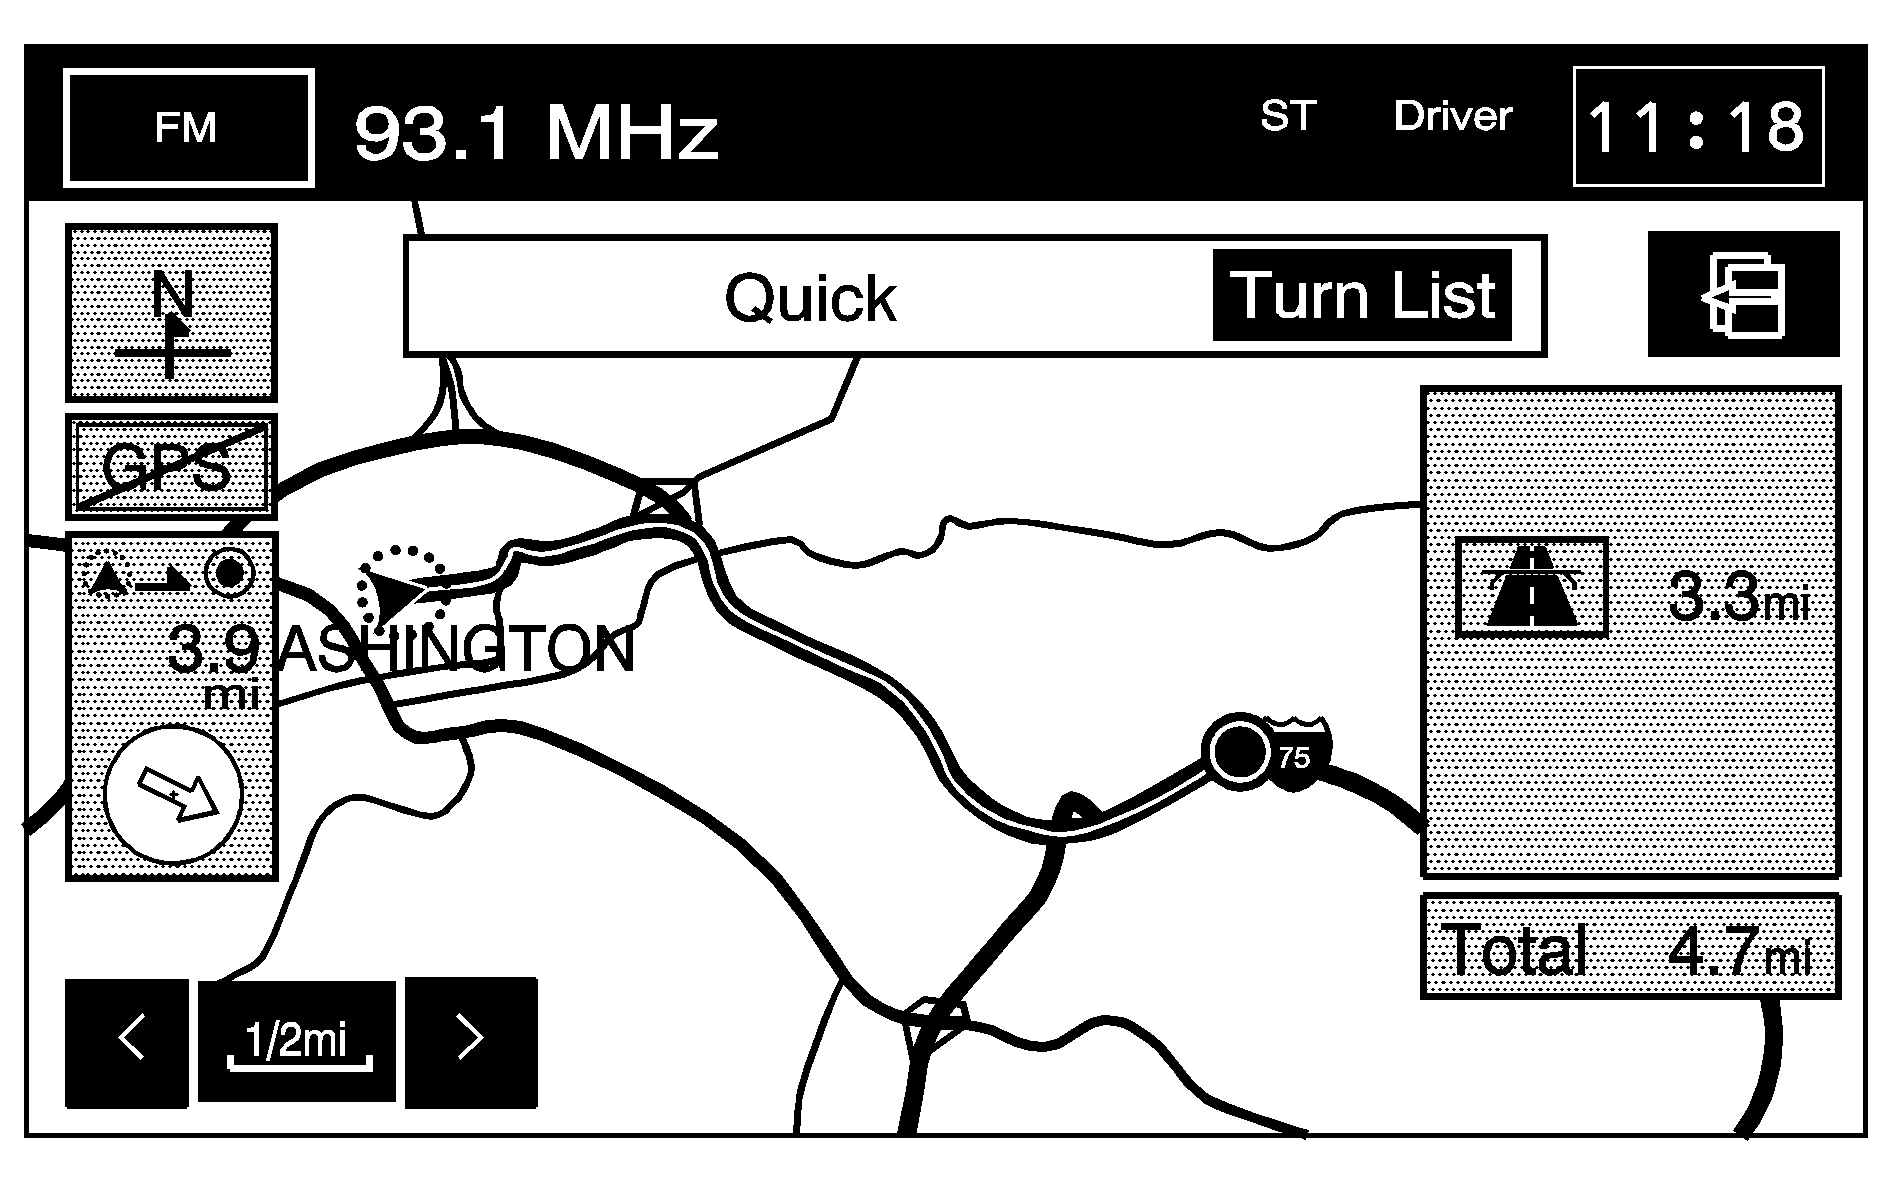
Select this screen button from the ROUTE OPTIONS screen to view the entire planned route on the map screen.
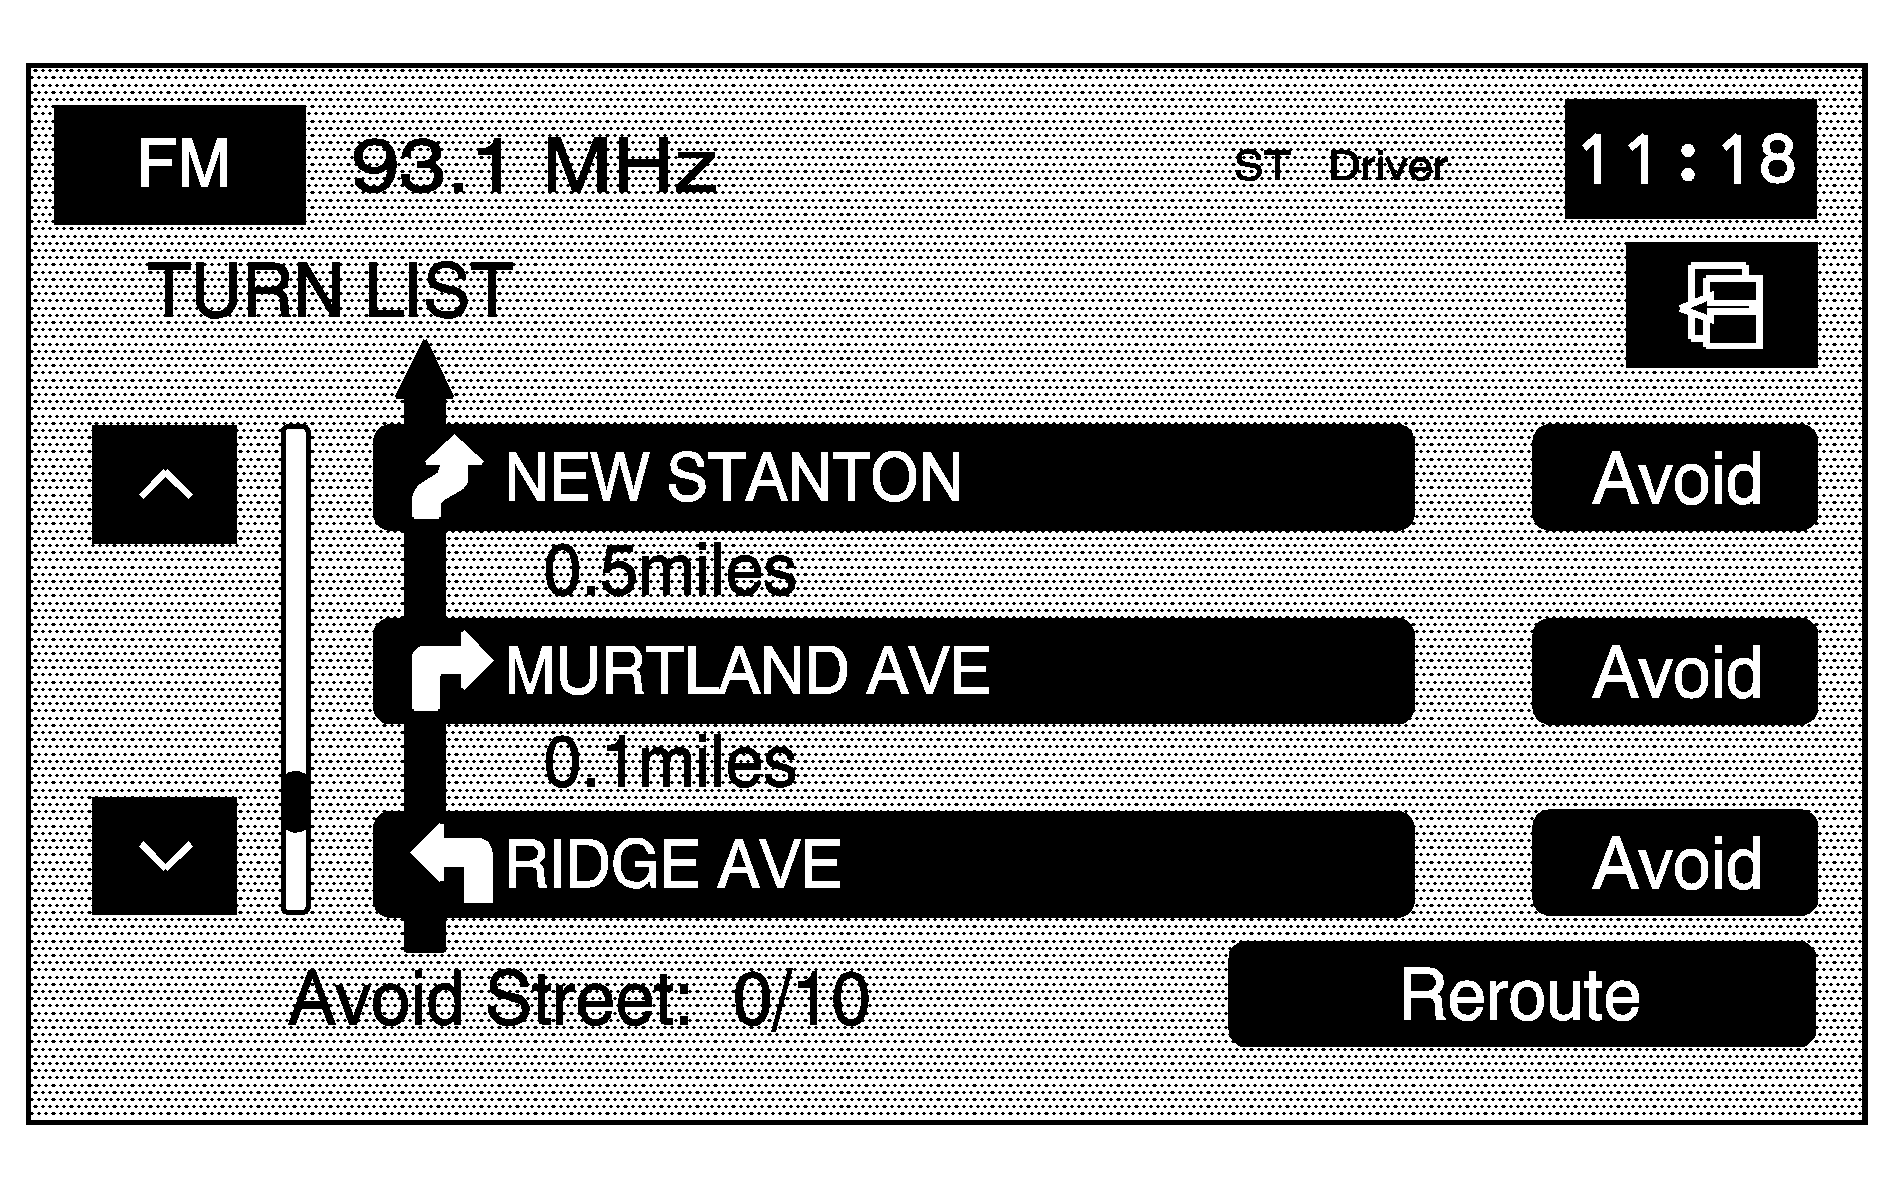
Turn List: Select to view or to edit the list of upcoming maneuvers for the entire route. A list of every turn on the route displays. With the turn list displayed, you can select to avoid streets/turns on the route.
/ (Scroll Arrows): Select the up and down arrow screen buttons to scroll through the list of maneuvers.
Avoid: To avoid a street, select the Avoid screen button next to the turn. To cancel the avoided turn, select Avoid again to deselect it.
Reroute/ (Back): Select either screen button to calculate the route based on the selected avoided maneuvers.
Delete: Press to cancel an avoided turn after the route has been replanned. A list of all of the avoided turns displays. Select the street that you want to add back to the route. A confirmation window displays. Select Yes to have the avoided street added back to the route. The Turn List screen displays.
Del. All (Delete All): Press to cancel all of the avoided turns after the route has been replanned. A list of all of the avoided turns displays. Select the Del. All screen button. A confirmation window displays. Select Yes to have all of the avoided streets added back to the route. The Turn List screen displays.
Route Preview
Select this screen button from the ROUTE OPTIONS screen to access the route preview screen.
From this screen, the entire route in either direction, can be previewed as well as edit the route.
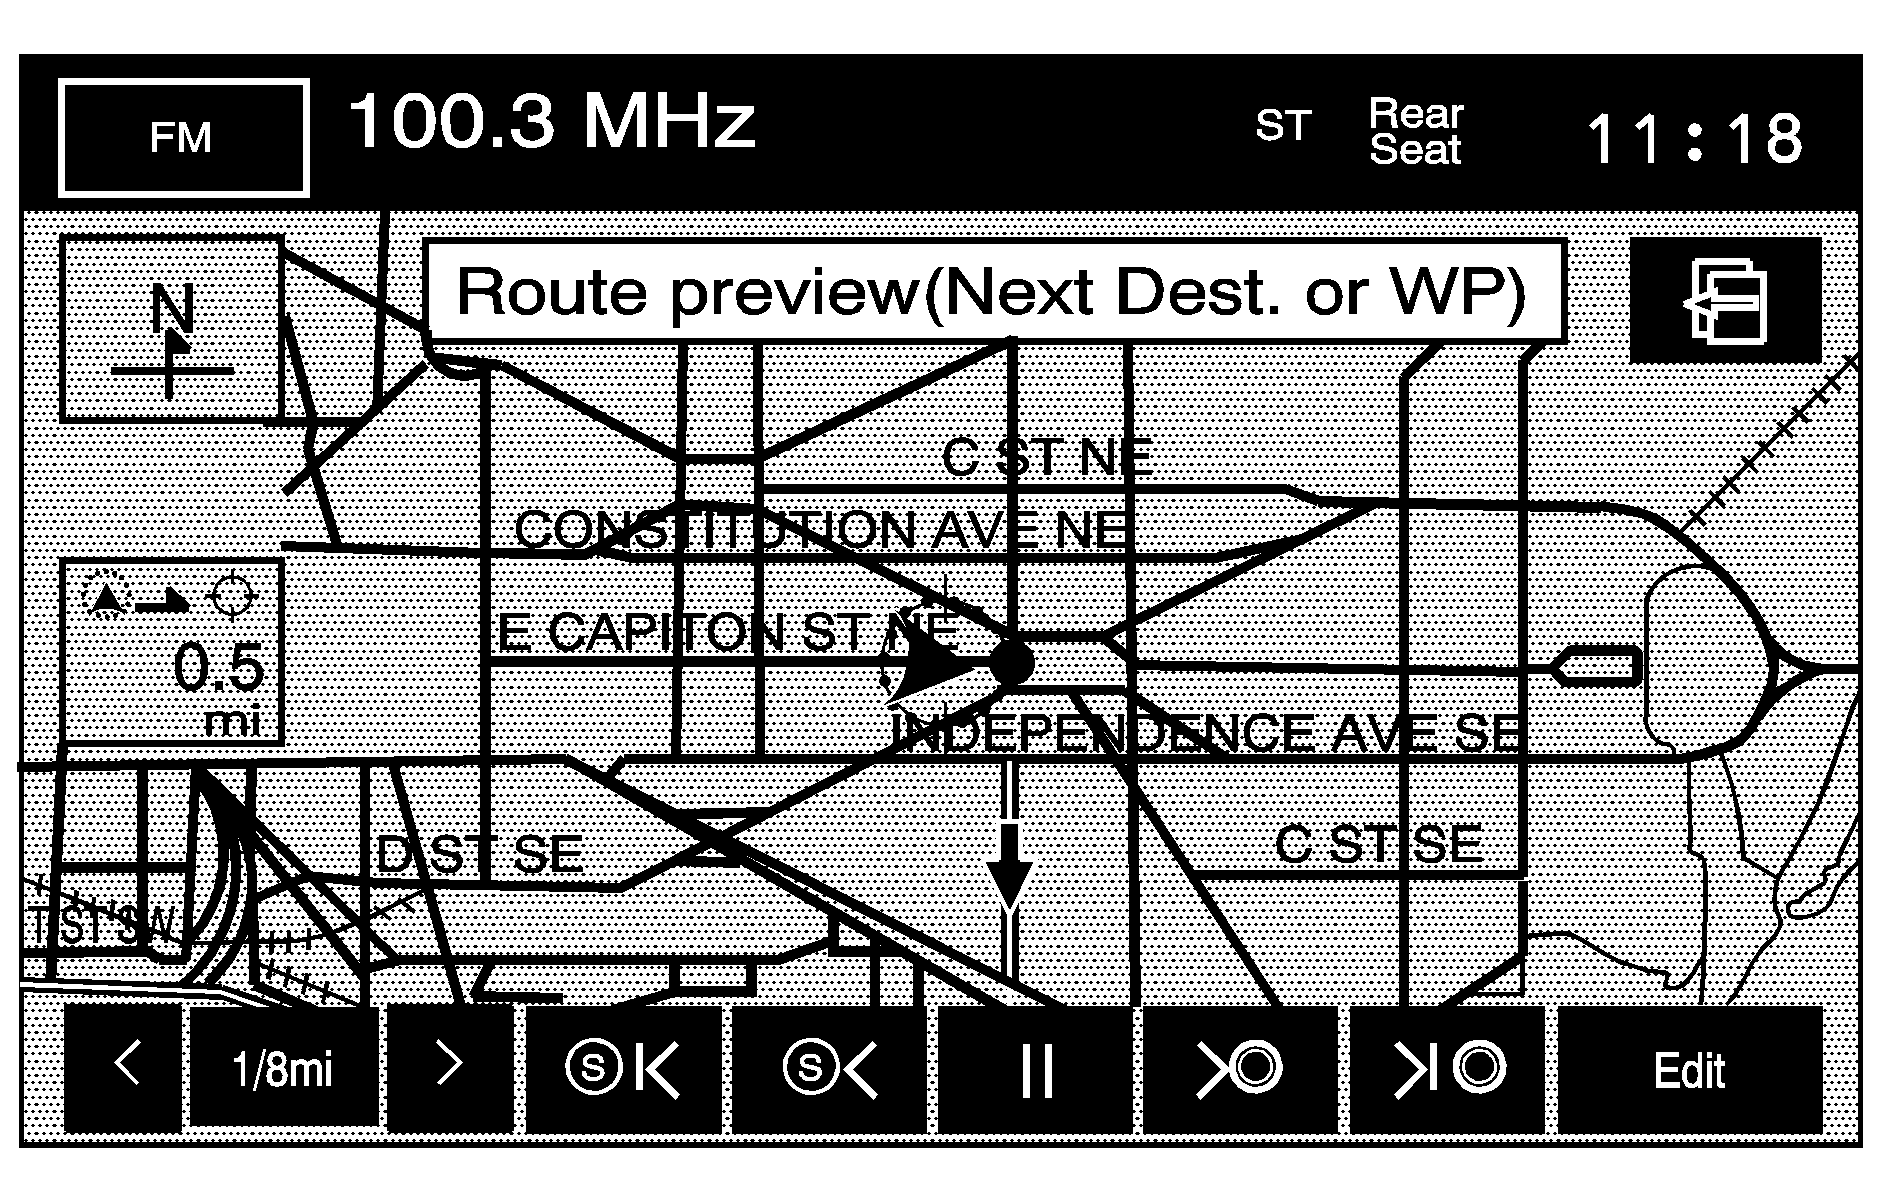
Use the screen buttons at the bottom of the screen to move forward or backward through the route.
(Skip to Start): Select to skip to the starting position, previous waypoint, or previous POI depending on the mode selected./ (Scroll to Start): Select to scroll to the starting position, previous waypoint, or previous POI depending on the mode selected. This button toggles between slow and fast speed.
(Pause): Select to pause the route preview.
/ (Scroll to Destination): Select to scroll to the destination, next waypoint, or next POI depending on the mode selected. This button toggles between slow and fast speed.
(Skip to Destination): Select to skip to the destination, next waypoint, or next POI depending on the mode selected.
Info (Information): When the skip/scroll functions are used and the cursor stops at a POI, this screen button appears. Press this screen button to provide information regarding the POI; name, address, city, and phone number.
Edit: Select to change the way the skip/scroll functions operate. The skip/scroll can be selected to go to the start point/destination or to the next available POI or waypoint.
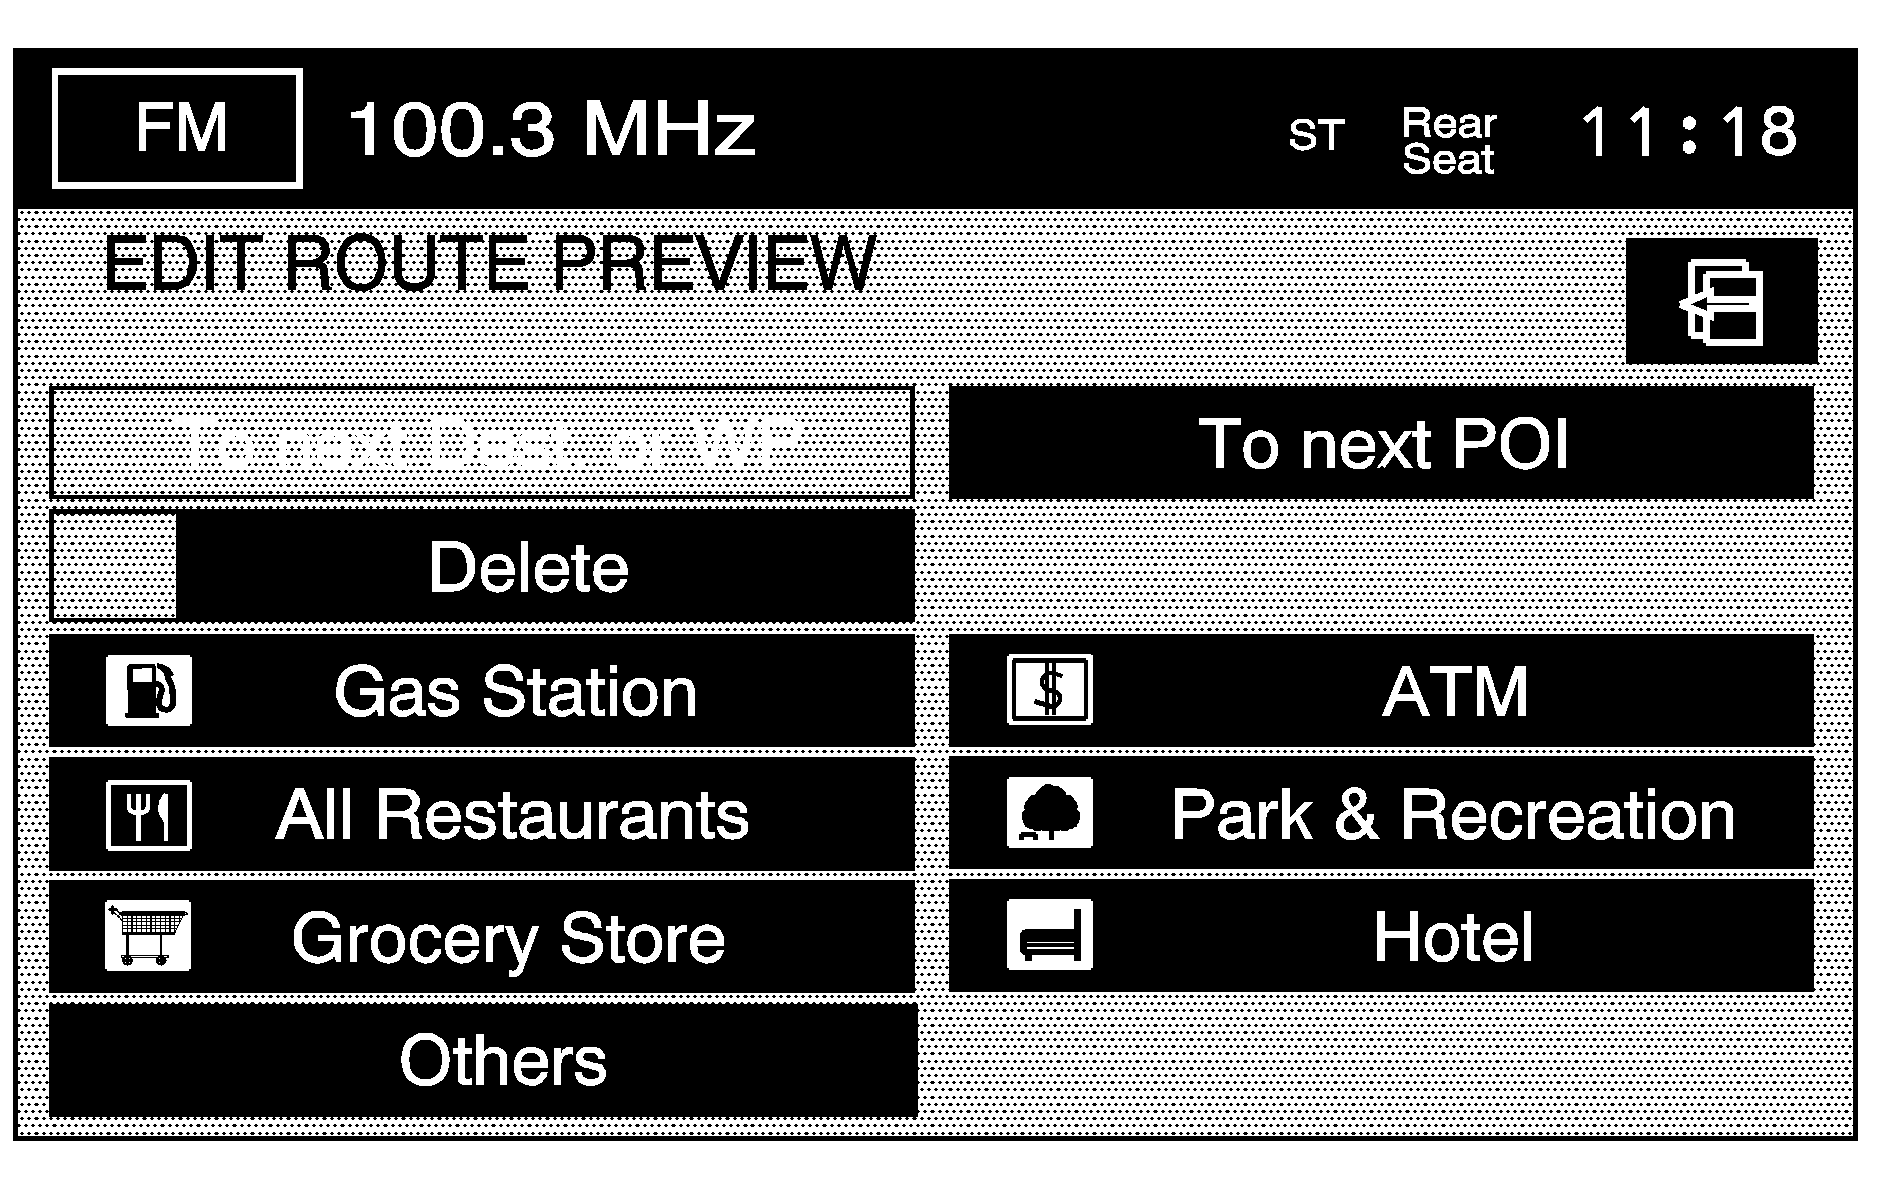
To next Dest. (destination) and WP (waypoint): Selecting this option causes the skip/scroll function to skip/scroll to the next destination or waypoint.
To next POI: To make this button available, a POI category must be selected. Select this option to skip/scroll to the next available POI, on the route, for the chosen category.
Delete: Select to delete the selected POI category.
Category Selection: Select one of the categories from the list to add or replace the current POI category.
Calculate
Select this screen button, from the ROUTE OPTIONS screen, to calculate the route, after any changes have been made.
Cancel Guidance
Select this screen button to cancel the current set destination. A confirmation window displays. Select Yes to cancel the destination; select No to continue on the current route.
Memory Points
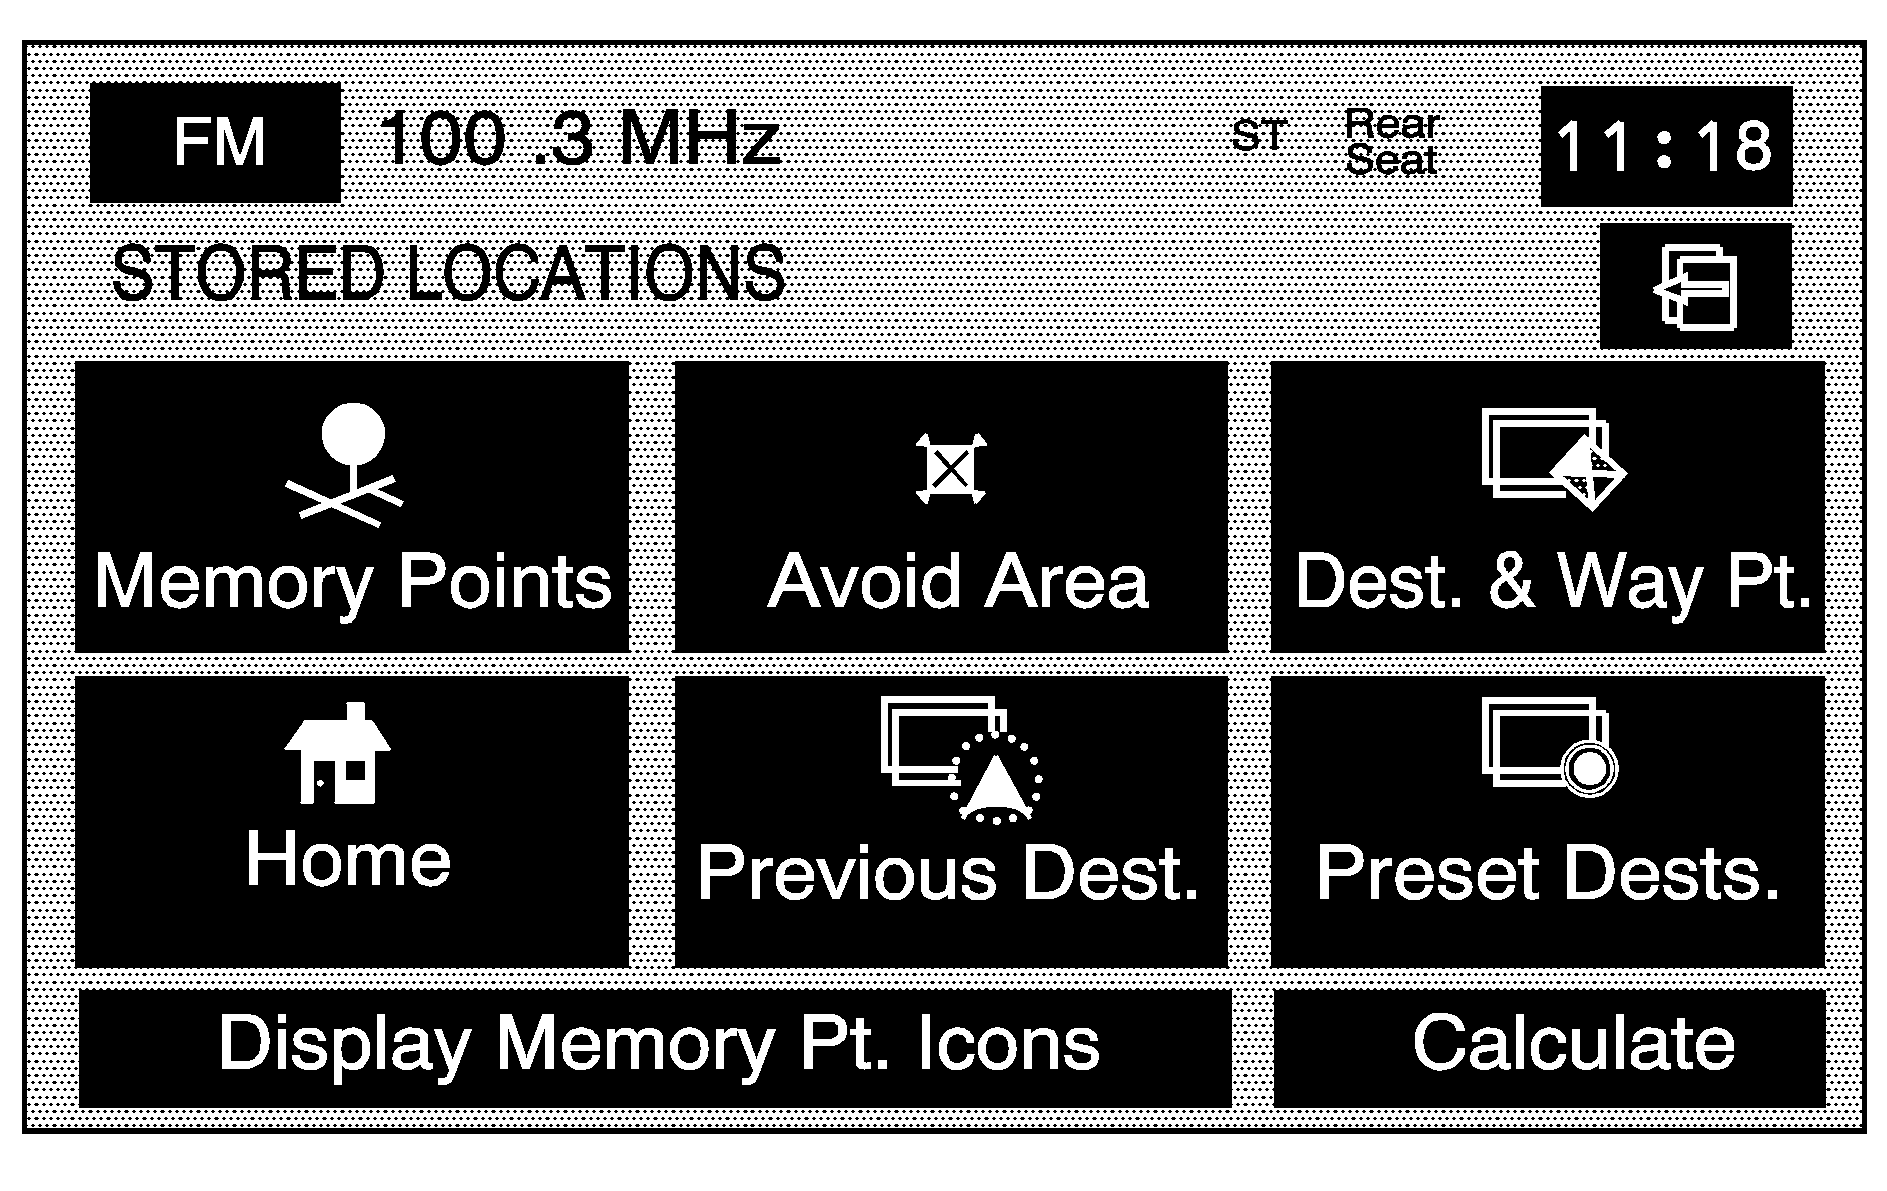
Selecting Memory Points from the NAV. MENU will take you to the STORED LOCATIONS screen. From the STORED LOCATIONS screen, the following options can be accessed:
Memory Points
Select this screen button from the STORED LOCATIONS screen to access the MEMORY POINTS screen.
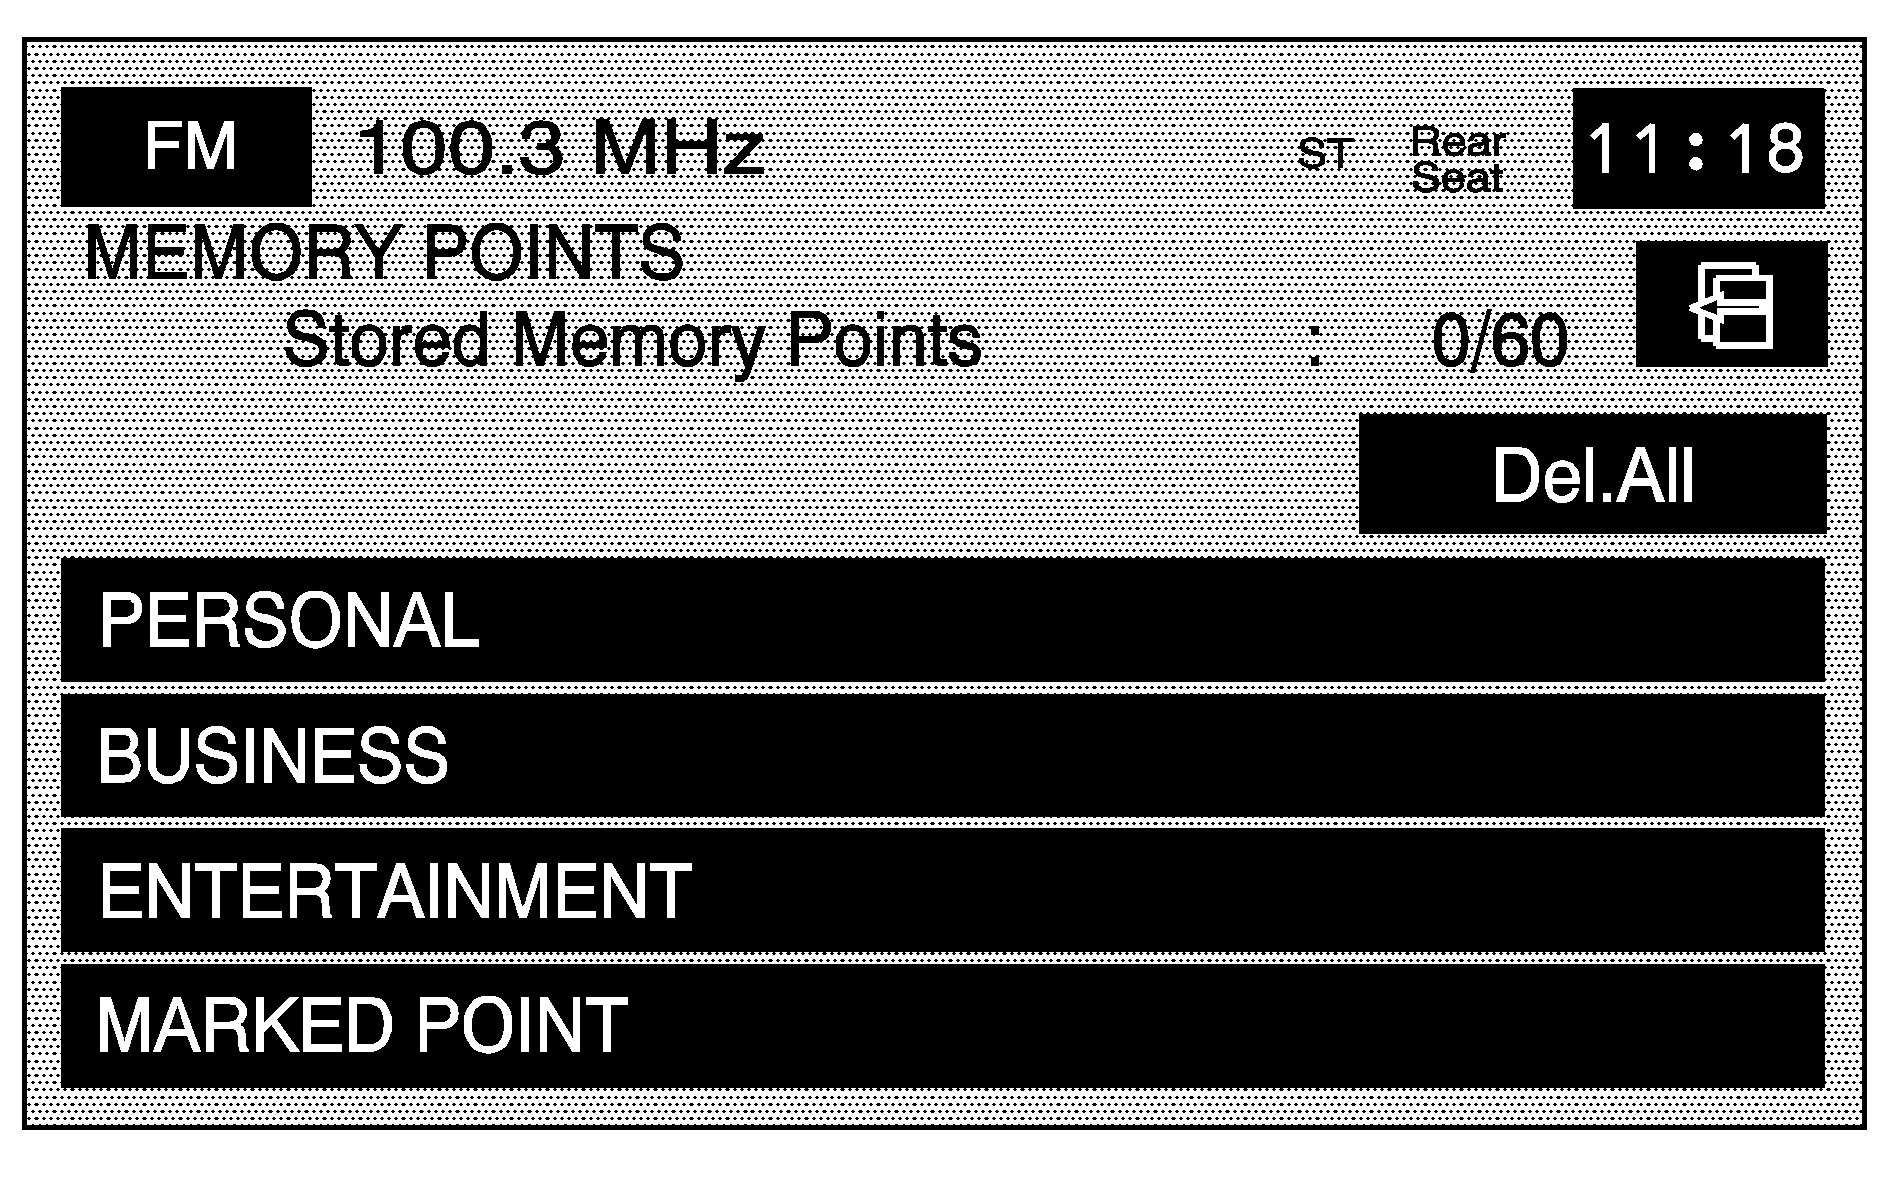
This feature allows the ability to store memory points. Storing memory points makes these points easily available to set as a destination. See "Memory Points" under Destination for more information. Memory points can be stored, edited, deleted or a category name can be selected in the four different categories listed. Once in a folder/category you can store a point, edit a point, delete a point, delete all points, or edit a category name. Up to 60 memory points can be stored for each driver.
To store a point:
- Select the Memory Points screen button from the STORED LOCATIONS screen.
- Select one of the folders/categories listed.
- Select Add.
- Select the desired method of entering a destination to enter the memory point. See Destination for more information. A map screen appears displaying the selected memory point location.
- If available, touch the INFO button to view the address information of the selected point.
- Touch OK to store the point as a memory point.
To edit the name of a stored point:
- Select the Memory Points screen button from the STORED LOCATIONS screen.
- Select one of the folders/categories listed.
- Select the Edit screen button.
- Select the memory point from the list.
- Select the Name screen button.
- Use the backspace screen button to delete the current name or use the alpha keypad to make changes.
- Select the OK screen button to store the change.
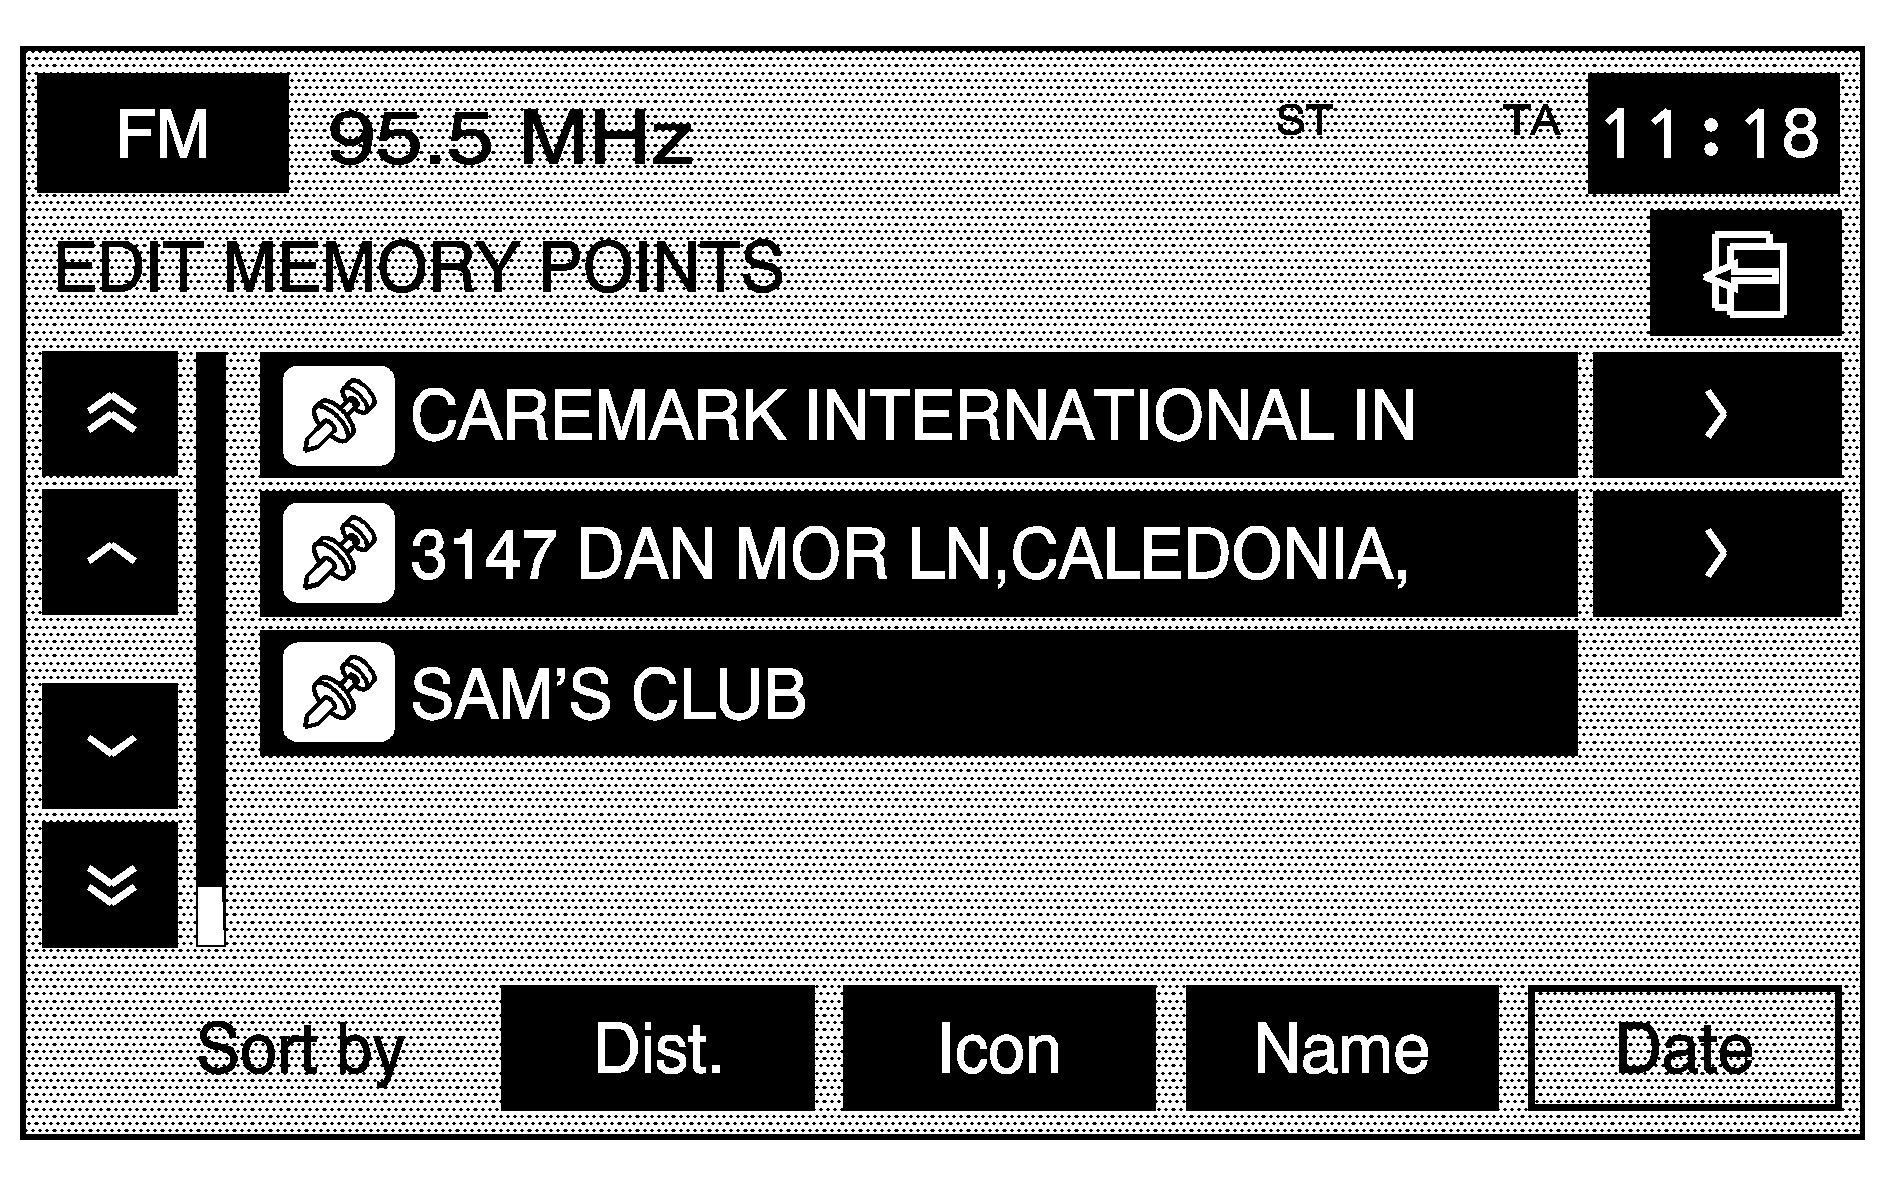
Use the Dist. (distance), Icon, Name, and Date screen buttons to change the sort methods.
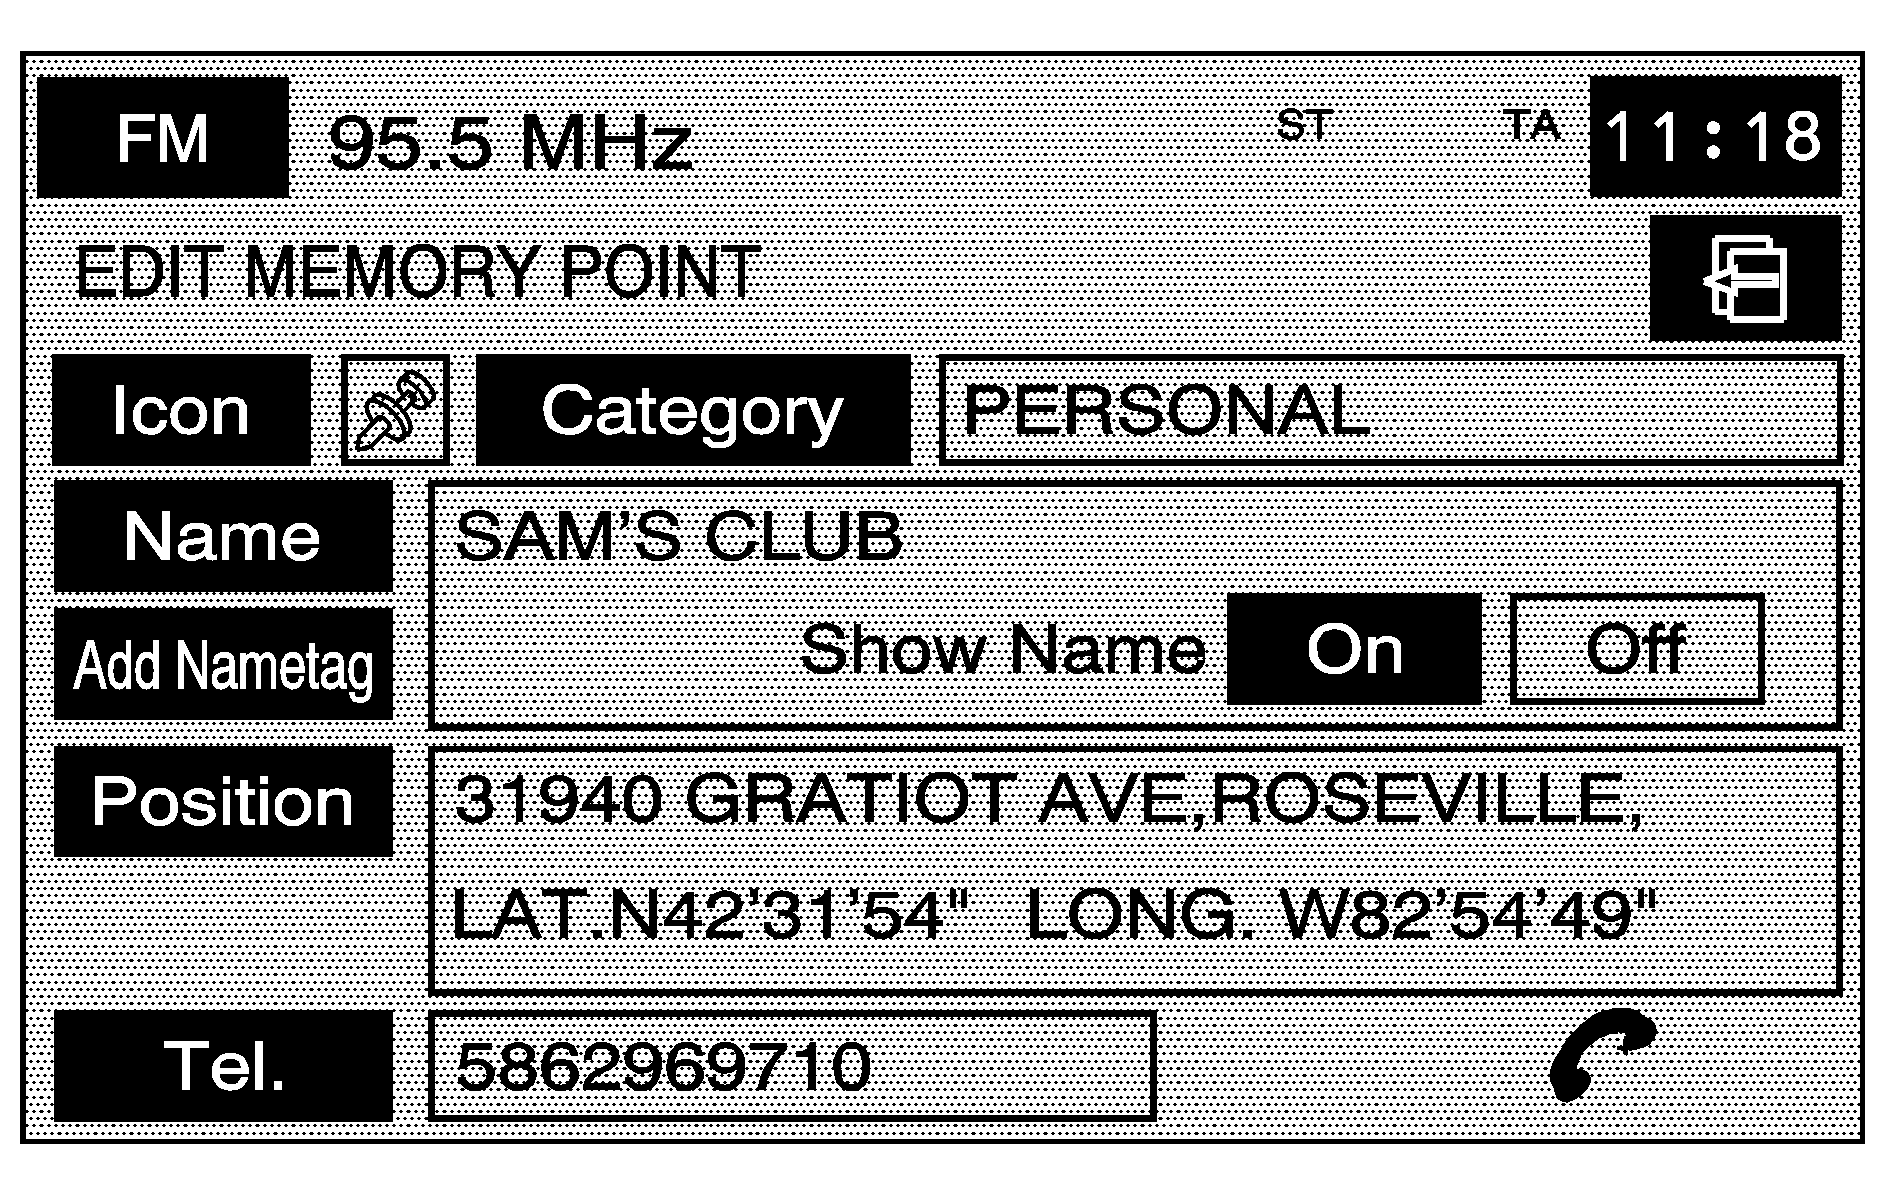
Choose whether or not to have the name show on the map screen, next to the POI icon, by selecting the Show Name On or Off screen buttons.
To move the memory point from one folder/category to another:
- Select the Memory Points screen button from the STORED LOCATIONS screen.
- Select the folder/category the memory point is stored in.
- Select the Edit screen button.
- Select the memory point that you wish to edit.
- Select the Category screen button.
- Select the new folder/category button you want to move the memory point to.
The system displays a message confirming the move.
To store the point as a nametag:
- Select the Memory Points screen button from the STORED LOCATIONS screen.
- Select the folder/category the memory point is stored in.
- Select the Edit screen button.
- Select the memory point that you wish to edit.
- Select the Add Nametag screen button.
- The system says "Name please." State what you would like to call the memory point.
- The system plays back what was recorded and then asks you to confirm the nametag. State "Yes" to confirm the nametag; state "No" to cancel the nametag and to try again.
Choose whether or not to have the name show on the map screen, next to the POI icon, by selecting the Show Name On or Off screen buttons.
Del Nametag (Delete): Once a nametag has been added, the Add Nametag screen button changes to Del Nametag. To delete a nametag, press the Del Nametag screen button. The nametag is automatically deleted from that memory point.To modify the position of the stored point:
- Select the Memory Points screen button from the STORED LOCATIONS screen.
- Select the folder/category the memory point is stored in.
- Select the Edit screen button.
- Select the memory point from the list.
- Select the Position screen button.
- The system displays the map screen with the destination marked. Touch the position on the map to move the memory point to that location.
- Select the OK screen button when the memory point has been moved to the appropriate location.
- The system returns to the EDIT MEMORY POINT screen and displays the new address, longitude, and latitude for the memory point.
To change the icon associated with a memory point:
- Select the Memory Points screen button from the STORED LOCATIONS screen.
- Select the folder/category the memory point is stored in.
- Select the Edit screen button.
- Select the memory point from the list.
- Select the Icon screen button.
- Select the desired icon. There are two pages of icons and a page of icons that have sounds associated with them.
- The new icon displays in the EDIT MEMORY POINT screen, next to the Icon screen button on the map.
To change the phone number of a memory point:
- Select the Memory Points screen button from the STORED LOCATIONS screen.
- Select the folder/category the memory point is stored in.
- Select the Edit screen button.
- Select the memory point from the list.
- Select the Tel. (telephone) screen button.
- Use the numeric keypad to change the phone number.
- Select the OK screen button to store the changed phone number.
To delete a memory point:
- Select the Memory Points screen button from the STORED LOCATIONS screen.
- Select the folder/category the memory point is stored in.
- Select the Delete screen button.
- Select the memory point from the list. Use the sort feature to sort by distance, icon, name, or date as needed.
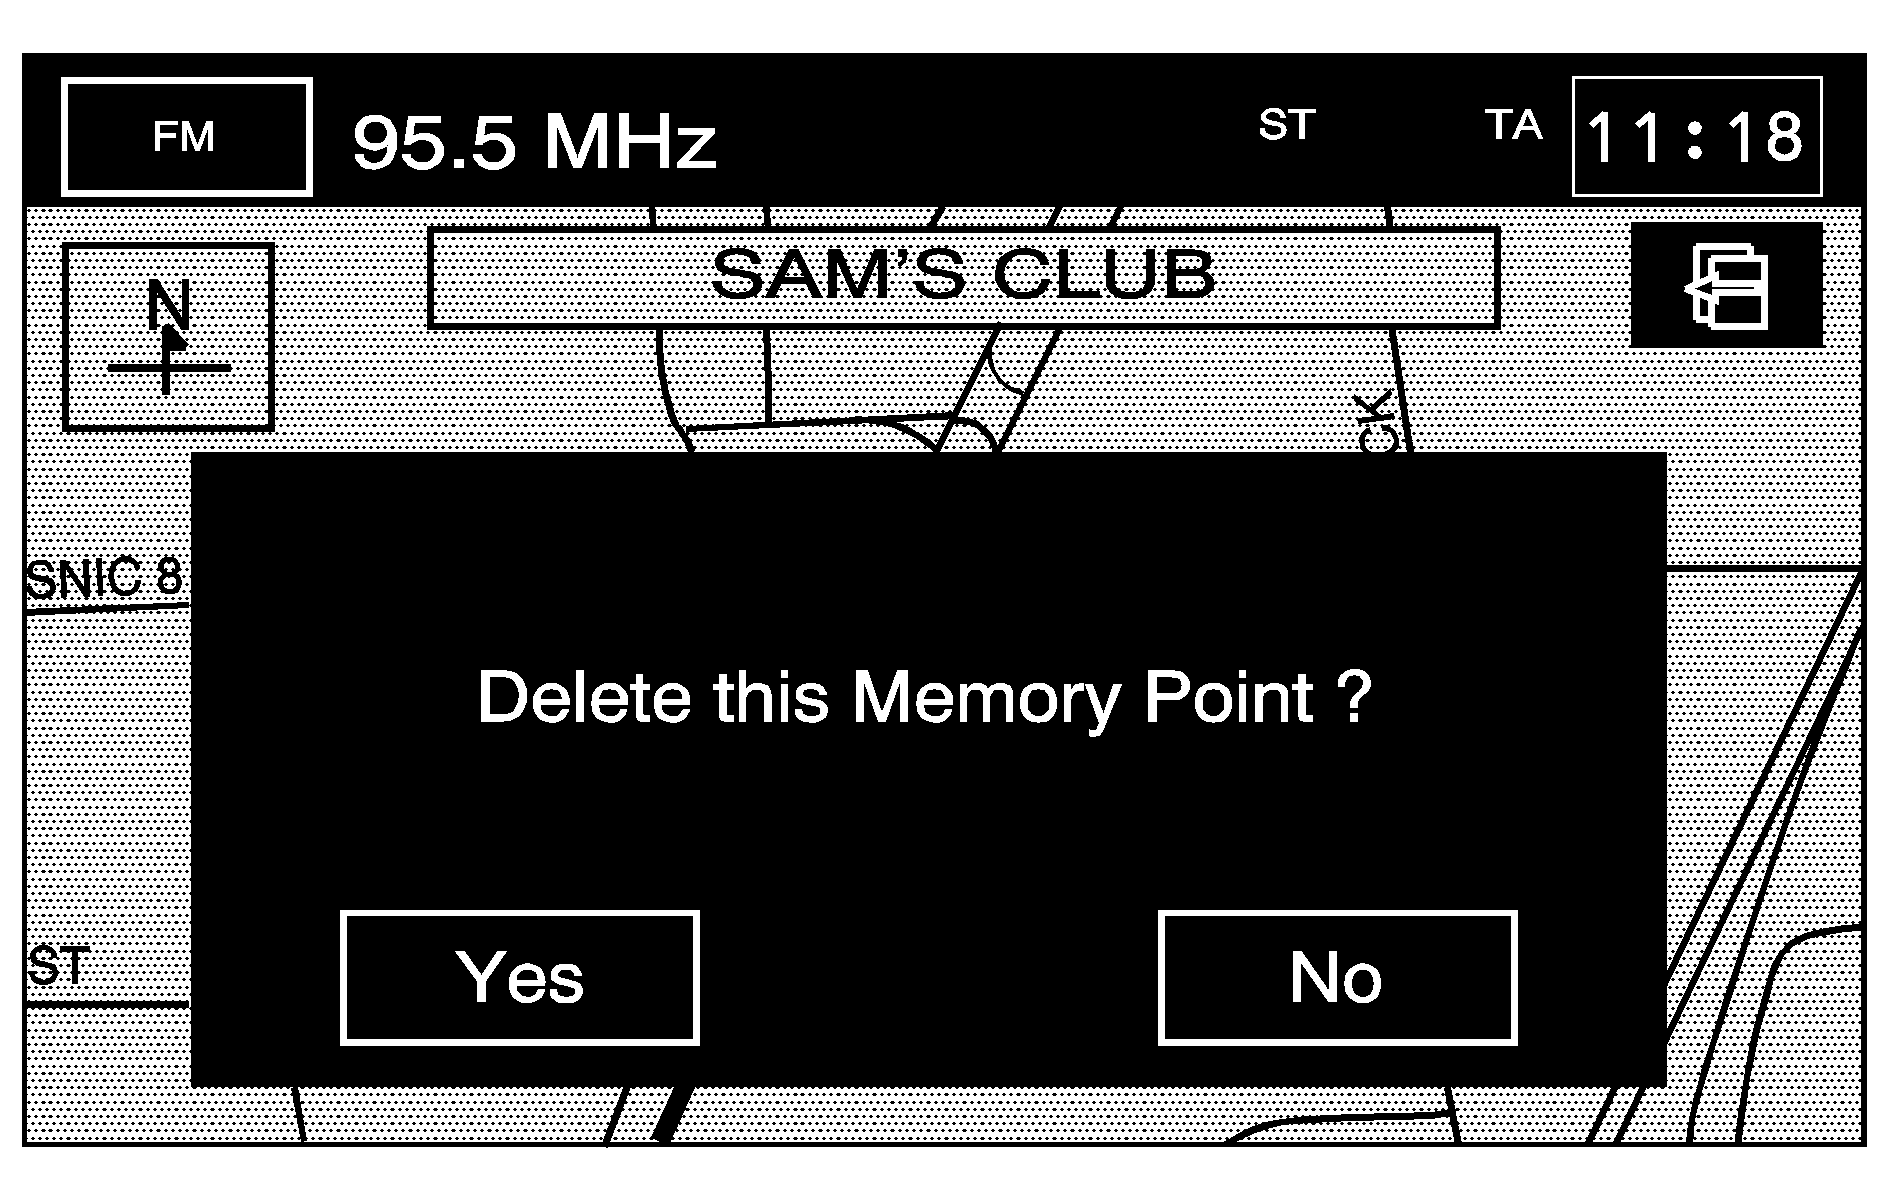
- The system shows the map screen with the position address and a pop-up confirmation message. Select Yes to delete the point; select No to not delete the point and to return to the STORED LOCATIONS screen.
To delete all of the memory points in a folder/category:
- Select the Memory Points screen button from the STORED LOCATIONS screen.
- Select the folder/category the memory points are stored in.
- Select the Del.All screen button.
- The system displays a pop-up confirmation message. Select Yes to delete all the points in the folder/category; select No to not delete the points and to return to the DELETE POINTS screen.
To change the name of the folder/category:
- Select the Memory Points screen button from the STORED LOCATIONS screen.
- Select the folder/category that is to have a name change.
- Select the Edit Category screen button.
- Use the (backspace) screen button to delete the displayed name.
- Use the alpha keypad to input the name of the folder/category.
- Select the OK screen button to save the changes.
Avoid Area
This feature allows you to store or delete an area to be avoided, while on a planned route. Up to 10 points can be stored.
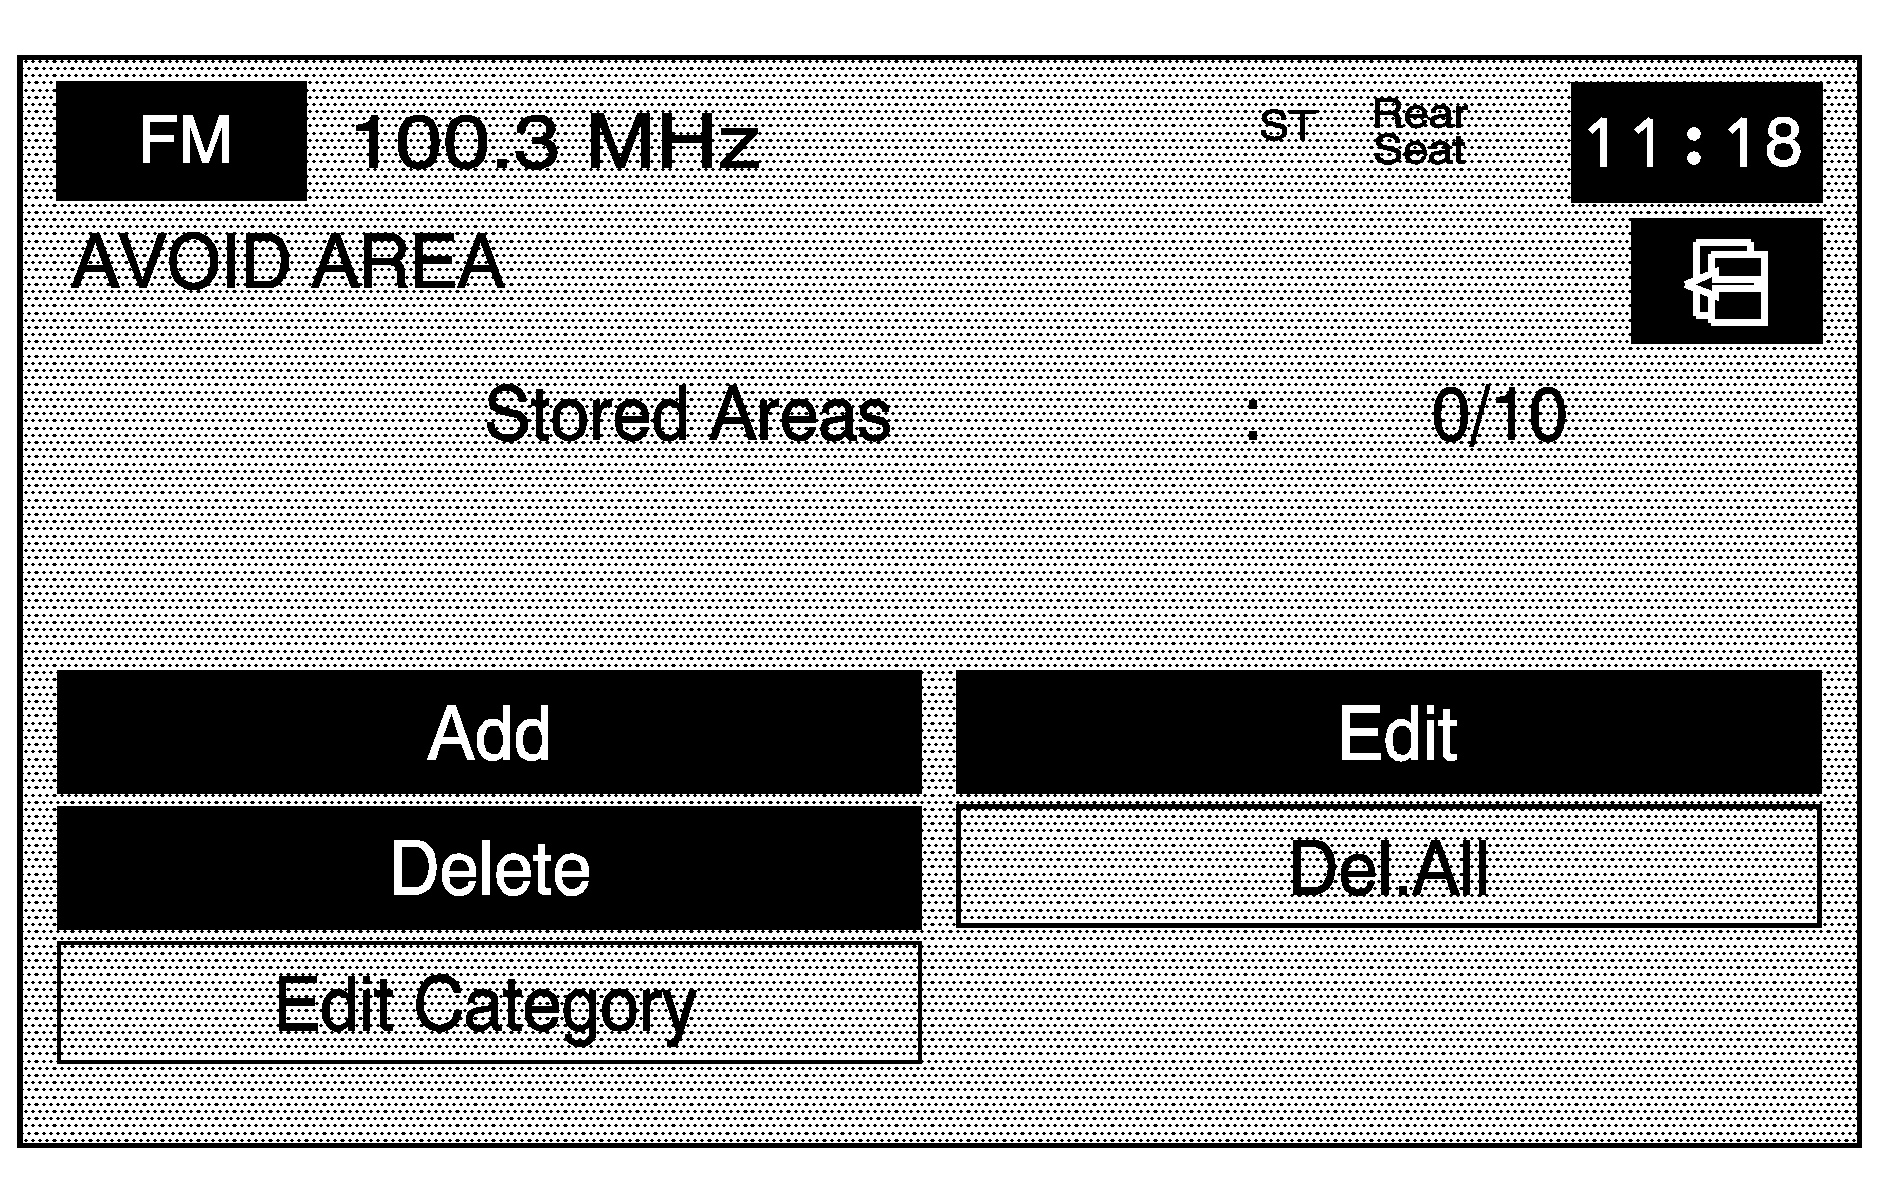
To store a point to be avoided:
- Select the Avoid Area screen button from the STORED LOCATIONS screen.
- Select the Add screen button.
- Select the desired method of entering a destination to enter the area to be avoided. See Destination for more information. A map screen appears displaying the selected location.
- If desired, reduce or enlarge the area around the point to be avoided by using the reduce or enlarge keys.
- Select the OK screen button to store the area.
When avoiding locations on freeways, reduce the avoid area to the minimum scale. This produces an X on the map, rather than a box. This ensures that the system knows to avoid the freeway itself, not the area around the freeway.
To edit the name of the point to be avoided:
- Select the Avoid Area screen button from the STORED LOCATIONS screen.
- Select the Edit screen button.
- Select the point to be changed from the list.
- Select the Name screen button.
- Use the alpha keypad to add or to change the name.
- Select the OK screen button to save the changes.
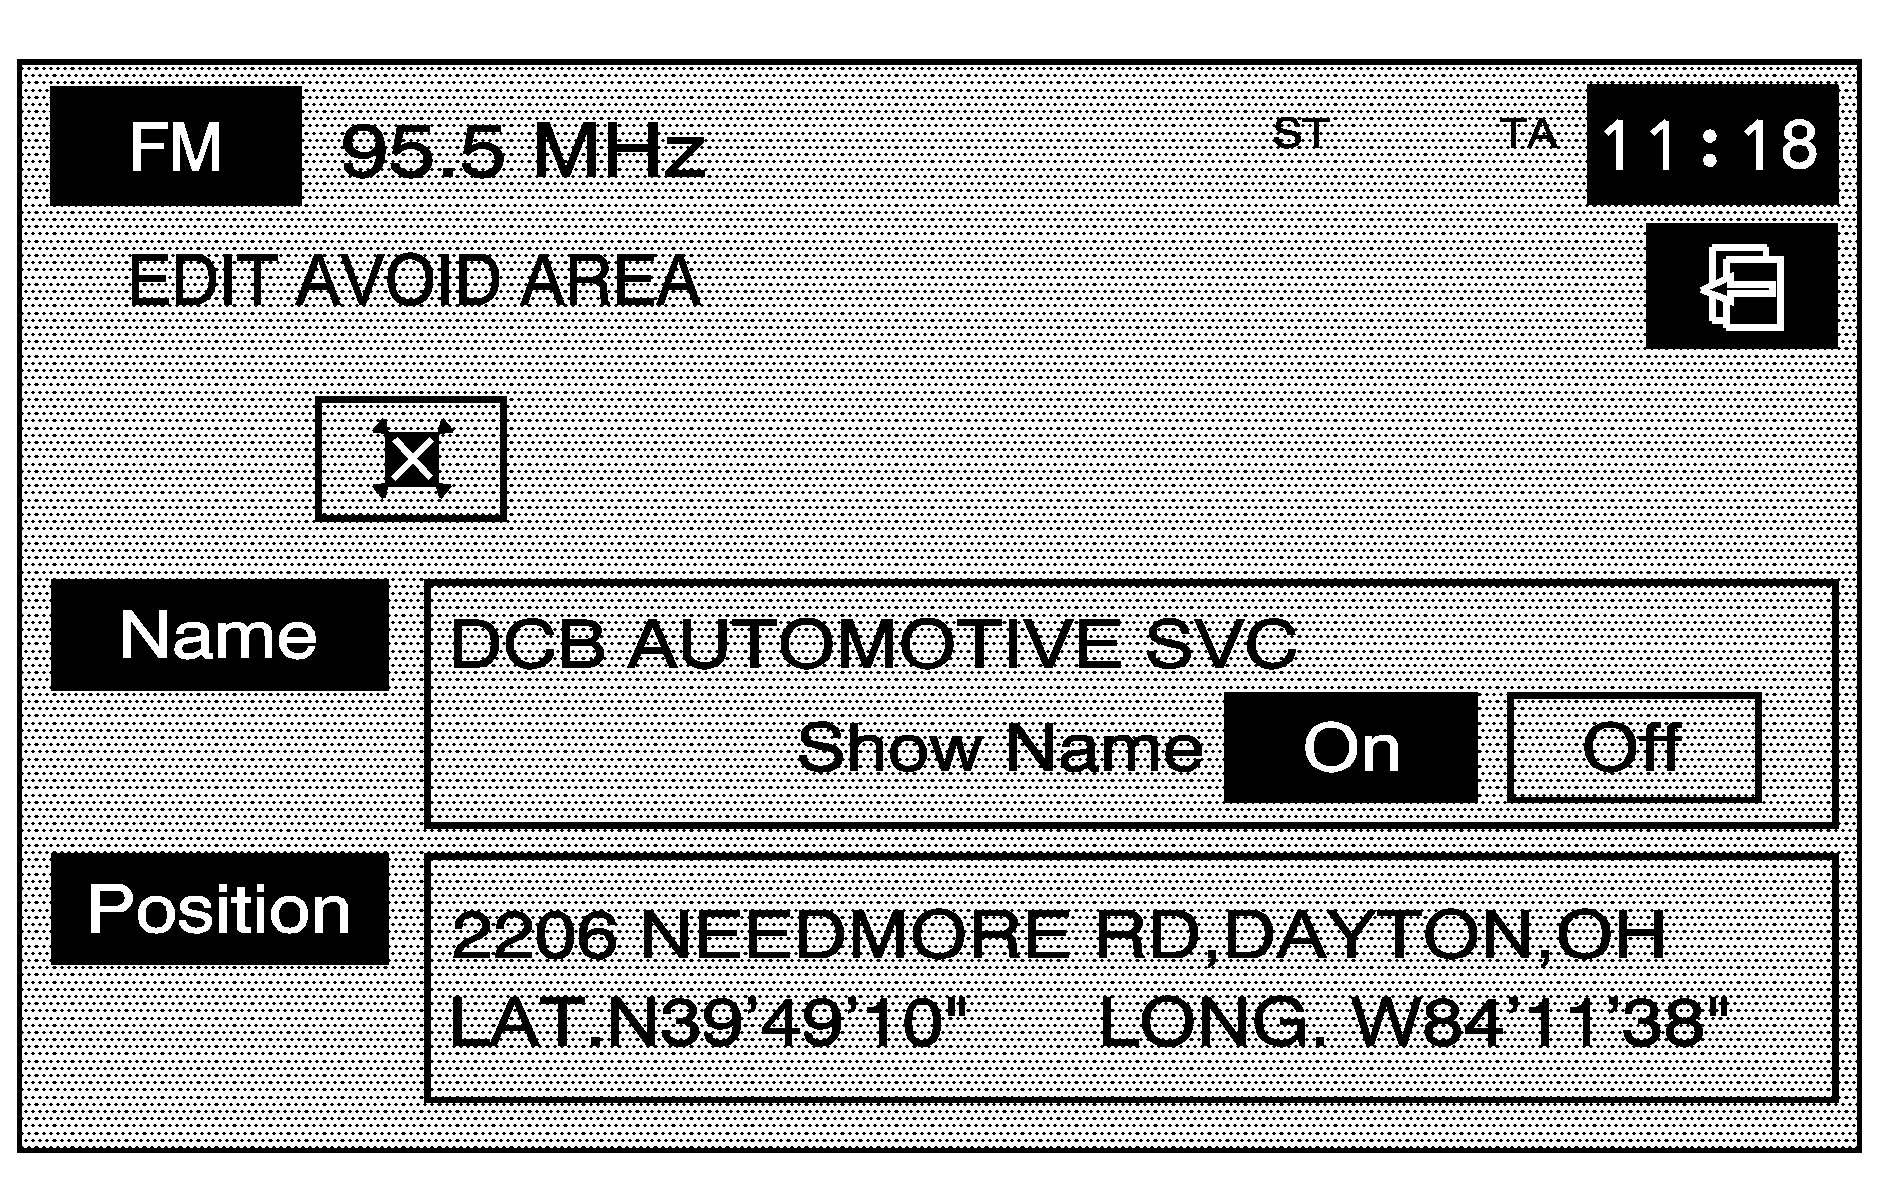
Choose whether or not to have the name show on the map screen, next to the avoided area, by selecting the Show Name On or Off screen buttons.
To edit the position of the point to be avoided:
- Select the Avoid Area screen button from the STORED LOCATIONS screen.
- Select the Edit screen button.
- Select the point to be changed from the list.
- Select the Position screen button.
- Select the map to move the location.
- If desired, reduce or enlarge the area around the point to be avoided by using the reduce or enlarge keys.
- Select the OK screen button to store the area.
To delete a point to be avoided:
- Select the Avoid Area screen button from the STORED LOCATIONS screen.
- Select the Delete screen button.
- Select the point to be deleted. Use the scrolling arrows as needed.
- The system displays the map screen with the name of the point and a pop-up confirmation message. Select Yes to have the point deleted; select No to not delete the point.
To delete all of the points to be avoided:
- Select the Avoid Area screen button from the STORED LOCATIONS screen.
- Select the Del.All screen button.
- The system displays a pop-up confirmation message. Select Yes to have all of the points deleted; select No to not delete the points and to return to the AVOID AREA screen.
Dest. & Way Pt. (Destination and Way Point)
This feature allows up to five waypoints to be stored, to the current route.
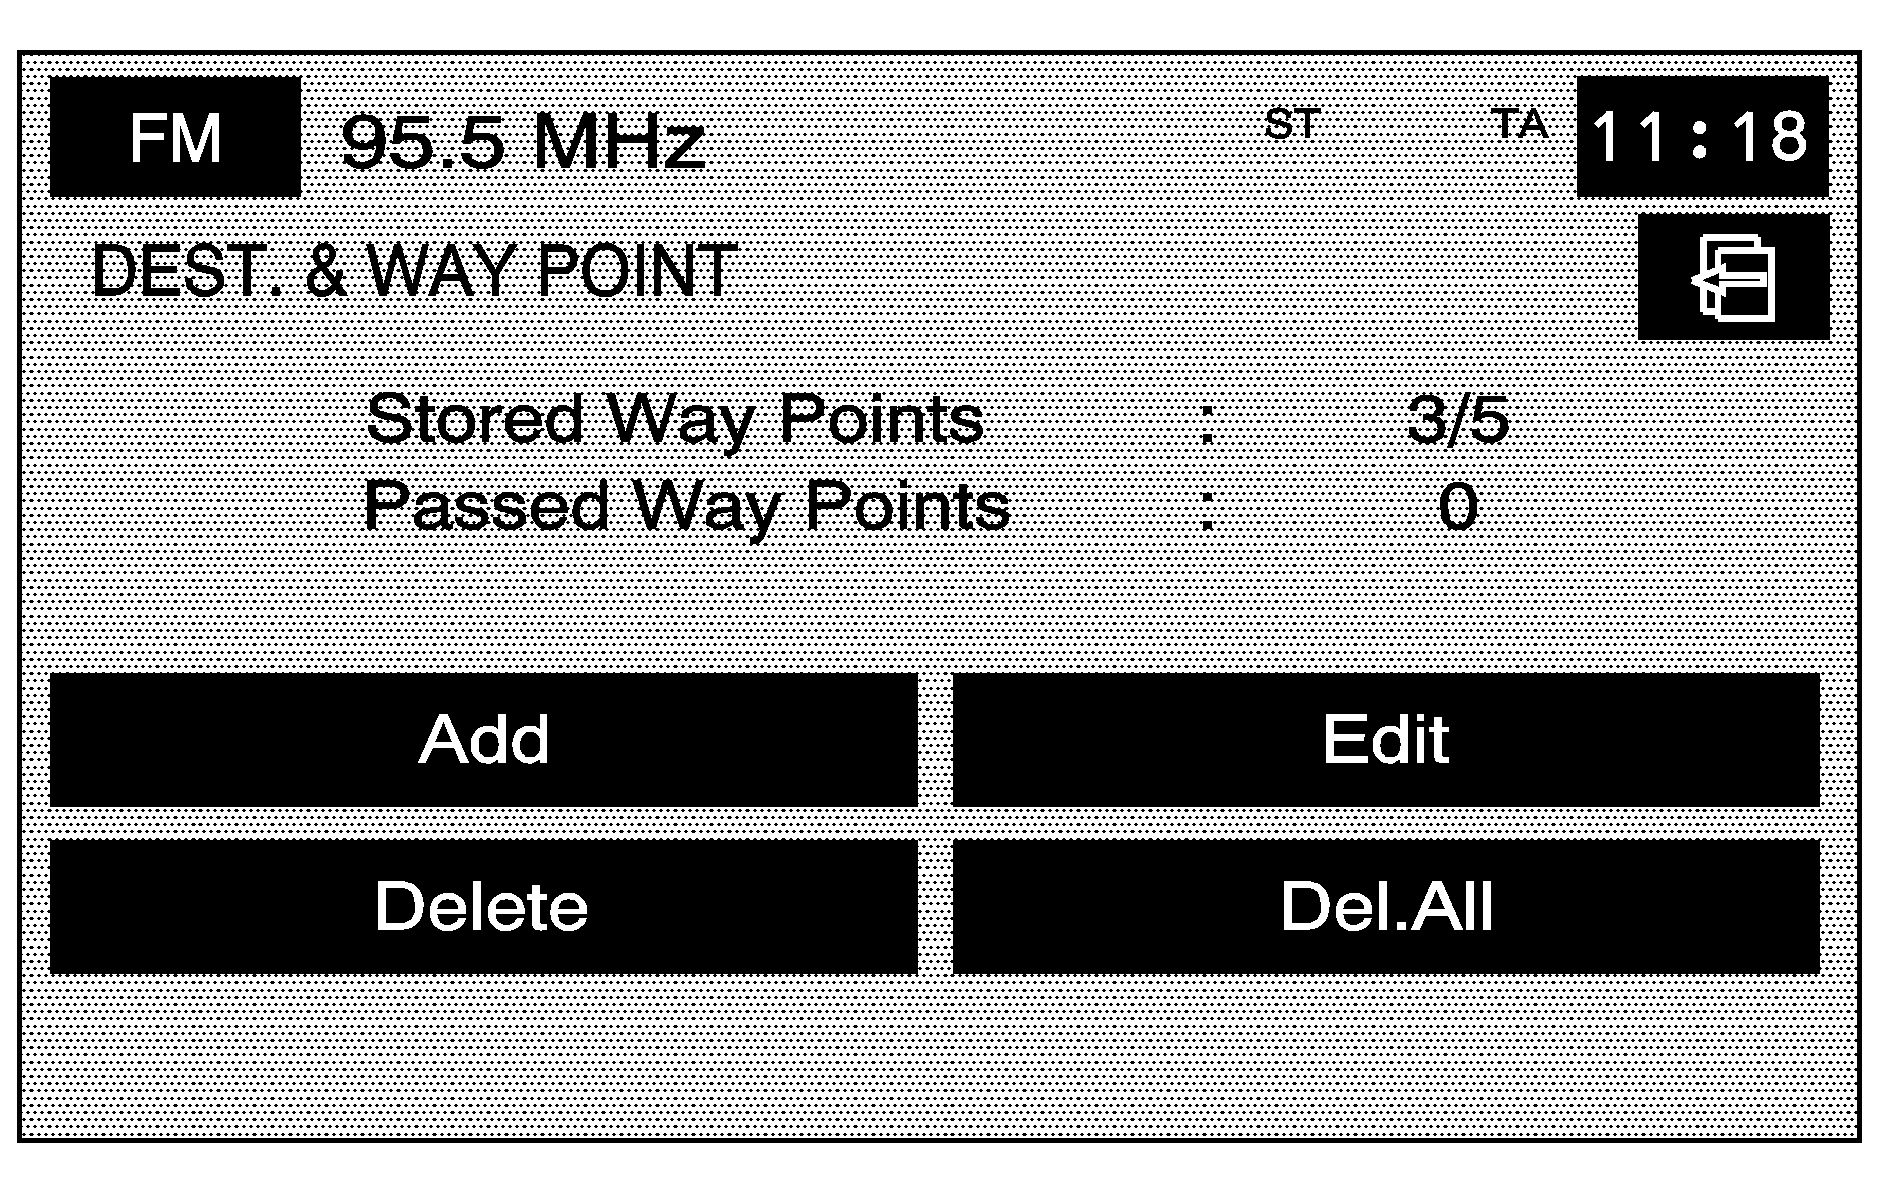
From this screen waypoints can be added, edited, or deleted to the route.
To add a waypoint:
- Select the Dest. & Way Pt. screen button from the STORED LOCATIONS screen.
- Select the Add screen button.
- Using the desired method of entering a destination, enter the waypoint. See Destination for more information.
- Select the (Waypoint) symbol on the map screen to save the waypoint.
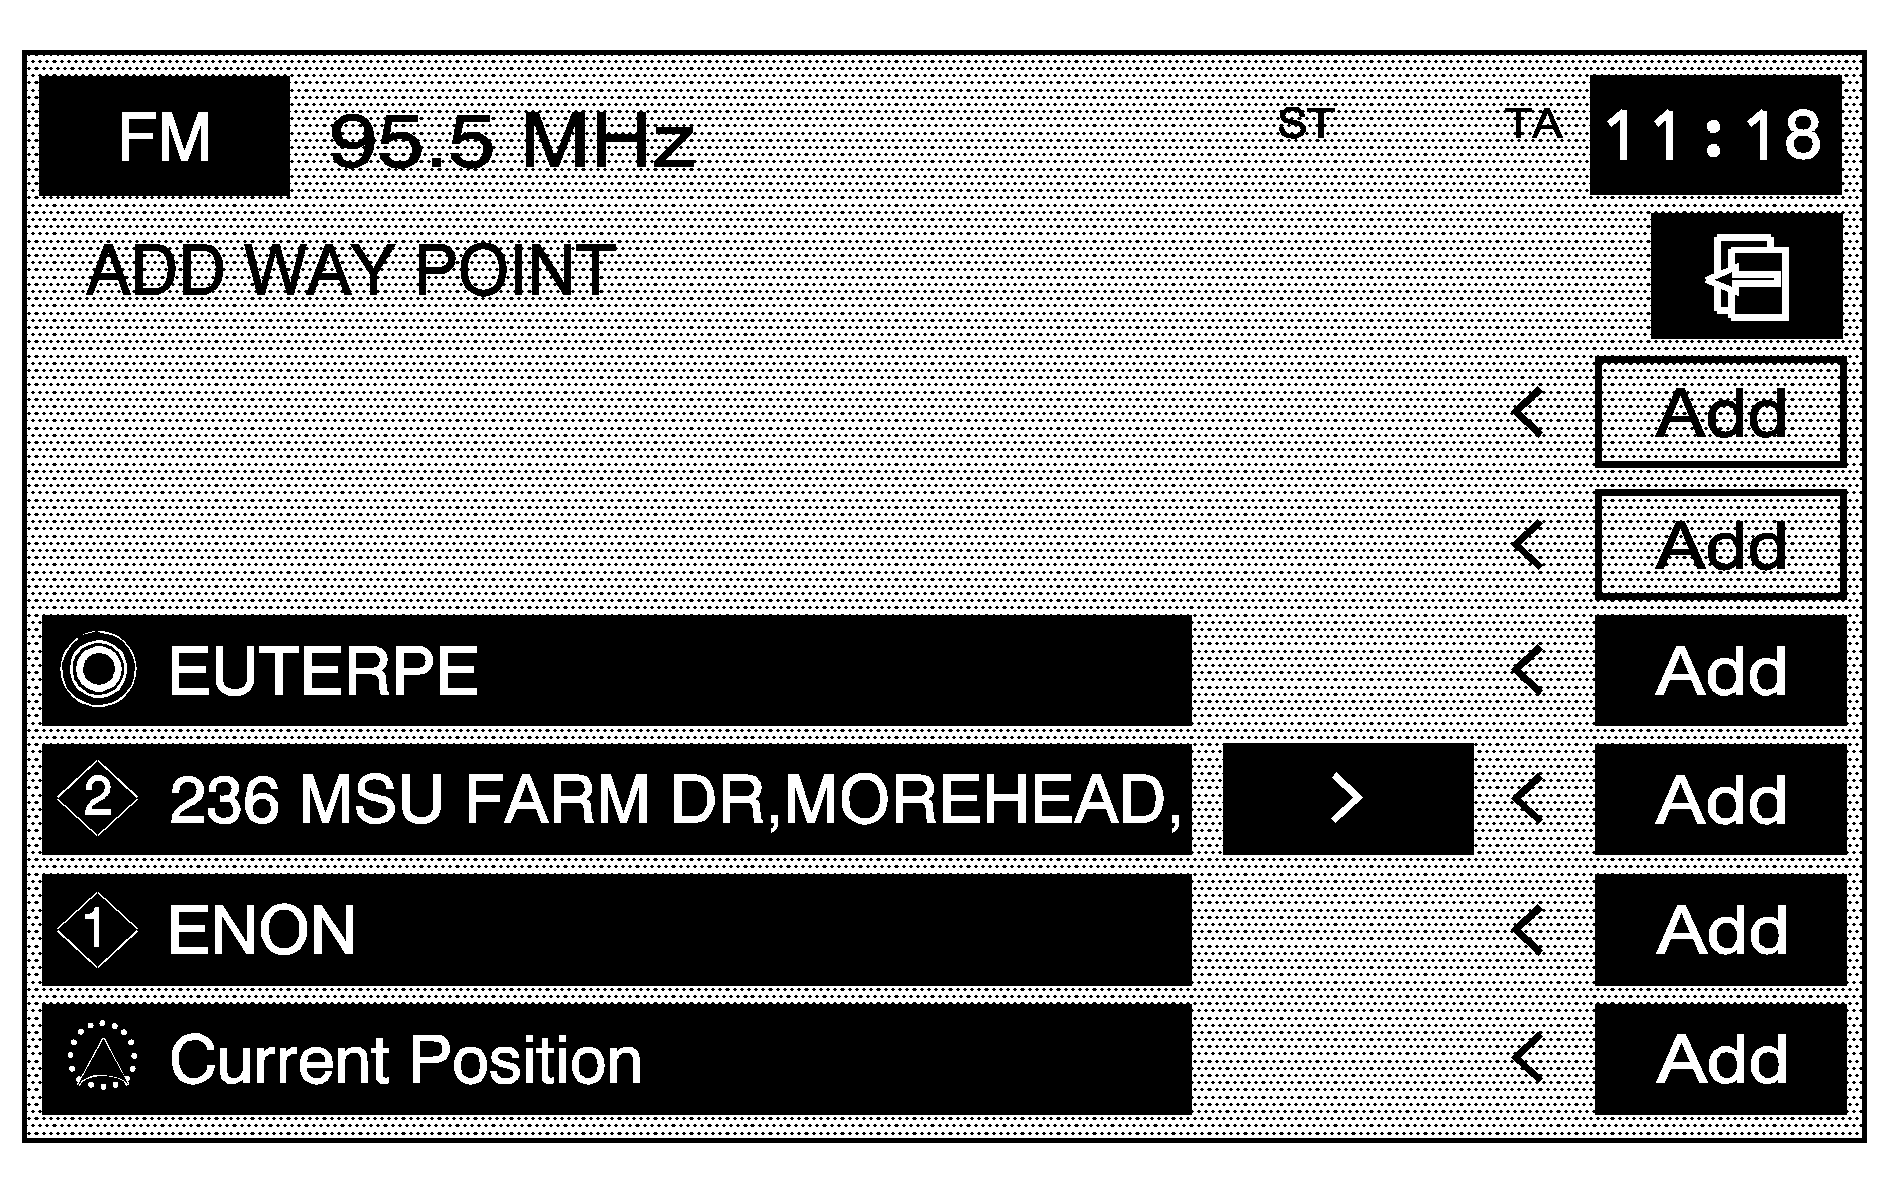
- Repeat Steps 1 - 4 to add up to five waypoints to the route. For the second through the fifth waypoints, the system displays the ADD WAYPOINT screen.
- Select the Add screen button, next to the corresponding waypoint row, to add the waypoint.
A map screen appears with the waypoint marked.
To change the order of the route:
- Select the Dest. & Way Pt. screen button from the STORED LOCATIONS screen.
- Select the Edit screen button.
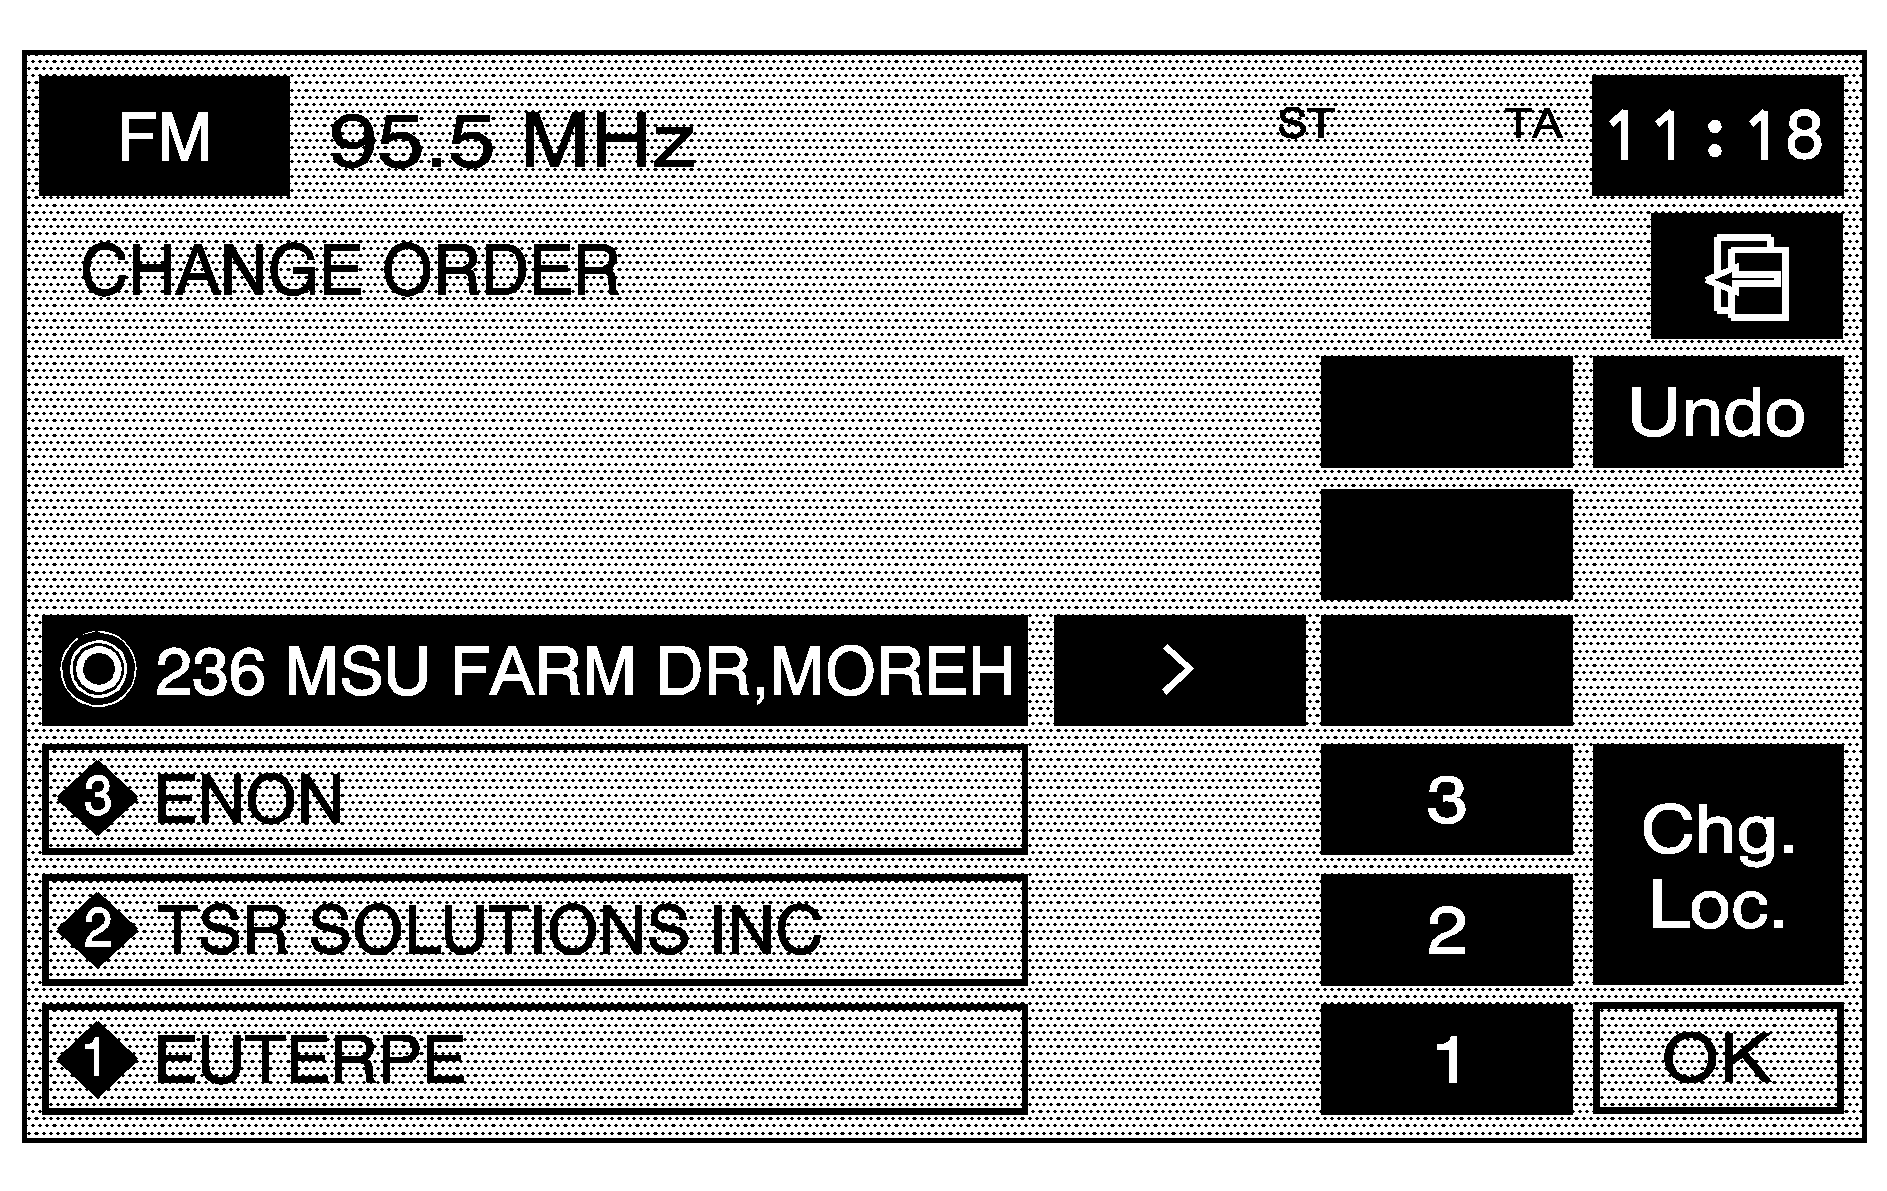
- From the CHANGE ORDER screen, select the names in the order you would like them to fall on the route.
- Select the OK screen button to save the changes.
To change the location of a waypoint:
- Select the Dest. & Way Pt. screen button from the STORED LOCATIONS screen.
- Select the Edit screen button.
- Select the Chg. Loc. screen button from the CHANGE ORDER screen.
- From the CHANGE LOCATION screen, select the point whose location needs to change.
- The system displays the map screen with the destination marked. Touch the position on the map, to move the waypoint to that location.
- Select the OK screen button to save your changes. The system returns to the STORED LOCATIONS screen.
To delete a waypoint from your current route:
- Select the Dest. & Way Point screen button from the STORED LOCATIONS screen.
- Select the Delete screen button.
- Select the waypoint/destination to be deleted.
- The system displays the map screen with a pop-up confirmation message. Select Yes to delete the waypoint; select No to not delete the waypoint.
To delete all of the waypoints on the route:
- Select the Dest. & Way Point screen button from the STORED LOCATIONS screen.
- Select the Del.All screen button.
- The system displays a pop-up confirmation message. Select Yes to delete all of the waypoints; select No to not delete the waypoints.
Home
This feature allows adding, deleting, or editing a point to be stored as your home destination.
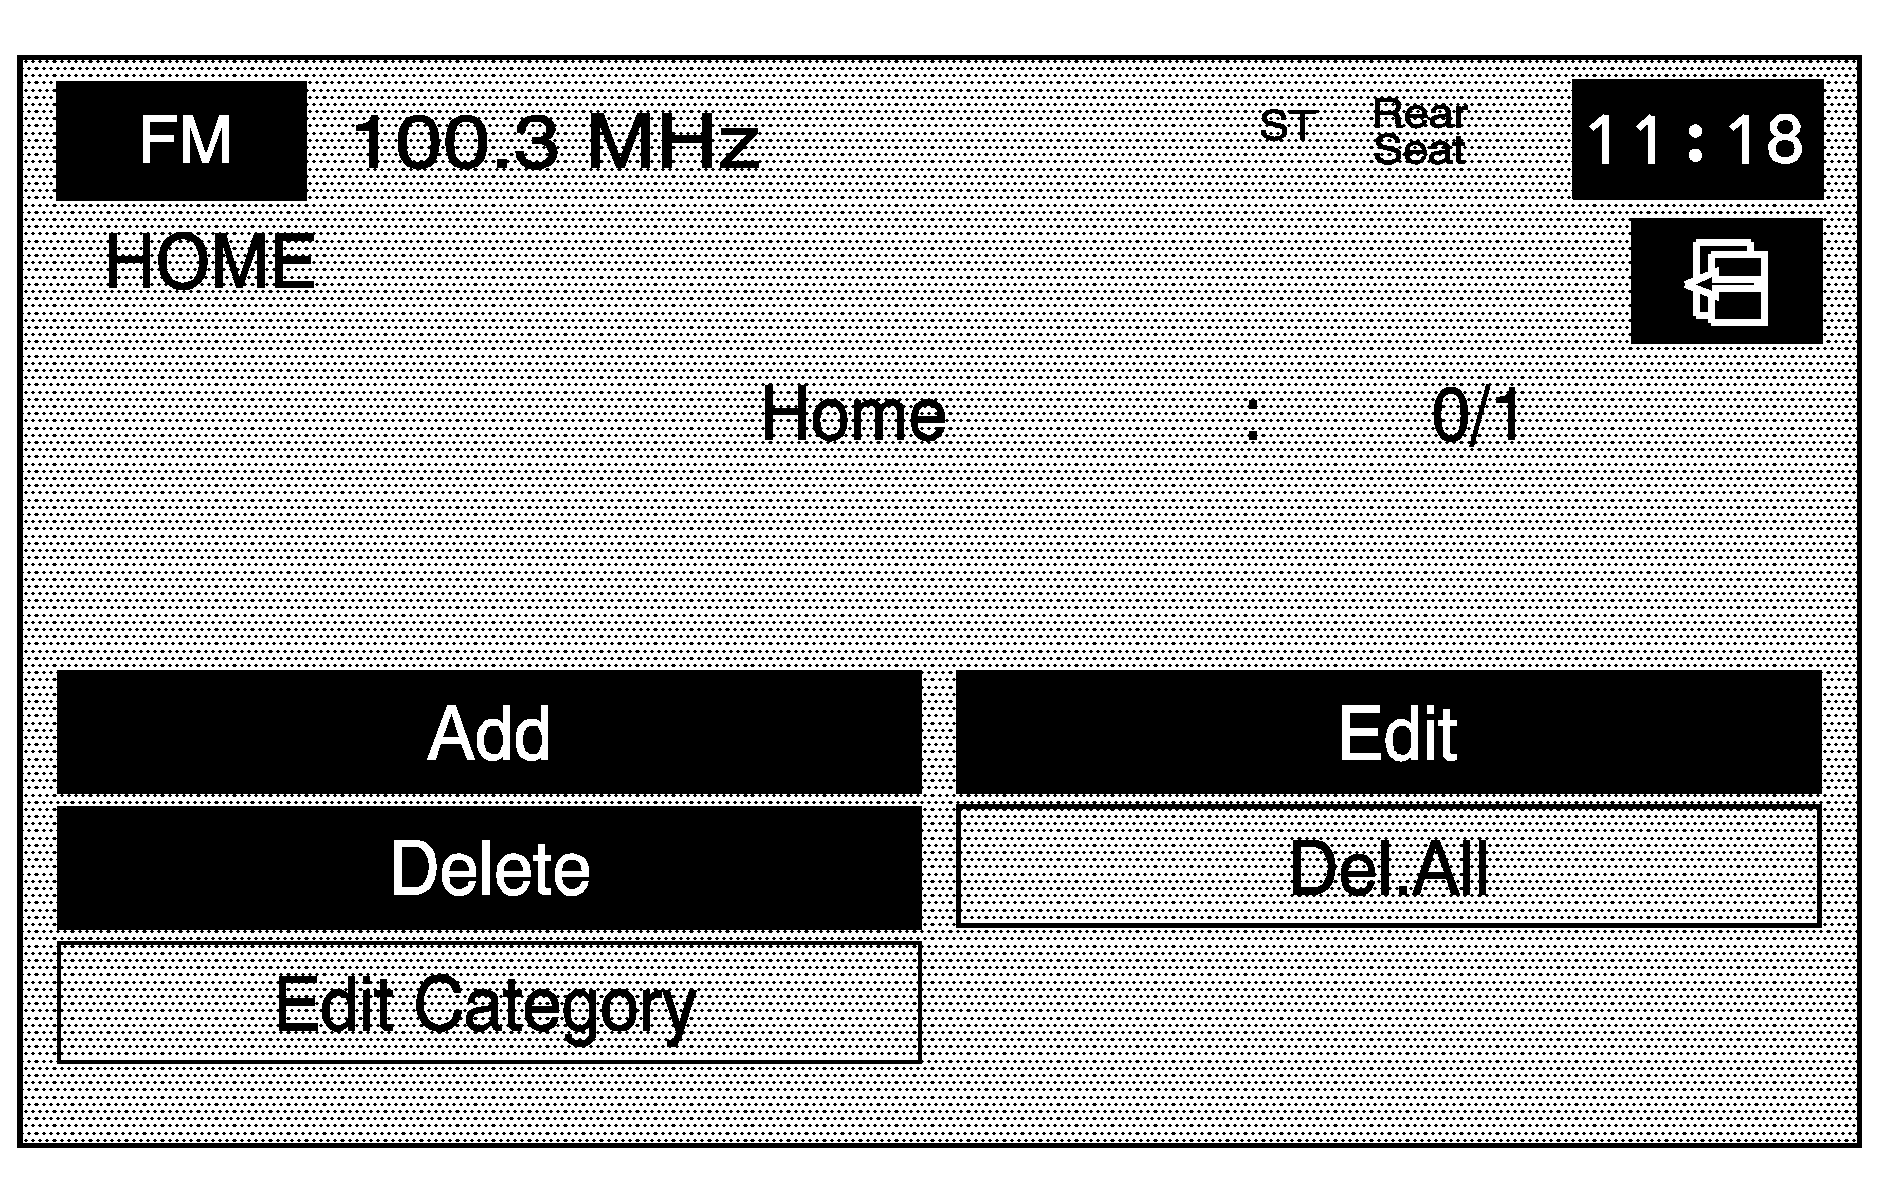
To store the home destination:
- Select the Home screen button from the STORED LOCATIONS screen.
- Select the Add screen button.
- Select a destination entry method. See Destination for more information.
- Select the OK screen button to store the destination. The home icon is highlighted on the DESTINATION ENTRY screen.
To edit the home destination:
- Select the Home screen button from the STORED LOCATIONS screen.
- Select the Edit screen button.
- Touch the map to move the location of the point.
- Select the OK screen button to save the changes.
To delete the home point:
- Select the Home screen button from the STORED LOCATIONS screen.
- Select the Delete screen button.
- The system displays the map screen with a pop-up confirmation message. Select Yes to delete the home point; select No to not delete the home point.
Previous Dest. (Destination)
This feature deletes one or all previous destinations that have been previously entered and automatically stored.
To delete a specific destination:
- Select the Previous Dest. screen button from the STORED LOCATIONS screen.
- Select the Delete screen button.
- Select a destination from the list.
- The system displays the map screen with a pop-up confirmation message. Select Yes to delete the destination; select No to not delete the destination.
To delete all destinations:
- Select the Previous Dest. screen button from the STORED LOCATIONS screen.
- Select the Del.All screen button.
- The system displays a pop-up confirmation message. Select Yes to delete all of the destinations; select No to not delete all of the destinations.
Preset Dests. (Destinations)
This feature adds, deletes, or changes one of five preset destinations. Storing preset destinations makes these destinations easily available to set as a destination. See "Preset Destination" under Destination for more information
To store a preset destination:
- Select the Preset Dests. screen button from the STORED LOCATIONS screen.
- Select the Add screen button to add a preset destination.
- Select the numbered preset row you would like it to appear as.
- Select a destination entry method. See Destination for more information.
- Select the OK screen button to store the destination. The destination is highlighted on the DESTINATION ENTRY screen.
To edit the name of a preset destination:
- Select the Preset Dests. screen button from the STORED LOCATIONS screen.
- Select the Edit screen button.
- Select the preset destination to be edited.
- Select the Name screen button and use the alpha keypad to edit or add the name.
- Select the OK screen button to save your changes.
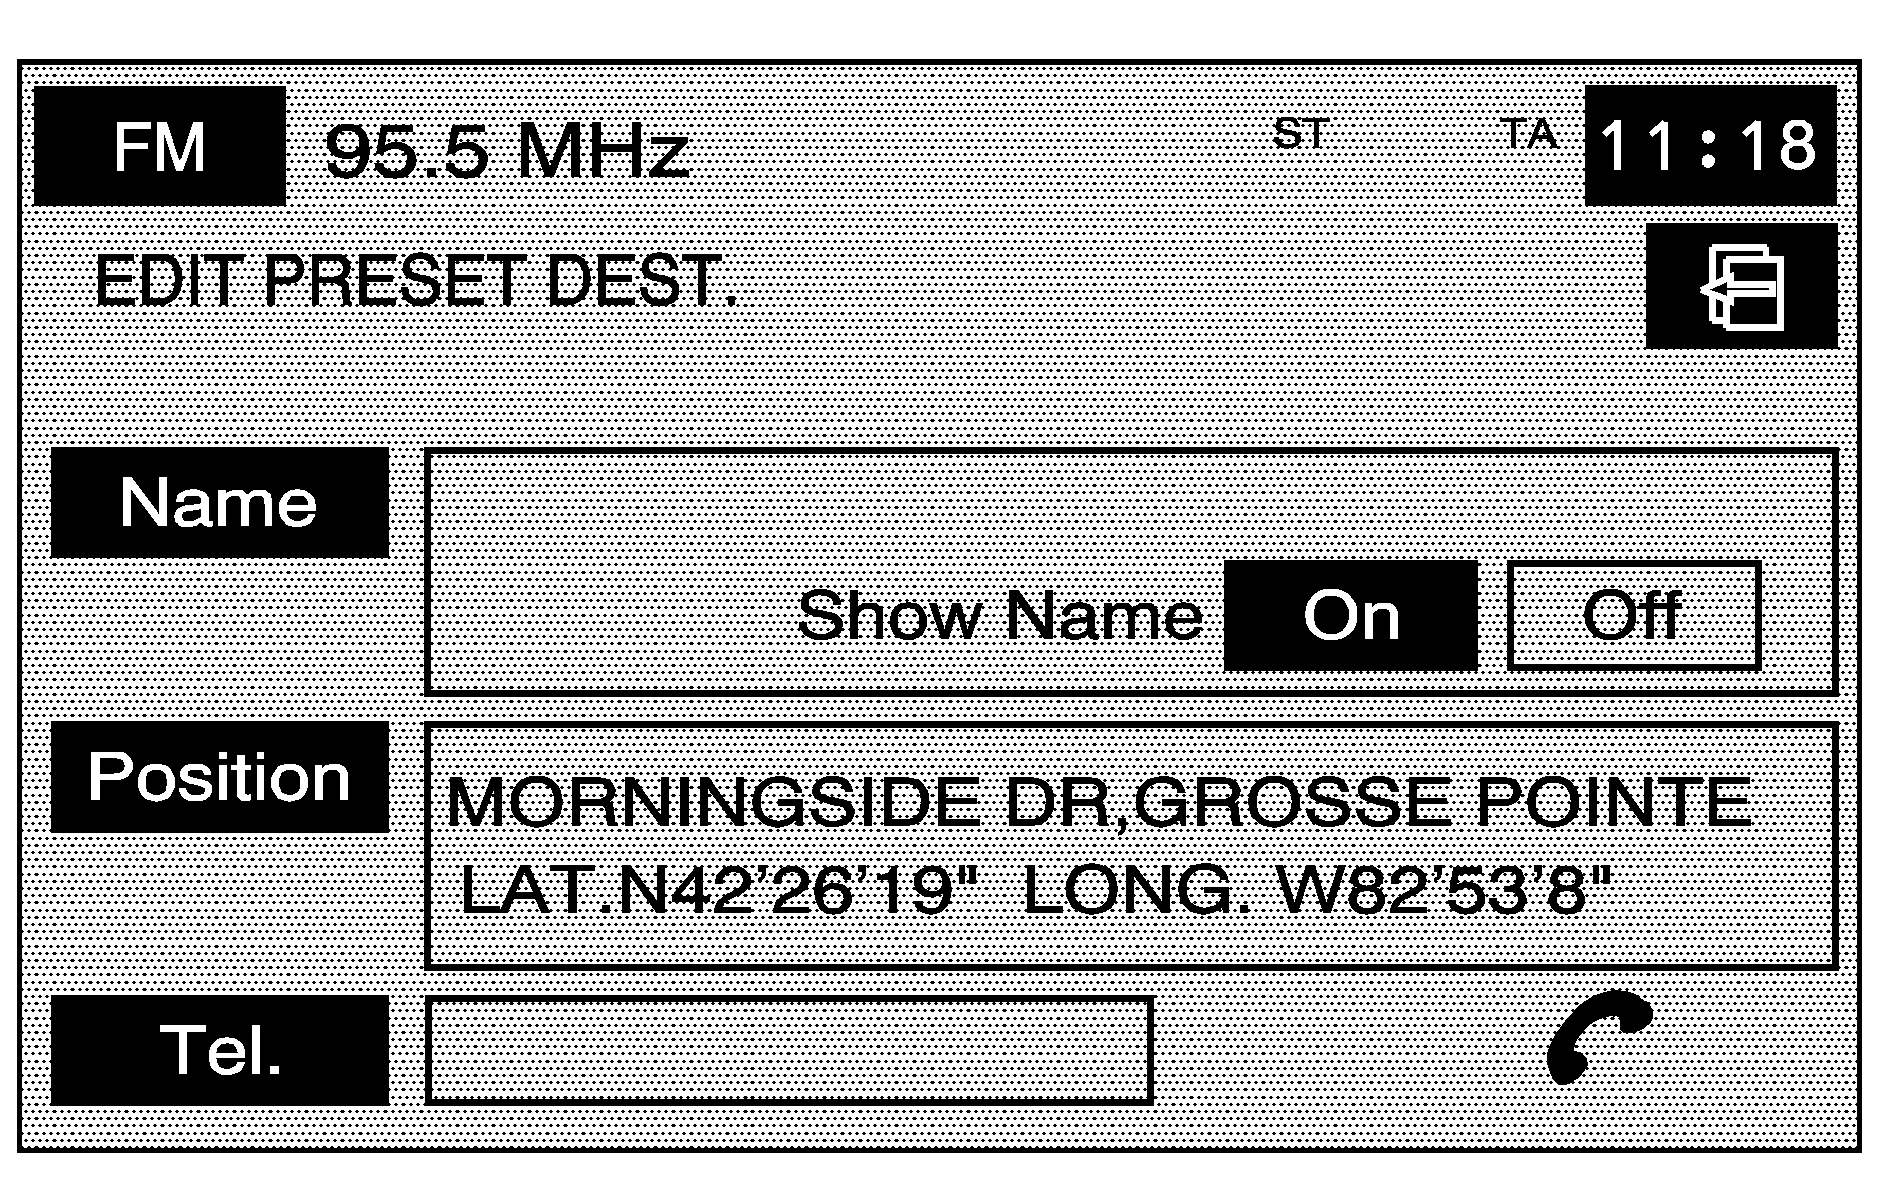
Choose whether or not to have the name show on the map screen, next to the preset destination symbol, by selecting the Show Name On or Off screen buttons.
To change the position of a preset destination:
- Select the Preset Dests. screen button from the STORED LOCATIONS screen.
- Select the Edit screen button.
- Select the preset destination to be changed.
- Select the Position screen button.
- Touch the position on the map, to move the destination to that location.
- Select the OK screen button to save the changes.
To add or change the phone number of a preset destination:
- Select the Preset Dests. screen button from the STORED LOCATIONS screen.
- Select the Edit screen button.
- Select the preset destination to be changed.
- Select the Tel. screen button and use the numeric keypad to input or change the phone number.
- Select the OK screen button to save the changes.
If a Bluetooth® phone is connected, touch the (Send/End Call) screen button and the system will call that number.
To delete a preset destination:
- Select the Preset Dests. screen button from the STORED LOCATIONS screen.
- Select the Delete screen button.
- Select the preset destination to be deleted.
- The system displays the map screen with a pop-up confirmation message. Select Yes to delete the destination; select No to not delete the destination.
To delete all preset destinations:
- Select the Preset Dests. screen button from the STORED LOCATIONS screen.
- Select the Del. All screen button.
- The system displays a pop-up confirmation message. Select Yes to delete all destinations; select No to not delete all destinations.
Display Memory Pt. Icons
When memory points have been stored, this screen button displays. Select this screen button, from the STORED LOCATIONS screen, to display memory point icons on the map screen.
Calculate
Select this screen button, from the STORED LOCATIONS screen, to calculate the route.
