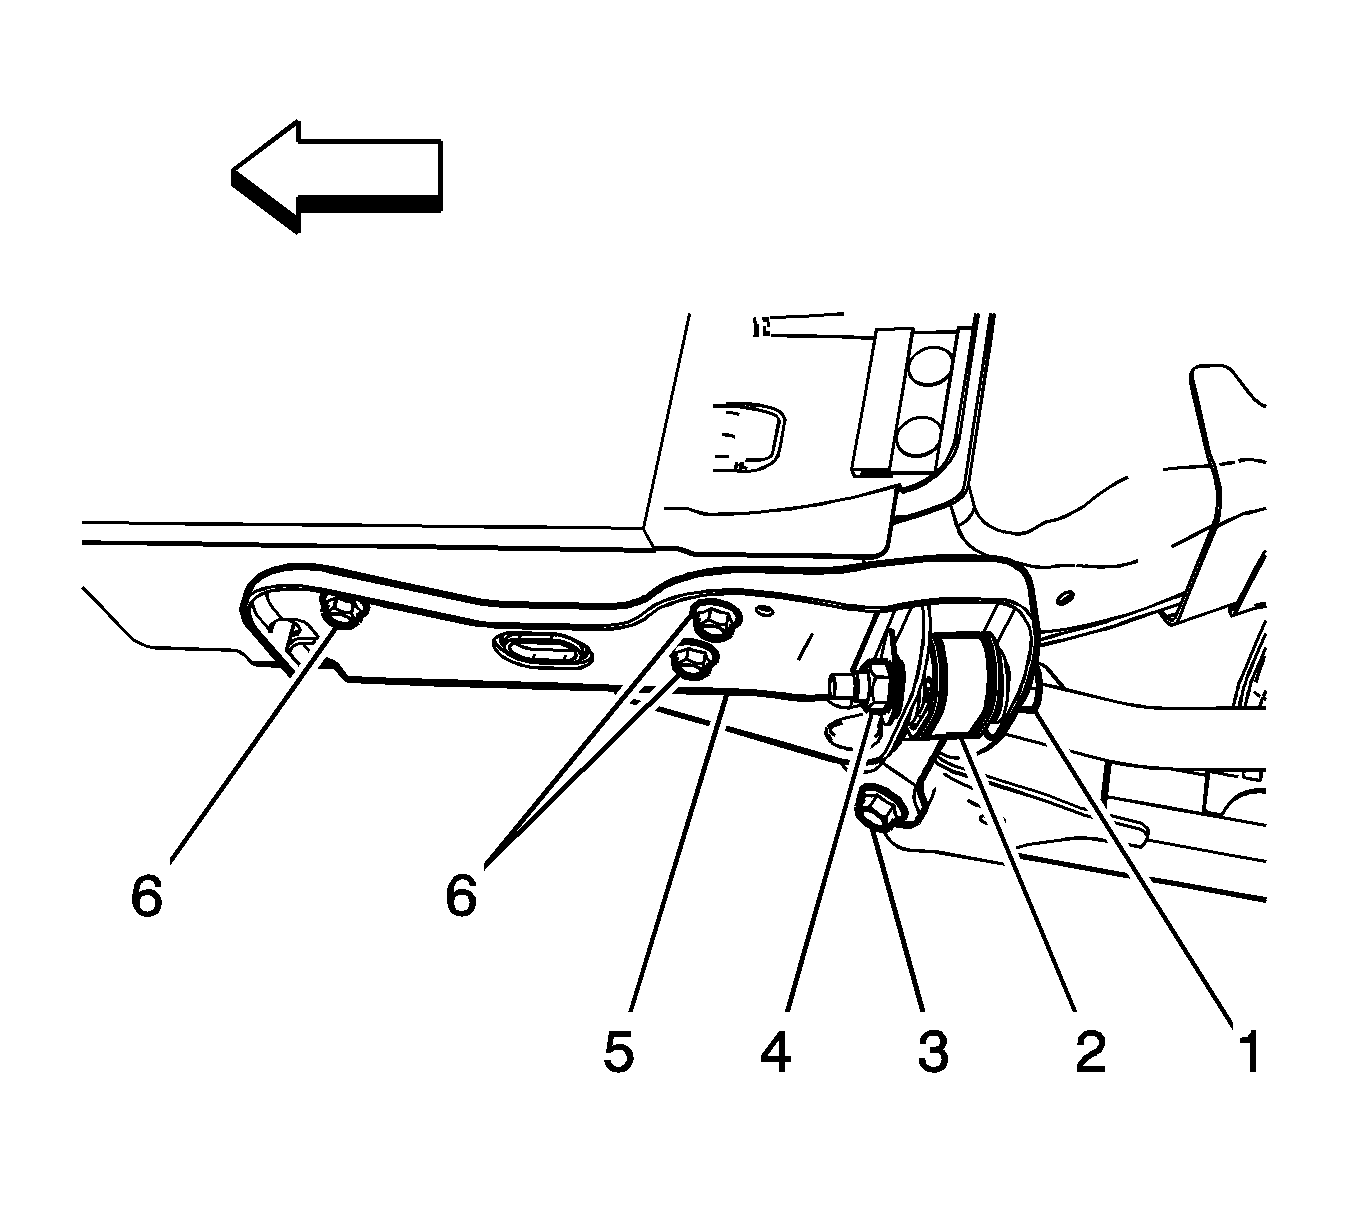
For 1990-2009 cars only
Removal Procedure
- Raise and support the vehicle. Refer to Lifting and Jacking the Vehicle.
- Support the lower control arm with a jack stand.
- Remove the suspension bracket bolts (6).
- Remove the rear suspension brace bolt (3).
- Remove the suspension bracket (5) from the vehicle.
- Remove the nut (4) and the bolt (1) for the rear suspension brace (2), if needed.
- Remove the rear suspension brace (2) from the rear suspension bracket (5), if needed.

Important:
• If removing the suspension bracket, but not servicing the suspension bracket, DO NOT remove the bolt (1). • If lowering the rear suspension cradle or if servicing the fuel filter, only remove the suspension bracket bolts (6).
Installation Procedure
- Position the rear suspension brace (2) in the rear suspension bracket (5), if needed.
- Install the rear suspension brace nut (4) and the bolt (1), if needed. Hand tighten the nut (4) and the bolt (1).
- Position the rear suspension bracket (5) on the vehicle.
- Install the rear suspension bracket mounting bolts (6).
- Install the rear suspension brace mounting bolt (3).
- Tighten the rear suspension brace bolt (1).
- Remove the jack stand from the lower control arm.
- Remove the support and lower the vehicle.

Notice: Refer to Fastener Notice in the Preface section.
Tighten
Tighten the rear suspension bracket mounting bolts to 58 N·m (43 lb ft).
Tighten
Tighten the rear suspension brace mounting bolt to 85 N·m (63 lb ft).
Tighten
Tighten the rear suspension brace mounting bolt to 160 N·m (118 lb ft).
