For 1990-2009 cars only
Special Tools
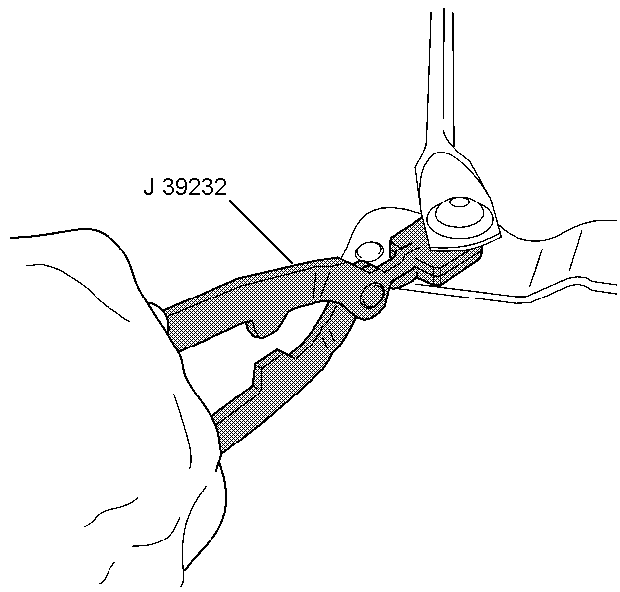
| • | J-39232 Wiper Linkage Separator Wiper Linkage Separator |
| • | J-39529 Wiper Linkage Installer |
Removal Procedure
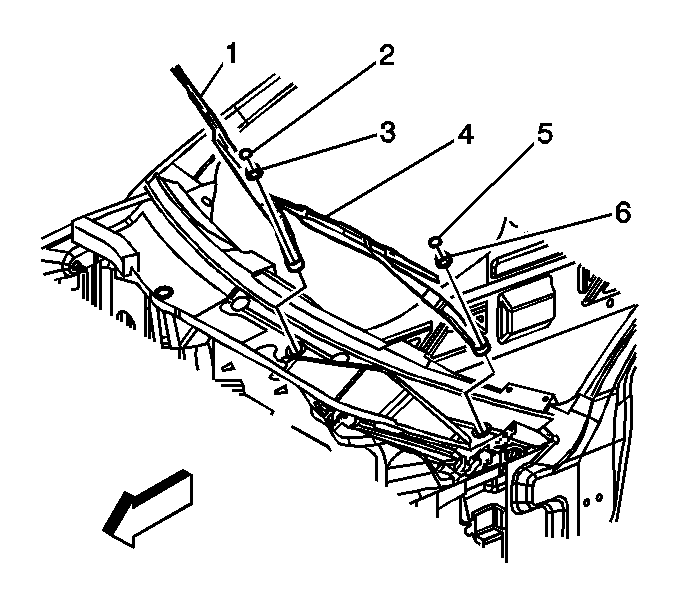
- Remove the wiper arms (1,4). Refer to Windshield Wiper Arm Replacement.
- Remove the air inlet grille panel. Refer to Air Inlet Grille Panel Replacement.
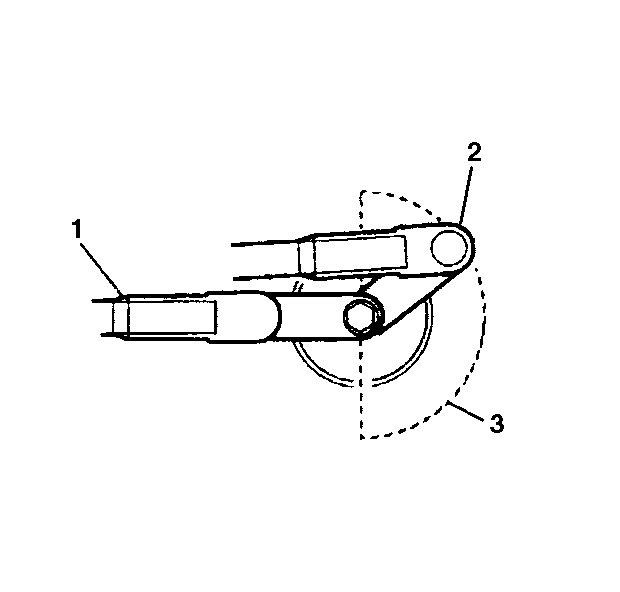
- Pull or push on the wiper transmission linkage to rotate the wiper motor crank arm (2) from the park position (1) to the area opposite the park position (3).
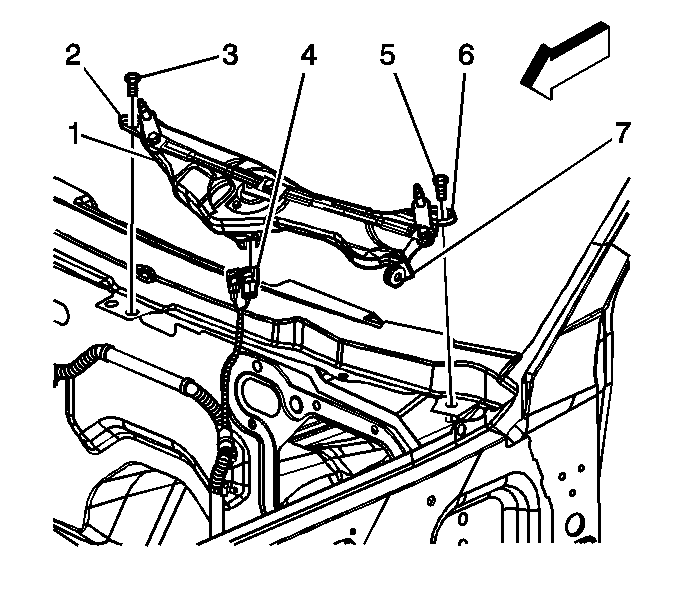
- Disconnect the wiper motor harness connector (4).
- Remove the 2 screws (3,5) retaining the wiper transmission.
- Remove the wiper transmission (1) from the vehicle.
- Remove the drive links from the wiper motor crank arm and the wiper transmission drive shafts with the J-39232 separator .
- Remove the transmission links from the module.
Installation Procedure
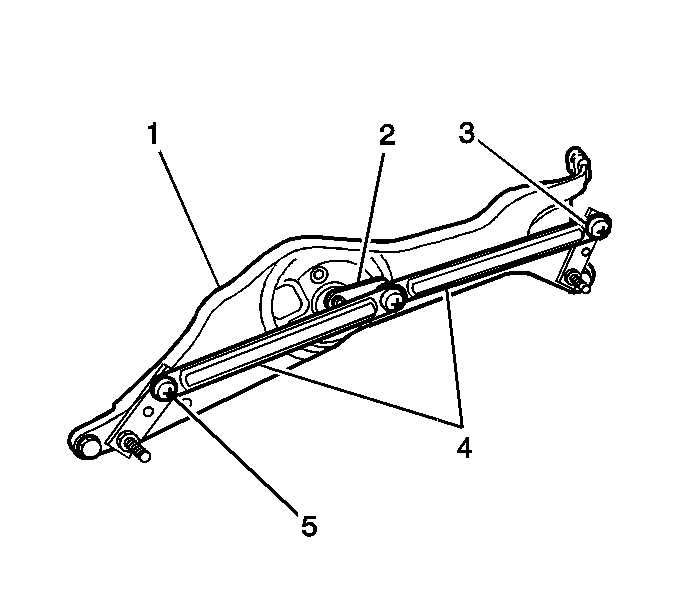
- Position the transmission drive links (4) to the pivot arms (3,5).
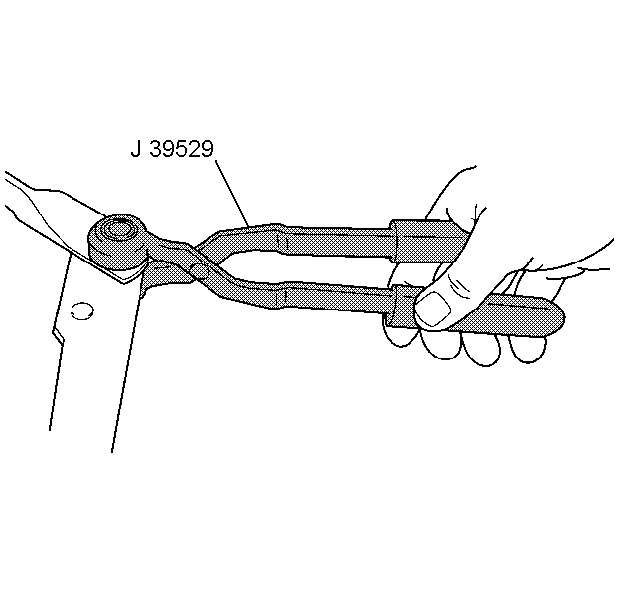
- Install the drive links onto the wiper motor crank arm and the wiper transmission drive shafts with the J-39529 installer .
- Connect the electrical connector (4) to the motor.
- Position the transmission (2) to the fender flange pin.
- Install the bolts (3,5) and tighten to 10 N·m (89 lb in).
- Install the air inlet grille panel. Refer to Air Inlet Grille Panel Replacement.
- Install the wiper arms (1,4). Refer to Windshield Wiper Arm Replacement.
- Operate the wipers and check for proper operation.

Caution: Refer to Fastener Caution in the Preface section.

