For 1990-2009 cars only
Removal Procedure
- Remove the front floor console. Refer to Front Floor Console Replacement.
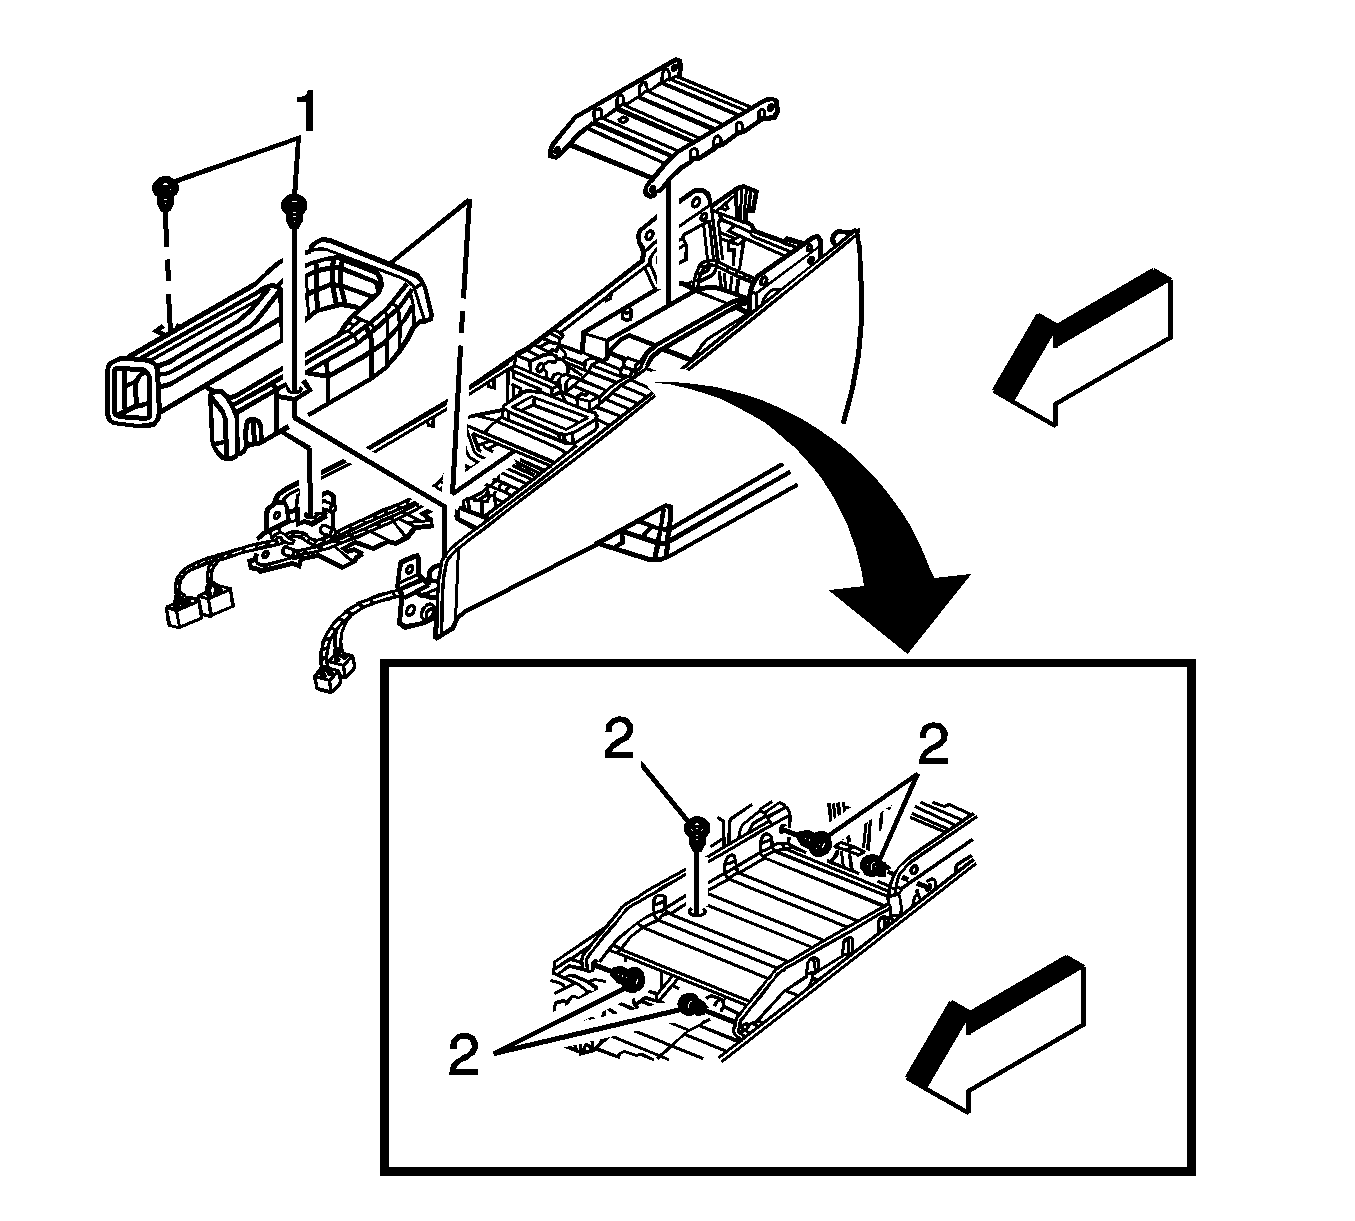
- Remove the front HVAC duct (1).
- Remove the screws (2) securing the side impact brace.
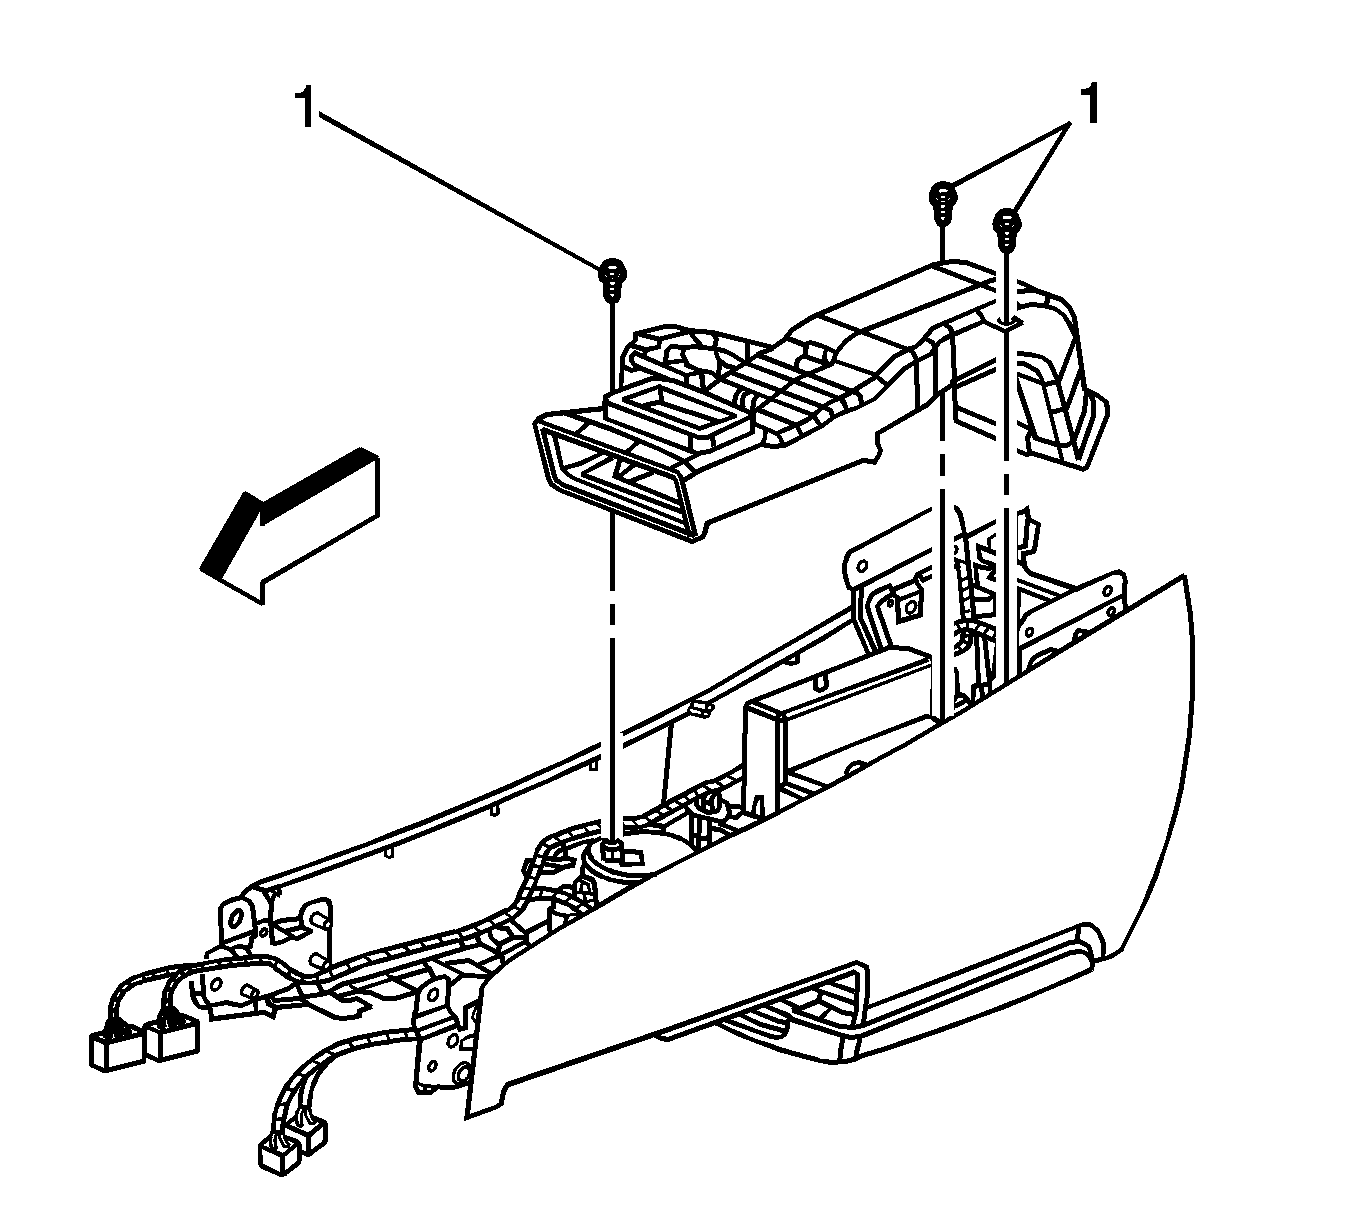
- Remove the screws (1) securing the center HVAC duct.
- Remove the HVAC Duct assembly.
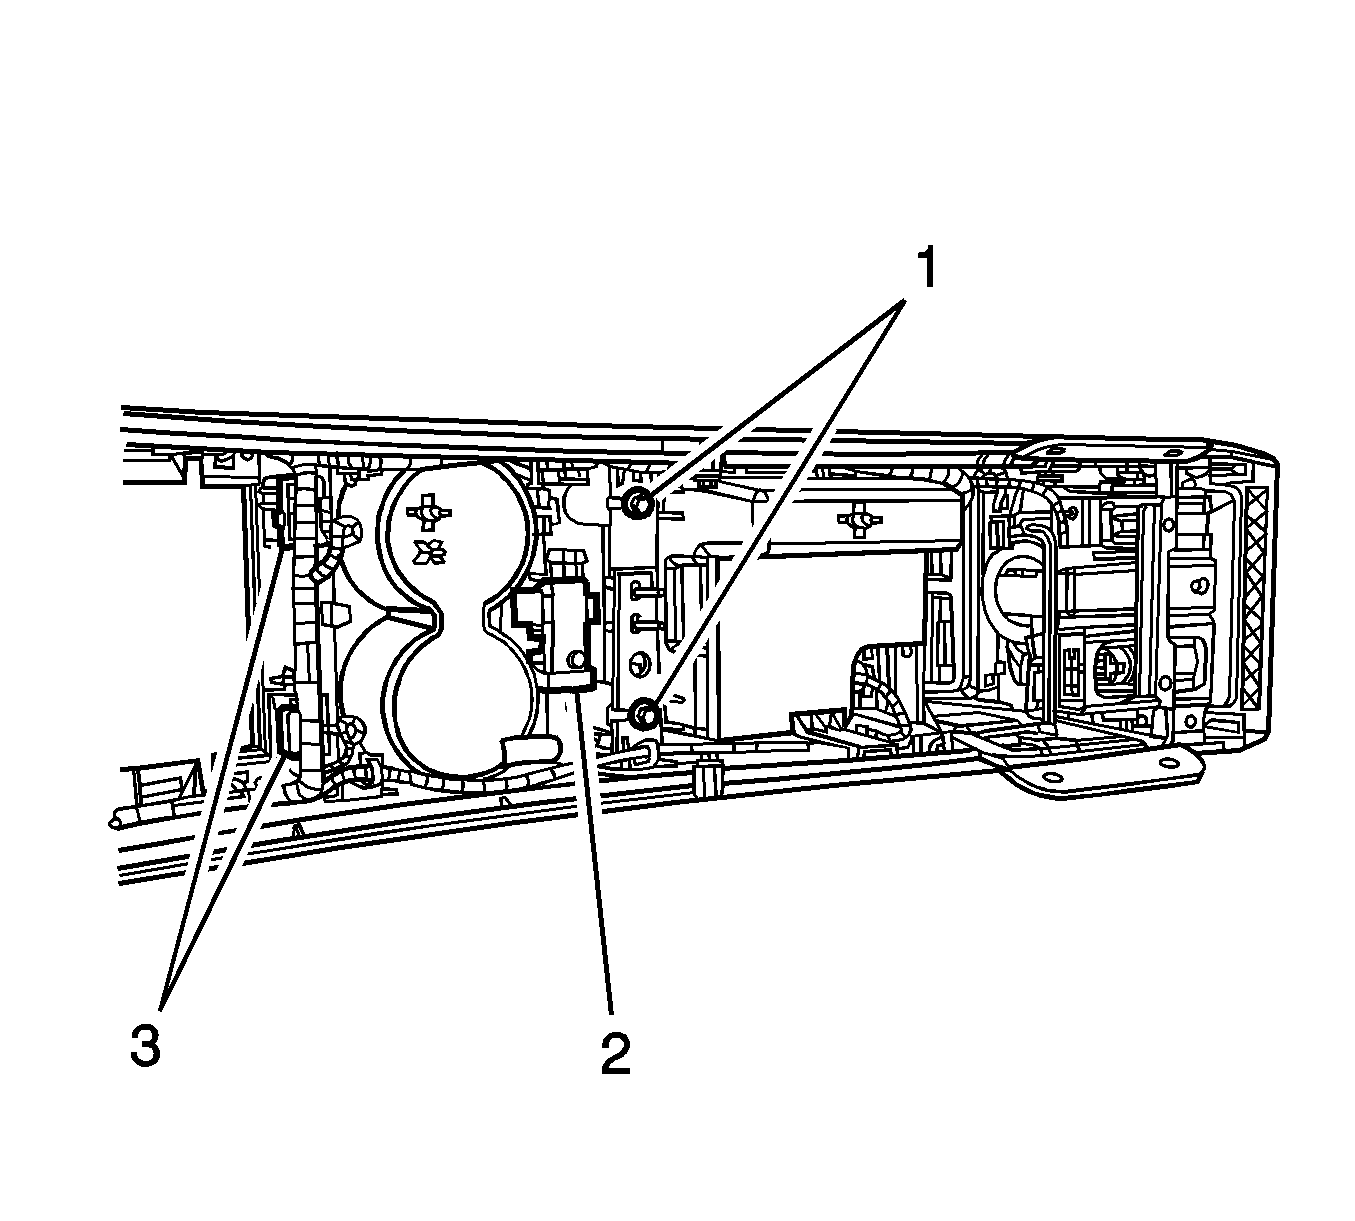
- Disconnect the electrical connections.
- Remove the screws (1) securing the cupholder to the console.
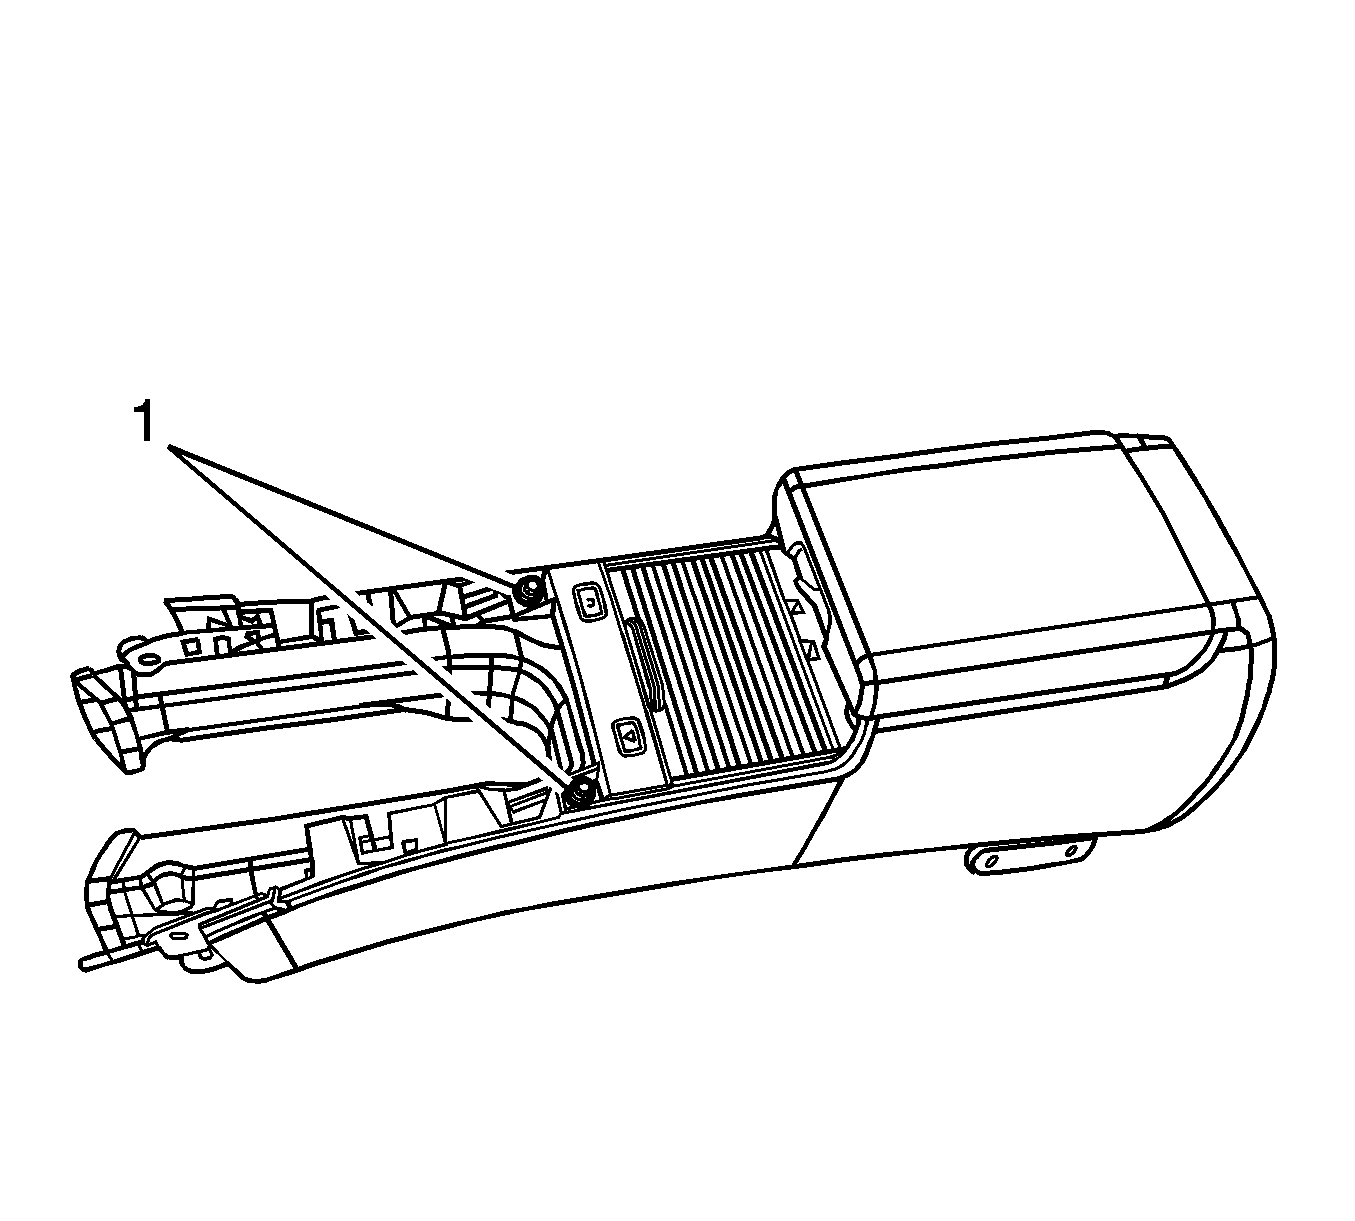
- Remove the screws (1) securing the cupholder to the top of the console.


Installation Procedure
- Install the screws (1) securing the cupholder to the top of the console.
- Install the screws (1) securing the cupholder to the console.
- Connect the electrical connections to the HVAC duct assembly.
- Install the HVAC Duct assembly into the console assembly.
- Install the screws (1) securing the center HVAC duct.
- Install the front HVAC duct (1).
- Install the screws (2) securing the side impact brace.
- Install the front floor console. Refer to Front Floor Console Replacement.
Caution: Refer to Fastener Caution in the Preface section.

Tighten
Tighten the screws to 2 N·m (18 lb in).

Tighten
Tighten the screws to 2 N·m (18 lb in).

Tighten
Tighten the screws to 2 N·m (18 lb in).

Tighten
Tighten the screws to 2 N·m (18 lb in).
