SHOULDER BELT COMFORT-INSTALL NEW RETRACTOR ASSEMBLY

SUBJECT: SHOULDER BELT COMFORT (INSTALL NEW SAFETY BELT RETRACTOR ASSEMBLIES)
VEHICLES AFFECTED: 1992 CADILLAC SEVILLE
Drivers and front seat passengers of 1992 Sevilles built before VIN breakpoint NU820265 may comment that the shoulder belts are not comfortable even after the height adjuster is properly set. These comments may be that the shoulder belt creates too much pressure on the person's neck, shoulder or chest, or some other comfort comment. If you receive these comments, you can use this procedure to install new safety belt retractor assemblies. These new assemblies have an adjustment feature that may alleviate these comments. Important owner notification materials are in the service kit and must be given to the owner, as covered in this procedure.
Parts Required:
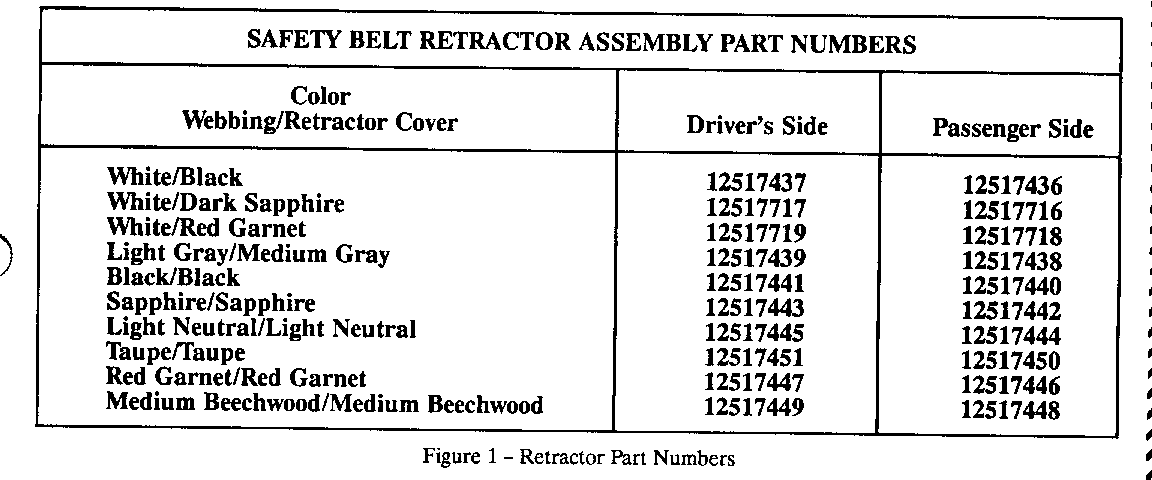
The following procedure requires that both the driver's safety belt retractor assembly and the right front passenger safety belt retractor assembly are replaced. The new safety belt retractor assemblies include a shoulder belt tension adjustment feature which the driver and right front passenger can use to set up to one inch of slack in the shoulder belt. Select the correct assembly part numbers from the following chart according to colour.
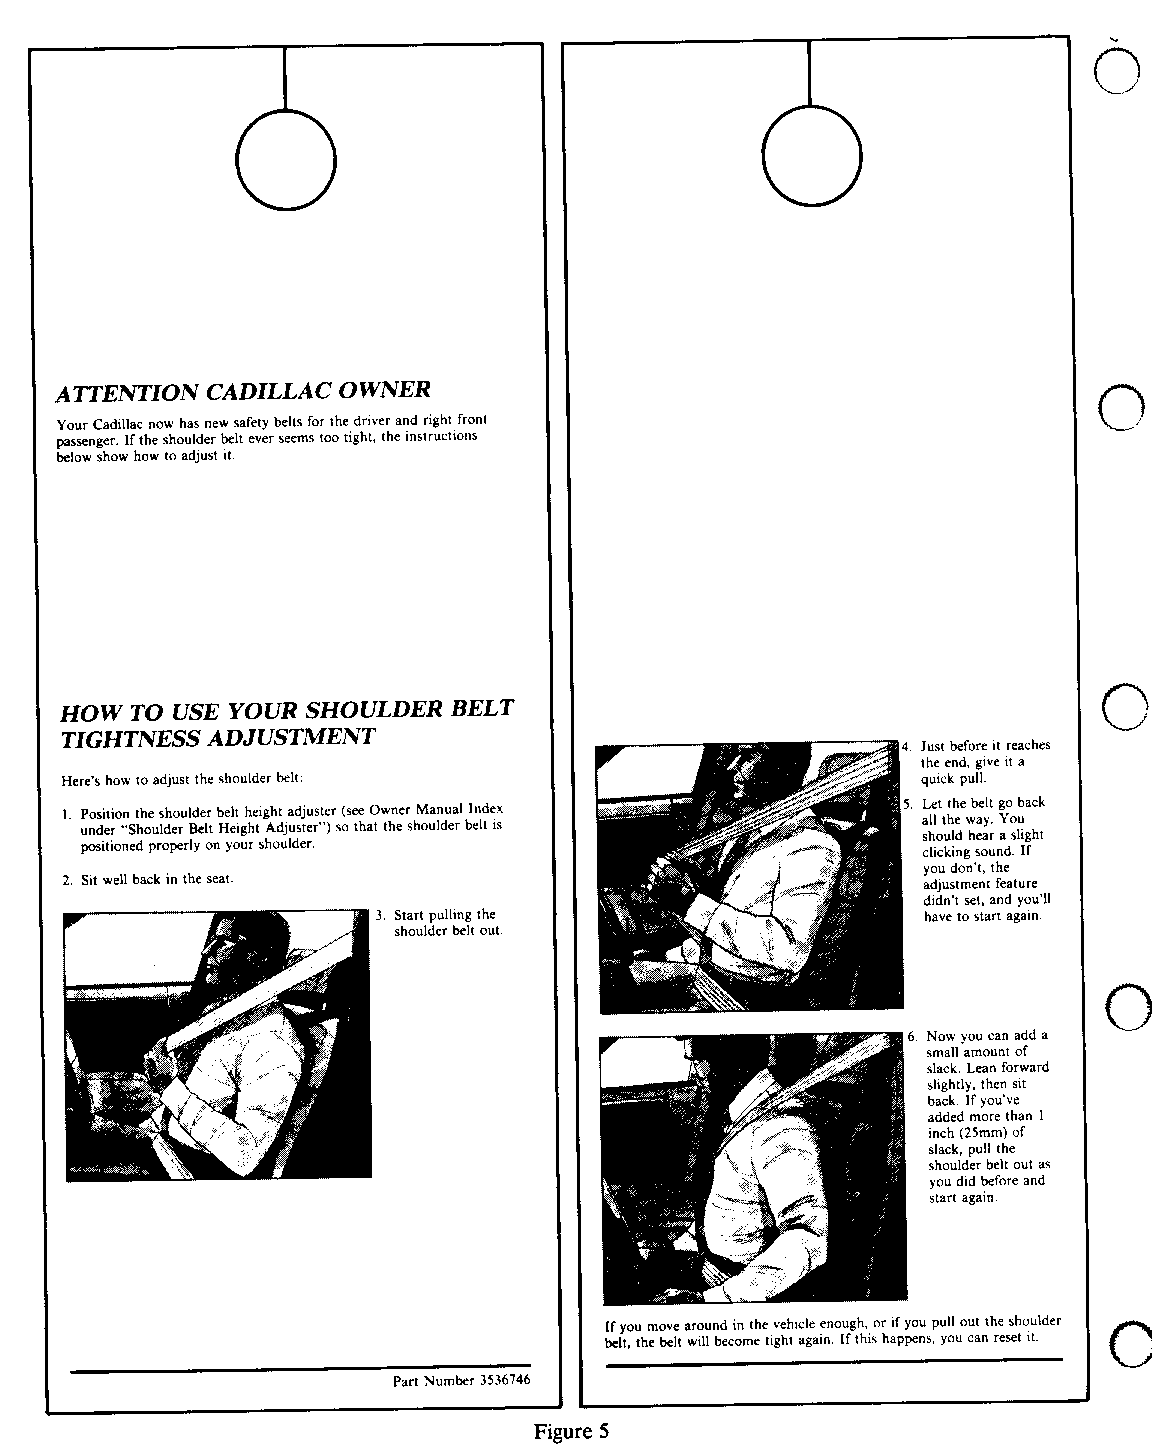
In addition, special owner notification materials are included with each driver retractor assembly, including an instruction card which is to be attached to the rearview mirror and two pages which are to be placed in the Owner's Manual.
Installation Procedure:
1. Remove driver's front and rear primary weather seal along the header.
2. Pop front courtesy/reading lamp cover off.
3. Remove rear courtesy/reading lamp with assist handle by removing two screws under assist handle.
4. Remove centre lock pillar trim panel. Refer to "Frame and Underbody" (Section 10-3).
5. Remove carpet retainer. Refer to "Frame and Underbody" (Section 10-3).
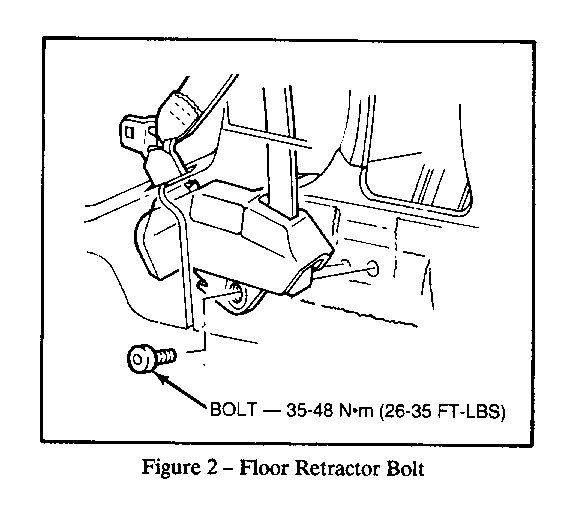
6. Remove bolt securing floor retractor to rocker inner. Refer to Figure 1.
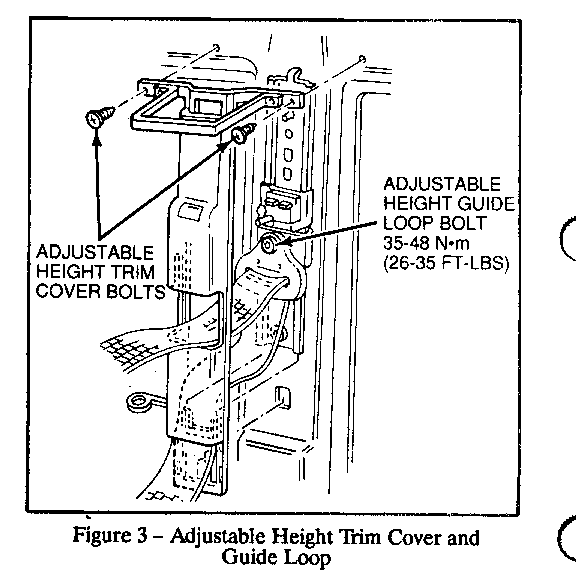
7. Remove height adjuster trim cover by removing two screws under headliner. Refer to Figure 2.
8. Remove height adjuster guide loop by removing bolt. Refer to Figure 2.
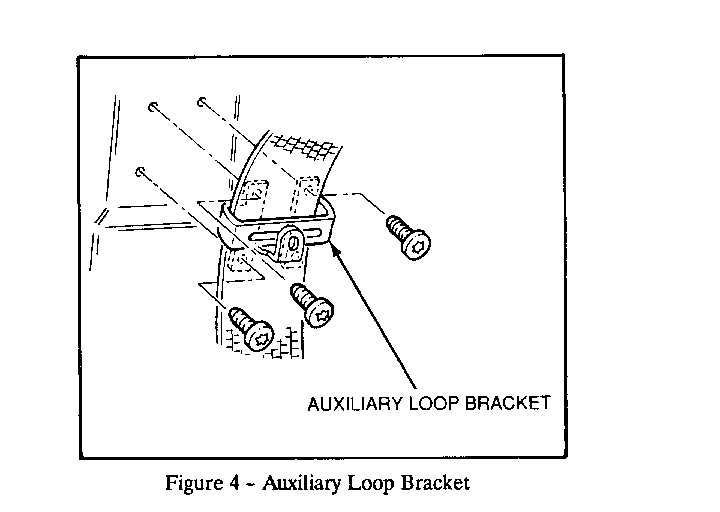
9. Remove auxiliary loop bracket. Refer to Figure 4.
10. Install height adjuster guide loop from new retractor assembly by reinstalling bolt at 35-48 N.m (26-35 ft. lbs.). Refer to Figure 2.
11. Install auxiliary loop bracket. Make sure belt is not twisted. Refer to Figure 3.
12. Install height adjuster trim cover. Refer to Figure 2.
13. Install bolt securing floor retractor to rocker inner and tighten 35-48 N.m. (26-35 ft. lbs.).
14. Install carpet retainer. Refer to "Frame and Underbody" (Section 10-3).
15. Install front and rear door primary weather seal along the header.
16. Install front courtesy/reading lamp cover.
17. Install rear courtesy/reading lamp with assist handle.
18. Install centre lock pillar trim panel. Refer to "Frame and Underbody" (Section 10-3).
19. Repeat procedure to install passenger's side retractor assembly.
20. HANG OWNER INSTRUCTION CARD AND PLACE TWO UPDATED PAGES INTO THE OWNER'S MANUAL.
Shoulder Belt Tightness Adjustment Procedure:
Up to one inch of slack can be set in the shoulder belt by using the procedure in Figure 4. This figure is a reproduction of the owner instruction card which is included with each driver's retractor assembly service kit. Dealer personnel should study and understand this procedure.
For vehicles repaired under warranty use: 1.2 hours.
General Motors bulletins are intended for use by professional technicians, not a "do-it-yourselfer". They are written to inform those technicians of conditions that may occur on some vehicles, or to provide information that could assist in the proper service of a vehicle. Properly trained technicians have the equipment, tools, safety instructions and know-how to do a job properly and safely. If a condition is described, do not assume that the bulletin applies to your vehicle, or that your vehicle will have that condition. See a General Motors dealer servicing your brand of General Motors vehicle for information on whether your vehicle may benefit from the information.
