Camshaft Cover Installation Left
Tools Required
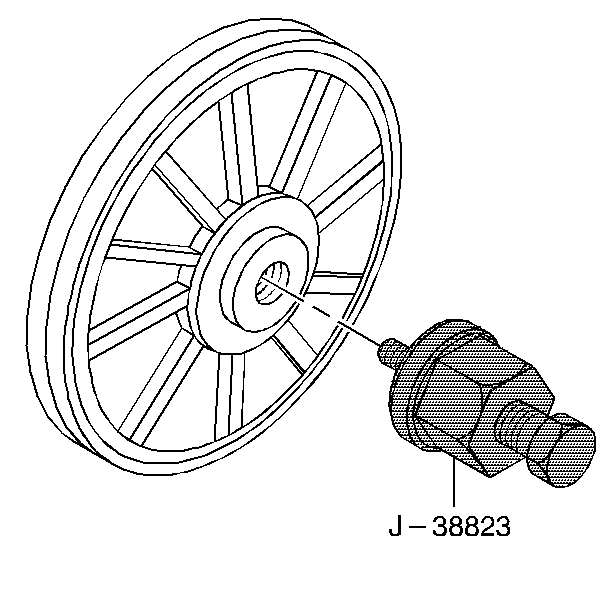
J 38823 Water Pump Drive Pulley Installer
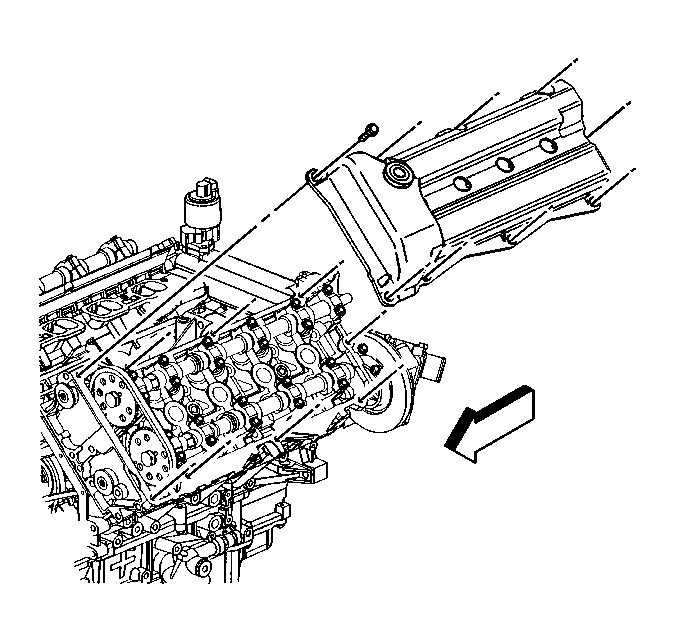
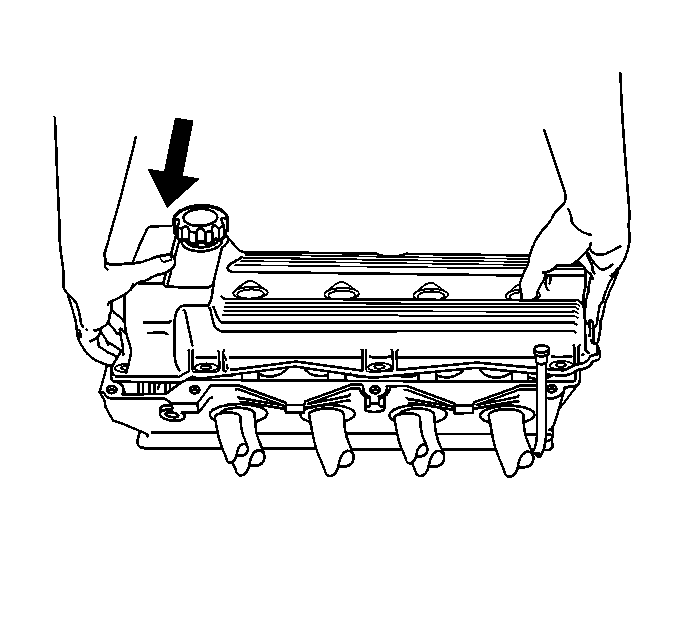
- Place the camshaft cover in position on the cylinder head.
- Insert the intake camshaft end through the hole in the end of the camshaft cover.
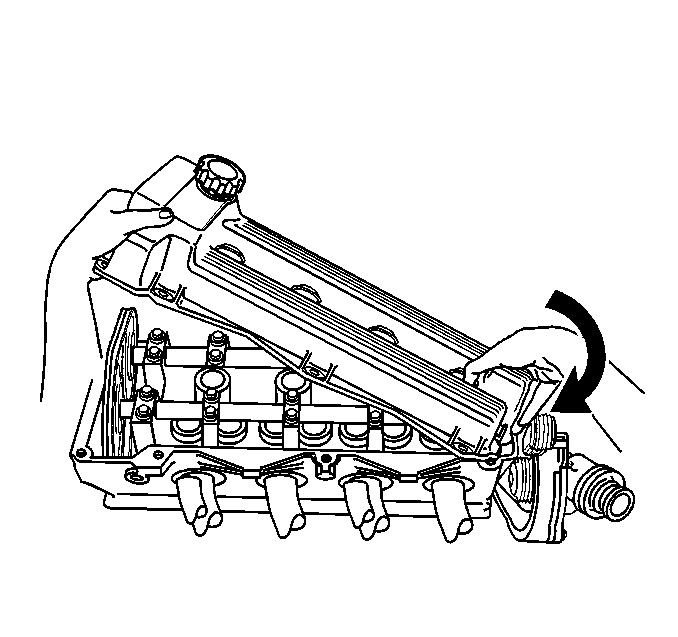
- Using your fingers, guide the camshaft cover up over the edge of the cylinder head. Be careful not to damage the exposed section of the camshaft cover seal on the edge of the cylinder head.
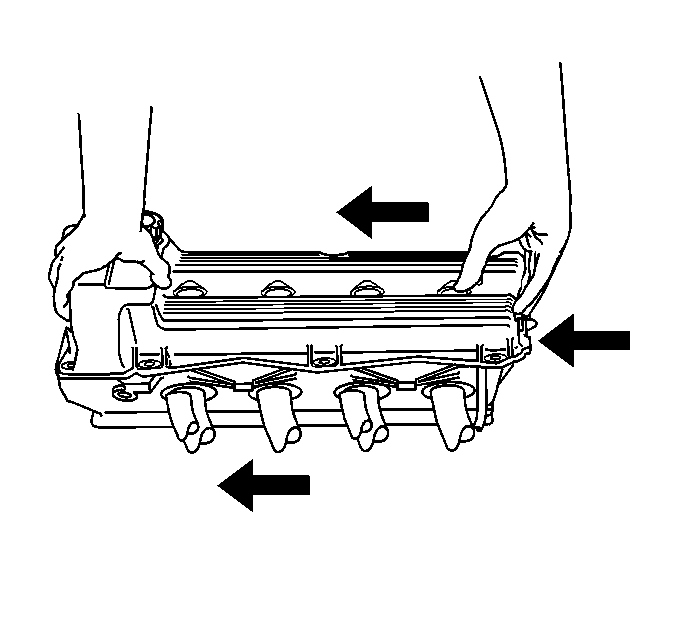
- Work the camshaft cover into position by pivoting the cover down and to the left allowing the cover to clear the camshaft drive chain and then aligning the bolt holes.
- Tighten the camshaft cover bolts.
- Install a new camshaft seal as follows:
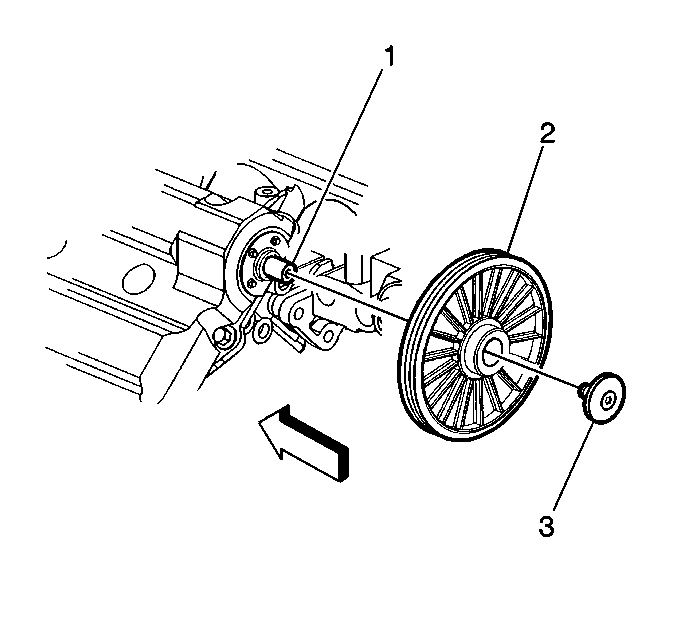
- Place the water pump drive pulley (2) in position on the intake camshaft (1).
- Install the water pump pulley on the intake camshaft using the J 38823 . During installation, the tool will bottom out on the camshaft at the proper depth.
- Install the camshaft end cap (3) in the camshaft (1).
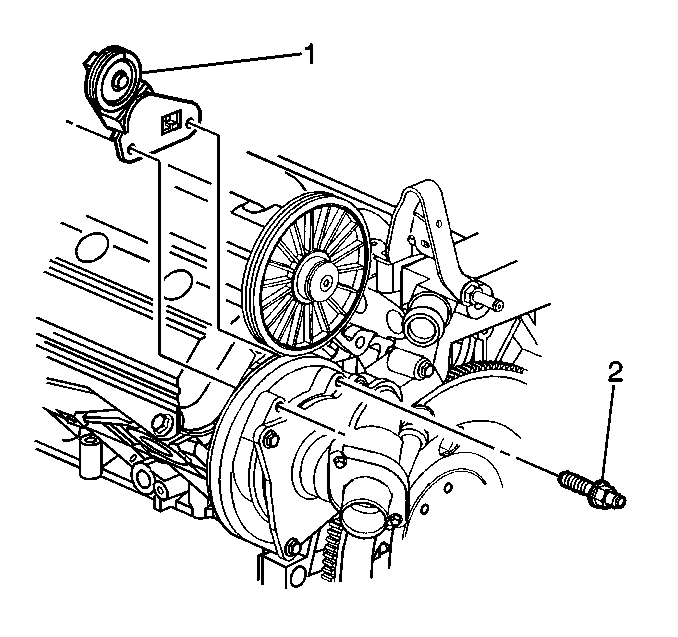
- Place the water pump drive belt tensioner (1) in position on the water pump housing.
- Install the water pump drive belt tensioner bolts.
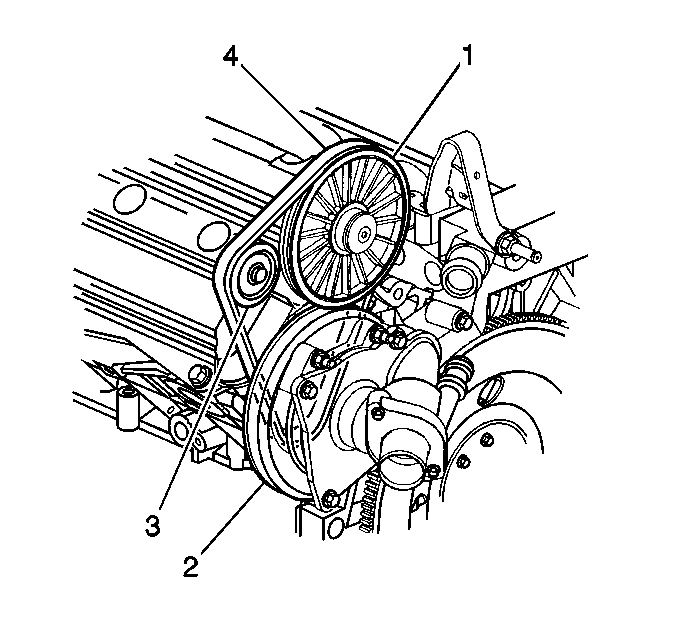
- Feed the water pump drive belt (4) around the water pump pulley (2) and the water pump drive belt tensioner (3).
- Compress the drive belt tensioner (3). Feed the drive belt around the drive pulley (1).
- Check the drive belt (4) for proper seating in all the pulley grooves.
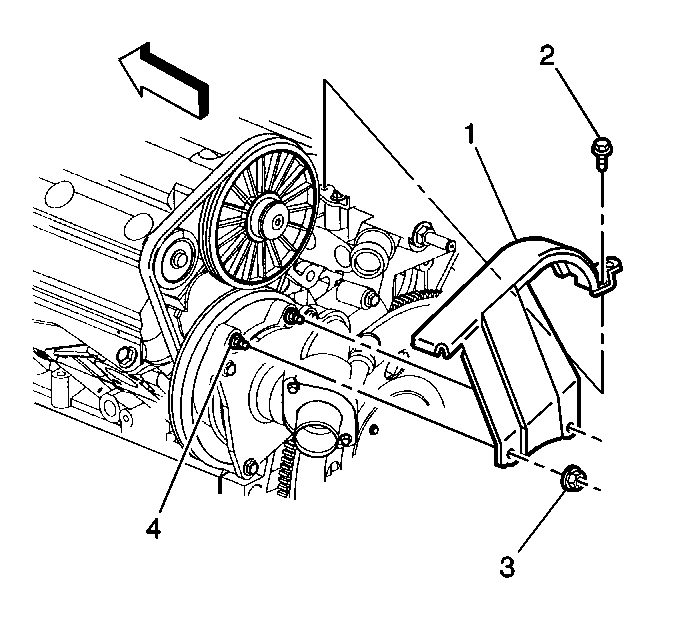
- Place the water pump drive belt shield (1) in position.
- Hand start the water pump drive belt shield retaining nuts (3) on the studs (4).
- Hand start the water pump drive belt shield retaining bolt (2).
Notice: Use the correct fastener in the correct location. Replacement fasteners must be the correct part number for that application. Fasteners requiring replacement or fasteners requiring the use of thread locking compound or sealant are identified in the service procedure. Do not use paints, lubricants, or corrosion inhibitors on fasteners or fastener joint surfaces unless specified. These coatings affect fastener torque and joint clamping force and may damage the fastener. Use the correct tightening sequence and specifications when installing fasteners in order to avoid damage to parts and systems.
Tighten
Tighten the bolts to 10 N·m (89 lb in).
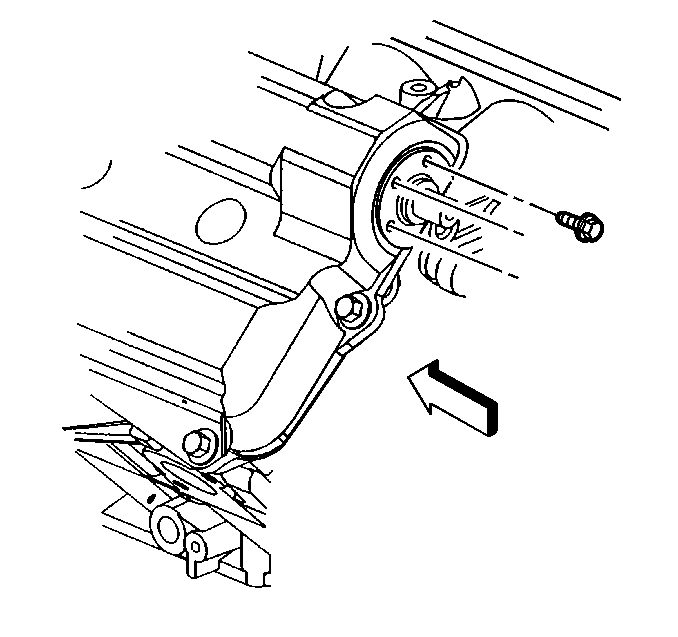
| 6.1. | Lubricate the lips of the camshaft seal with engine oil. |
| 6.2. | Push the camshaft seal into position around the intake camshaft using the protective sleeve supplied with the seal. |
| 6.3. | Coat the seal retaining screws with sealant, GM P/N 1052080 or equivalent. Install the screws. |
Tighten
Tighten the camshaft cover seal screws to 3 N·m (27 lb in).

Tighten
Tighten the drive belt tensioner retaining bolts to 10 N·m
(89 lb in).
Tighten
Tighten the water pump shield retaining nuts to 10 N·m
(89 lb in).
Tighten
Tighten the water pump shield retaining bolt to 10 N·m
(89 lb in).
Camshaft Cover Installation Right
- Install new camshaft cover seals if required.
- Place the right camshaft cover in position on the cylinder head by aligning the bolt holes.
- Tighten the camshaft cover bolts.

Notice: Use the correct fastener in the correct location. Replacement fasteners must be the correct part number for that application. Fasteners requiring replacement or fasteners requiring the use of thread locking compound or sealant are identified in the service procedure. Do not use paints, lubricants, or corrosion inhibitors on fasteners or fastener joint surfaces unless specified. These coatings affect fastener torque and joint clamping force and may damage the fastener. Use the correct tightening sequence and specifications when installing fasteners in order to avoid damage to parts and systems.
Tighten
Tighten the camshaft cover bolts to 10 N·m (89 lb in).
