Drive Belt Tensioner Installation Procedure
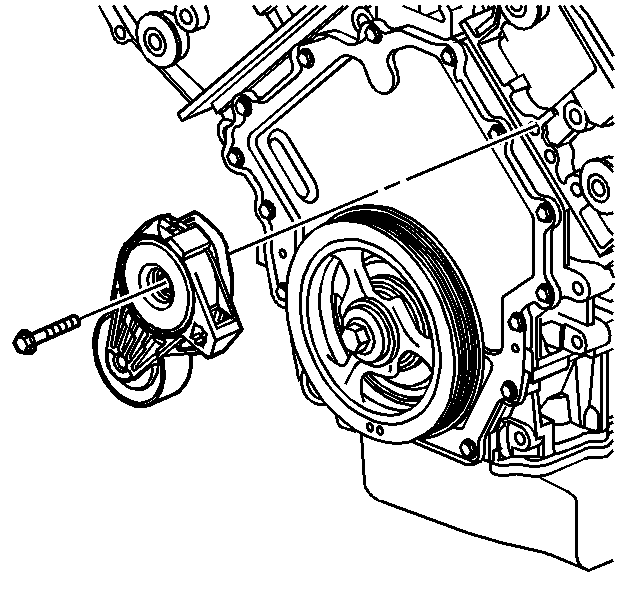
- Place the drive belt tensioner in position. Be sure to locate the tensioner anchor pin in the cylinder head recess.
- Install the drive belt tensioner bolt.
Notice: Use the correct fastener in the correct location. Replacement fasteners must be the correct part number for that application. Fasteners requiring replacement or fasteners requiring the use of thread locking compound or sealant are identified in the service procedure. Do not use paints, lubricants, or corrosion inhibitors on fasteners or fastener joint surfaces unless specified. These coatings affect fastener torque and joint clamping force and may damage the fastener. Use the correct tightening sequence and specifications when installing fasteners in order to avoid damage to parts and systems.
Tighten
Tighten the drive belt tensioner bolt to 50 N·m (37 lb ft).
Generator Installation Procedure
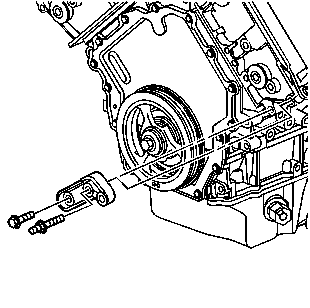
- Install the generator front mounting bracket to the block.
- Install the generator front mounting bracket bolts.
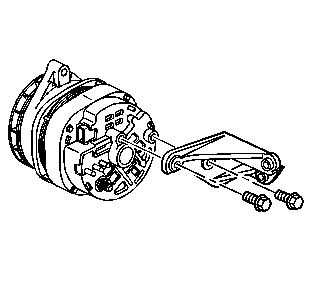
- Install the generator rear mounting bracket to the generator.
- Install the generator rear mounting bracket bolts.
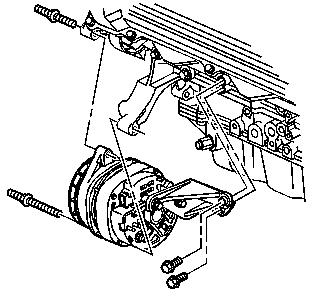
- Place the generator in position.
- Install the generator mounting bolts finger tight.
- Tighten the generator mounting bolts in the following sequence:
- Tighten the generator front lower mounting bracket bolt to 50 N·m (37 lb ft).
- Tighten the generator front upper mounting bracket bolt to 50 N·m (37 lb ft).
- Tighten the generator rear mounting bracket bolts to the engine block to 50 N·m (37 lb ft).
Notice: Use the correct fastener in the correct location. Replacement fasteners must be the correct part number for that application. Fasteners requiring replacement or fasteners requiring the use of thread locking compound or sealant are identified in the service procedure. Do not use paints, lubricants, or corrosion inhibitors on fasteners or fastener joint surfaces unless specified. These coatings affect fastener torque and joint clamping force and may damage the fastener. Use the correct tightening sequence and specifications when installing fasteners in order to avoid damage to parts and systems.
Tighten
Tighten the generator front mounting bolts to 50 N·m (37 lb ft).
Tighten
Tighten the generator rear mounting bracket bolts to 50 N·m
(37 lb ft).
Tighten
Air Conditioning Compressor Installation Procedure
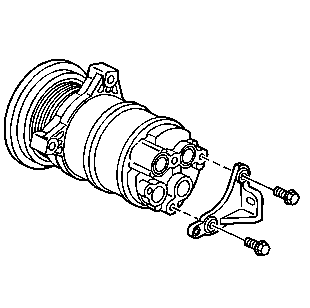
- Install the air conditioning compressor rear mounting bracket
- Install the air conditioning compressor rear mounting bracket bolts
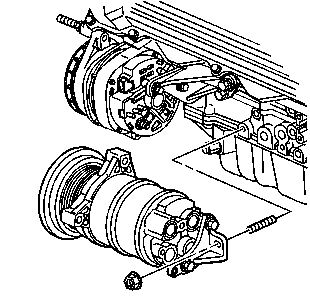
- Install the air conditioning compressor rear mounting stud to the engine block.
- Install the air conditioning compressor by sliding onto the rear mounting stud and hold the air conditioning compressor in position.
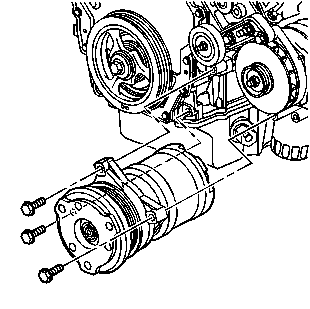
- Install the air conditioning compressor mounting bolts and nut finger tight.
- Tighten the air conditioning compressor mounting bolts and nut in the following sequence:
- Tighten the air conditioning compressor front lower mounting bolt to the engine block to 50 N·m (37 lb ft).
- Tighten the air conditioning compressor front upper mounting bolt to the engine block to 50 N·m (37 lb ft).
- Tighten the air conditioning compressor front mounting bolt to the generator/air conditioning compressor mounting bracket to 50 N·m (37 lb ft).
- Tighten the air conditioning compressor rear mounting bracket nut to 25 N·m (18 lb ft).
Notice: Use the correct fastener in the correct location. Replacement fasteners must be the correct part number for that application. Fasteners requiring replacement or fasteners requiring the use of thread locking compound or sealant are identified in the service procedure. Do not use paints, lubricants, or corrosion inhibitors on fasteners or fastener joint surfaces unless specified. These coatings affect fastener torque and joint clamping force and may damage the fastener. Use the correct tightening sequence and specifications when installing fasteners in order to avoid damage to parts and systems.
Tighten
Tighten the air conditioning compressor rear mounting bracket bolts
to 25 N·m (18 lb ft).
Tighten
Tighten the air conditioning compressor rear mounting stud to 25 N·m
(18 lb ft).
Tighten
Power Steering Pump Installation Procedure
- Place the power steering pump in position in the engine valley. Slide the molded wedge into the retaining feature cast into the cylinder block.
- Install the power steering pump bolt.
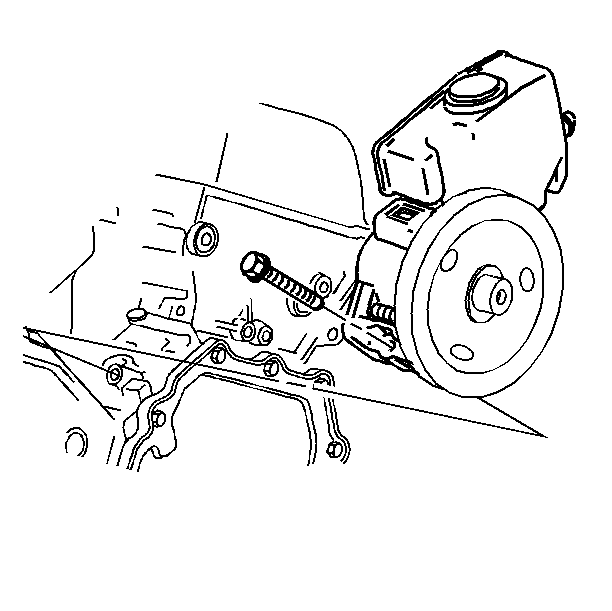
Important: Esure the power steering pump is as far back toward the rear of the engine as possible before tightening the bolt.
Notice: Use the correct fastener in the correct location. Replacement fasteners must be the correct part number for that application. Fasteners requiring replacement or fasteners requiring the use of thread locking compound or sealant are identified in the service procedure. Do not use paints, lubricants, or corrosion inhibitors on fasteners or fastener joint surfaces unless specified. These coatings affect fastener torque and joint clamping force and may damage the fastener. Use the correct tightening sequence and specifications when installing fasteners in order to avoid damage to parts and systems.
Tighten
Tighten the power steering pump bolt to 50 N·m (37 lb ft).
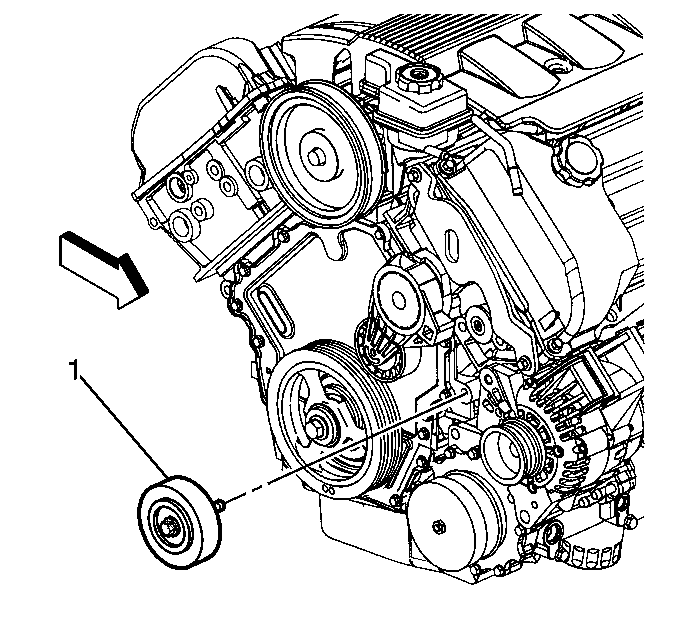
Drive Belt Idler Pulley Installation Procedure
- Place the drive belt idler pulley and bolt (1) in position.
- Tighten the drive belt idler pulley bolt.
Notice: Use the correct fastener in the correct location. Replacement fasteners must be the correct part number for that application. Fasteners requiring replacement or fasteners requiring the use of thread locking compound or sealant are identified in the service procedure. Do not use paints, lubricants, or corrosion inhibitors on fasteners or fastener joint surfaces unless specified. These coatings affect fastener torque and joint clamping force and may damage the fastener. Use the correct tightening sequence and specifications when installing fasteners in order to avoid damage to parts and systems.
Tighten
Tighten the drive belt idler pulley bolt to 50 N·m (37 lb ft).
