Tools Required
| • | J 39630-2 Lower
Control/Valve Body Gasket Guide Pins |
| • | J 36850 Assembly
Lubricant (or equivalent) |
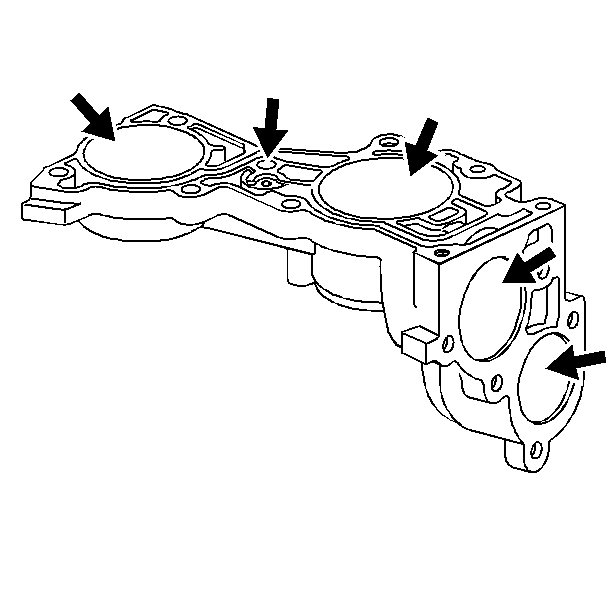
- Inspect the accumulator
housing for damage or scoring in the bores.
- Inspect all fluid passages for debris.
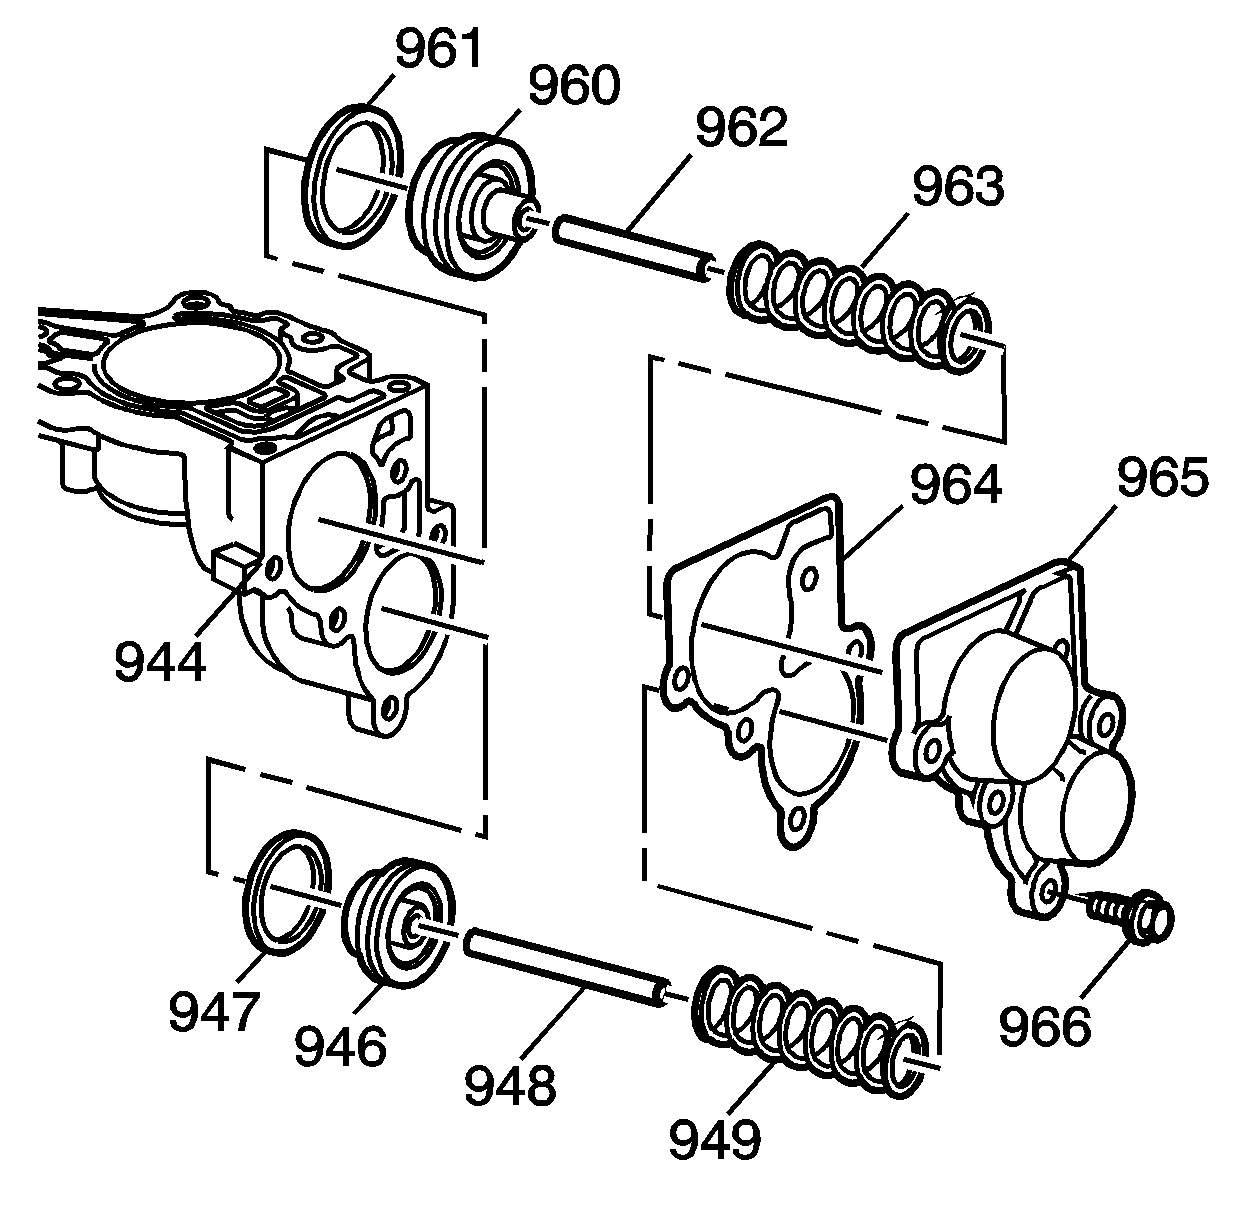
- Install new seals (947,
961) onto the accumulator pistons (946, 960).
- Install the following parts:
| • | The forward accumulator pin (962) into the accumulator housing
(944) |
| • | The forward accumulator piston (960) |
- Install the following parts:
| • | The reverse accumulator pin (948) |
| • | The reverse accumulator piston (946) |
| • | The reverse accumulator spring (949) |
- Install the following parts:
| • | The accumulator housing cover gasket (964) |
| • | The accumulator housing cover (965) |
Notice: Use the correct fastener in the correct location. Replacement fasteners
must be the correct part number for that application. Fasteners requiring
replacement or fasteners requiring the use of thread locking compound or sealant
are identified in the service procedure. Do not use paints, lubricants, or
corrosion inhibitors on fasteners or fastener joint surfaces unless specified.
These coatings affect fastener torque and joint clamping force and may damage
the fastener. Use the correct tightening sequence and specifications when
installing fasteners in order to avoid damage to parts and systems.
| • | The five 8 mm
accumulator housing cover bolts (966) |
Tighten
Tighten the bolts to 8-14 N·m (6-10 lb ft).
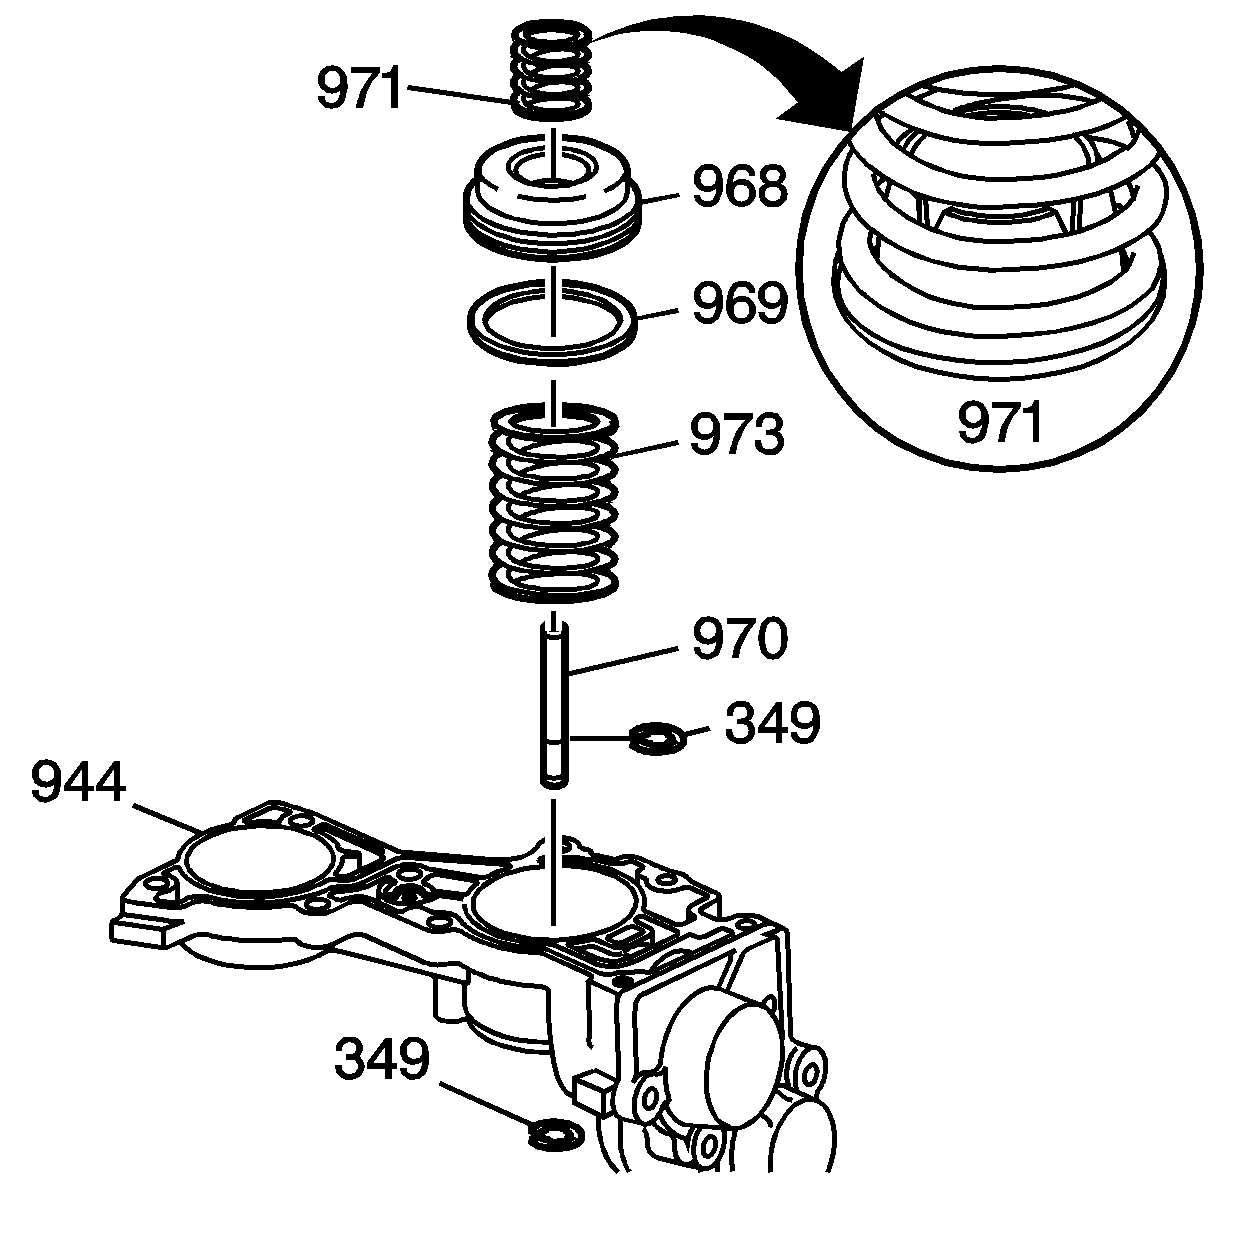
- Install a new seal (969) onto the 1-2
accumulator piston (968).
- Install the following parts:
| • | The 1-2 accumulator spring (973) |
| • | The 1-2 accumulator pin (970) |
| • | The 1-2 accumulator piston (968) |
| • | The snap ring (349). Install the snap ring onto the 1-2 accumulator
pin (970) after you have passed the pin through the top of the accumulator
housing (944). |
| • | The 1-2 accumulator inner spring assembly (971) |
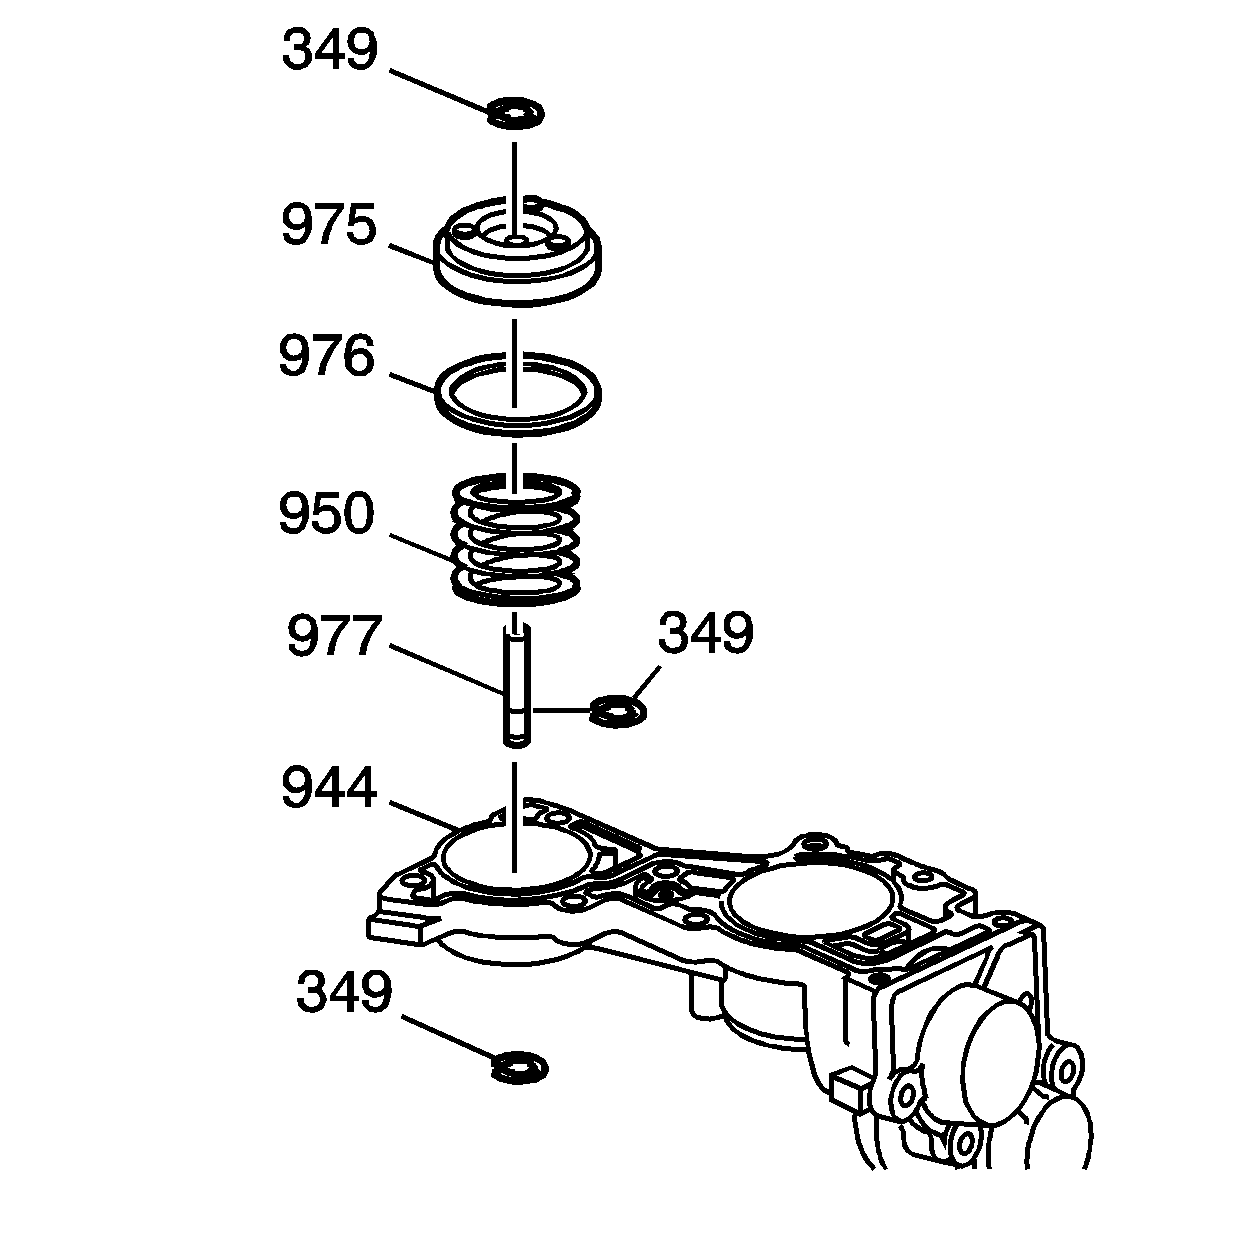
- Install the following parts:
| • | The 3-4 accumulator spring (950) |
| • | The 3-4 accumulator pin (977) |
| • | The 3-4 accumulator piston (975) |
| • | The snap ring (349). Install the snap ring onto the 3-4 accumulator
pin (977) after you have passed the pin through the top of the accumulator
housing (944). |
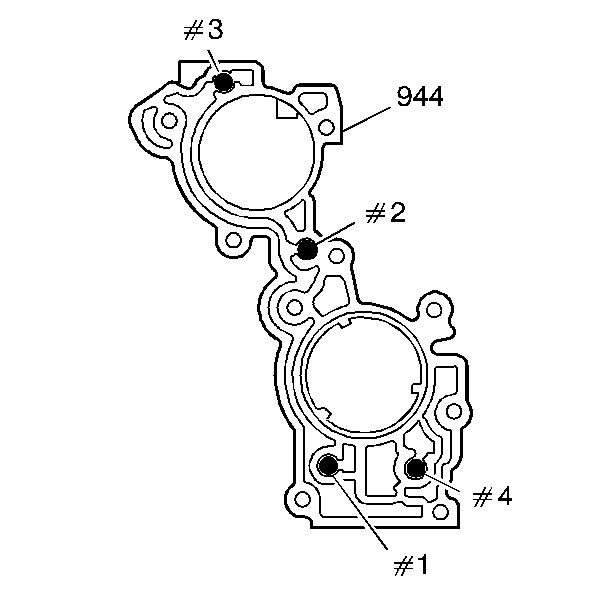
- Install the checkballs
(#1-4) into their proper cavities in the accumulator housing (944).
Retain the checkballs with J 36850
or equivalent.
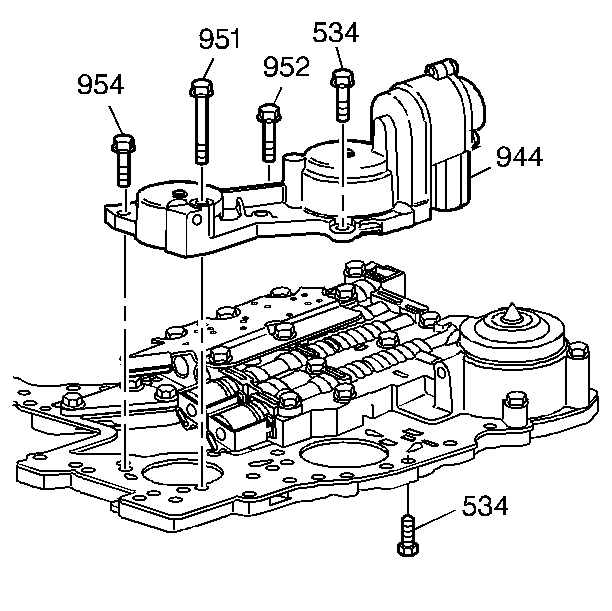
- Install theJ 39630-2
into the lower control valve body
gasket for the accumulator housing. Make sure that the 1-2 accumulator inner
spring assembly (971) goes into the channel plate washer side down.
- Install the accumulator housing (944) onto the lower channel plate
and install the bolts (534, 951, 952, 954) and hand tighten.
- Remove the J 39630-2
and install the rest of the accumulator housing bolts, including bolts
(534) from the channel plate side.
Tighten
Tighten the bolts (534, 951, 952, 954) in a star pattern to 8-14 N·m
(6-10 lb ft).


