Removal Procedure
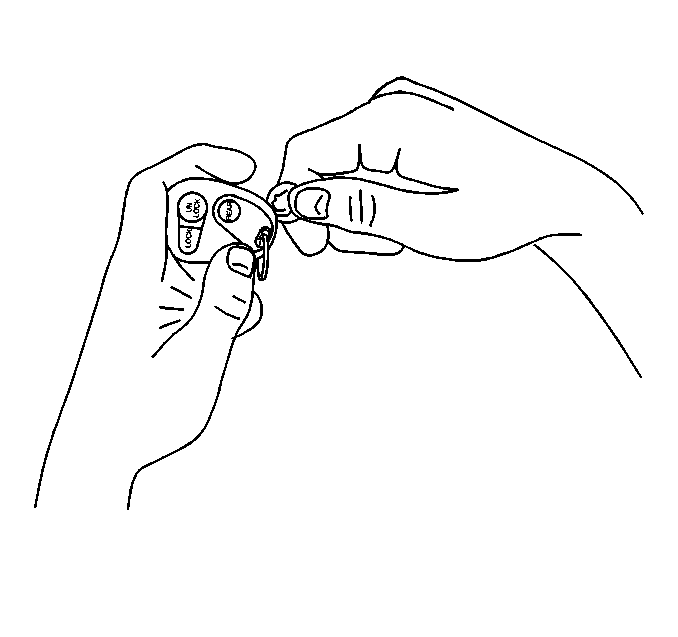
- Insert a small coin between the two halves of the transmitter case at the slot provided near the key ring hole.
- Twist the coin in order to open the case.
- Open the transmitter case.
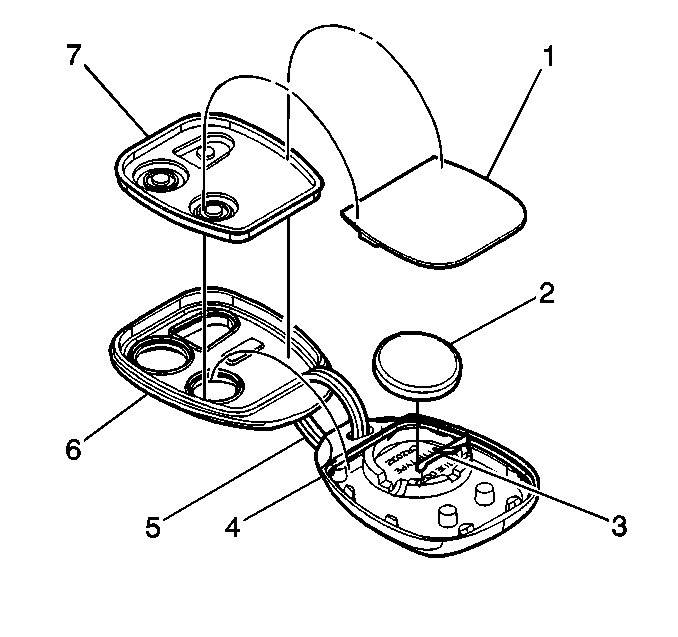
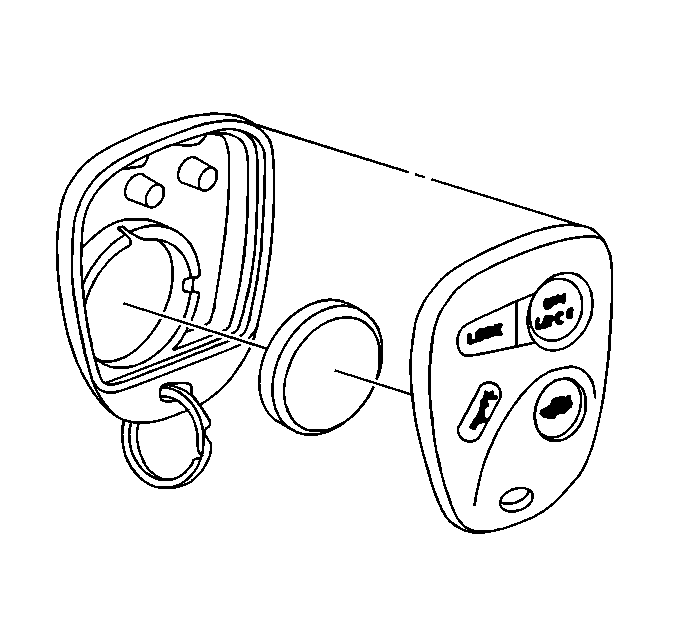
- Remove the battery (2).

Notice: Electrostatic discharge (ESD) can damage many solid-state electrical components.
ESD susceptible components may or may not be labeled with the ESD symbol. Handle
all electrical components carefully. Use the following precautions in order to avoid
ESD damage:
• Touch a metal ground point in order to remove your body's static charge
before servicing any electronic component; especially after sliding across the vehicle
seat. • Do not touch exposed terminals. Terminals may connect to circuits susceptible
the ESD damage. • Do not allow tools to contact exposed terminals when servicing connectors. • Do not remove components from their protective packaging until required
to do so. • Avoid the following actions unless required by the diagnostic procedure: - Jumpering or grounding of the components or connectors. - Connecting test equipment probes to components or connectors. Connect
the ground lead first when using test probes. • Ground the protective packaging of any component before opening. Do not
rest solid-state components on metal workbenches, or on top of TVs, radios, or other
electrical devices.
Installation Procedure
- Install the battery (2) with the positive (+) side down. Use one 3 V CR2302 battery or the equivalent.
- Align both halves (6,4) of the transmitter.
- Ensure that the seal is positioned correctly.
- Close the transmitter case.
- Resynchronize the transmitter. Refer to Transmitter Synchronization .
- Replace the battery when the range of the transmitter decreases to less than 7 meters (23 feet).


