Removal Procedure
Important:
• Always use replacement cables that are of the same type, diameter and
length of the cables that you are replacing. • Always route the replacement cable the same way as the original cable.
- Disconnect the battery negative cable. Refer to Battery Negative Cable Disconnection and Connection .
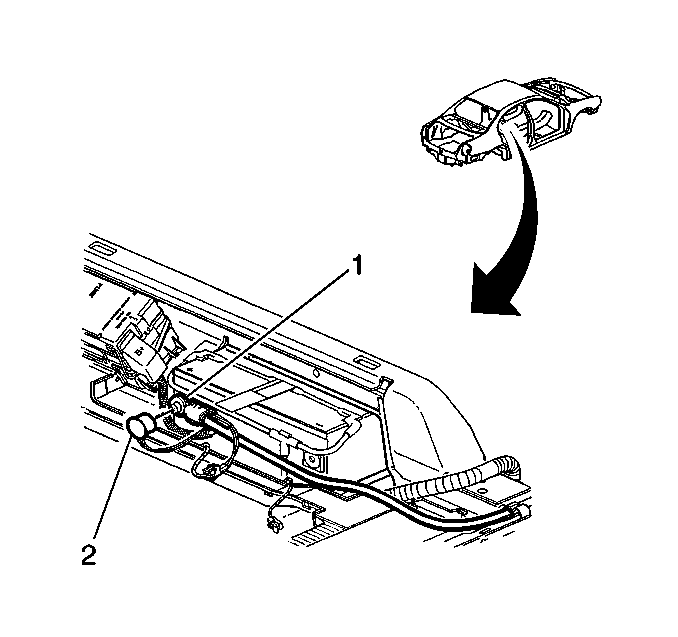
- Disconnect the positive battery cable (1) from the battery.
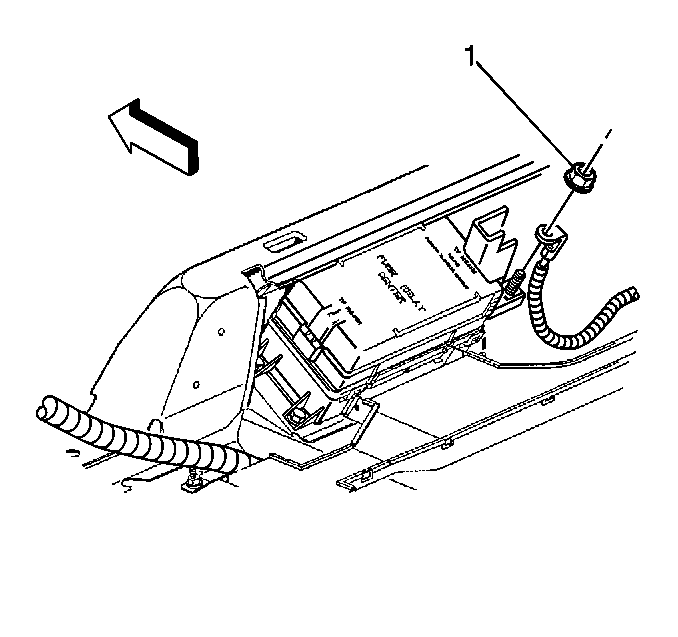
- Remove the nut (1) securing the positive battery cable to the rear fuse block.
- Remove the interior trim moldings. Refer to Center Pillar Garnish Molding Replacement in Interior Trim to expose the positive battery cable.
- Remove the right closeout insulator panel. Refer to Instrument Panel Insulator Panel Replacement - Right Side in Instrument Panel, Gages and Console.
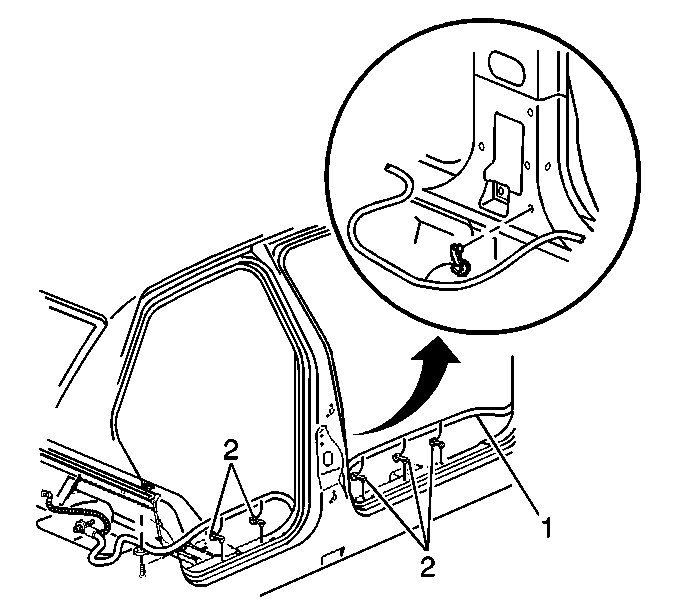
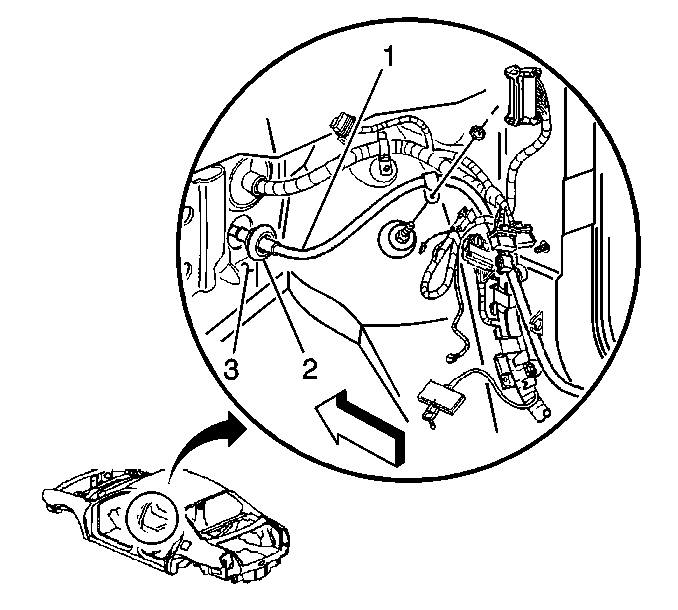
- Remove the battery cable retainers (2) from the rocker panel area.
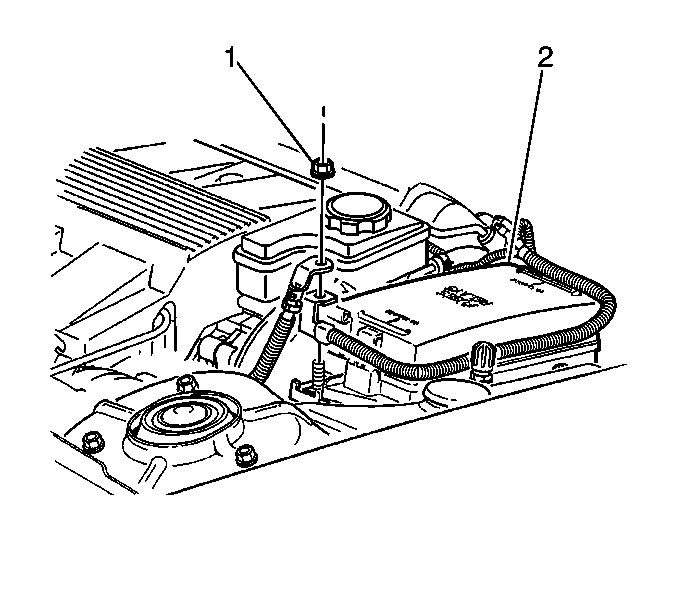
- Disconnect the positive battery cable from the underhood fuse block (2).
- Remove the battery cable retainer from the rail.
- Unseat the battery cable grommet (2) from the cowl panel (3).
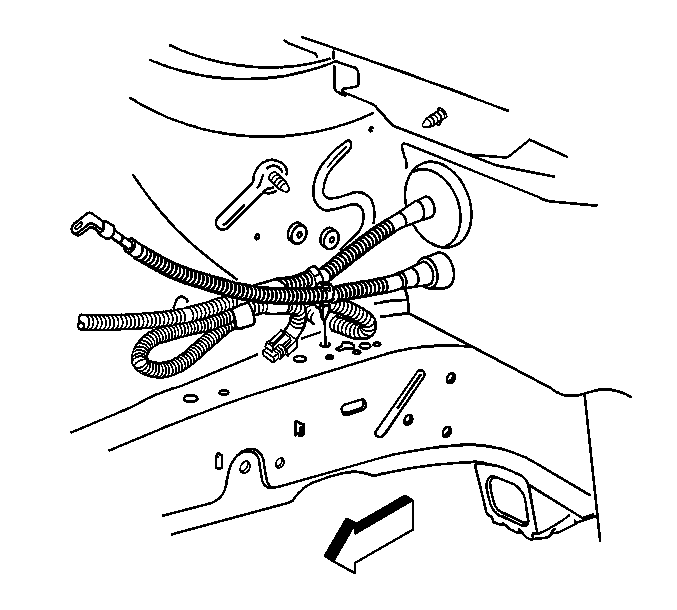
- Carefully remove the battery cable (1) from the vehicle by pulling the cable through the cowl panel (3) and out of the vehicle.
Installation Procedure
- Slide the battery cable (1) through the opening in the cowl panel (3) and seat the cable grommet (2) by pulling the cable forward into the engine compartment.
- Install the battery cable retainer to the rail.
- Connect the positive battery cable to the underhood fuse block (2).
- Route the battery cable (1) along the rocker panel and install the cable retainers (2).
- Install the right closeout insulator panel. Refer to Instrument Panel Insulator Panel Replacement - Right Side in Instrument Panel, Gages and Console.
- Install the interior trim moldings. Refer to Center Pillar Garnish Molding Replacement in Interior Trim to expose the positive battery cable.
- Connect the positive battery cable to the rear fuse block.
- Connect the positive battery cable (1) to the battery.
- Connect the battery negative cable. Refer to Battery Negative Cable Disconnection and Connection .


Notice: Use the correct fastener in the correct location. Replacement fasteners must be the correct part number for that application. Fasteners requiring replacement or fasteners requiring the use of thread locking compound or sealant are identified in the service procedure. Do not use paints, lubricants, or corrosion inhibitors on fasteners or fastener joint surfaces unless specified. These coatings affect fastener torque and joint clamping force and may damage the fastener. Use the correct tightening sequence and specifications when installing fasteners in order to avoid damage to parts and systems.
Tighten
Tighten the battery cable to remote positive terminal nut (1)
to 12 N·m (106 lb in).


Tighten
Tighten the battery cable to the rear fuse block nut (1) to 15 N·m (11 lb ft).

Tighten
Tighten the battery cable bolt to 17 N·m (13 lb ft).
