Front Wheelhouse Replacement Full Front Replacement
Removal Procedure
- Remove panels and components as necessary for access.
- Restore as much of the damage as possible to factory specifications.
- Remove all sealers and anti-corrosion materials as necessary.

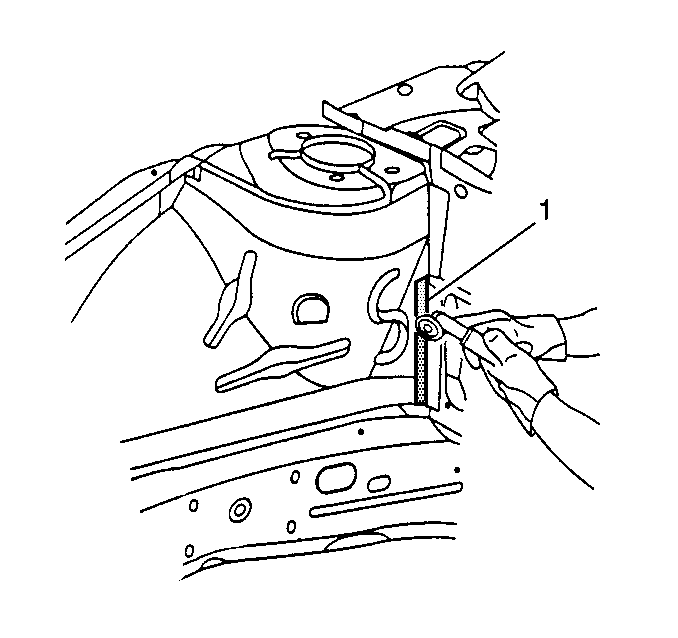
- Place 25 mm (1 in) wide masking tape on the forward contour of the wheelhouse at the flange where it attaches to the cowl panel.
- Cut the wheelhouse along the forward edge of the masking tape (1) to leave a 25 mm (1 in) tab extending forward from the cowl panel. This will provide an overlap for welding the service part to the original wheelhouse without welding directly to the cowl panel.
- Locate, mark, and drill out the factory welds attaching the wheelhouse assembly at the following:
- Remove the damaged wheelhouse assembly.
Installation Procedure
- Clean and prepare surfaces to be welded.

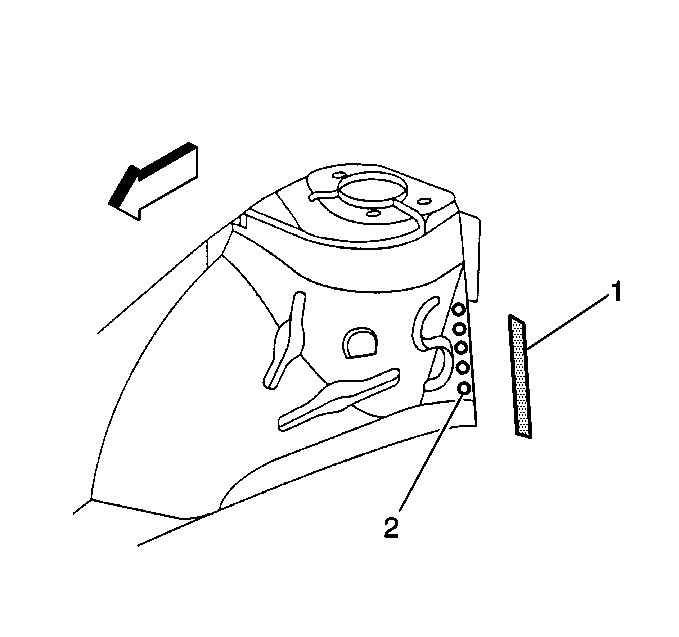
- Cut the flange off the service part that is normally welded to the cowl panel (1).
- Drill 8 mm (5/16 in) holes for plug welding in the locations noted from the original assembly.
- Drill holes for plug welding every 40 mm (1½ in) along the cut edge to be attached to the tab remaining from the original assembly (2).
Important: Watch for flammable materials when welding to the interior panels of the vehicle.
- Prepare all mating surfaces for welding as necessary.
- Apply 3M Weld-Thru Coating P/N 05916 or equivalent to all mating surfaces.
- Position the wheelhouse assembly using three-dimensional measuring equipment.
- Plug weld wheelhouse as necessary.
- Clean and prepare all bare metal surfaces.
- Apply the following as necessary:
| • | Anti-corrosion materials |
| • | Two-part catalyzed primer |
| | Important: Prior to refinishing, refer to publication GM 4901M-D-01 GM Approved Refinish Materials for recommended products. Do not combine paint systems. Refer to paint manufacturer's recommendations.
|
- Install the panels and components previous removed for access.


