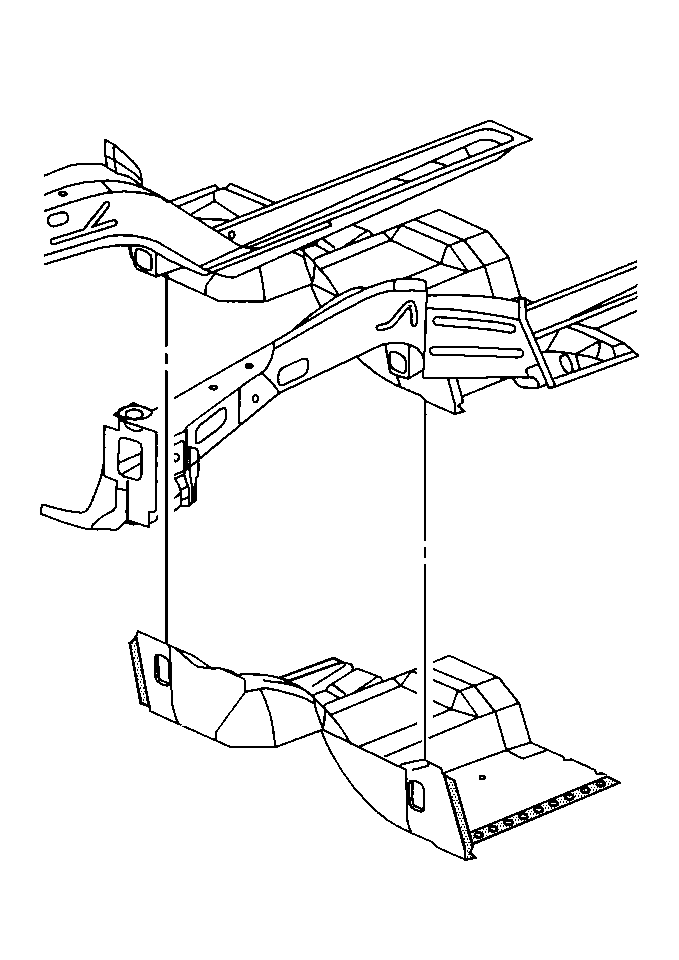
Lower Rail Replacement Frame
Removal Procedure
Important: When servicing the lower rail and floor panel reinforcement, it is advised you use a fire resistant welding blanket to help avoid damage to the interior of the vehicle.
Install the blanket between the floor pan and the foam pad underneath the carpet.
- Remove all panels and components necessary for access.
- Restore as much of the damage as possible to factory specifications.
- Remove the following as necessary:
| • | Anti-corrosion materials |

- Drill out the factory welds along the lower flange on the floor pan reinforcement. Note that the flanges overlap the rails. Note the number and location of welds for installation of the new rail. Care must be taken not to damage the flange.

- Separate the floor pan reinforcement vertical flange from the inside of the lower rail. Care must be taken not to damage the flange.
- Turn the lower flange down on an angle away from the rail.
- Drill out the remaining factory welds on the rail.
- The lower portion of the wheelhouse at the rail must also be drilled out and removed.
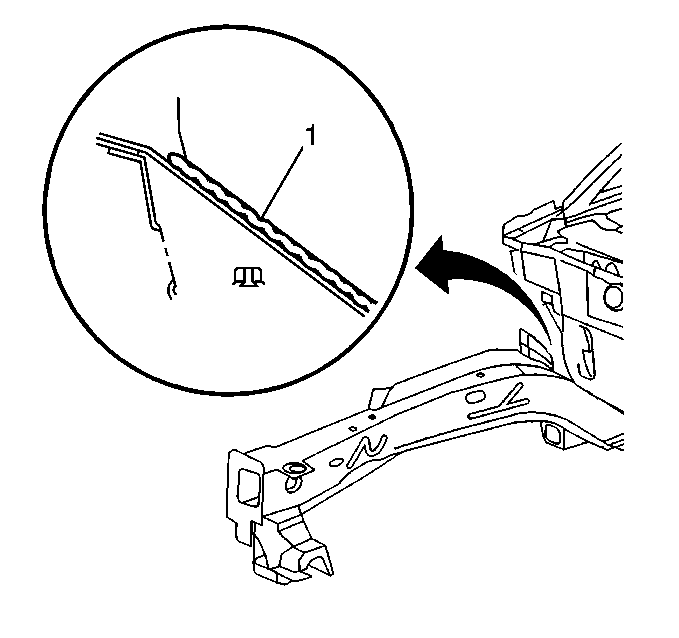
- With a flat chisel, loosen the adhesive (1) between the floor pan and lower rail by prying the rail away from the floor. Care must be taken to avoid damaging the floor.
- Remove the damaged rail.
Installation Procedure
- Prepare mating surfaces for proper fit of the new rail.
- Turn the vertical flange forward to be welded to the new rail.
- On the new rail, drill the same number of 8 mm (5/16 in) holes in remaining locations as noted from original rail.
- Position the new rail in place and check for proper alignment.
- Remove rail to clean and prepare all bare metal surfaces.
- Prime surfaces in the same locations as the original adhesive using PPG's DP40, or an equivalent primer.
- Apply GM Goodwrench structural bonding epoxy P/N 12345726, or equivalent.
- Position the new rail in place and secure with temporary screws or clamps.

- With the new rail in place, reposition the down-turned flange to the original location.
- Plug weld in random formation until all welding is completed.
- Remove temporary screws or clamps.
- Clean and prepare all bare metal surfaces.
- Apply the following as necessary:
| • | Anti-corrosion materials |
| • | Two-part catalyzed primer |
| | Important: Prior to refinishing, refer to publication GM 4901M-D-01 GM Approved Refinish Materials for recommended products. Do not combine paint systems. Refer to paint manufacturer's recommendations.
|
- Install the panels and components previously removed for access.


