For 1990-2009 cars only
Area Preparation
| • |
| • |
| • |
| • |
Adjustment Procedure
- Completely assemble all the components to the vehicle.
- Place the vehicle on a level pad or surface.
- Stop all unnecessary operations or work on the vehicle that affects the vehicle trim.
- Close the doors.
- Verify that the tires are inflated to the proper tire pressure.
- Rock the vehicle sideways to stabilize the suspension.
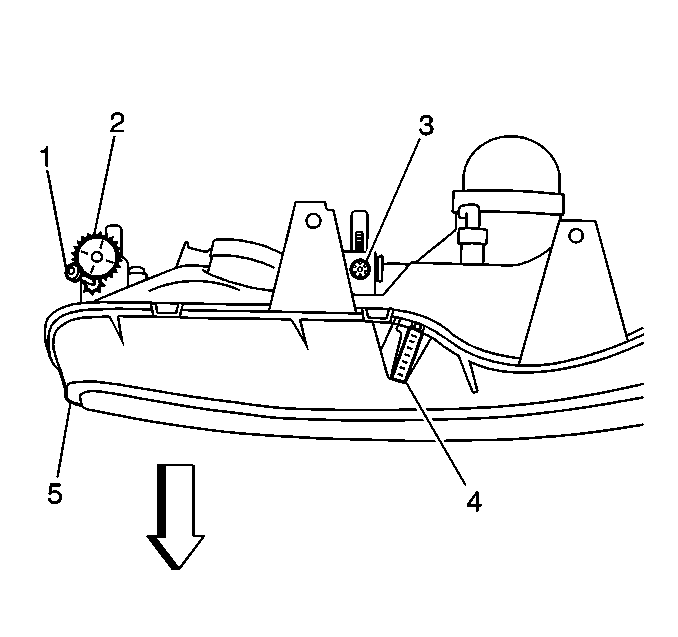
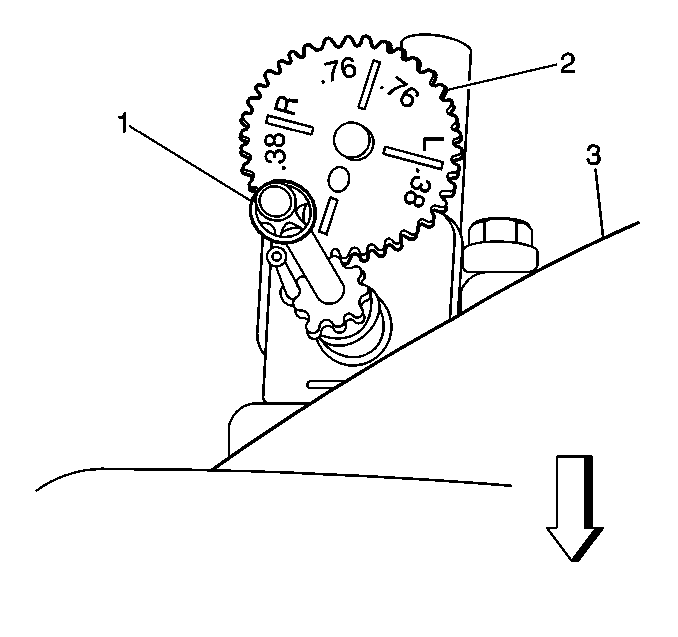
- Set the horizontal aim gage (2) to the 0 (zero) mark by turning the horizontal aim screw (1) until the pointer is lined up with the 0 (zero).
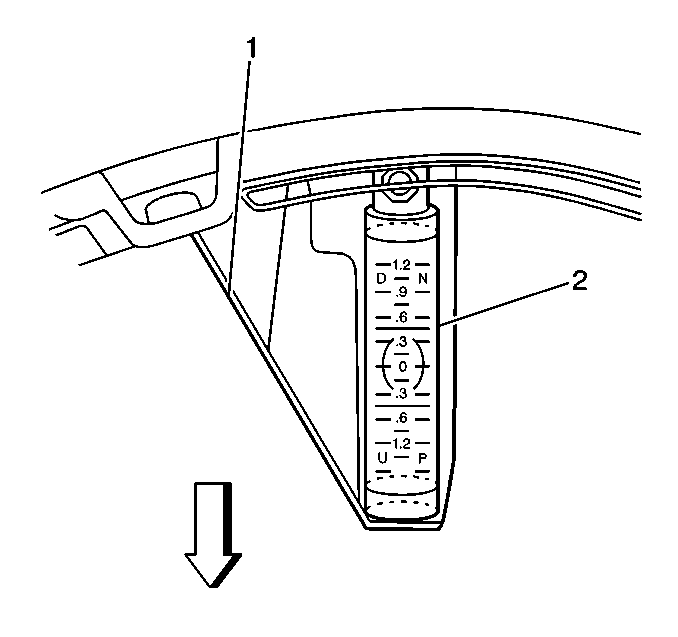
- If equipped, adjust the vertical aim by turning the vertical aim screw until the bubble in the vertical aim level (2) is centered at the 0 (zero).
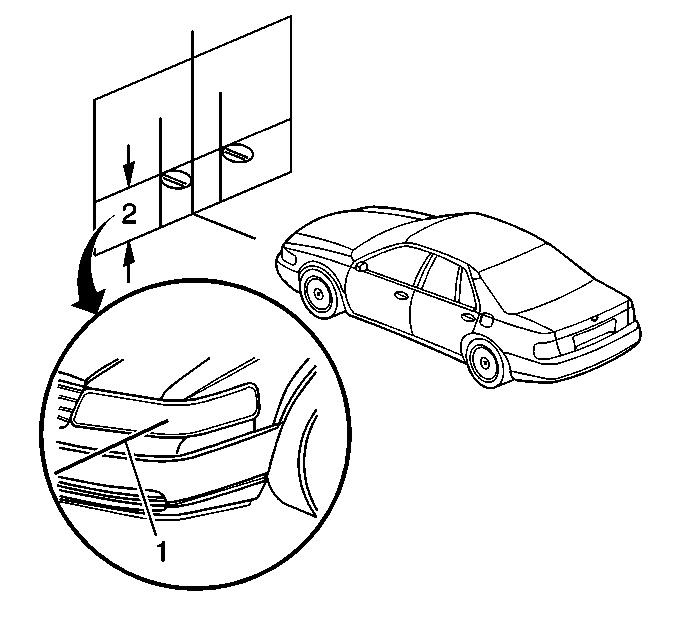
- Position the vehicle so that the headlamp aim dots (1) are square with the screen or wall (2).
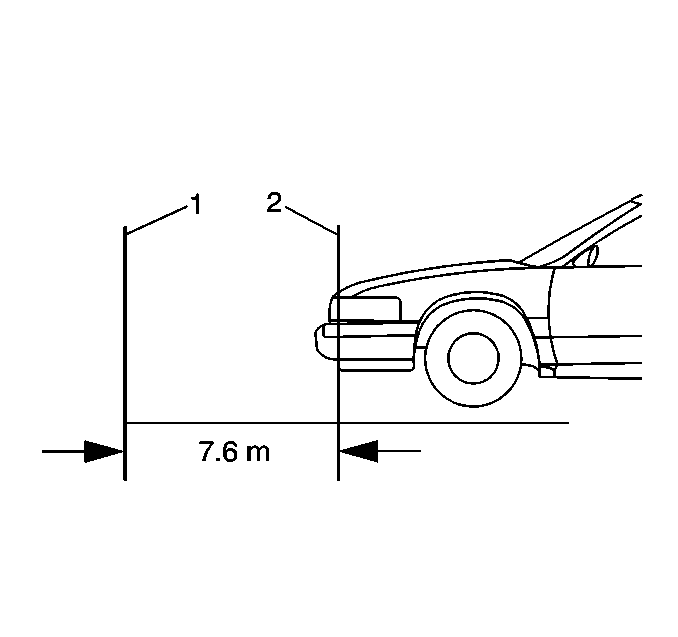
- Move the vehicle rearward so that the headlamp aim dots (1) are 7.6 meters (25 feet) away from the screen or the wall (2).
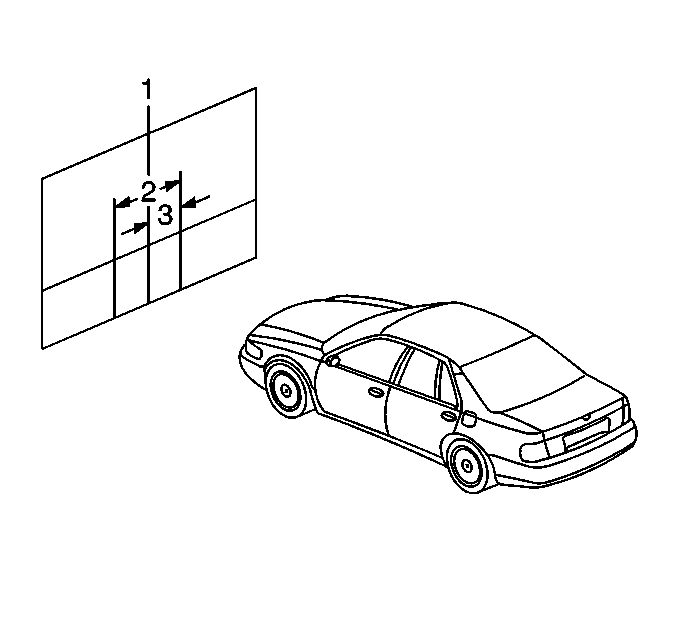
- Measure the distance (2) from the floor to the headlamp aim dot. Transfer that measurement to the screen or wall (1). Repeat this for both headlamps.
- Locate the vertical centerline (1) on the screen or wall so that it is in line with the center of the vehicle. This can be accomplished by sighting through the center of the rear window and over the hood.
- Measure the distance (2) between the right headlamp aim dot and the left headlamp aim dot. Divide the distance in half (3) and transfer that distance to the screen or wall. Repeat this for both headlamps.
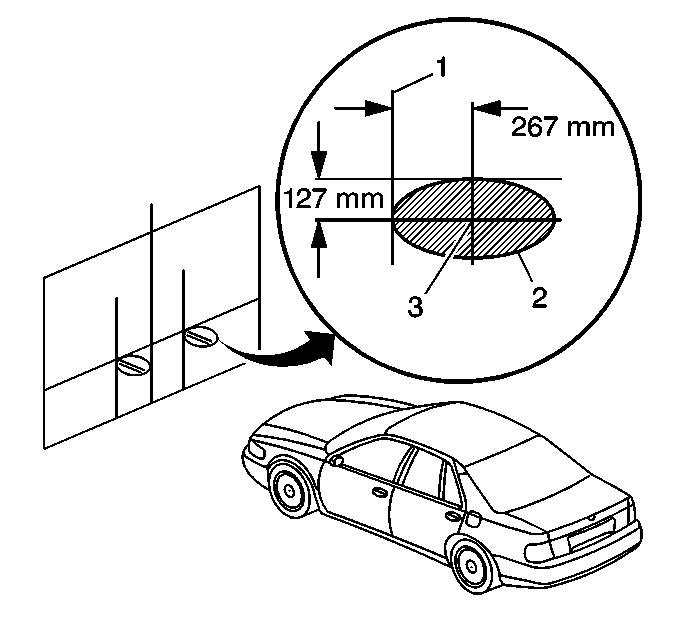
- Measure 267 mm (10.5 in) to the right of the vertical centerline of the headlamp. Transfer that measurement to the screen or wall. Repeat this for both headlamps.
- Measure 127 mm (5 in) down from the horizontal centerline of the headlamp. Transfer that measurement to the screen or wall. Repeat this for both headlamps. The point at which these measurements intersect should be the center (3) of the headlamp hot spot (2).
- Turn the headlamps ON.
- Verify that the edge of the headlamp hot spot (2) is to the right of the vertical centerline and below the horizontal centerline.
- Verify that the center (3) of the headlamp hot spot (2) is in the proper location.
- Adjust the horizontal headlamp aim as necessary, using the horizontal aim screw (1).
- Adjust the vertical headlamp aim as necessary, using the vertical aim screw (3).
Important: If the vehicle regularly carries an unusual load in the rear compartment, or a trailer, these loads should be on the vehicle when the headlamps are checked.
Important: The horizontal aiming of the headlamps must be performed before the vertical aiming to obtain the correct headlamp aim.
Important: If the fuel tank is near empty to 1/4 full, adjust the vertical aim to negative 4 degrees.
Important: Some state and local laws specify requirements for headlamp aim. These laws must be followed.
Important: The horizontal aiming of the headlamps must be performed before the vertical aiming to obtain the correct headlamp aim.
