For 1990-2009 cars only
Tools Required
J 42640 Steering Wheel Anti-Rotation Pin
Removal Procedure
- Disable SIR. Refer to SIR Disabling and Enabling and SIR Disabling and Enabling in SIR.
- Remove the floor console. Refer to Console Replacement .
- Remove the drivers knee bolster. Refer to Knee Bolster Replacement .
- Remove the instrument panel (I/P) outer trim cover. Refer to Instrument Panel Outer Trim Cover Replacement .
- Remove the I/P upper trim pad. Refer to Instrument Panel Upper Trim Pad Replacement .
- Remove the defroster grille. Refer to Defroster Grille Replacement .
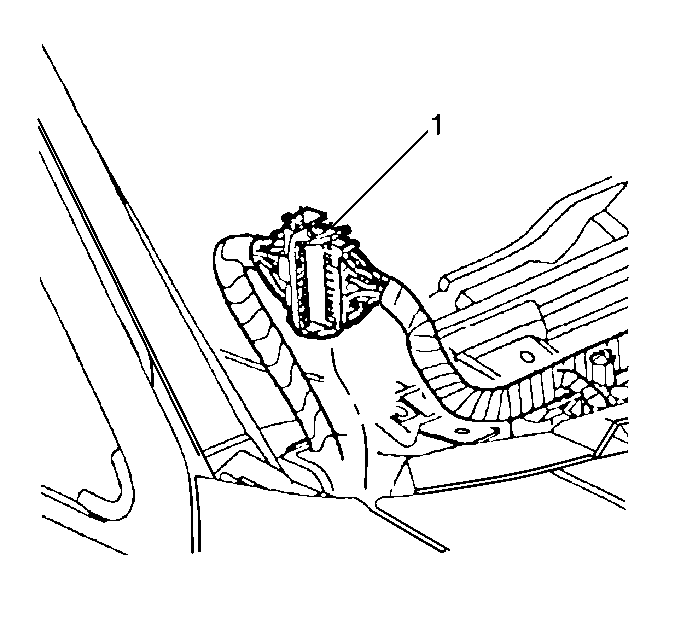
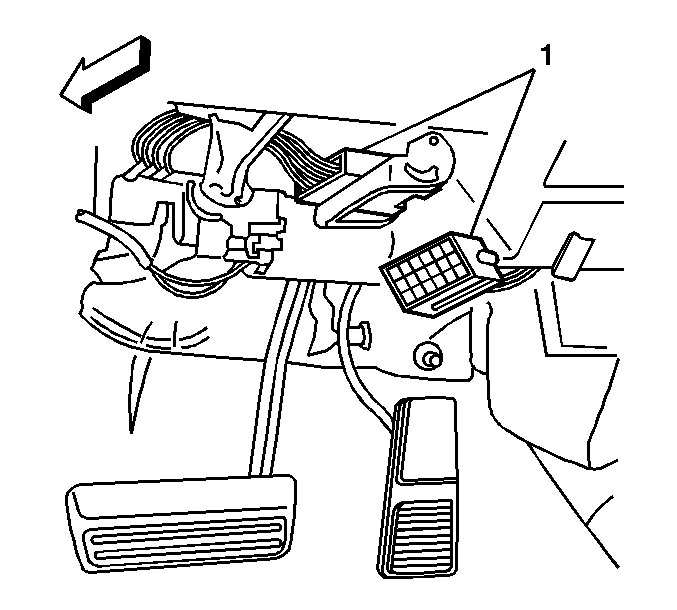
- Disconnect the body to I/P electrical connectors (1) at the top, outside corners of I/P.
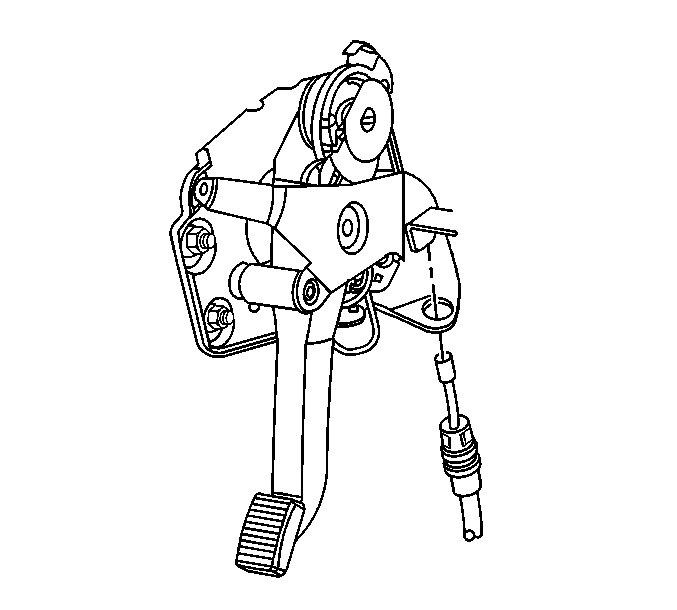
- For RHD only, remove the park brake cable from the park brake pedal assembly. Refer to Parking Brake Front Cable Replacement in Park Brake.
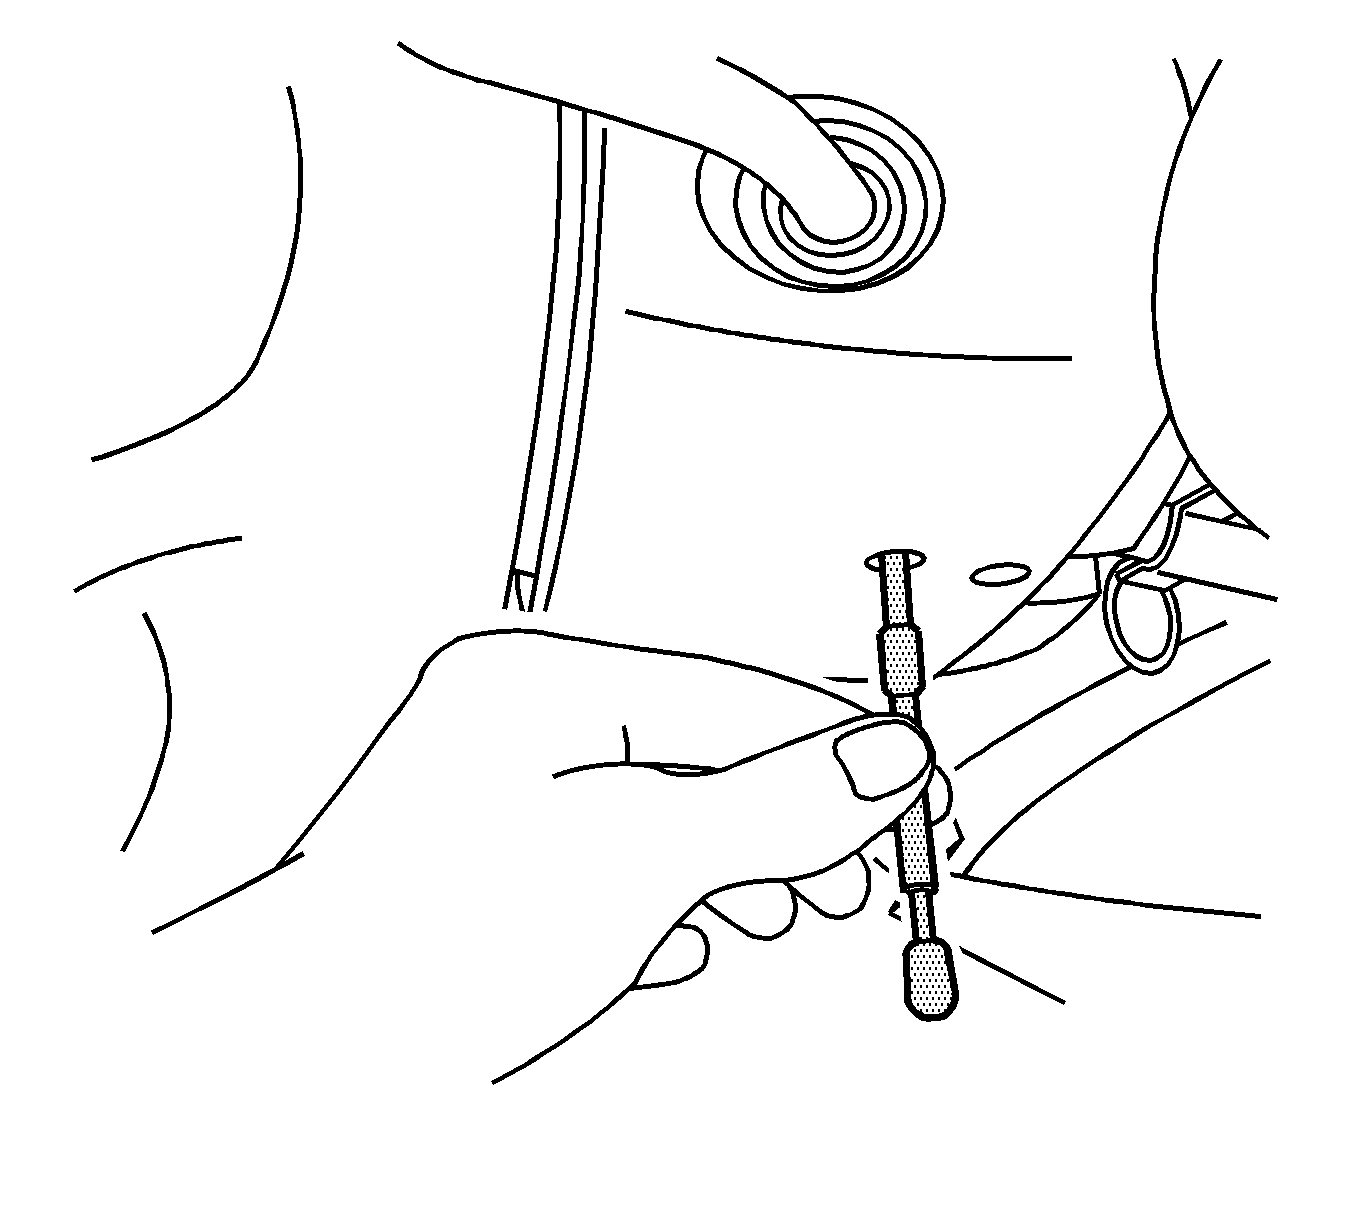
- With the steering wheel centered, install the J 42640 in order to lock the steering column.
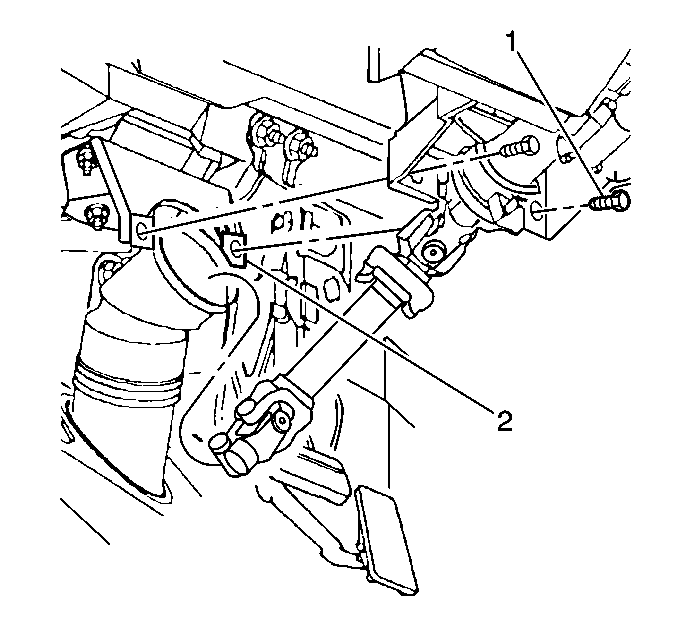
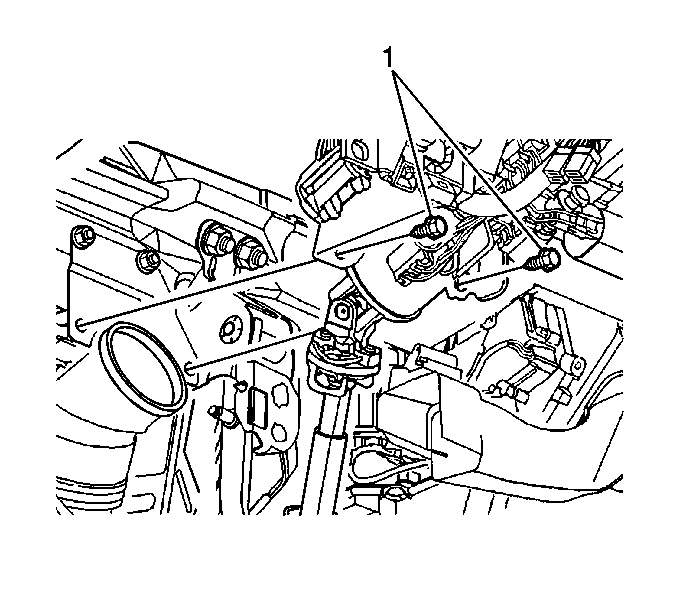
- Remove the steering column to body bolts (1). Refer to Steering Column Replacement in Steering Wheel and Column.
- Disconnect the steering shaft from the steering gear. Refer to Intermediate Steering Shaft Replacement in Steering Wheel and Column.
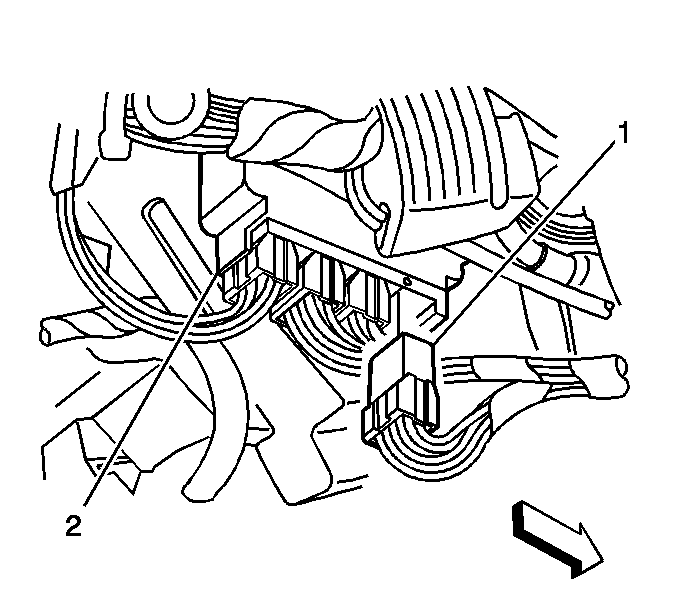
- Disconnect the steering column harness connector (1).
- Disconnect the electrical connector (1) for the tilt and telescoping module, to the main body harness, if equipped.
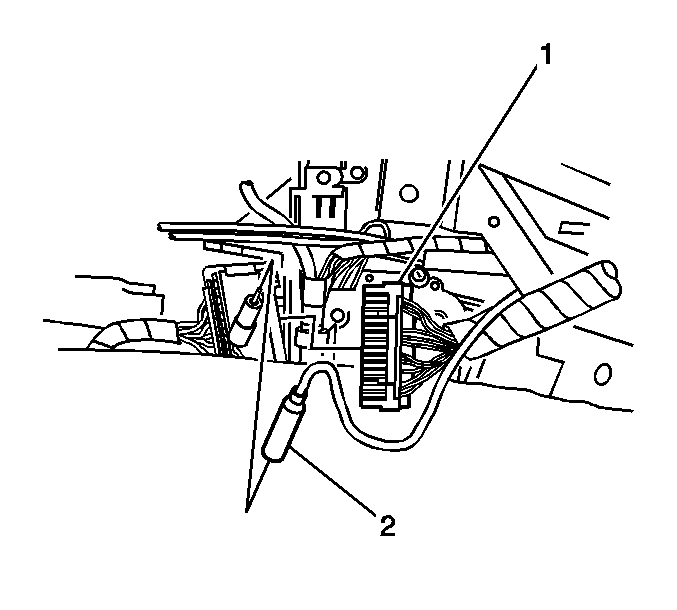
- Disconnect the body harness connection (1) and the audio antenna connection (2), which are located next to the I/P extension.
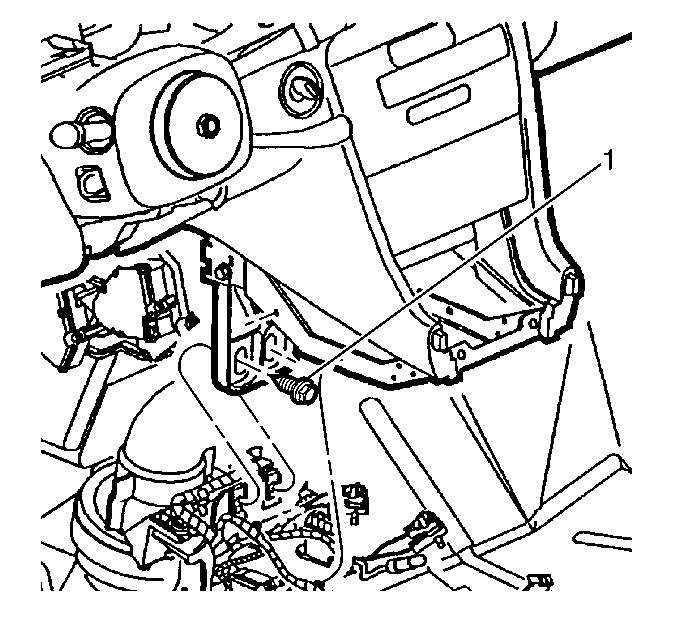
- Remove the I/P extension bolts (1).
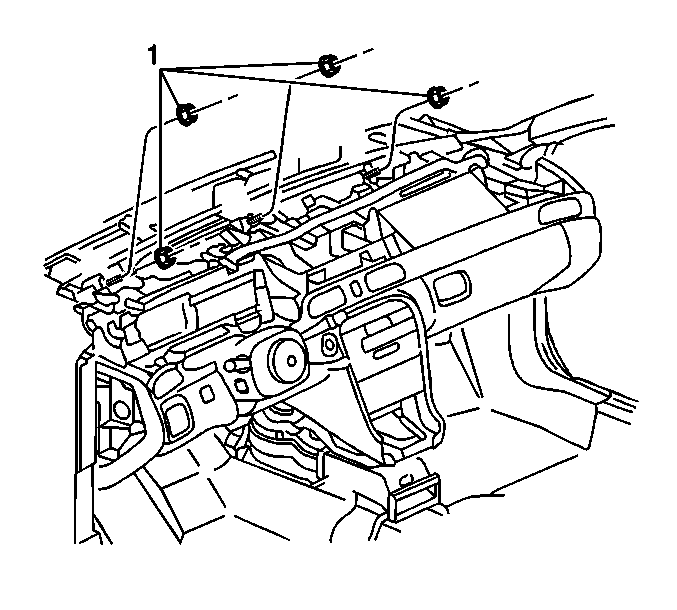
- Remove I/P carrier to cowl nuts (1).
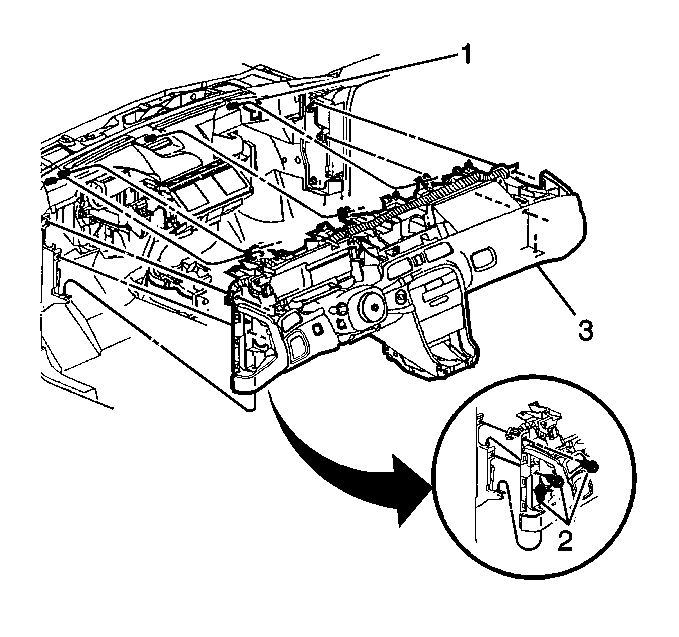
- Remove the bolts (2) from the left and right I/P carrier to hinge pillar.
- Remove the I/P assembly (3) from the vehicle.
Caution: Refer to SIR Caution in the Preface section.
Installation Procedure
- Install the I/P assembly (3) to the vehicle.
- Install the I/P assembly to hinge pillar bolts (2).
- Install the I/P carrier to cowl nuts (1).
- Install the I/P extension bolts (1).
- Install the steering column support bolts (1). Refer to Steering Column Replacement in Steering Wheel and Column.
- Install the steering shaft to the steering column. Refer to Intermediate Steering Shaft Replacement in Steering Wheel and Column.
- Remove the J 42640 from the steering column.
- Connect the steering column main harness electrical connector (1).
- Connect the tilt and telescoping module electrical connector (1), if equipped.
- Connect the body harness electrical connector (1) and the audio antenna connection (2).
- For RHD, Install the park brake cable to the park brake pedal assembly. Refer to Parking Brake Front Cable Replacement in Park Brake.
- Connect the I/P to body electrical connectors (1) at top outside corners of I/P.
- Install the defroster grille. Refer to Defroster Grille Replacement .
- Install the I/P upper trim pad. Refer to Instrument Panel Upper Trim Pad Replacement .
- Install the drivers knee bolster bracket. Refer to Knee Bolster Replacement .
- Install the floor console. Refer to Console Replacement .
- Install the left and right I/P outer trim cover. Refer to Instrument Panel Outer Trim Cover Replacement .
- Enable the SIR. Refer to SIR Disabling and Enabling and SIR Disabling and Enabling in SIR.
Notice: Refer to Fastener Notice in the Preface section.

Tighten
Tighten the I/P carrier bolts (2) to 25 N·m (18 lb ft).

Tighten
Tighten the I/P carrier to cowl nuts (1) to 25 N·m (18 lb ft).

Tighten
Tighten the I/P extension bolts (1) to 25 N·m (18 lb ft).
