For 1990-2009 cars only
Removal Procedure
Notice: Refer to Fastener Notice in the Preface section.
- Disable the SIR. Refer to SIR Disabling and Enabling or SIR Disabling and Enabling in SIR.
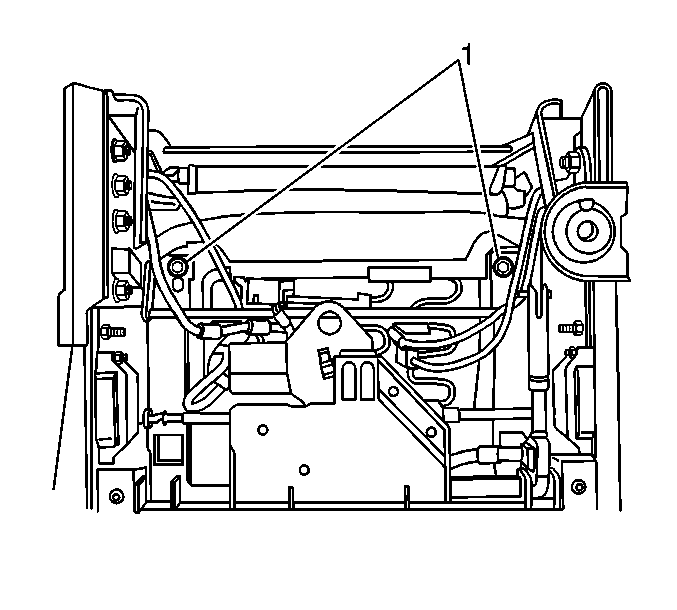
- Adjust the front seat assembly up and forward in order to access the fasteners (1) at the rear of the front seat cushion assembly.
- Remove the front seat cushion assembly fasteners (1), at the rear of the seat cushion.
- Adjust the front seat assembly to the rear of the vehicle.
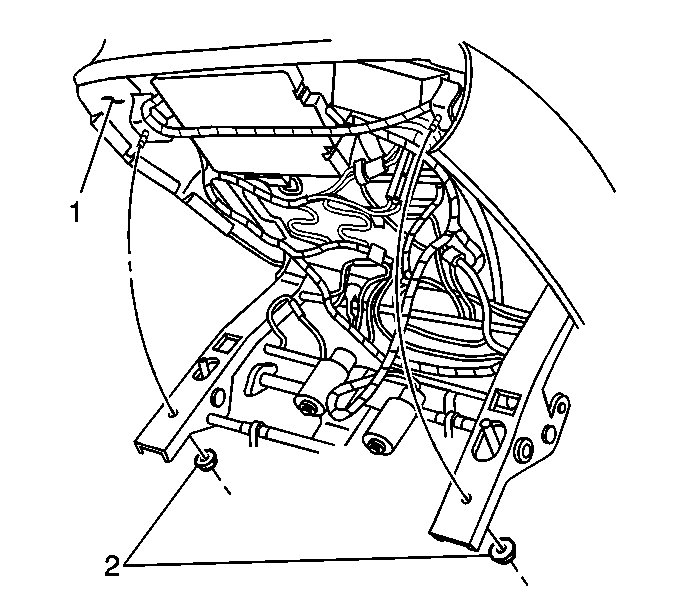
- Angle the front seat cushion (1) up, in order to access the front seat cushion assembly fasteners (2).
- Remove the front seat cushion assembly fasteners (2).
- Lift the front seat cushion assembly (1) away from the seat riser.
- Position the seat cushion assembly (1) against the seat back, in order to access the heated seat module rivets and the electrical connectors.
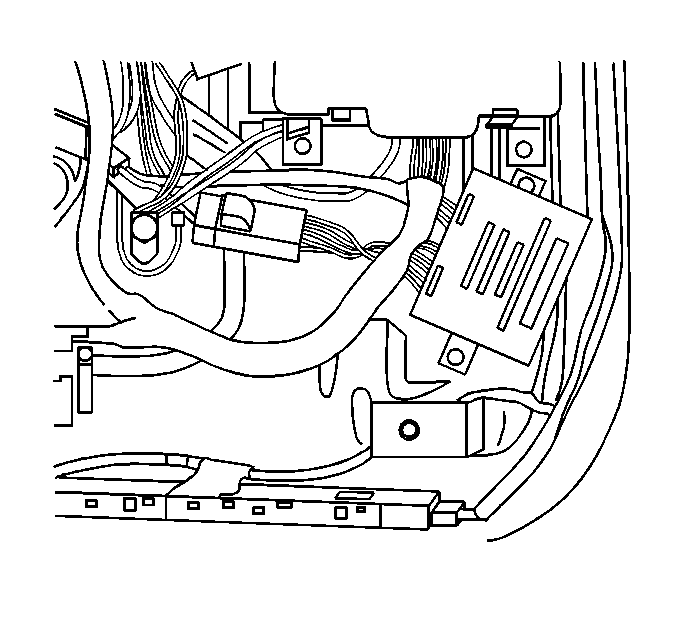
- Disconnect the heated seat module electrical connector.
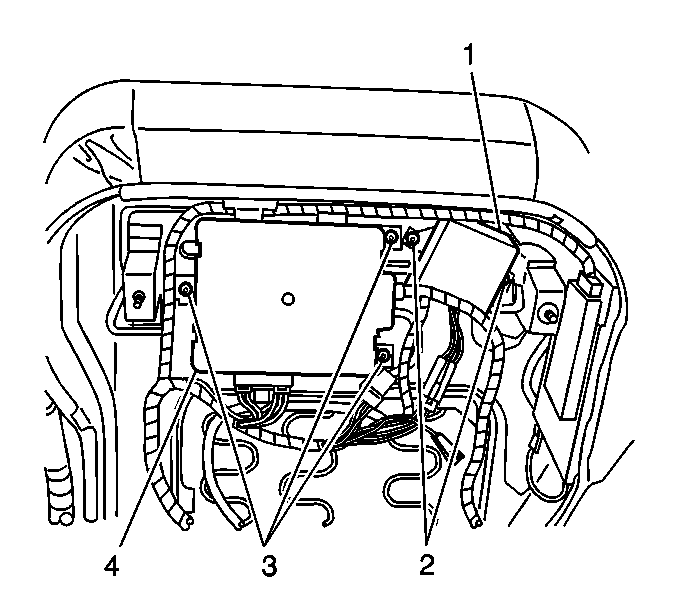
- Drill out the rivets (2) retaining the heated seat module (1) to the seat cushion frame.
- Remove the heated seat module (1).


Important: The heated seat cushion cover connectors and a several wire hold down clips will need to be removed in order to position the seat cushion against the seat back.


Caution: Eye protection must be worn when drilling rivets to reduce the chance of personal injury.
Important: Cover the seat motors and cables in order to avoid metal shavings in the mechanism.
Installation Procedure
- Install the heated seat module (1) to the seat cushion frame.
- Install the new rivets (2) to the heated seat module (1) in order to secure the heated seat module to the seat cushion frame.
- Connect the electrical connector to the heated seat module.
- Connect the heated seat cover electrical connectors and the wire hold down clips which were removed during disassembly.
- Remove the protective cover from the seat riser.
- Install the seat cushion assembly (1) to the seat riser.
- Install the front seat cushion fasteners (2).
- Adjust the front seat assembly up and forward in order to access the fasteners (1) at the rear of the front seat cushion assembly
- Install the front seat cushion assembly rear fasteners (1) to the seat cushion assembly.
- Angle the front of the front seat cushion up, in order to access the front seat cushion assembly fasteners.
- Enable the SIR. Refer to SIR Disabling and Enabling or SIR Disabling and Enabling in SIR.


Notice: Refer to Fastener Notice in the Preface section.

Tighten
Tighten the seat cushion assembly fasteners to 9 N·m (80 lb in).
Tighten
Tighten the seat cushion assembly fasteners to 9 N·m (80 lb in).
