For 1990-2009 cars only
Removal Procedure
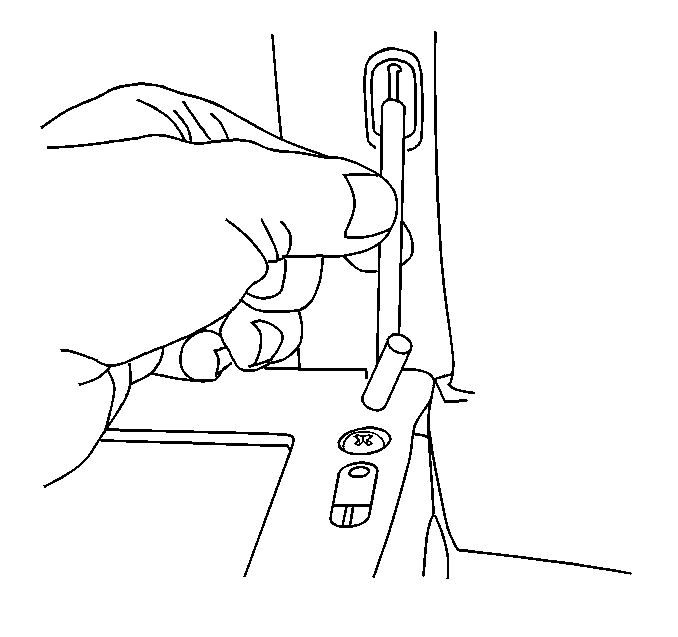
- Open the Instrument panel (IP) storage compartment door.
- Lift the door slightly and twist the compensator rod in order to disengage the end of the rod from the door.
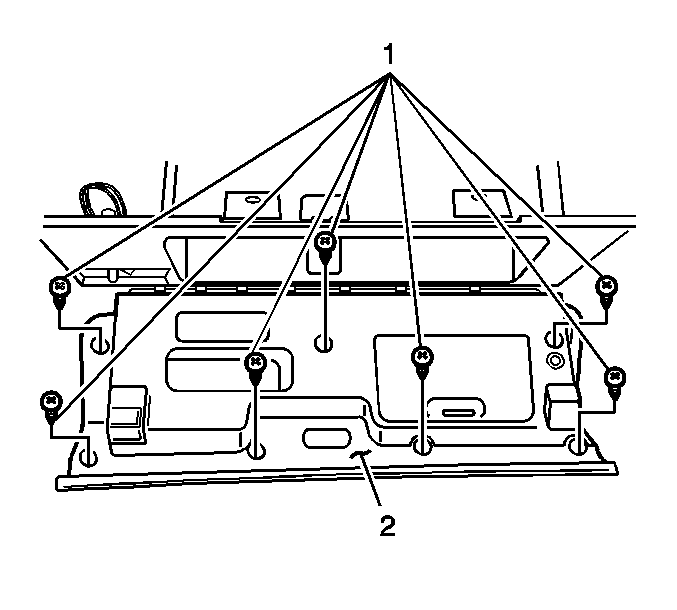
- Remove the screws (1) from the IP storage compartment door trim panel (2).
- Remove the IP storage compartment door trim panel (2).
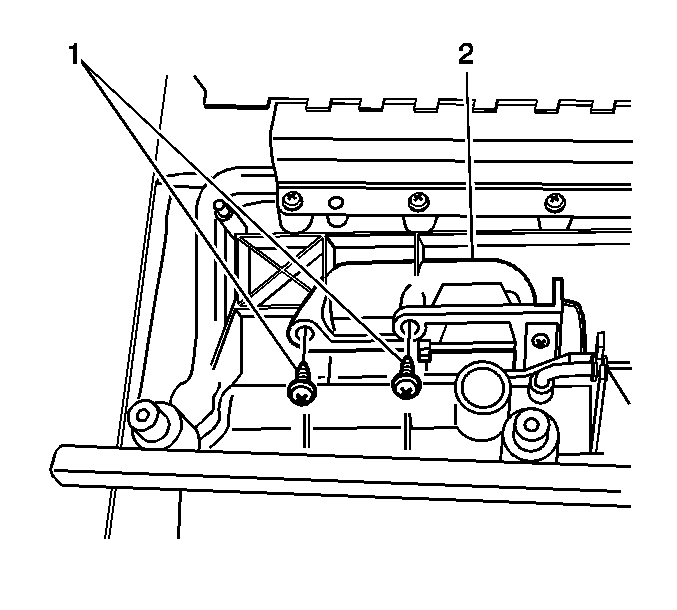
- Remove the screws (1) securing the IP storage compartment door handle (2) to the IP storage compartment door.
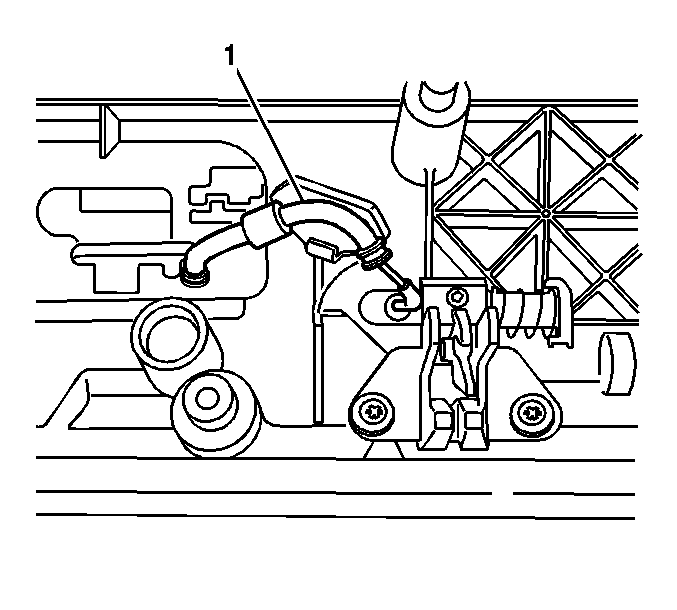
- Disengage the compartment latch actuator cable (1) from IP storage compartment latch.
- Remove the lock cylinder from the IP storage compartment latch handle:
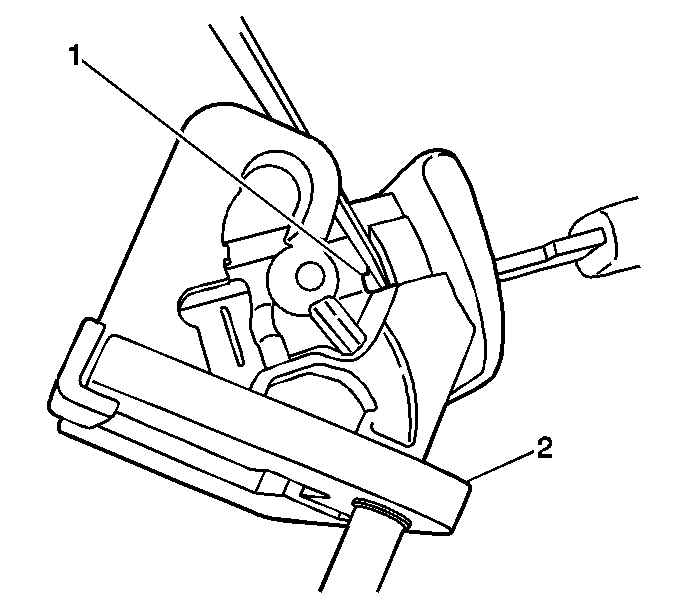
| 7.1. | Insert the key into the door handle lock cylinder. |
| 7.2. | Turn the key 1/4 turn clockwise (LOCK position). |
| 7.3. | Insert a small diameter tool into the small rectangular opening (1) on the RH side of the compartment handle. |
| 7.4. | Depress and hold the lock cylinder retainer. |
| 7.5. | Turn the key an additional 1/4 turn clockwise. |
| 7.6. | Remove the key and lock cylinder from the compartment handle (2). |
Installation Procedure
- When installing a new lock cylinder, code the lock cylinder to the vehicle key. Refer to Key and Lock Cylinder Coding in General Information.
- Insert the key into the lock cylinder assembly (2).
- Insert the lock cylinder into the IP storage compartment door handle (1).
- Push the lock cylinder (2) toward the IP compartment latch handle in order to fully seat the lock cylinder to the IP storage compartment latch handle (1).
- Turn the key 1/4 turn counterclockwise in order to secure the lock cylinder (2) to the IP storage compartment latch handle (1).
- Turn the key an additional 1/4 turn counterclockwise and remove the key from the lock cylinder.
- Inspect the lock cylinder for proper operation.
- Engage the handle/latch actuator cable (1) to the IP storage compartment latch.
- Install the IP compartment latch handle (2) to the IP storage compartment door.
- Install the IP storage compartment latch handle screws (1).
- Install the IP storage compartment door trim plate (2).
- Install the screws (1) to the IP storage compartment door trim panel (2).
- Lift the IP storage compartment door in order to install the IP storage compartment door compensator.
- Install the end of the IP compartment door compensator rod into the IP storage compartment door, and twist the compensator rod 1/4 turn in order to secure the IP compartment door compensator rod to the IP storage compartment door.
- Close the IP storage compartment door.
- Inspect the IP storage compartment/latch for proper operation.
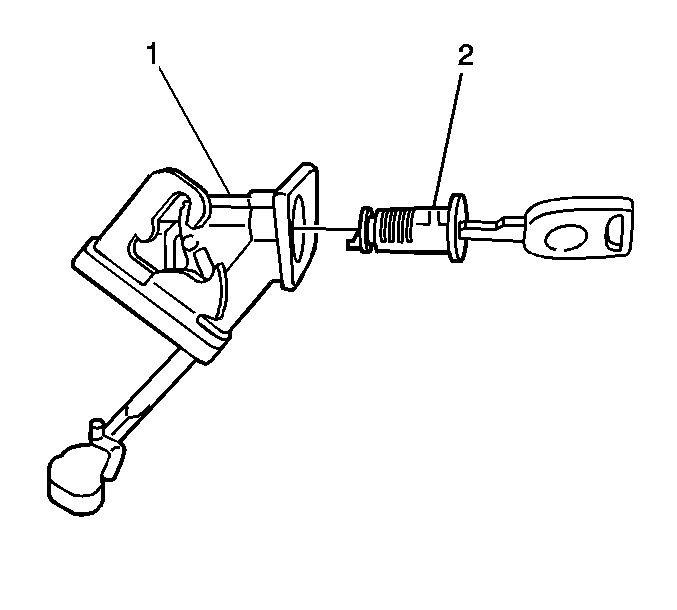
Align the lock cylinder to the latch handle in the same position observed during removal.
Important: The lock cylinder should only turn a 1/4 turn and should be securely retained to the IP compartment latch handle when installed.


Notice: Refer to Fastener Notice in the Preface section.
Tighten
Tighten the screws (1) fully driven, seated, but not stripped.

Tighten
Tighten the screws (1) fully driven, seated, but not stripped.

