Tools Required
EN 46109 Guide Pins
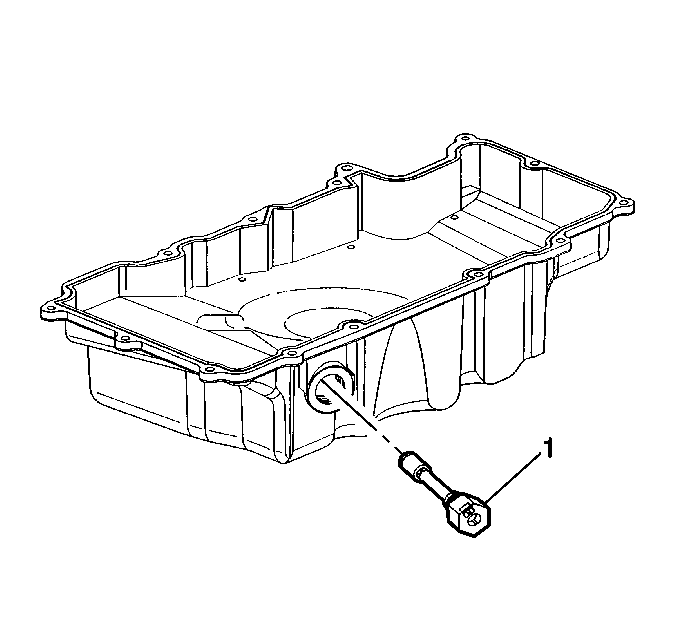
- Install the oil level switch (1).
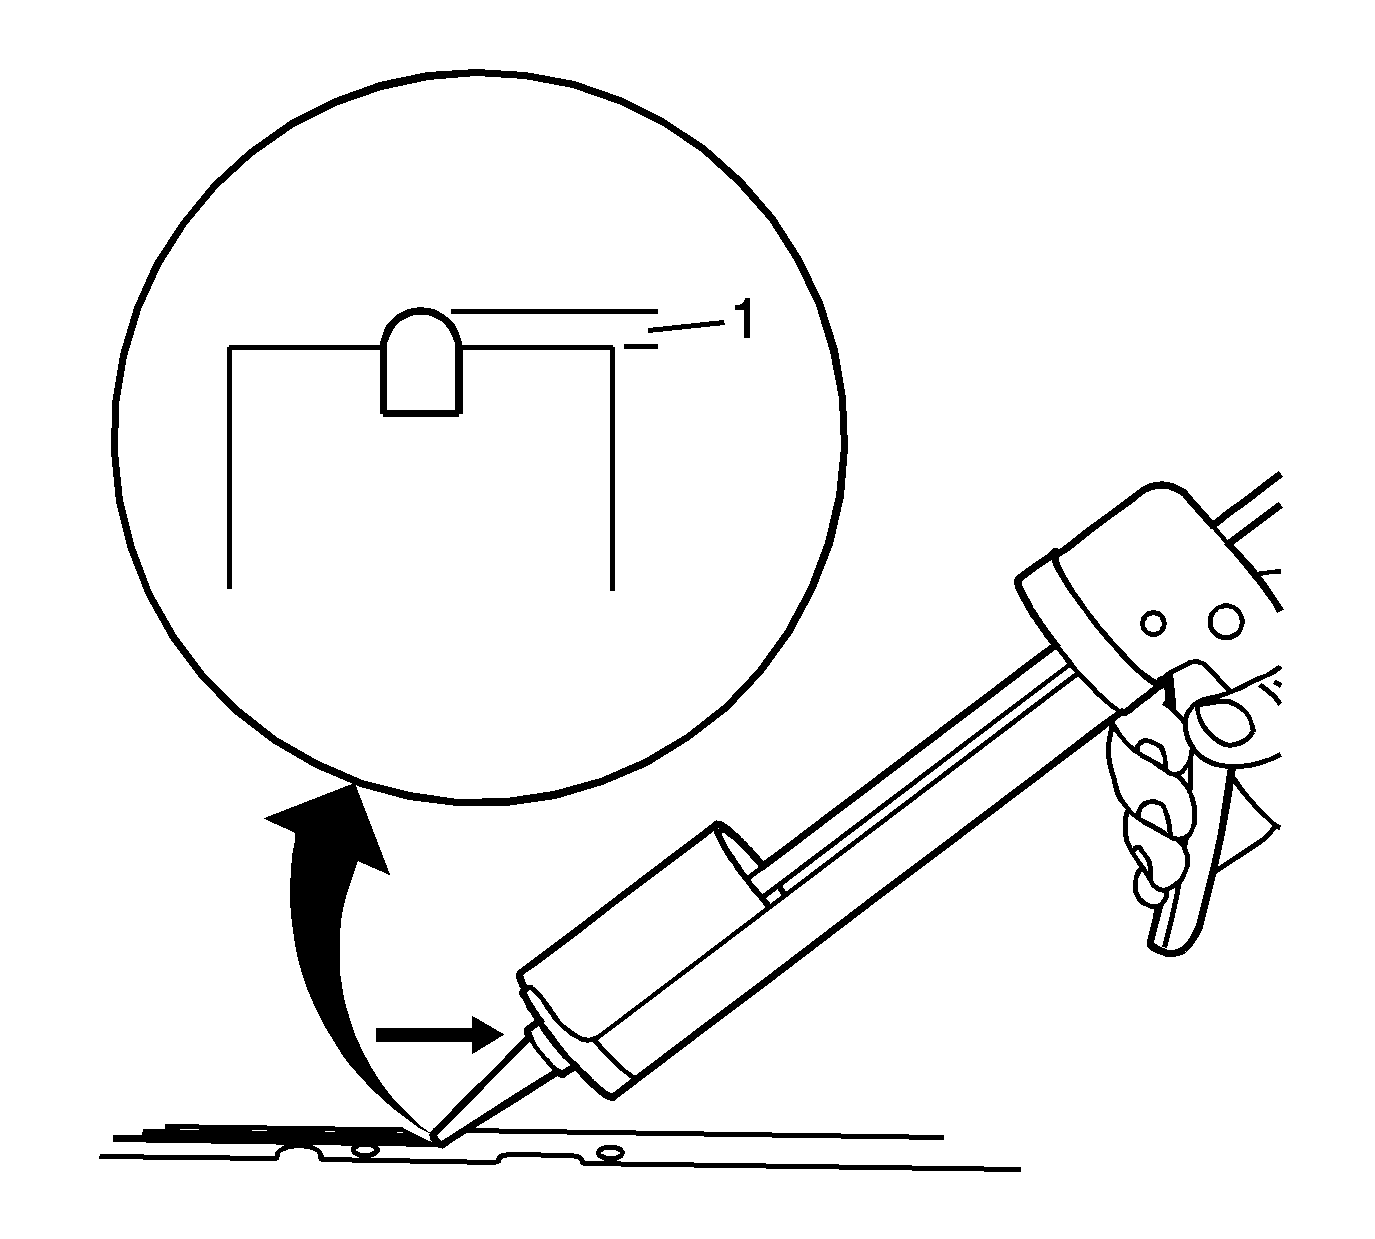
- Completely fill and slightly overfill the oil pan seal groove with a continuous bead of RTV sealant GM P/N 12378521 (Canadian P/N 88901148) or equivalent.
- Ensure the RTV sealant GM P/N 12378521 (Canadian P/N 88901148) or equivalent bead is higher than the oil pan sealing surface (1) by 3 mm (0.118 in).
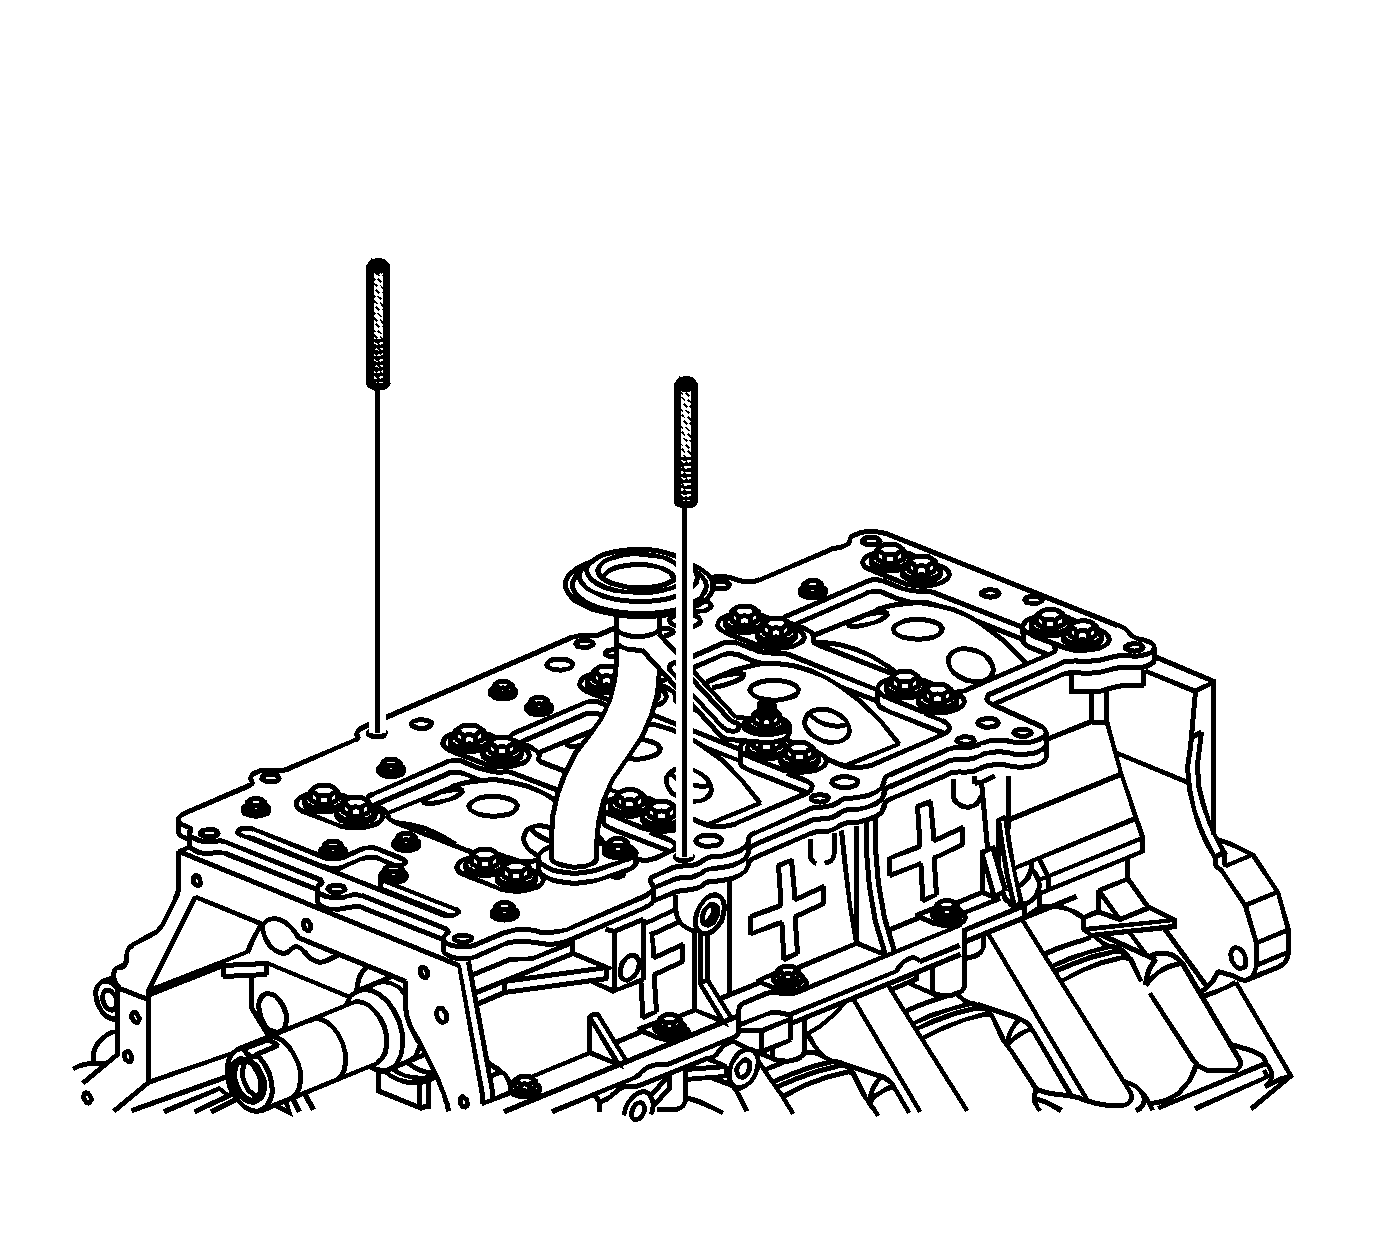
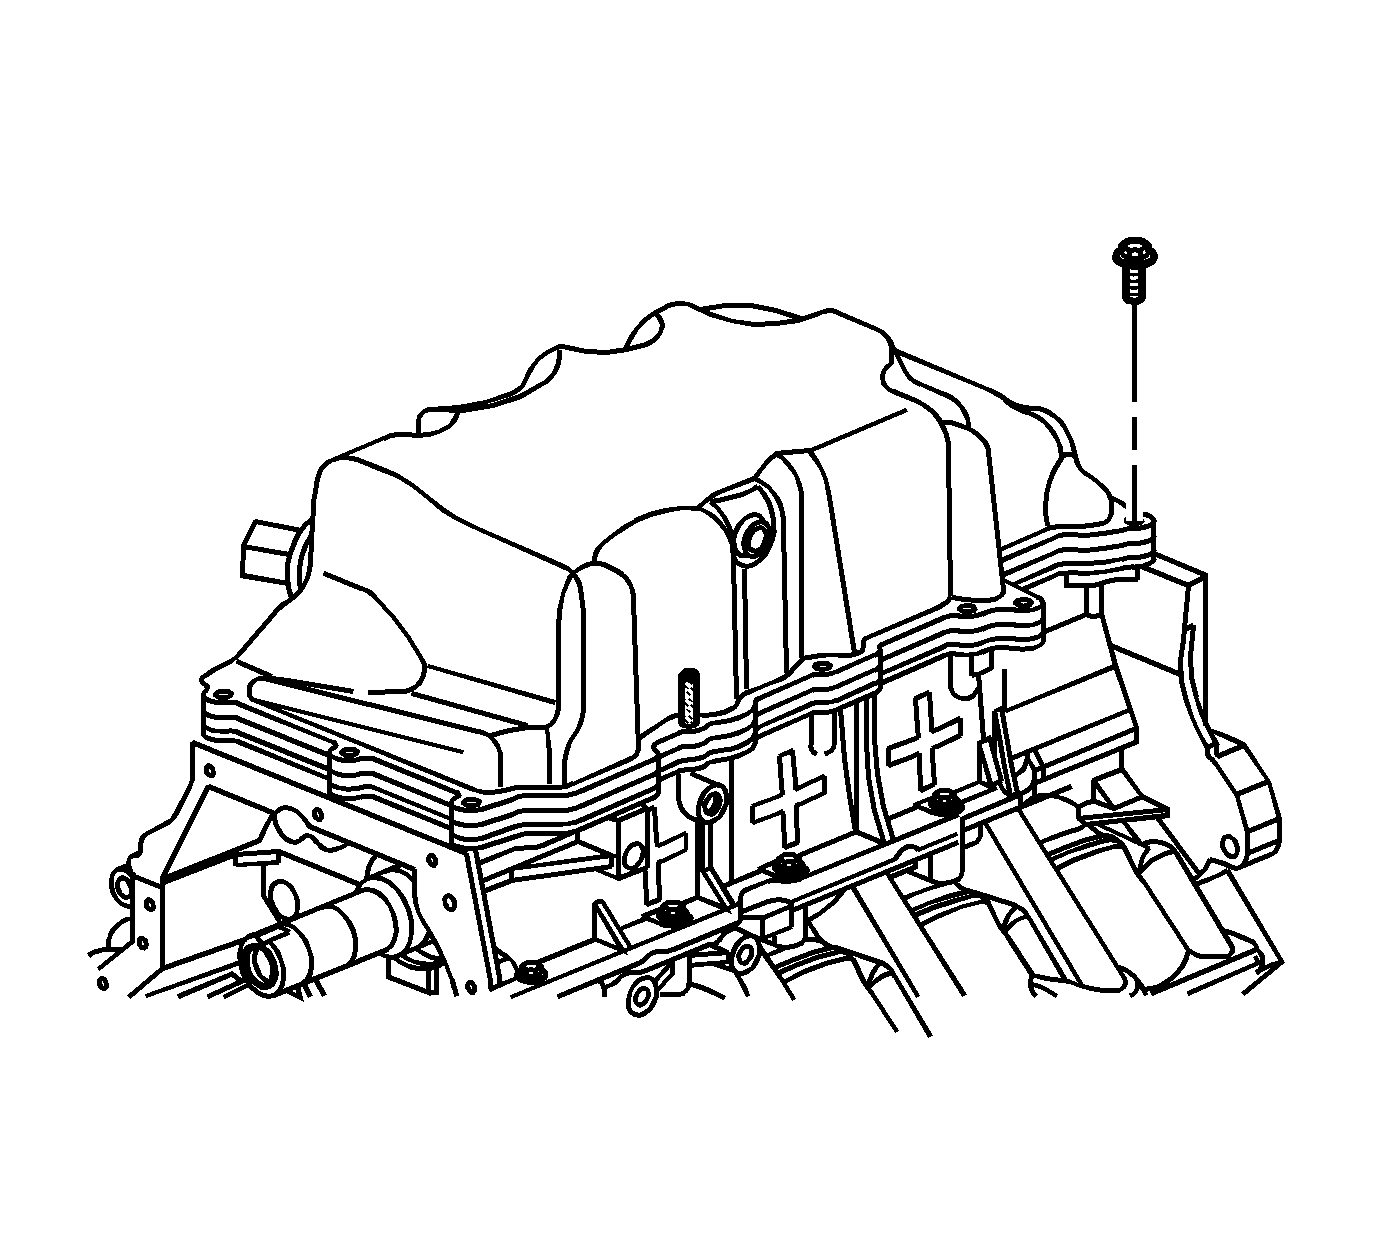
- To prevent shifting of the oil pan, install one EN 46109 into a bolt hole in each side of the lower crankcase.
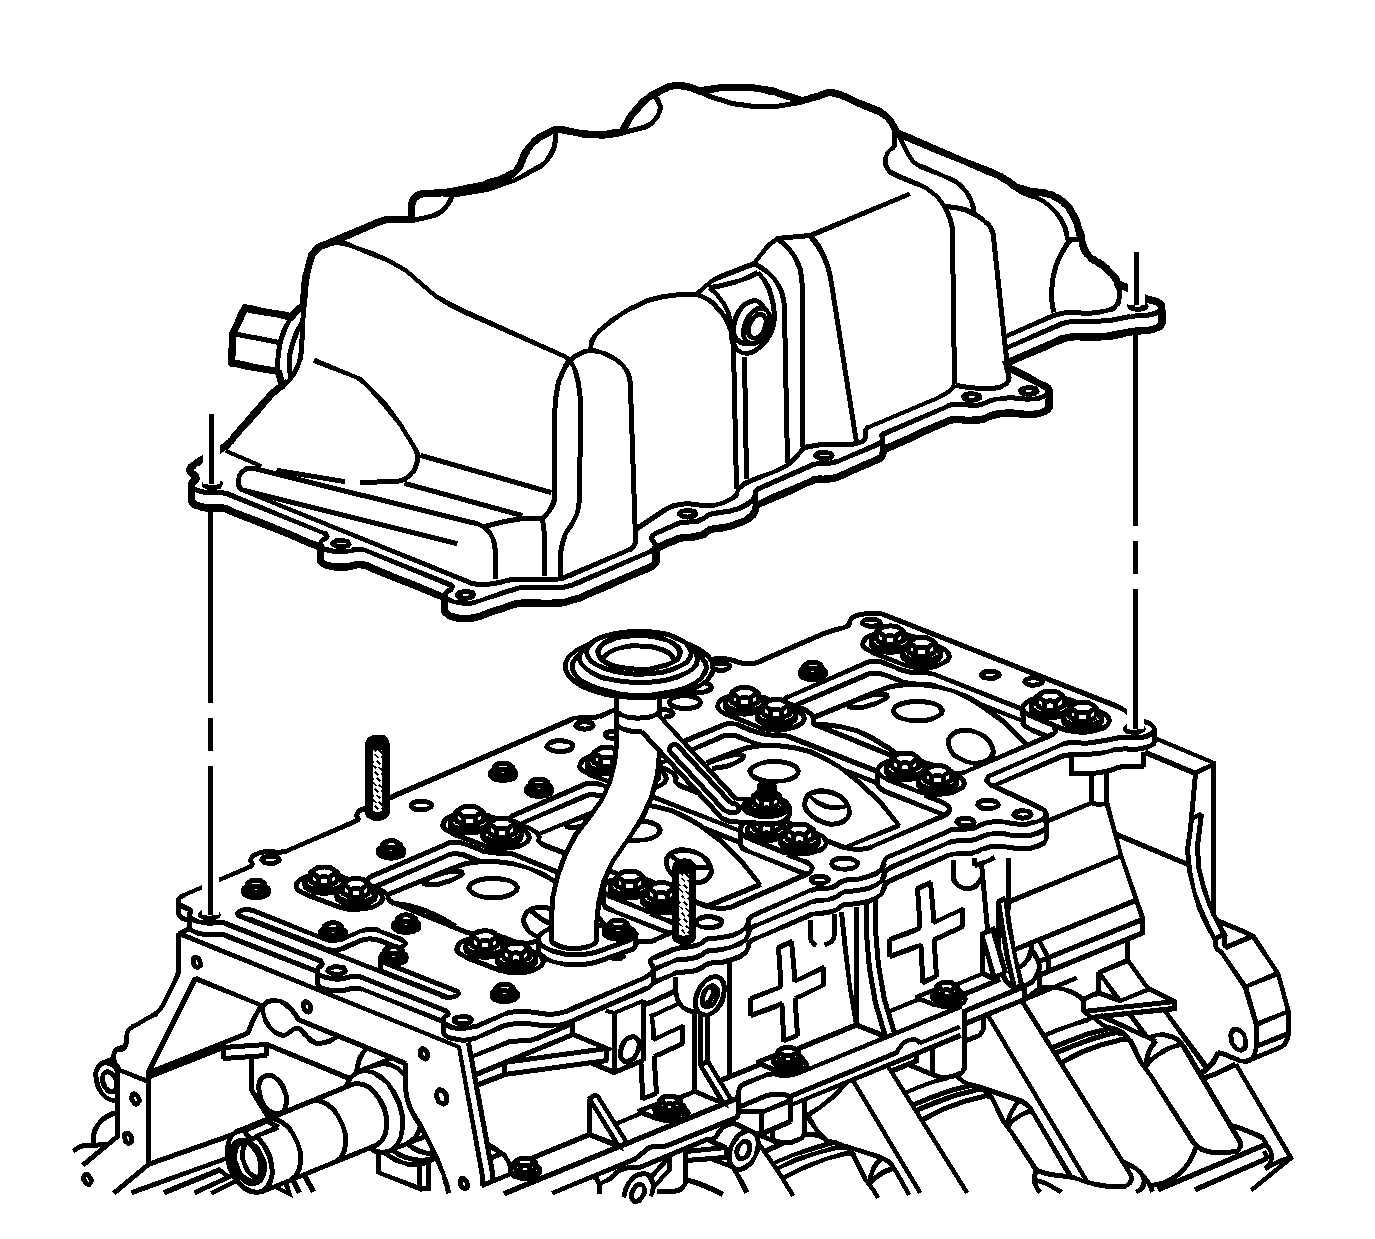
- Position the oil pan onto the lower crankcase.
- Loosely install several of the oil pan bolts.
- Remove the EN 46109 .
- Finish loosely installing the remaining oil pan bolts.
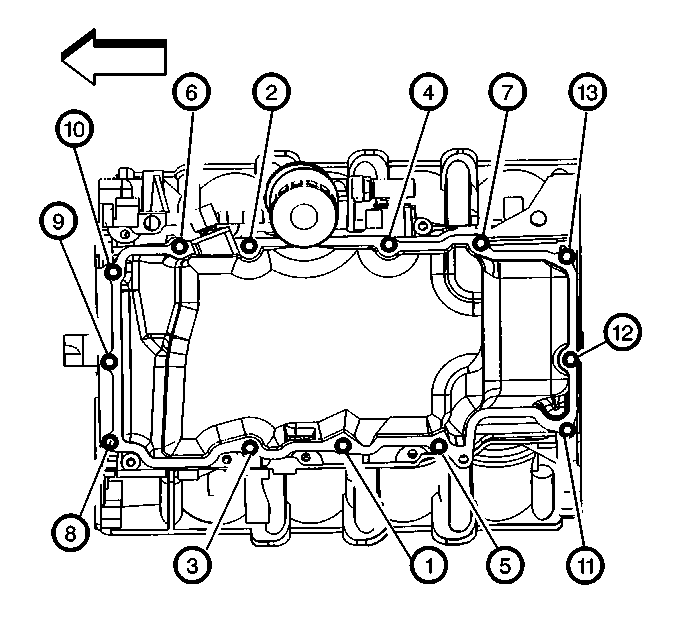
- Tighten the oil pan bolts in the sequence shown.
- Tighten the oil pan bolts a first pass to 8 N·m (71 lb in) in the sequence shown.
- Tighten the oil pan bolts a final pass to 12 N·m (106 lb in) in the sequence shown.
- Clean off any sealant that has protruded to the exterior of the engine.
Notice: Use the correct fastener in the correct location. Replacement fasteners must be the correct part number for that application. Fasteners requiring replacement or fasteners requiring the use of thread locking compound or sealant are identified in the service procedure. Do not use paints, lubricants, or corrosion inhibitors on fasteners or fastener joint surfaces unless specified. These coatings affect fastener torque and joint clamping force and may damage the fastener. Use the correct tightening sequence and specifications when installing fasteners in order to avoid damage to parts and systems.
Tighten
Tighten the oil level switch to 20 N·m (15 lb ft).
Important: Ensure components being sealed with room temperature vulcanizing (RTV) sealant are assembled within 20 minutes. Components assembled after the RTV sealant has skinned-over, approximately 20 minutes, will not seal properly.
Tighten
