For 1990-2009 cars only
Removal Procedure
- Block the vehicle wheels.
- Put the shift lever into neutral (N).
- Remove the console trim plate.
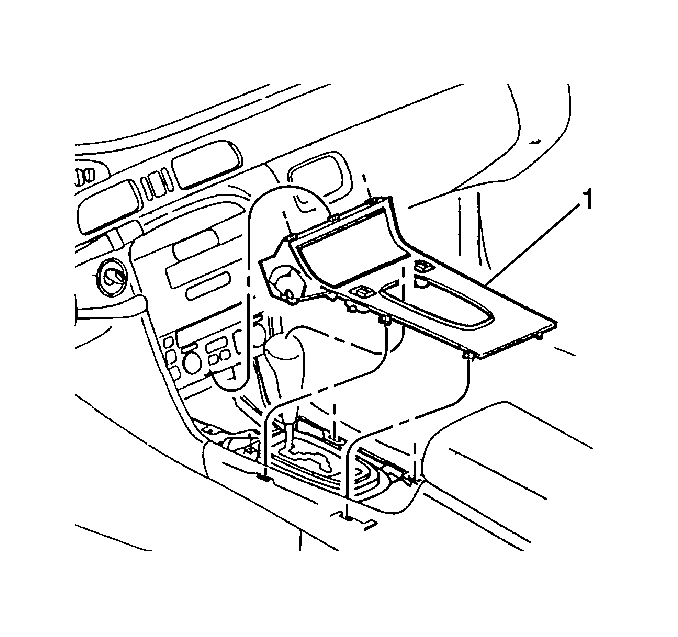
- Lift the console trim plate assembly upwards from the rear edge and pull the assembly rearward.
- Disconnect the electrical connectors as necessary.
Important: Do not use the convenience door opening as a leverage point.
Notice: To prevent component damage, DO NOT use metal tools to remove the trim.

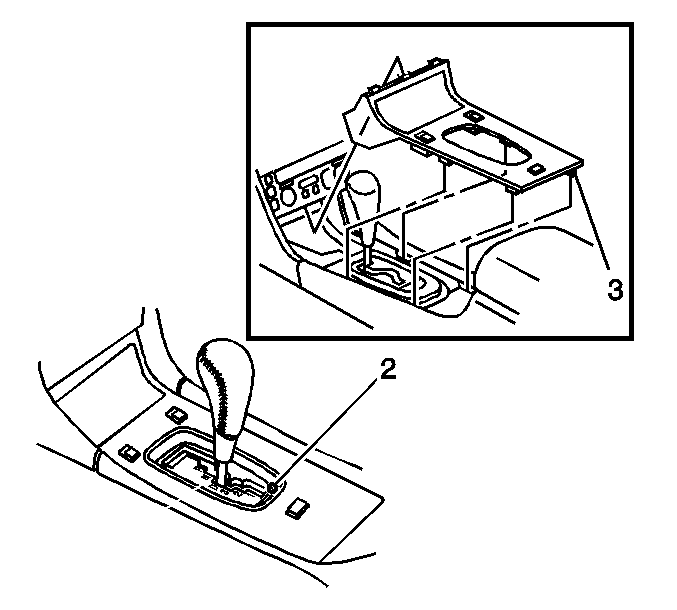
| 3.1. | Insert your fingers (if necessary, use a flat plastic tool) between the trim plate and the PRNDL at the RH rear corner of the chrome trim (2). |
| 3.2. | Gently lift up the trim plate in order to disengage the RH rear corner retainer (3). |
| 3.3. | Use the same method at the LH rear corner and the two front corners of the chrome trim in order to disengage the remaining retainers. |
Installation Procedure
- Connect the electrical connectors.
- Guide the forward edge of the trim panel (1) into the lower instrument panel (IP) opening.
- Align the trim panel retainers with the top of the console, and press down firmly in order to engage the console trim panel.
- Shift the vehicle into park (P).
- Remove the blocks from the wheels.

Important: Make sure the retainers are aligned properly before attempting to engage the trim plate.
