For 1990-2009 cars only
Removal Procedure
- Open the hood.
- Remove the front section of the air cleaner assembly. Refer to Air Cleaner Assembly Replacement .
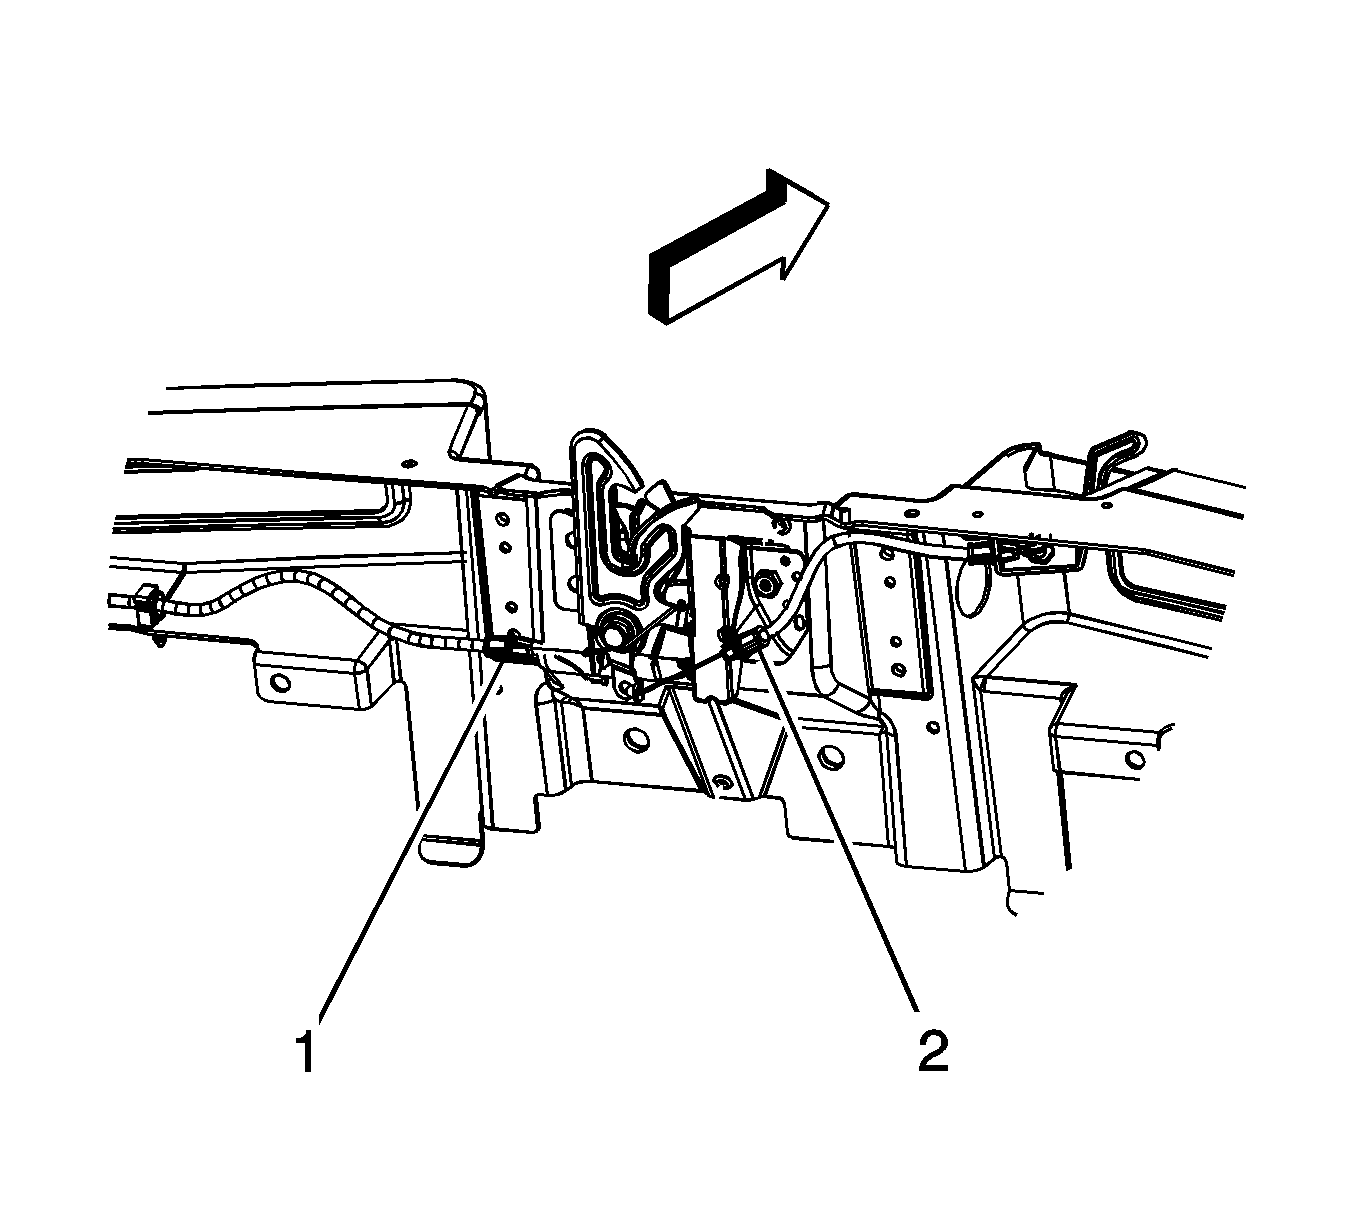
- Disconnect the hood release cable (1) from the hood latch.
- Disconnect the secondary hood latch cable from the hood latch.
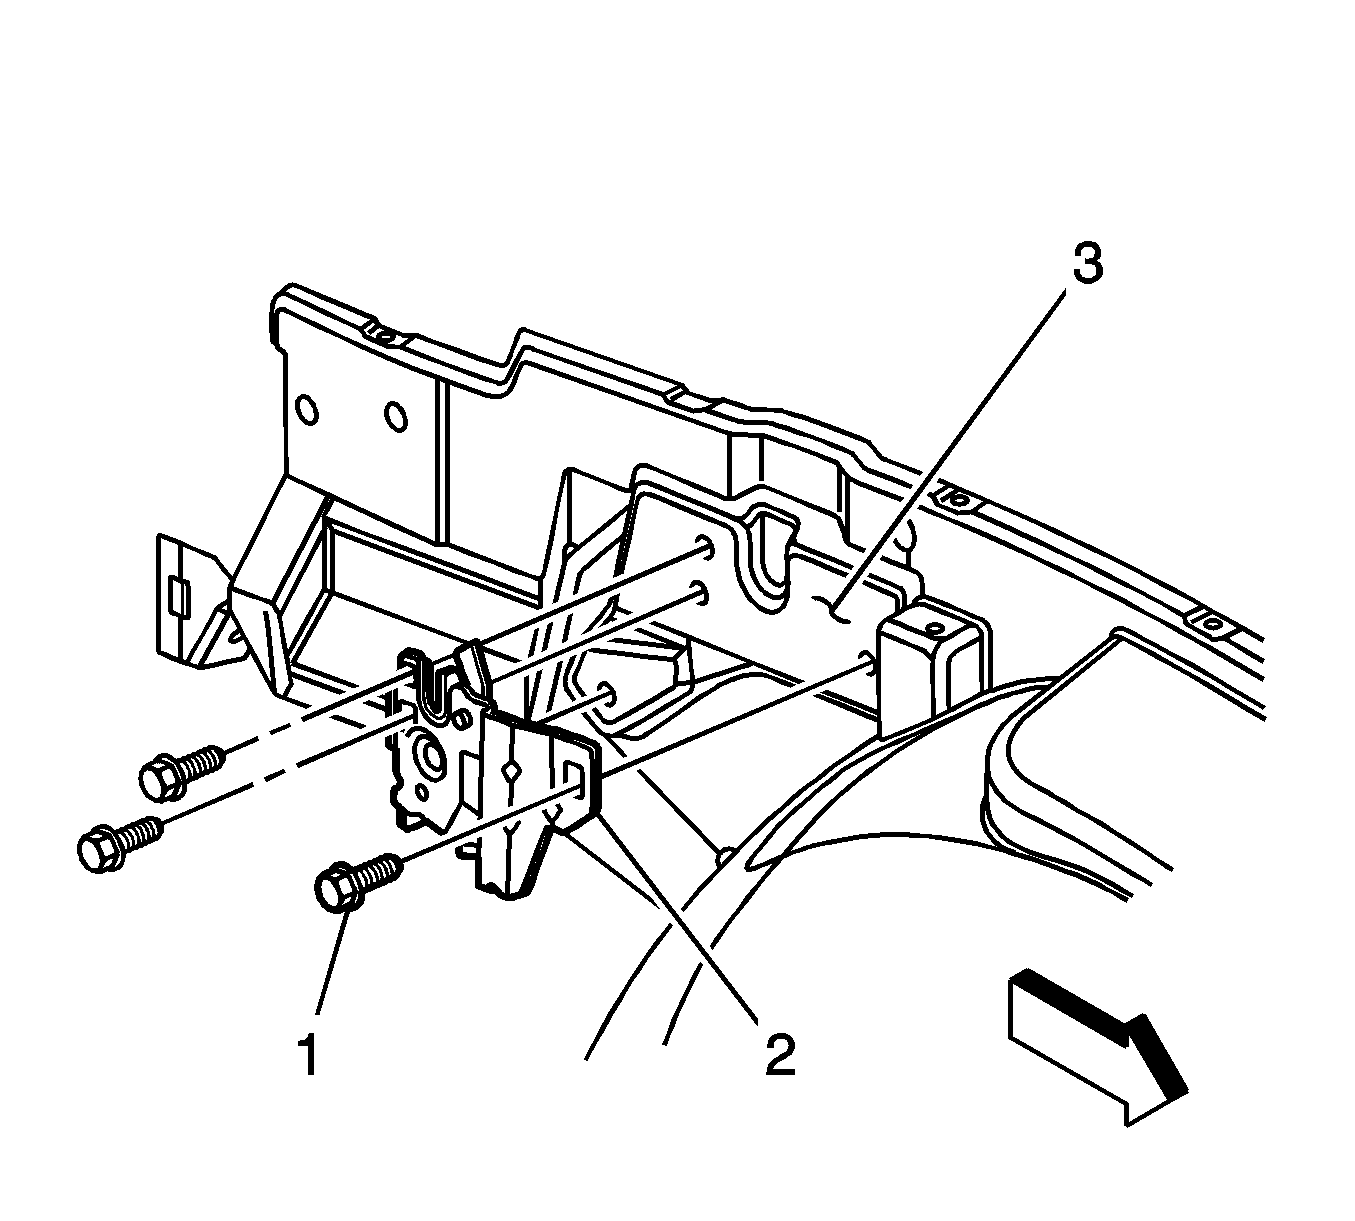
- Remove the bolts (1) attaching the hood latch (2) from latch support (3).
- Remove the latch from the latch support.
Installation Procedure
- Install the hood latch (2) to the latch support (3).
- Install the bolts (1) attaching the latch (2) to the latch support (3).
- Connect the hood release cable (1) to the latch.
- Connect the secondary latch cable (2) to the latch.
- Slowly lower the hood and check the latch for the proper alignment.
- Adjust the latch as necessary.
- Install the front section of the air cleaner assembly. Refer to Air Cleaner Assembly Replacement .
- Close the hood.
Notice: Refer to Fastener Notice in the Preface section.
Tighten
Tighten the bolts to 9 N·m (80 lb in).
