For 1990-2009 cars only
Removal Procedure
- Raise the door window.
- Remove the door panel. Refer to Door Trim Panel Replacement .
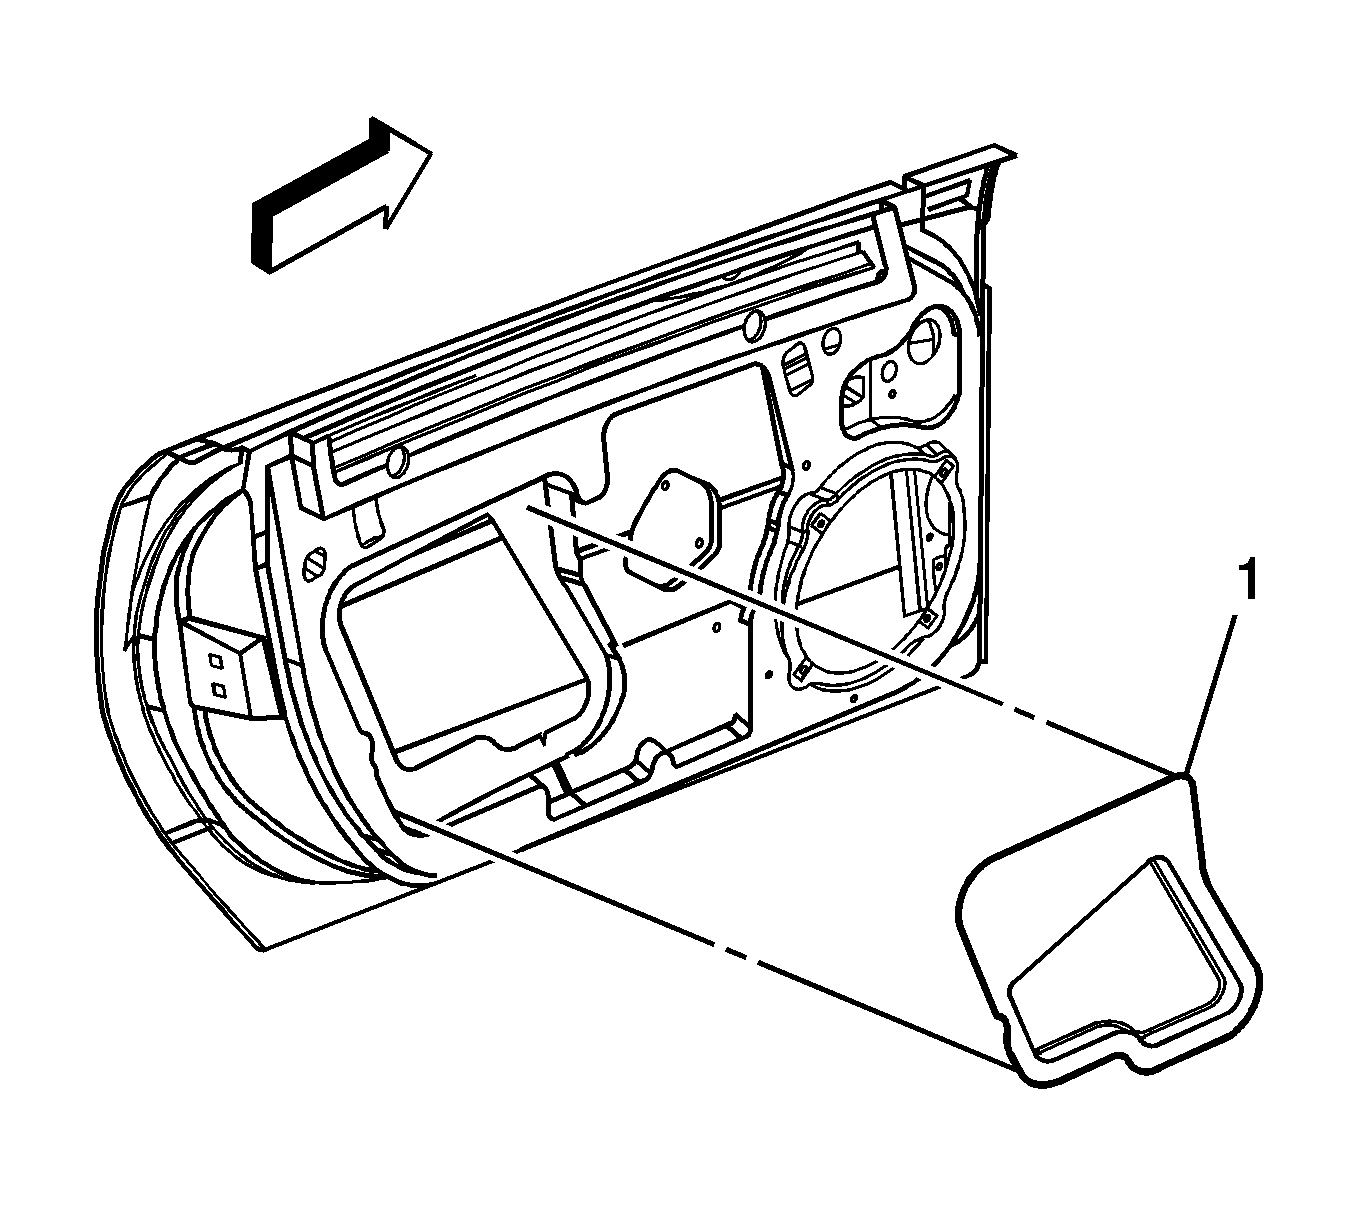
- Remove the large water deflector (1) for inside access to the rear of the door.
- Mark the striker location on the outer door edge.
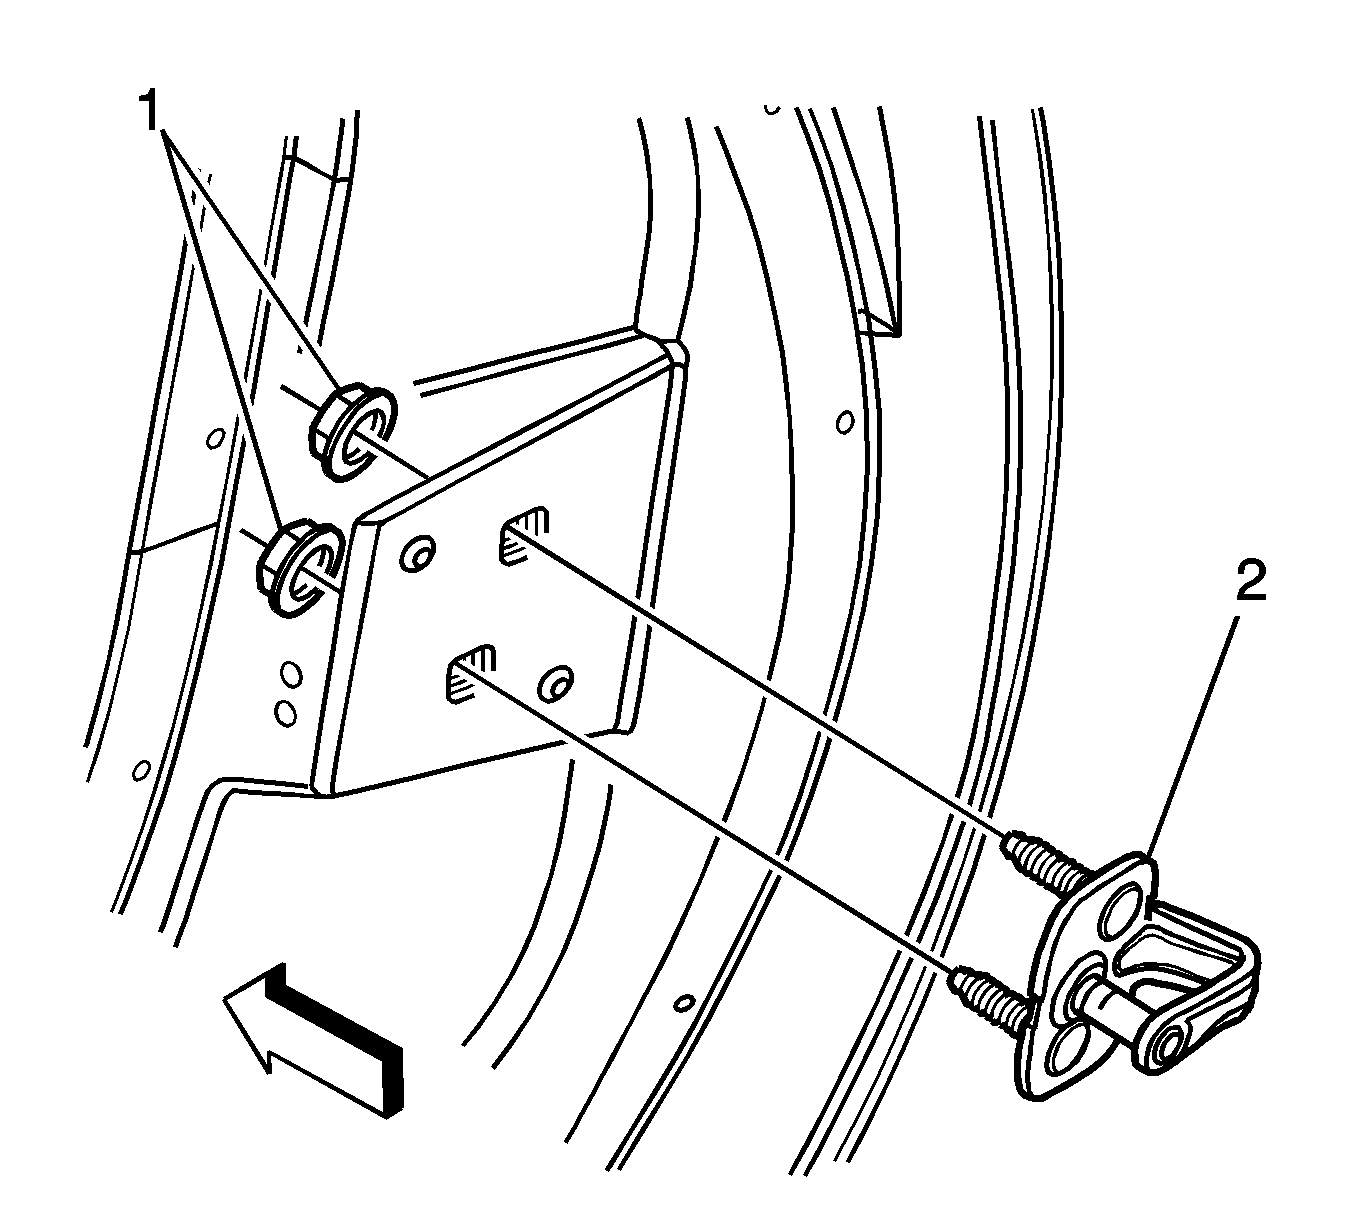
- Remove the striker fasteners (1) from the inside of the door.
- Remove the striker (2).
Installation Procedure
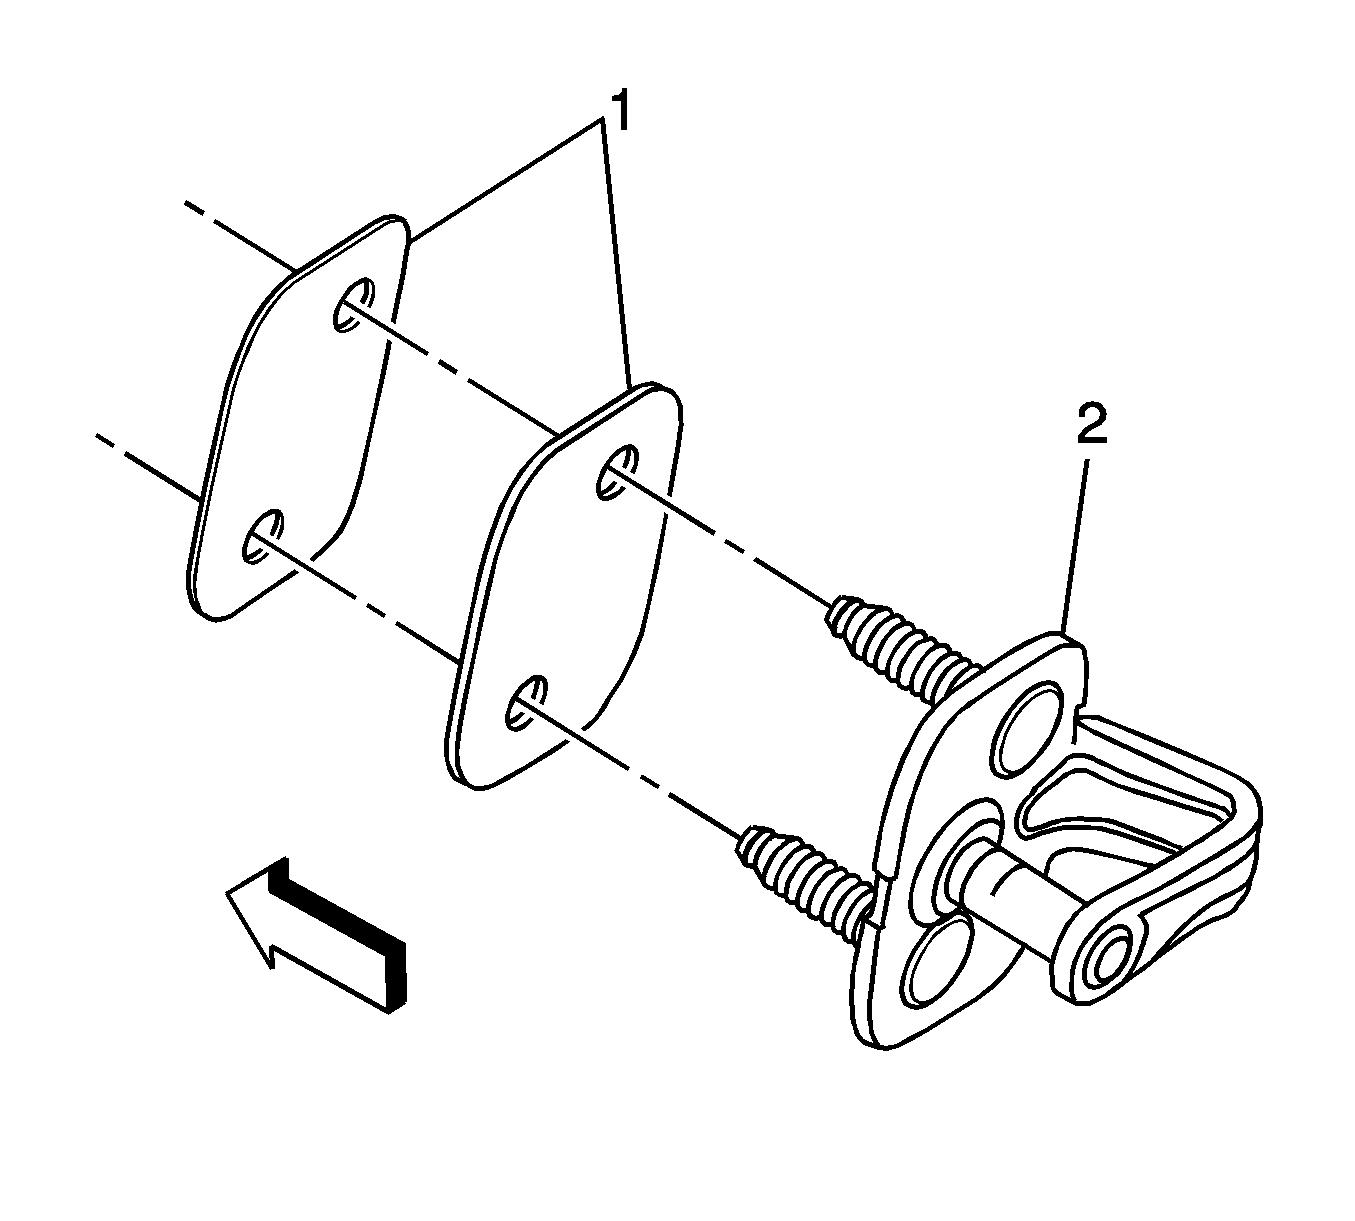
- Position the striker (2) onto the door, with the latching pin toward the door latch.
- Install the fasteners (1) snugly onto the striker.
- Align the striker (2) to the previous marks. Tighten the fasteners.
- If you are unable to locate the previous striker marks, perform the following steps:
- Install the large water deflector (1) to the rear of the door.
- Install the door panel. Refer to Door Trim Panel Replacement in Interior Trim.
- Verify the fit of the panels, and the operation of the door latch by using the manual and electric door release.
Notice: Refer to Fastener Notice in the Preface section.
Tighten
Tighten the door lock striker screws to 24 N·m (18 lb ft).
| 4.1. | With the striker installed, and the fasteners snug but still adjustable, have an assistant hold the outer door panel flush with the quarter panel. |
| 4.2. | Tighten the striker fasteners from the interior of the vehicle while the door is flush with the quarter panel. |
Tighten
Tighten the door lock striker screws to 24 N·m (18 lb ft).
