Removal Procedure
Caution: When working with any type of glass or sheet metal with exposed or rough
edges, wear approved safety glasses and gloves in order to reduce
the chance of personal injury.
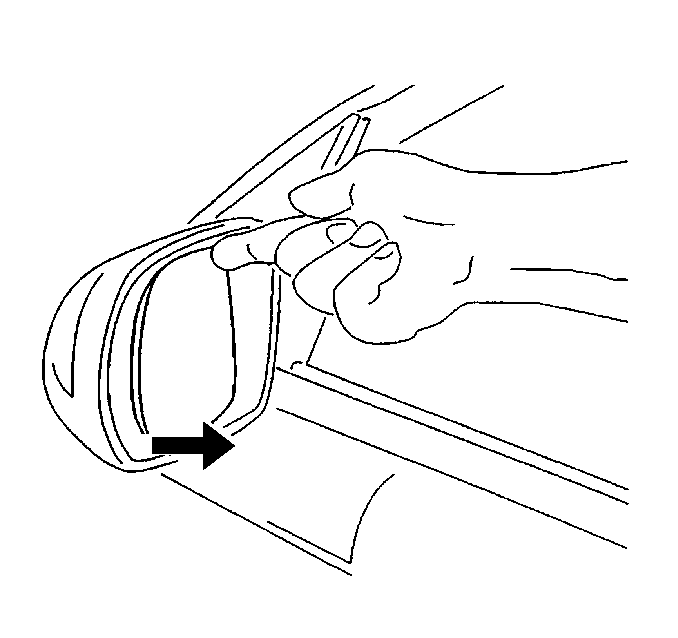
- Push in on one edge of the mirror face, tilting the mirror support to allow finger access.
- Grasp the face support firmly, and pull the support from the mirror body.
- Disconnect the wire connectors from the support (heated mirror).
- Remove the two jackscrews from the mirror face support.
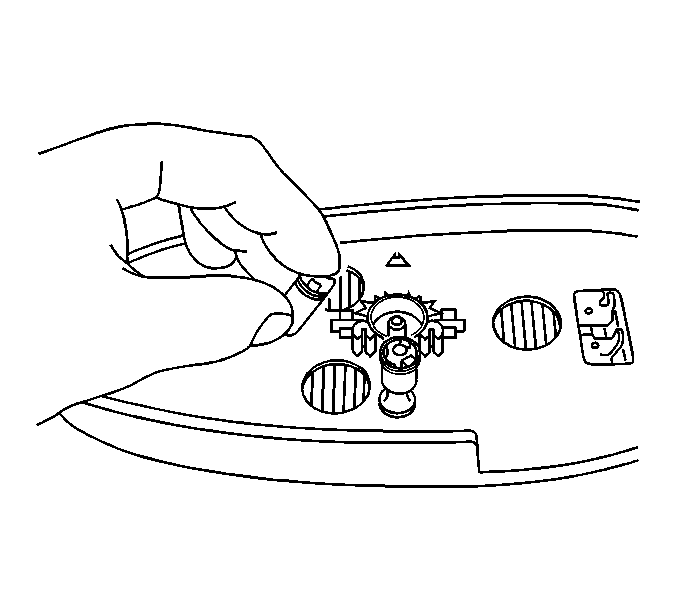
| 4.1. | Bend the jackscrew over. |
| 4.2. | Press down on the side of the jackscrew, popping the jackscrew from the mirror face support. |
| 4.3. | Save the jackscrews for reinstallation to the mirror motor. |
Installation Procedure
Caution: When working with any type of glass or sheet metal with exposed or rough
edges, wear approved safety glasses and gloves in order to reduce
the chance of personal injury.
IMPORTANT: The mirror face support is not the same for the right and left mirror. For ease of assembly of the mirror face support, place a small amount of white lithium grease on the motor pivot, and on the tip of the installed jackscrews.
- The jackscrew springs must be positioned down, compressing the fingers at the bottom of the jackscrews.
Push on the jackscrews, to install into the mirror motor.
- Rotate both jackscrews to position the ball flanges to be inline with the attaching hub. This will correctly position the parts to the mirror face support. (This is shown in the above graphic).
- Connect the electrical connectors to the mirror face support (heated mirror).
- Align the support to the mirror motor.
- With the palm of your gloved hand, press firmly on the center of the mirror glass support until the support engages onto the motor.
- Push the mirror face support onto the jackscrews.
| • | Right mirror. Rotate the mirror face support down and press firmly on the lower side engaging the mirror face support to the lower jackscrew. |
| • | Left mirror. Rotate the mirror face support up, and press firmly on the upper side, engaging the mirror face support to the upper jackscrew. |
| • | Rotate the mirror face support, and press firmly on the outer side, engaging the mirror face support to the outer jackscrew. The jackscrews will give a clicking noise when properly seated. |
