For 1990-2009 cars only
Removal Procedure
- Move the seat to the rear position.
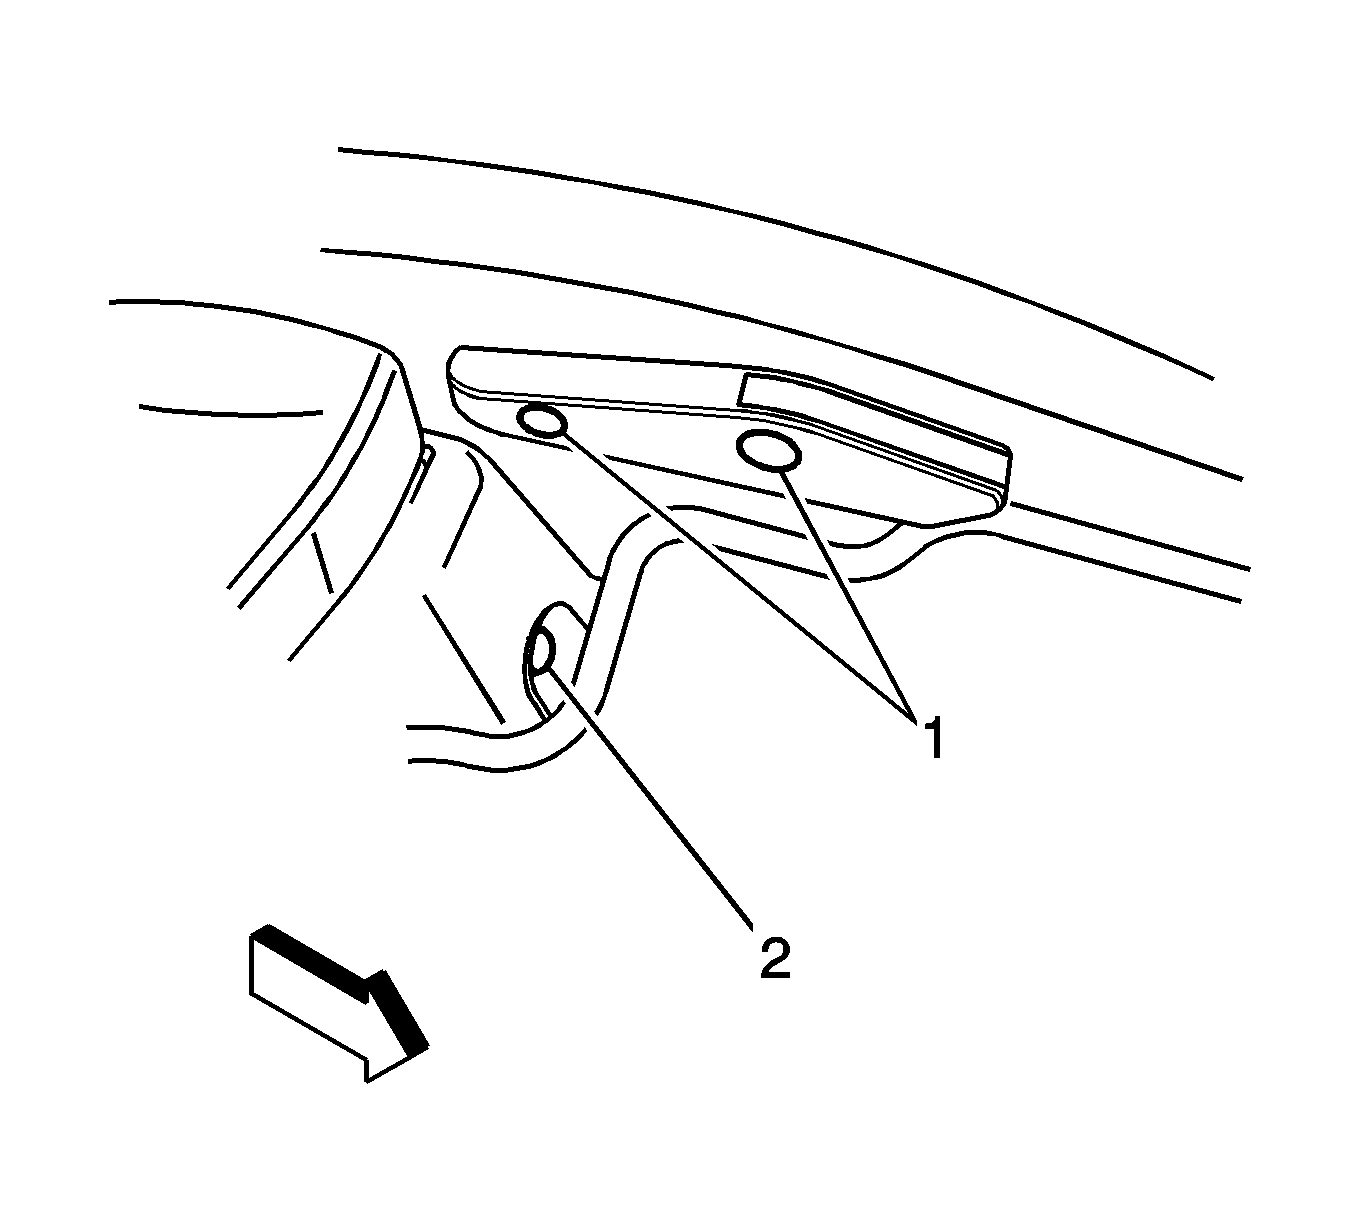
- Remove both trim plugs from the fastener sockets (1) of the floor mounted door release.
- Remove the pushpin (2) from the front seat riser cover. The cover is nearest to the floor mounted door release.
- Tilt the seat riser cover forward for clearance to the rear fastener of the door release.
- Remove both fasteners (1) from the door release.
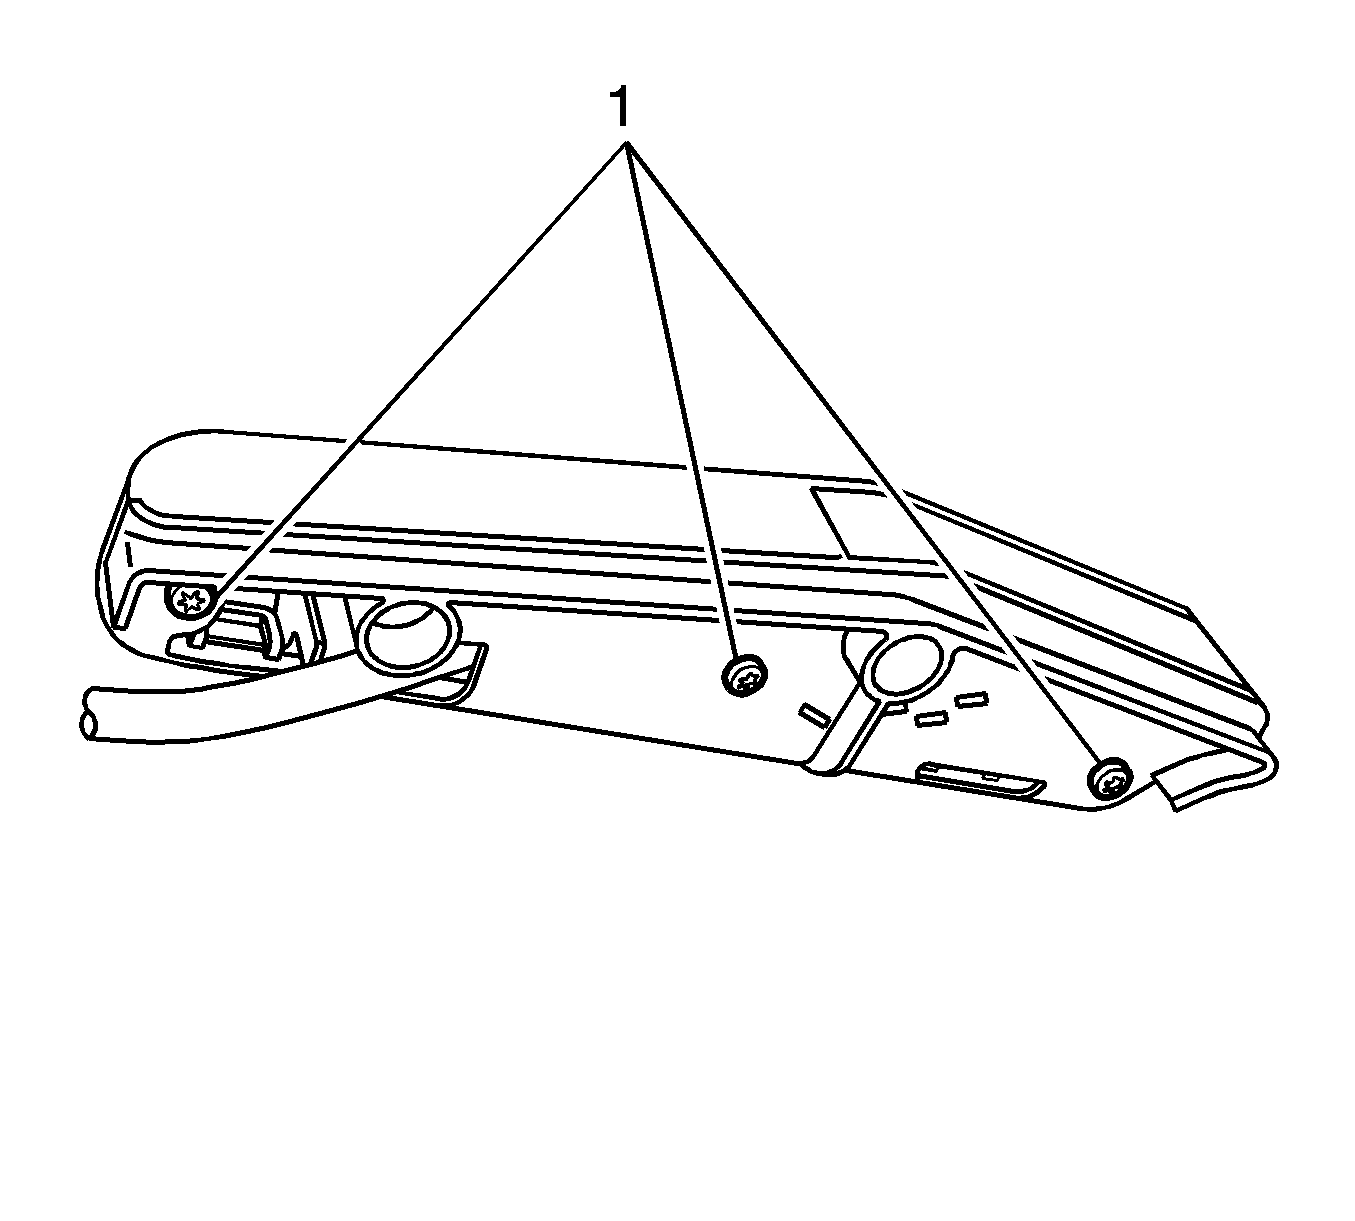
- Remove the fasteners (1) from the backside of the door release actuator.
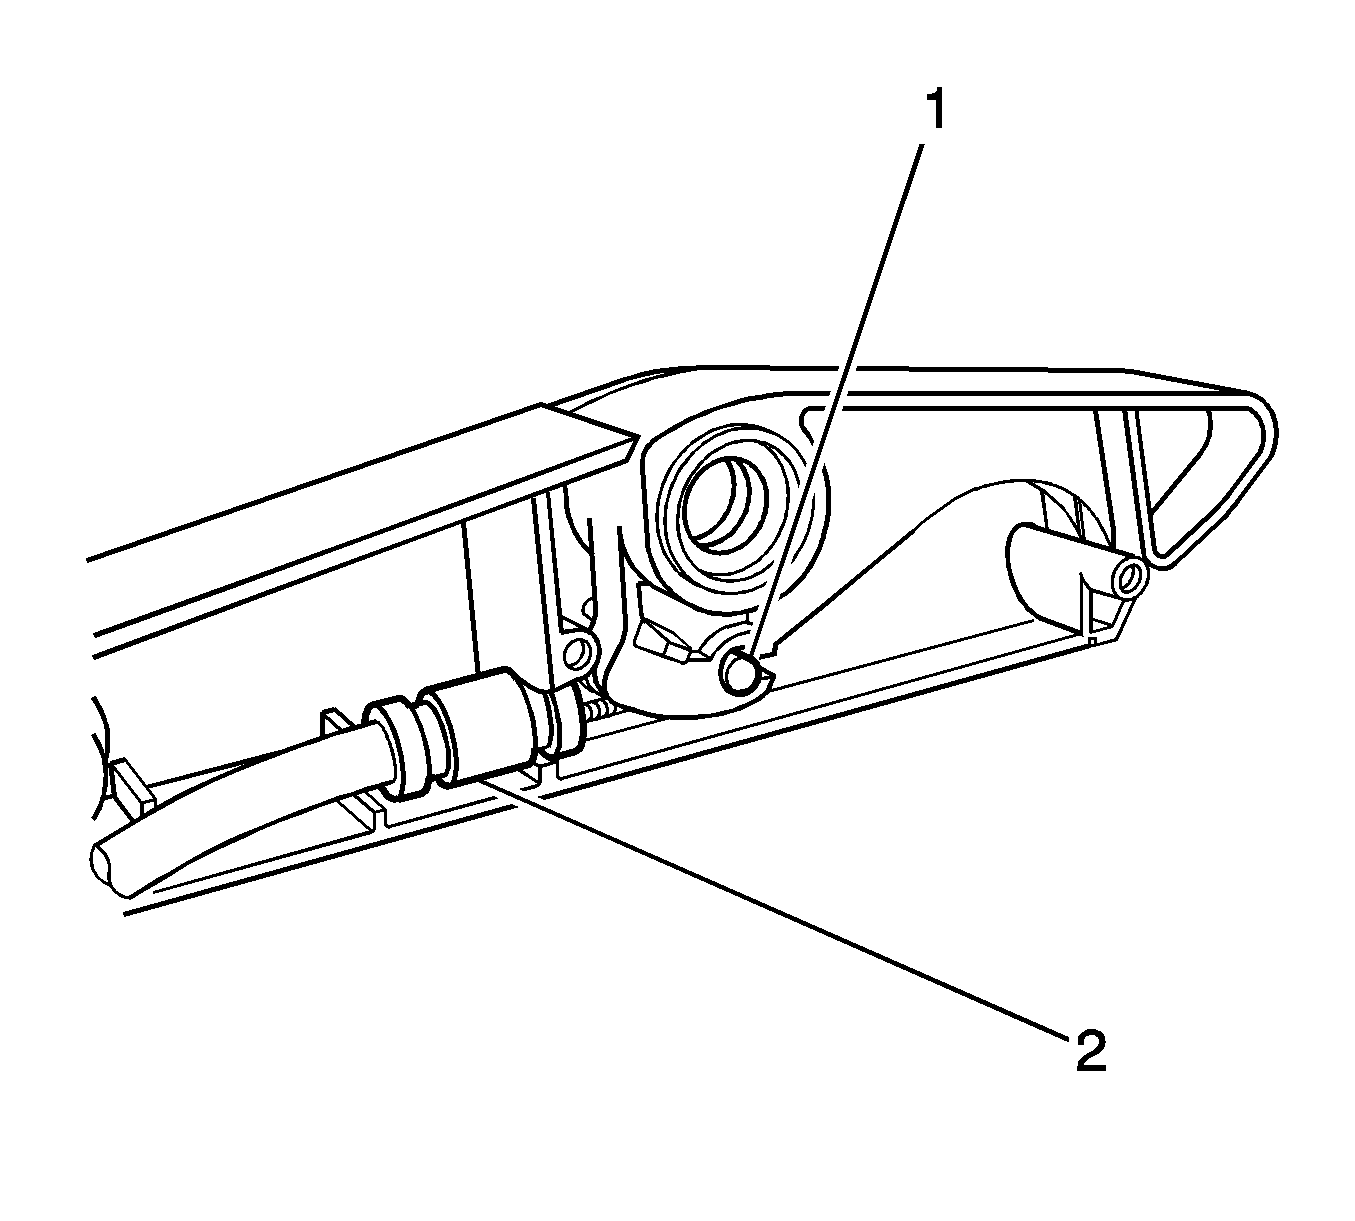
- Separate the release halves, and unseat the cable sheath (2) from the housing.
- Rotate the door release towards the rear, while guiding the cable between the actuator halves.
- Disengage the cable end (1) from the latch actuating lever.


Important: Note the position of the cable sheath end in the actuator housing for installation reference.
Installation Procedure
- With the door release actuator facing the rear, engage the cable end (1) to the release actuating lever.
- Rotate the door release assembly forward, while guiding the cable between the actuator halves.
- Position the cable sheath (2) in the actuator, and join the halves.
- Install the fasteners (1) to the backside of the door release actuator.
- Position the door release actuator to the door sill.
- Install both fasteners (1) to the door release.
- Install both fastener trim plugs (1) to the door release actuator.
- Align the seat riser cover to the hole in the riser. Fasten the pushpin (2).

Important: Position the cable sheath end in the molded fingers of the actuator housing.
Notice: Refer to Fastener Notice in the Preface section.

Tighten
Tighten the fasteners to 2 N·m (18 lb in)

Tighten
Tighten the fasteners to 10 N·m (89 lb in)
