For 1990-2009 cars only
Removal Procedure
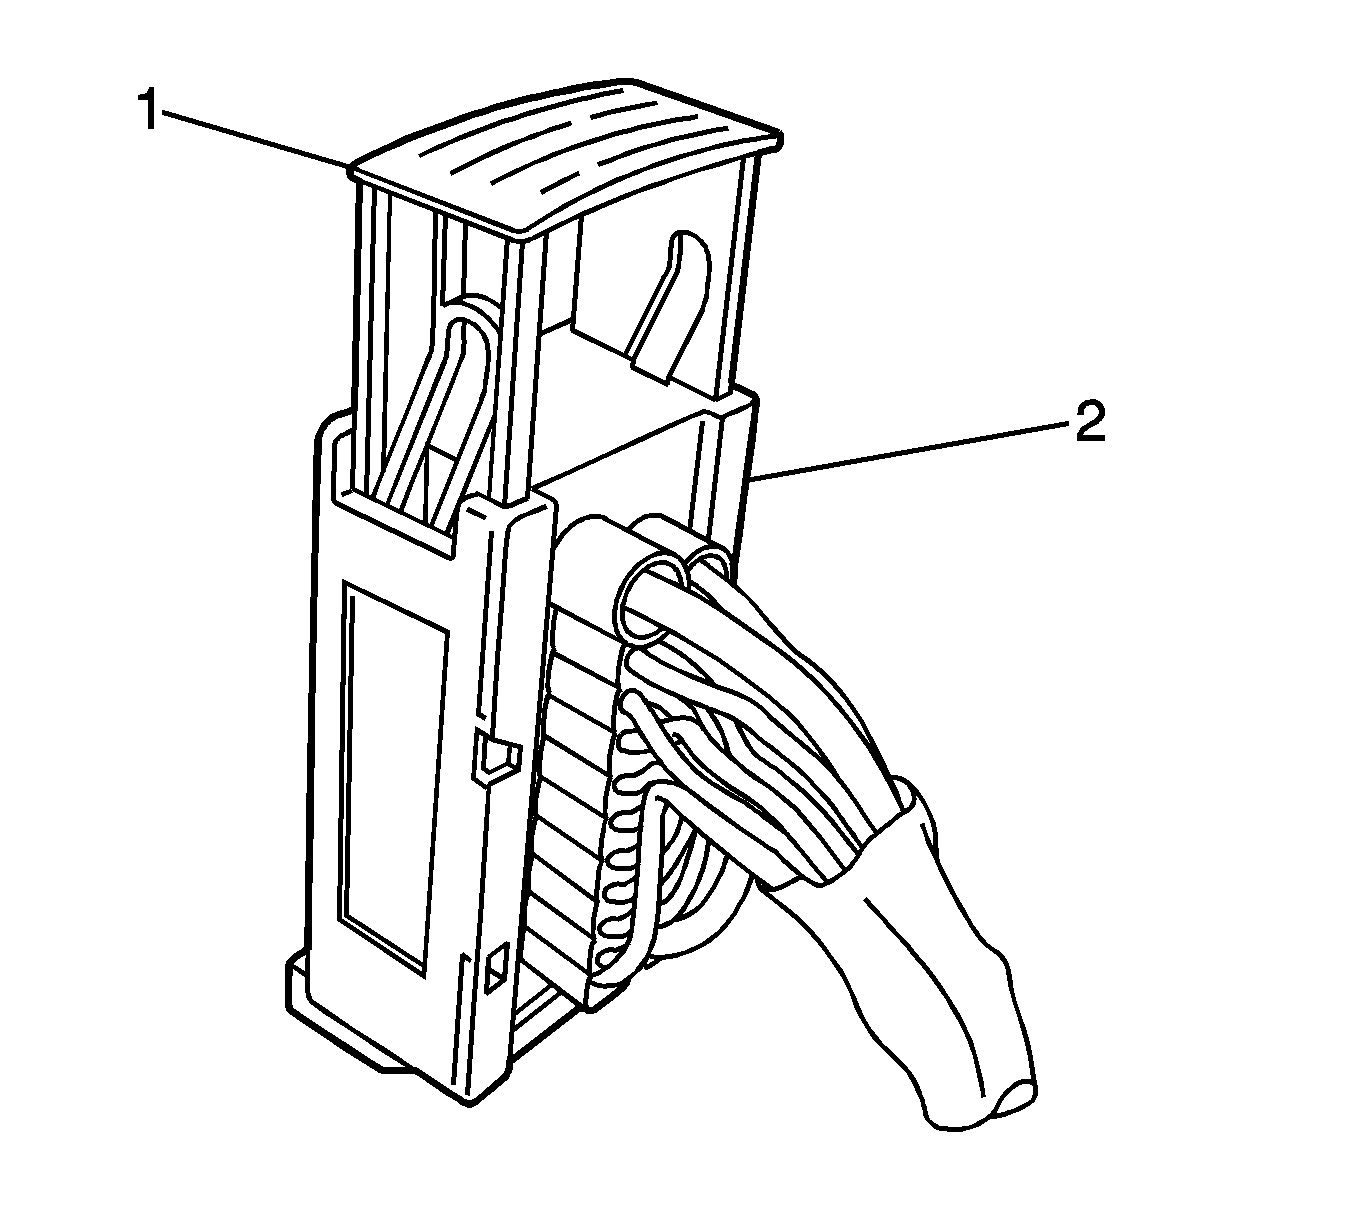
- Unscrew and remove both cargo net hooks from the driver side trim panel in the rear compartment.
- Pull the trim away from the body.
- Guide the end of the door release cable through the slit in the trim panel, toward the body. The release is in the driver side trim panel, behind a trap door with the fuel door release.
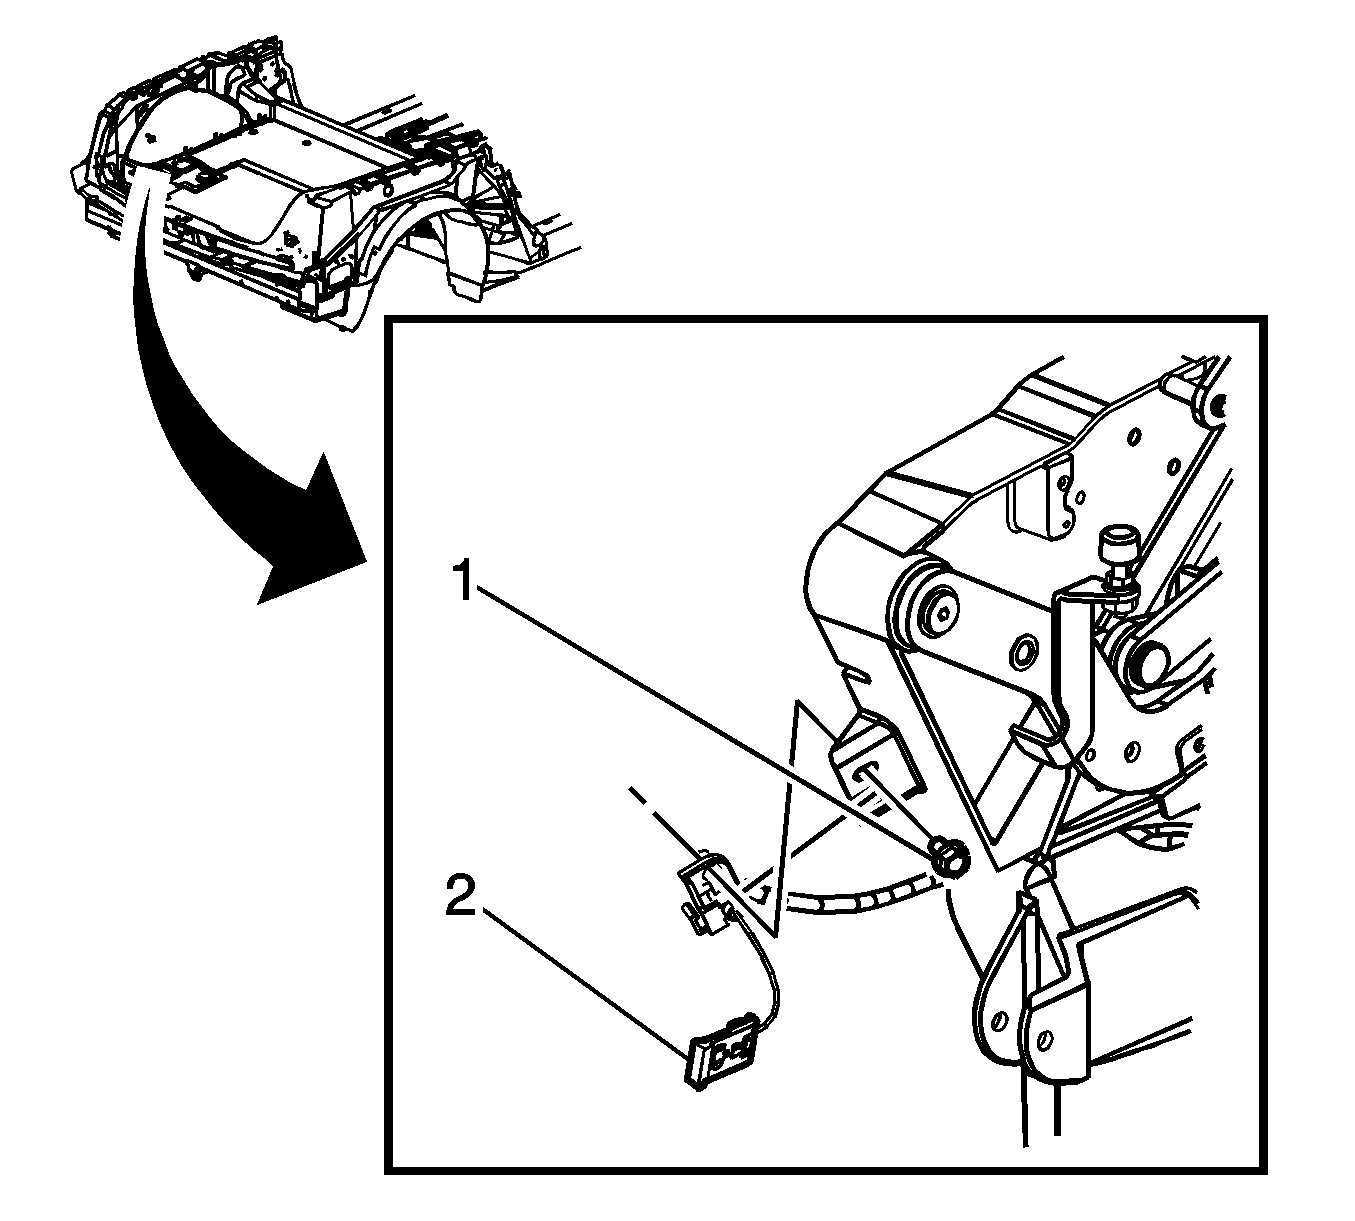
- Remove the fastener (1) from the retaining bracket that holds the rear-mounted door release cable.
- Lift the driver side carpet from the rear compartment floor to expose the rear-mounted door release cable.
- Separate the fingers (2) of the retainers in order to free the cable (1).
- Disconnect the battery.
- Remove the doorsill trim. Refer to Carpet Retainer Replacement in Interior Trim.
- Remove the B-Pillar interior trim. Refer to Rear Quarter Trim Panel Replacement in Interior Trim.
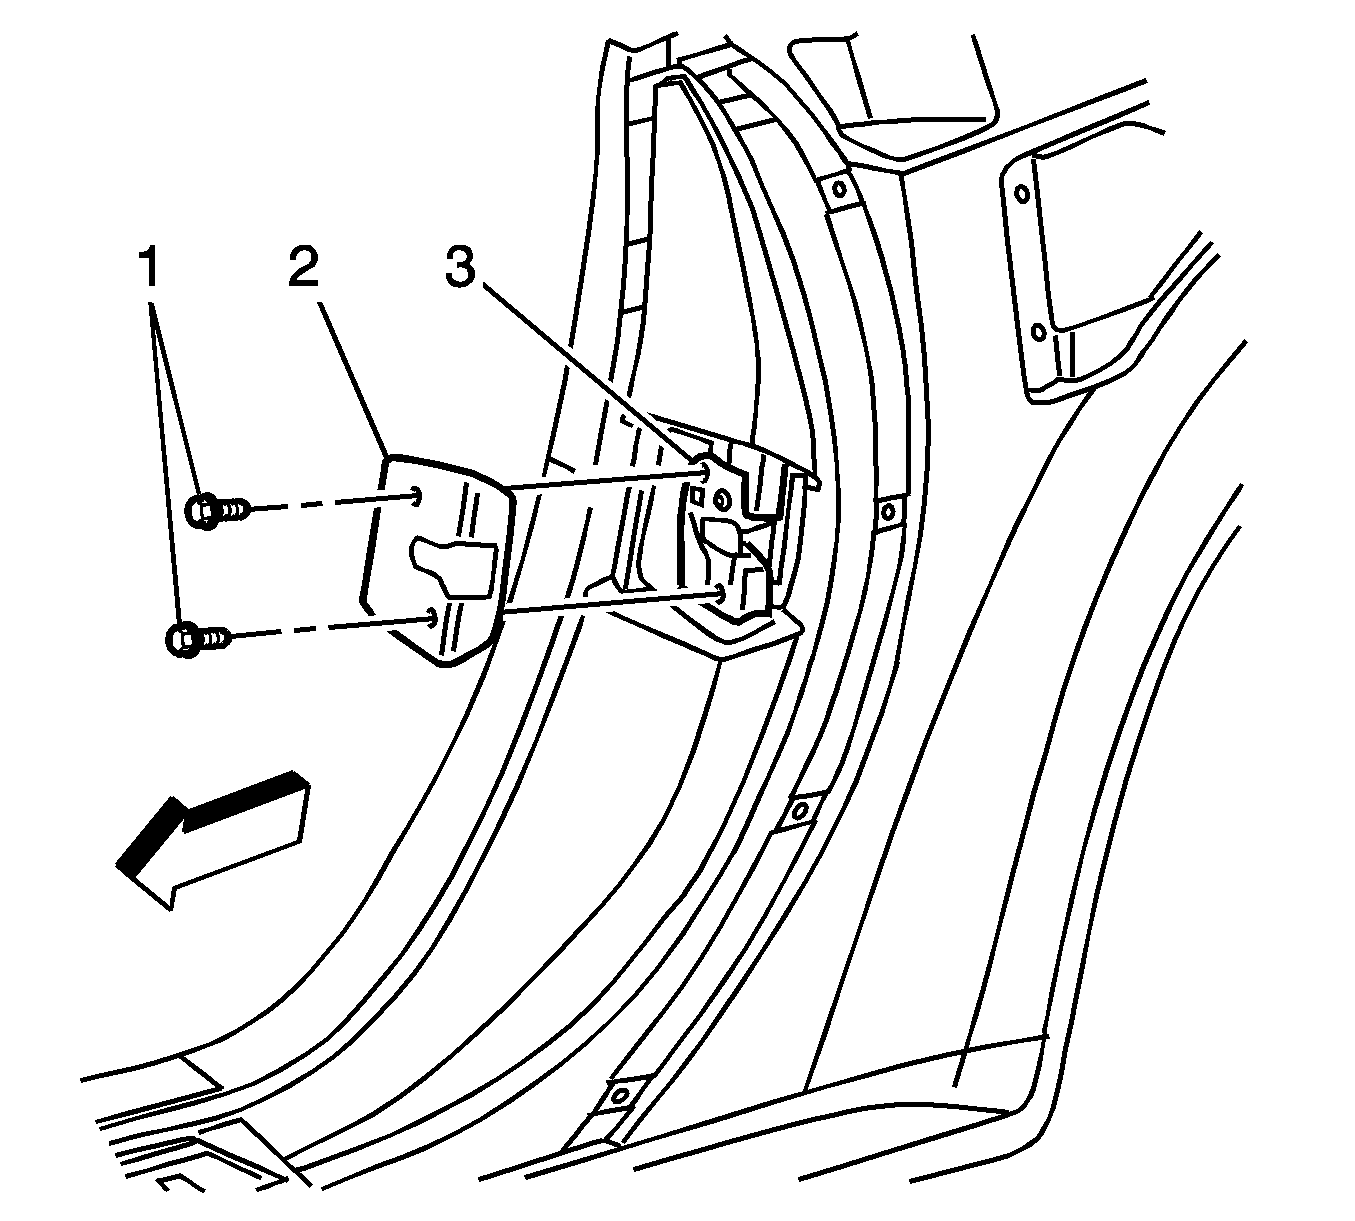
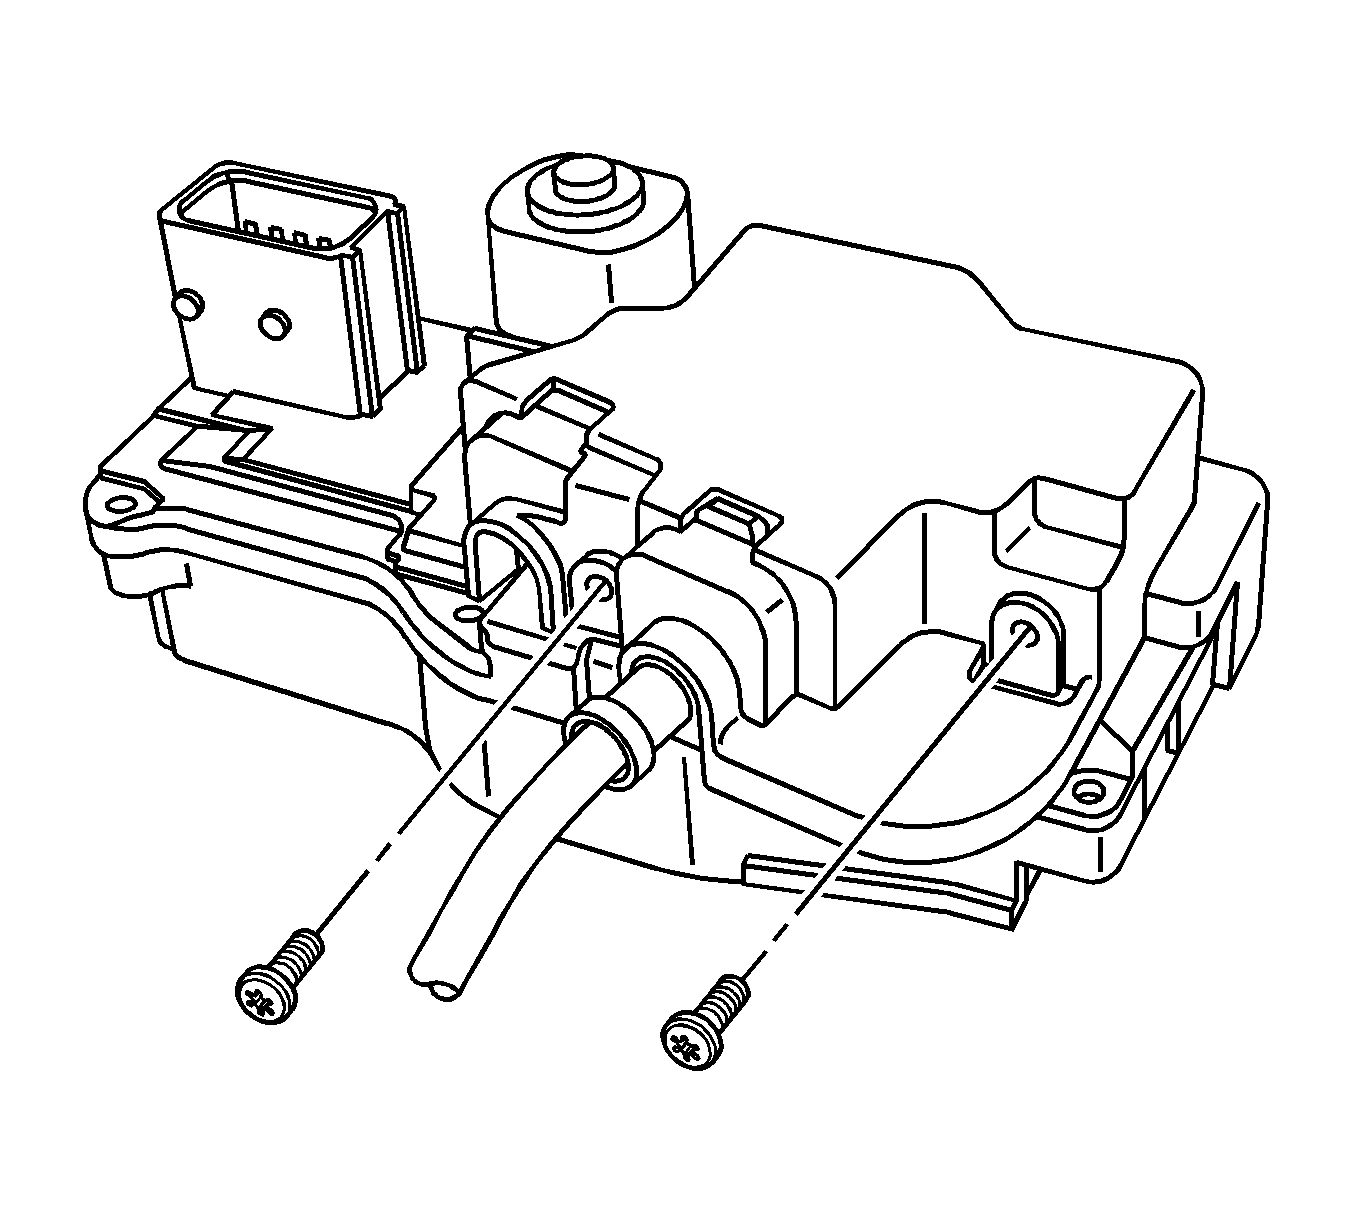
- Remove the mastic cover (1) from the door latch access hole in the body.
- Remove the fasteners (1) from the B-Pillar mounted door latch (3).
- Remove the latch (1) from the body access hole.
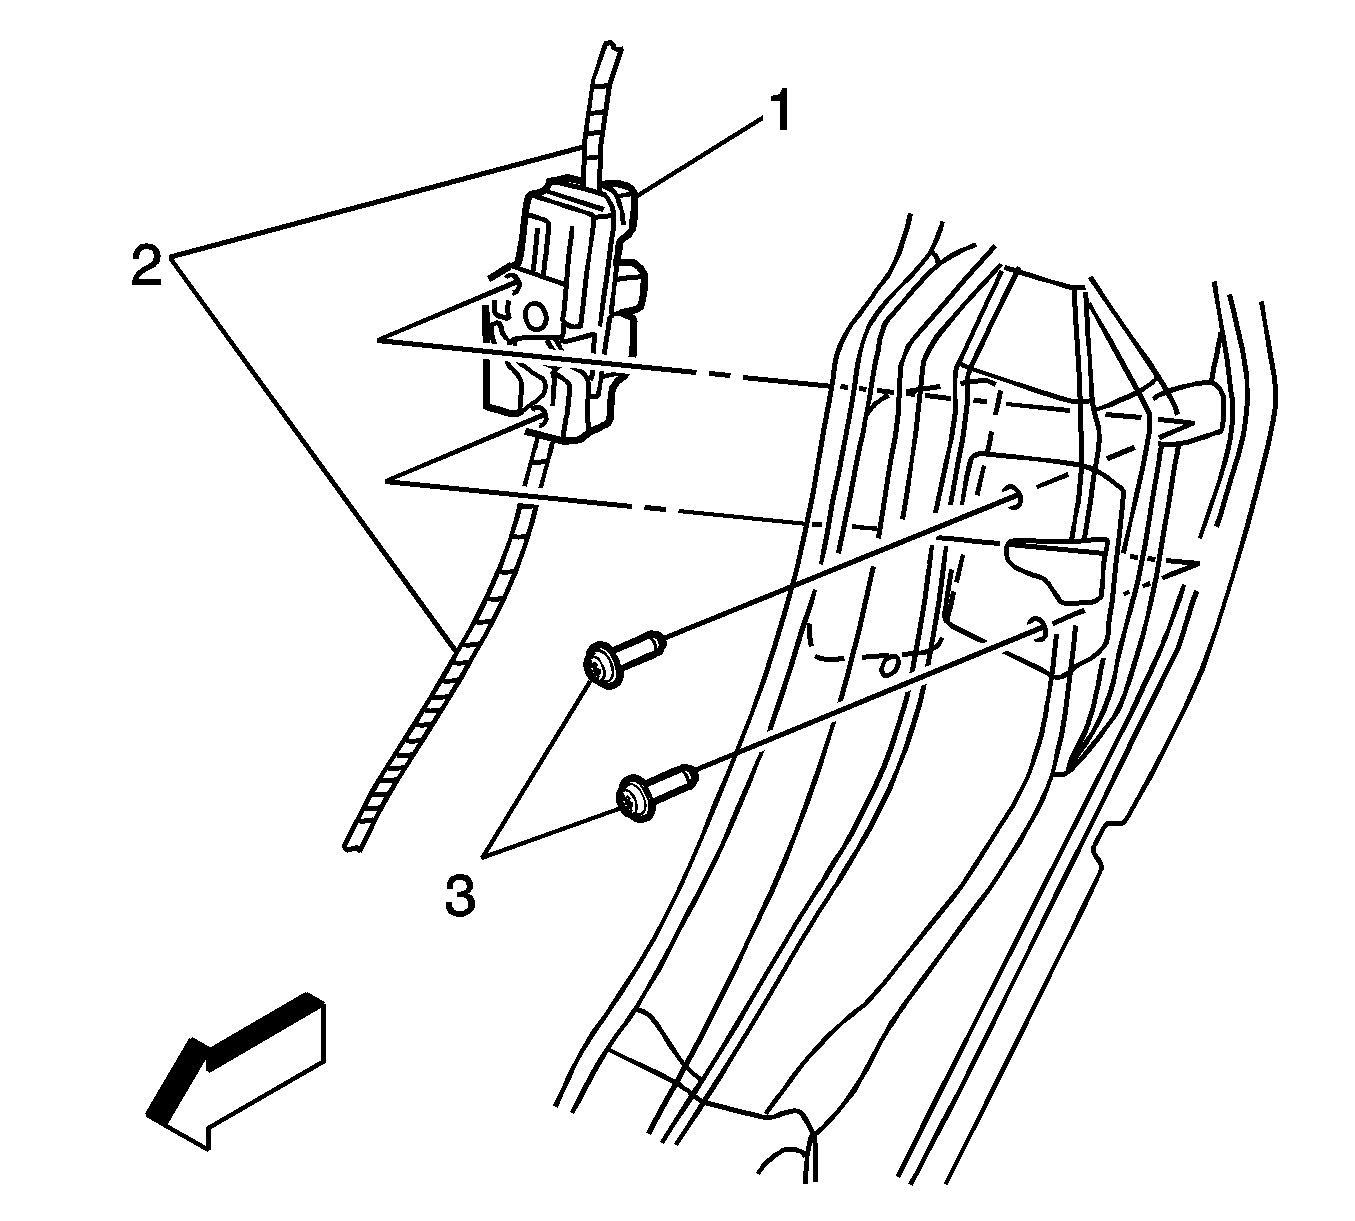
- Slide the electrical connector lock (1) to the unlocked position. Remove the connector from the door latch.
- Remove the fasteners from the rear latch cover securing the cables.
- Release the cable sheath ends. Remove the latch cover.
- Remove the cable end by rotating the cable a quarter turn to disengage from the latch actuating lever. The floor mounted release cable is attached to the lower lever on the latch.
- Attach a mechanic's wire to the latch end of the cable in order to assist in guiding the replacement cable back into position.
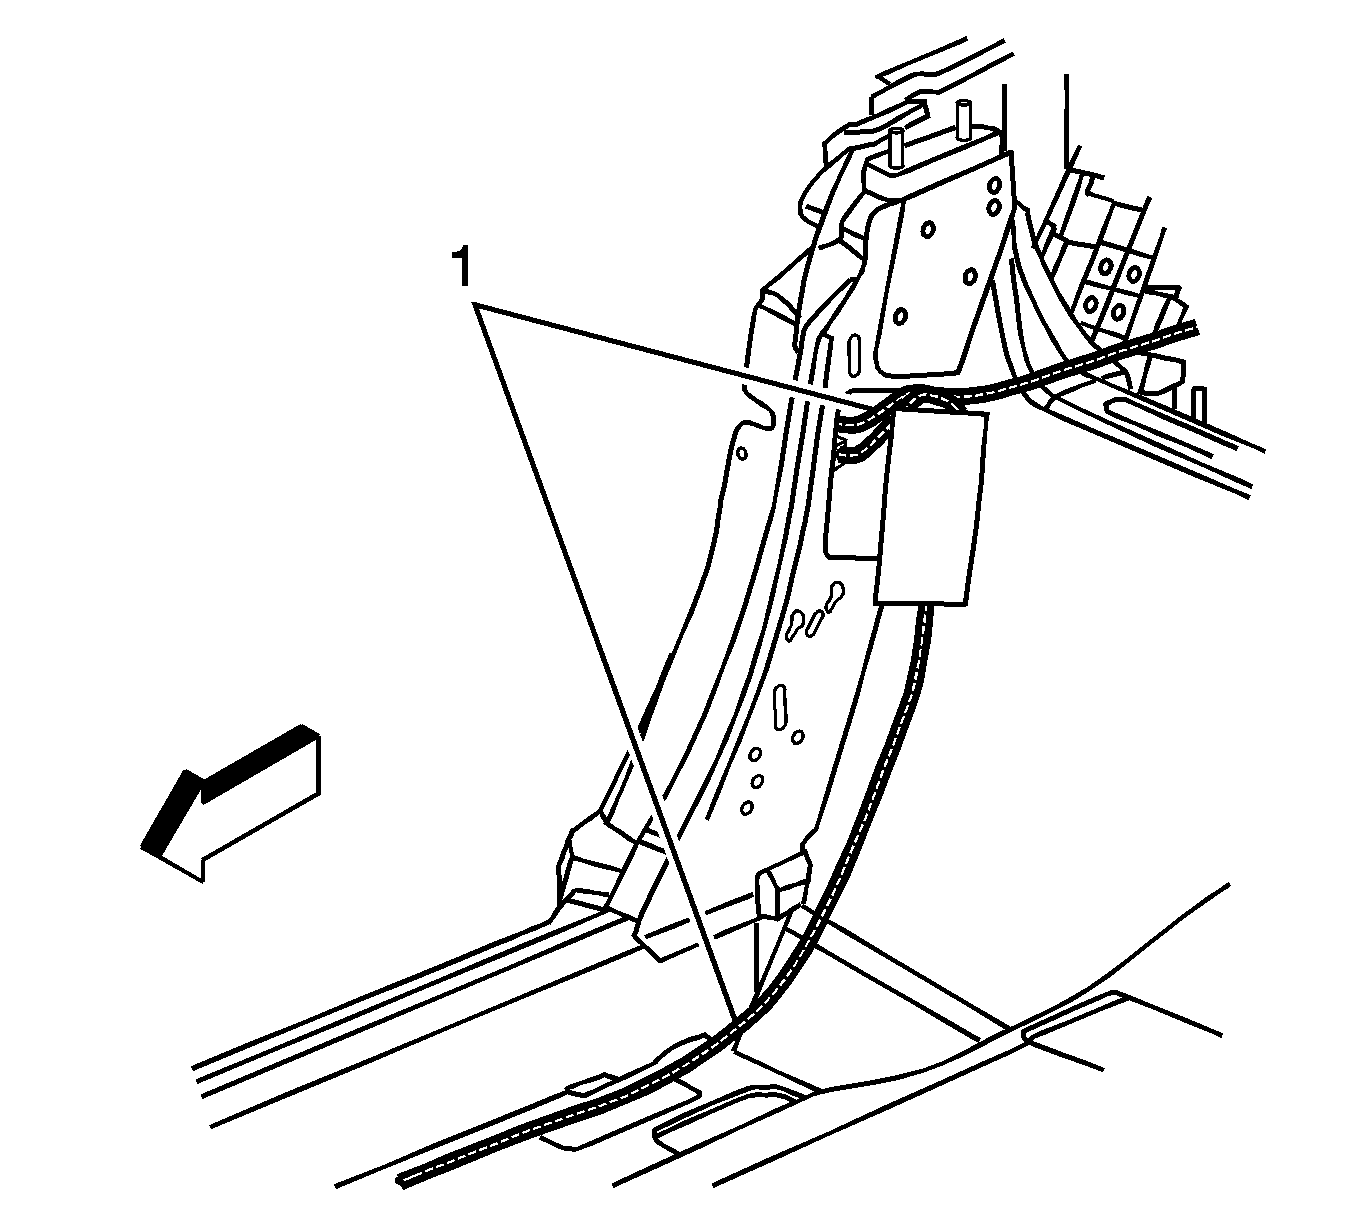
- Pull the cable from the rear compartment end, and guide it out through the trim panel in the rear compartment.

Caution: Refer to Battery Disconnect Caution in the Preface section.
Installation Procedure
- Attach the replacement cable end to the mechanic's wire.
- Pull the mechanics wire back through the carpet, guiding the cable toward the latch.
- Install the cable end on the latch by rotating the cable a quarter turn to engage the cable end to the latch actuating lever.
- Seat the cables into the molded latch cover recess. Install the latch cover.
- Install the latch cover fasteners to the latch.
- Install the electrical connector. Slide the connector lock (1) to the seated position on the door latch mechanism.
- Place the latch (1) in the body access hole, aligning the fastener holes to the body.
- Install the fasteners (1) through the cover plate (2) and to the B-Pillar mounted door latch (3).
- Install the fastener (1) to the bracket retaining the rear door release cable (2).
- Guide the end of the door release cable through the slit in the trim panel toward the rear compartment area.
- Seat the trim panel to the body, and screw in both cargo net hooks to the driver side trim panel in the rear compartment.
- Connect the battery.
- Verify the operation of the latch using the front and rear manual release. Verify the key fob, the door touch pad, and the door panel electrical actuators.
- Install the new mastic cover (1) over the latch access hole in the body.
- Install the B-Pillar interior trim. Refer to Rear Quarter Trim Panel Replacement in Interior Trim.
- Install the doorsill trim. Refer to Carpet Retainer Replacement in Interior Trim.
Notice: Refer to Fastener Notice in the Preface section.
Tighten
Tighten the fasteners to 2 N·m (18 lb in).
Tighten
Tighten the fasteners to 10 N·m (89 lb in).
Tighten
Tighten the fasteners to 3 N·m (27 lb in).
