Removal Procedure
- Open the hood.
- Remove the headlamp assembly. Refer to Headlamp Assembly or Headlamp Bulb and/or Cornering, Sidemarker, Park, Turn Signal Bulb Replacement .
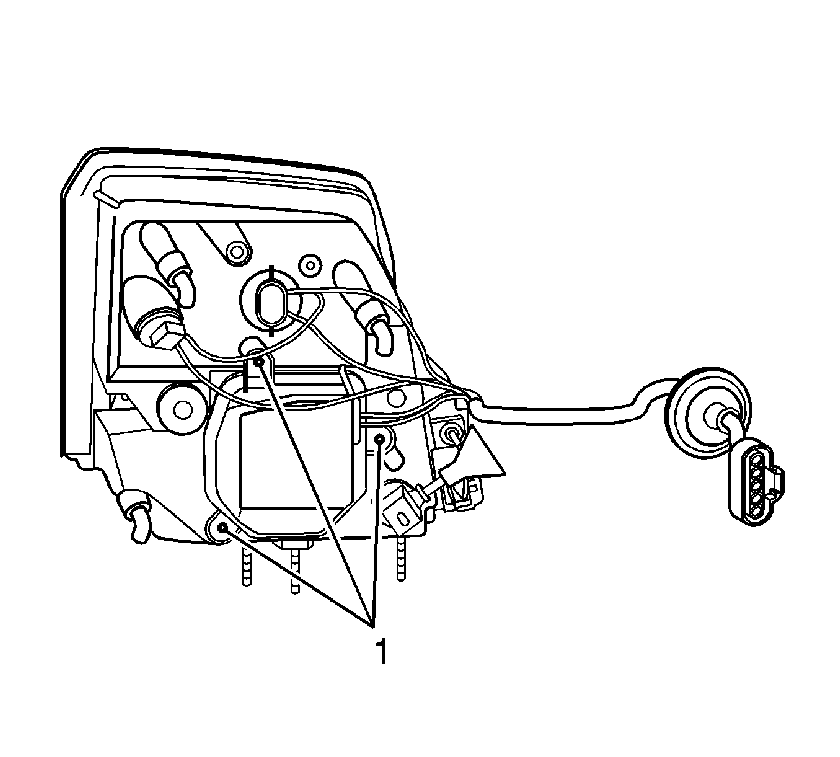
- Remove the screws (1) attaching the arc tube and starter cover to the headlamp housing.
- Remove the arc tube and starter cover.
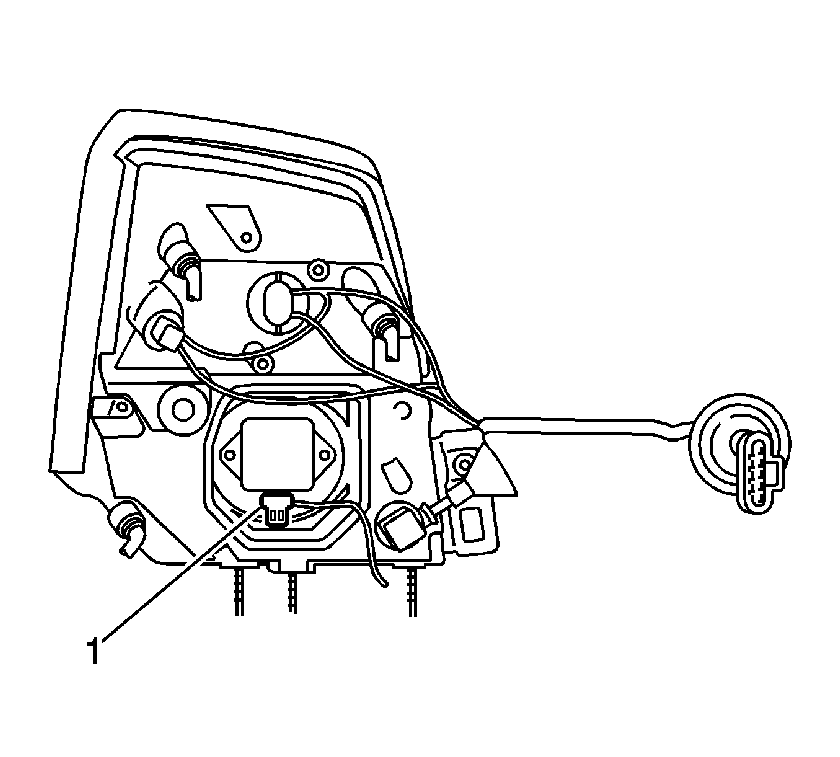
- Disconnect the arc tube and starter electrical connector (1).
- Remove the ballast cable from the arc tube and starter cover.
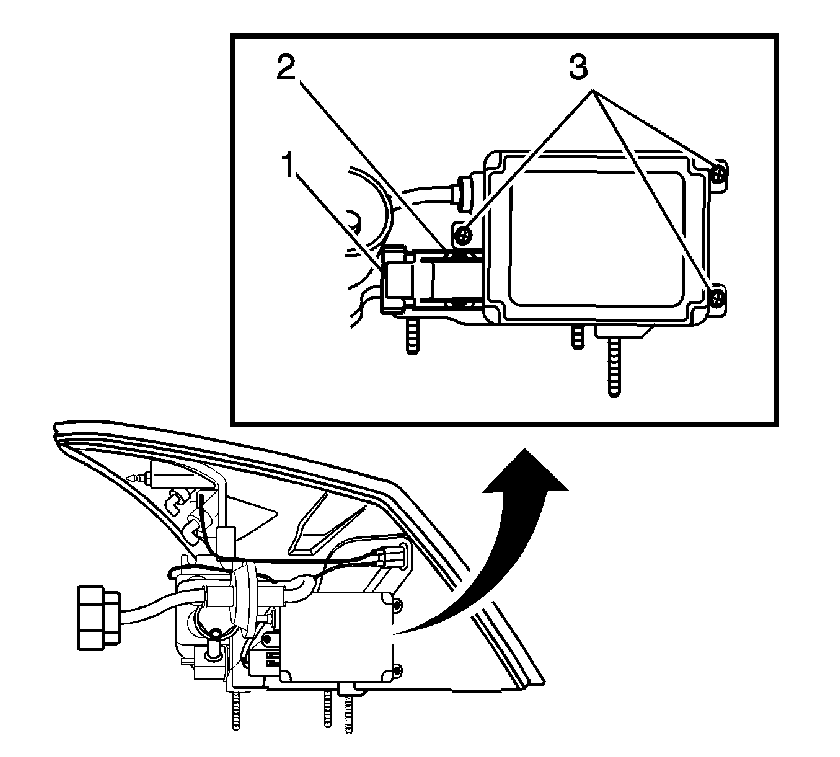
- Release the connector position assurance (CPA) (2) from the ballast electrical connector (1).
- Disconnect the electrical connector (1) from the ballast.
- Remove the screws (3) attaching the ballast to the headlamp.
- Remove the ballast from the headlamp.
Caution: The high intensity discharge system produces high voltage and current.
To reduce the risk of severe shocks and burns:
• Never open the high intensity discharge system ballast or the
arc tube assembly starter. • Never probe between the high intensity discharge system ballast
output connector and the arc tube assembly.


Installation Procedure
- Install the ballast to the headlamp.
- Install the screws (3) attaching the ballast to the headlamp.
- Connect the electrical connector (1) to the ballast.
- Install the CPA (2) to the ballast electrical connector (1).
- Install the ballast cable to the arc tube and starter cover.
- Connect the arc tube and starter electrical connector (1).
- Install the arc tube and starter cover.
- Install the screws (1) attaching the arc tube and starter cover to the headlamp.
- Install the headlamp. Refer to Headlamp Assembly or Headlamp Bulb and/or Cornering, Sidemarker, Park, Turn Signal Bulb Replacement .
- Close the hood.
Notice: Refer to Fastener Notice in the Preface section.

Tighten
Tighten the screws to 2 N·m (18 lb in).

Important: Ensure the rubber grommet attached to the ballast cable is properly installed and sealed to the arc tube and starter cover, in order to avoid water intrusion in the headlamp.

Important: Ensure the arc tube and starter cover are properly installed and sealed to the headlamp in order to avoid water intrusion in the headlamp assembly.
Tighten
Tighten the screws to 2 N·m (18 lb in).
