For 1990-2009 cars only
Removal Procedure
- Remove the latch. Refer to Folding Top Front Latch Replacement .
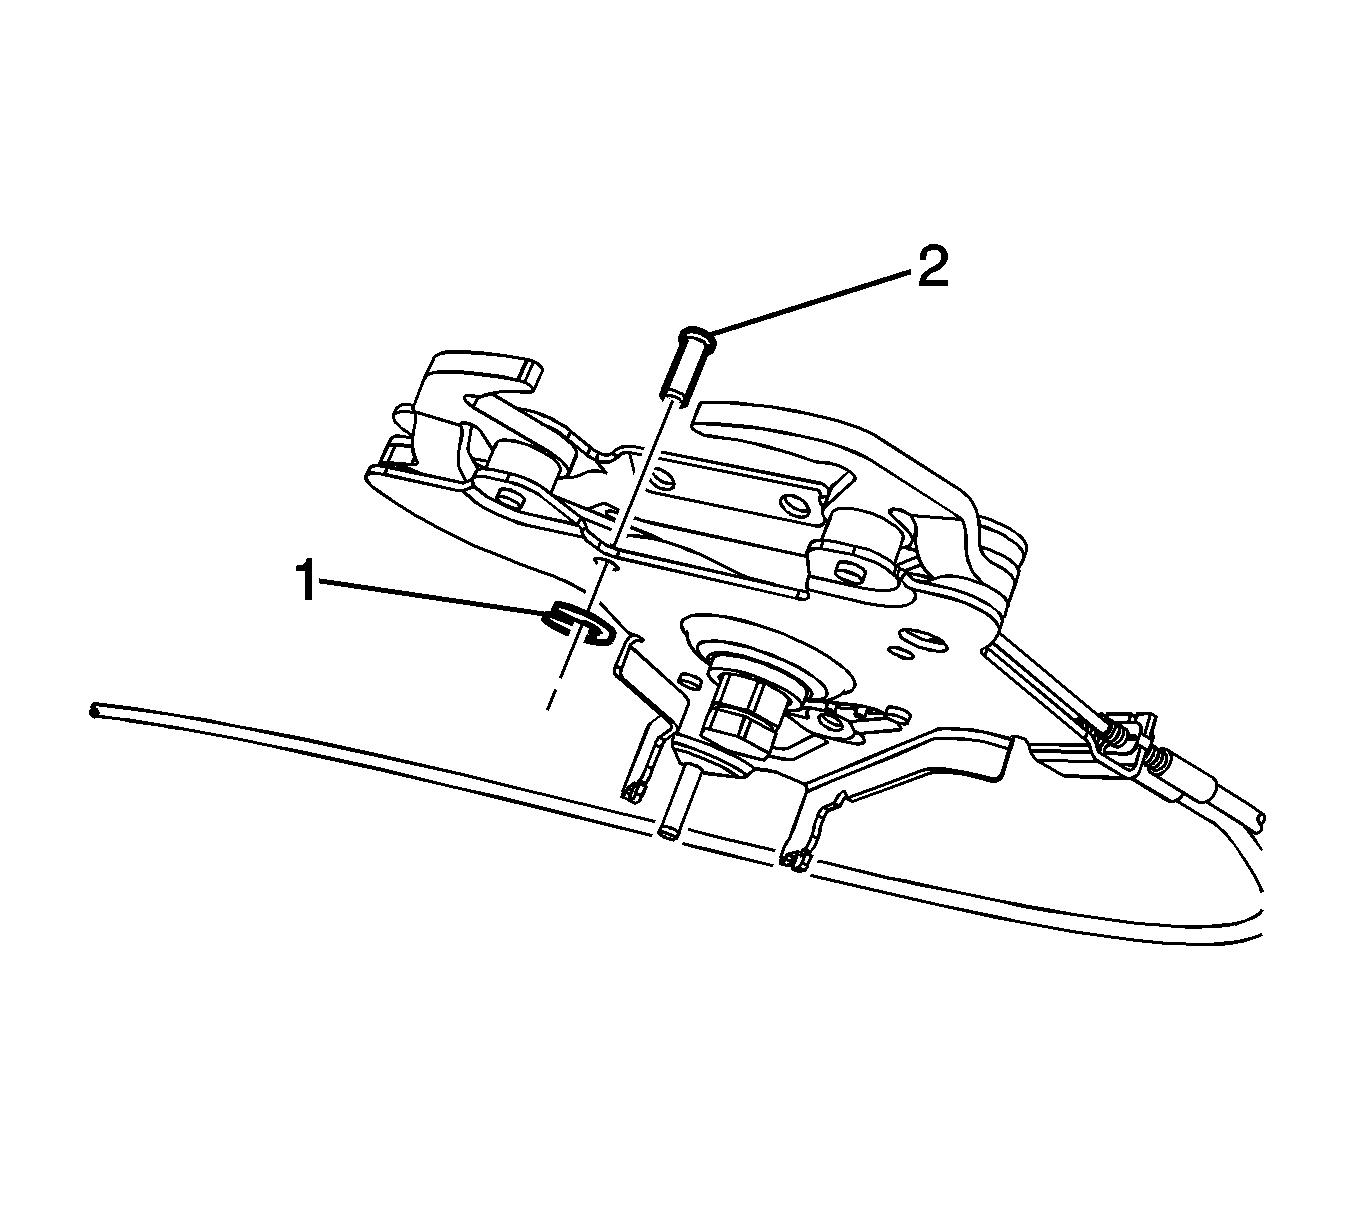
- Remove the travel limit C-clip (1) from the pin (2).
- Remove the pin (2) from the latch.
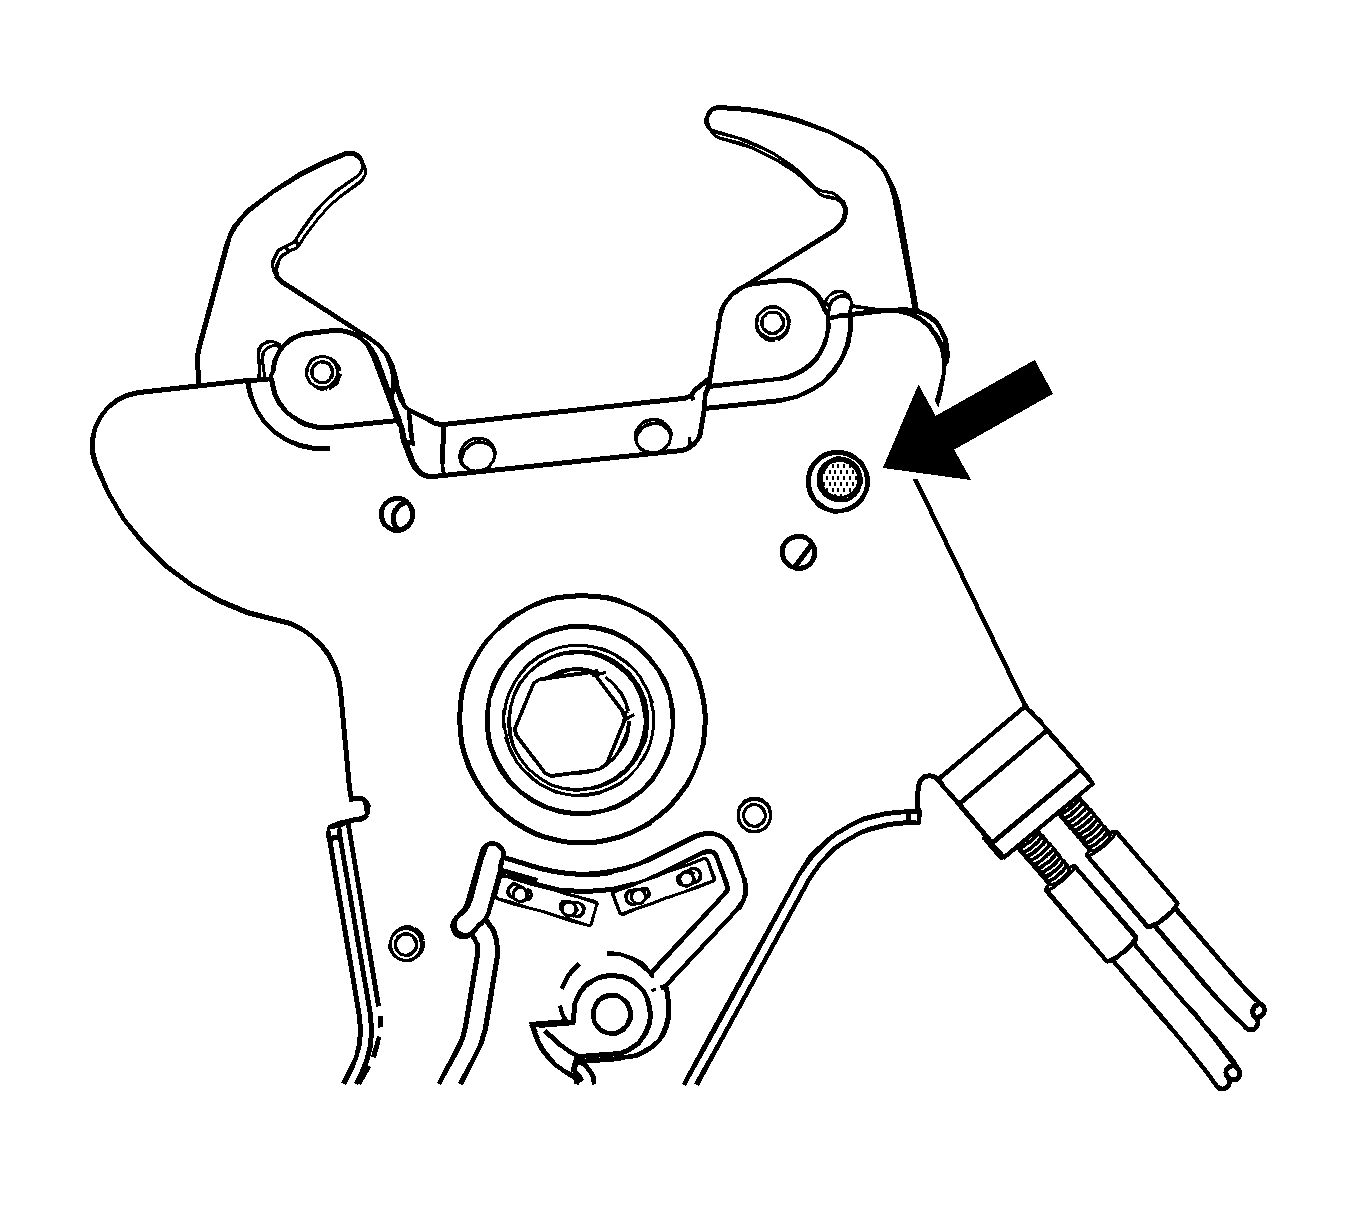
- Open the latch arms until the pulley wheel pin aligns with the access hole in the latch.
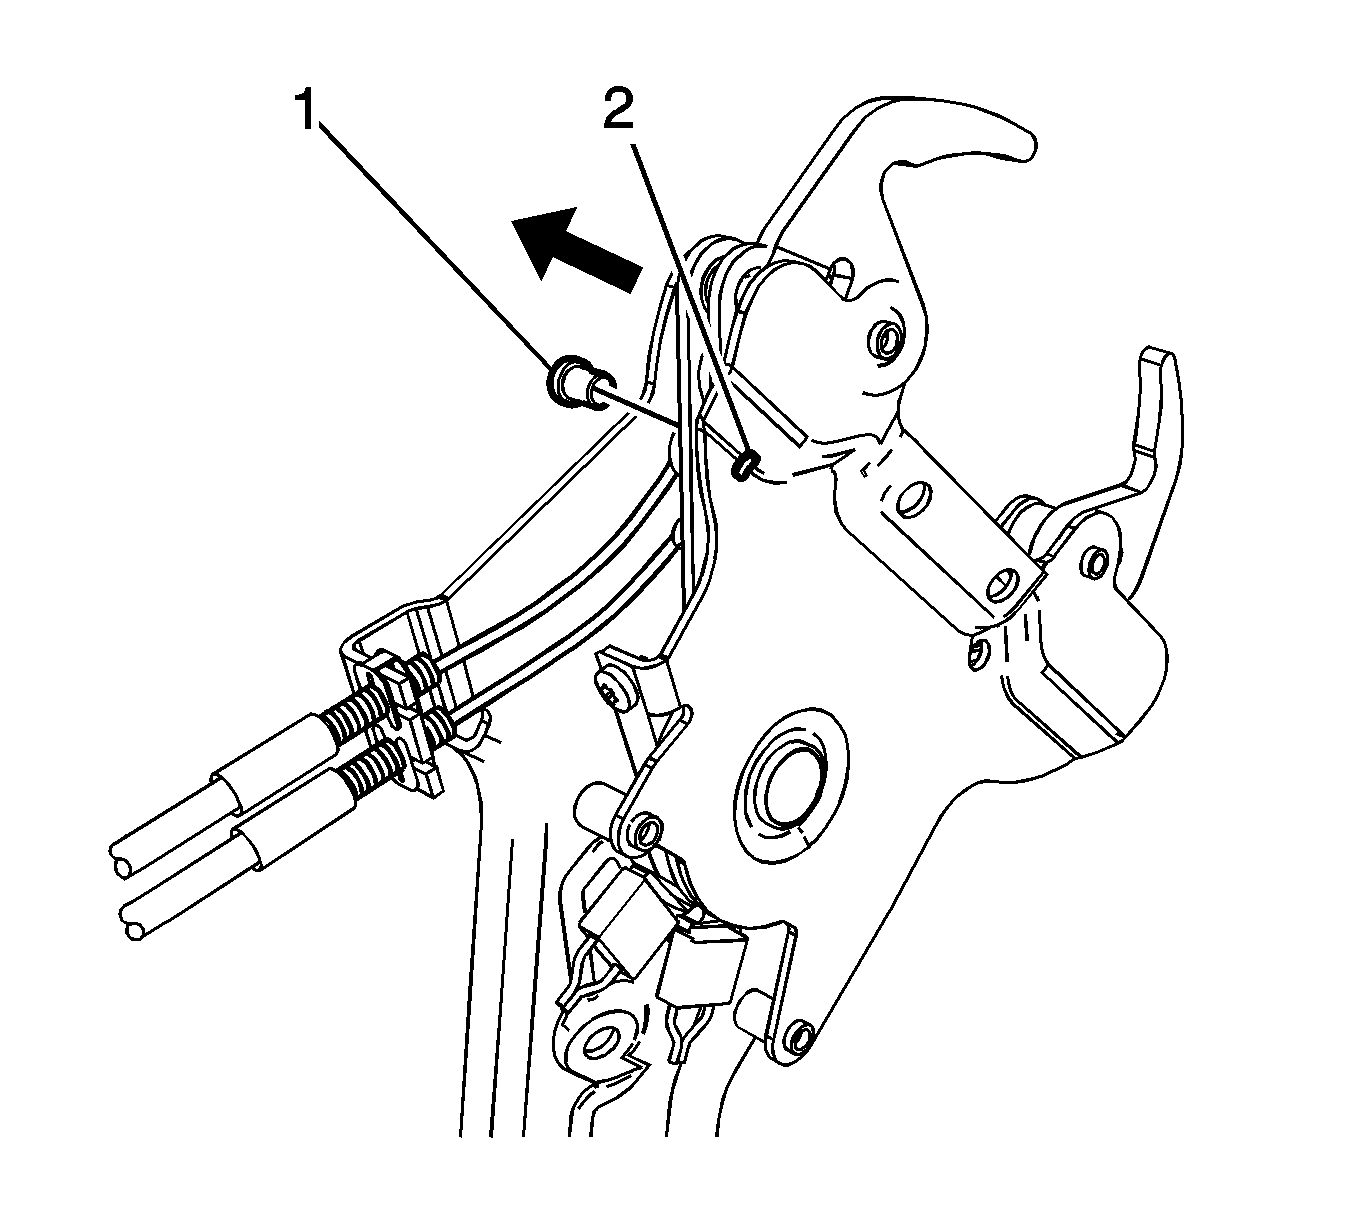
- Push the pulley wheel pin (1) through the latch access holes (2).
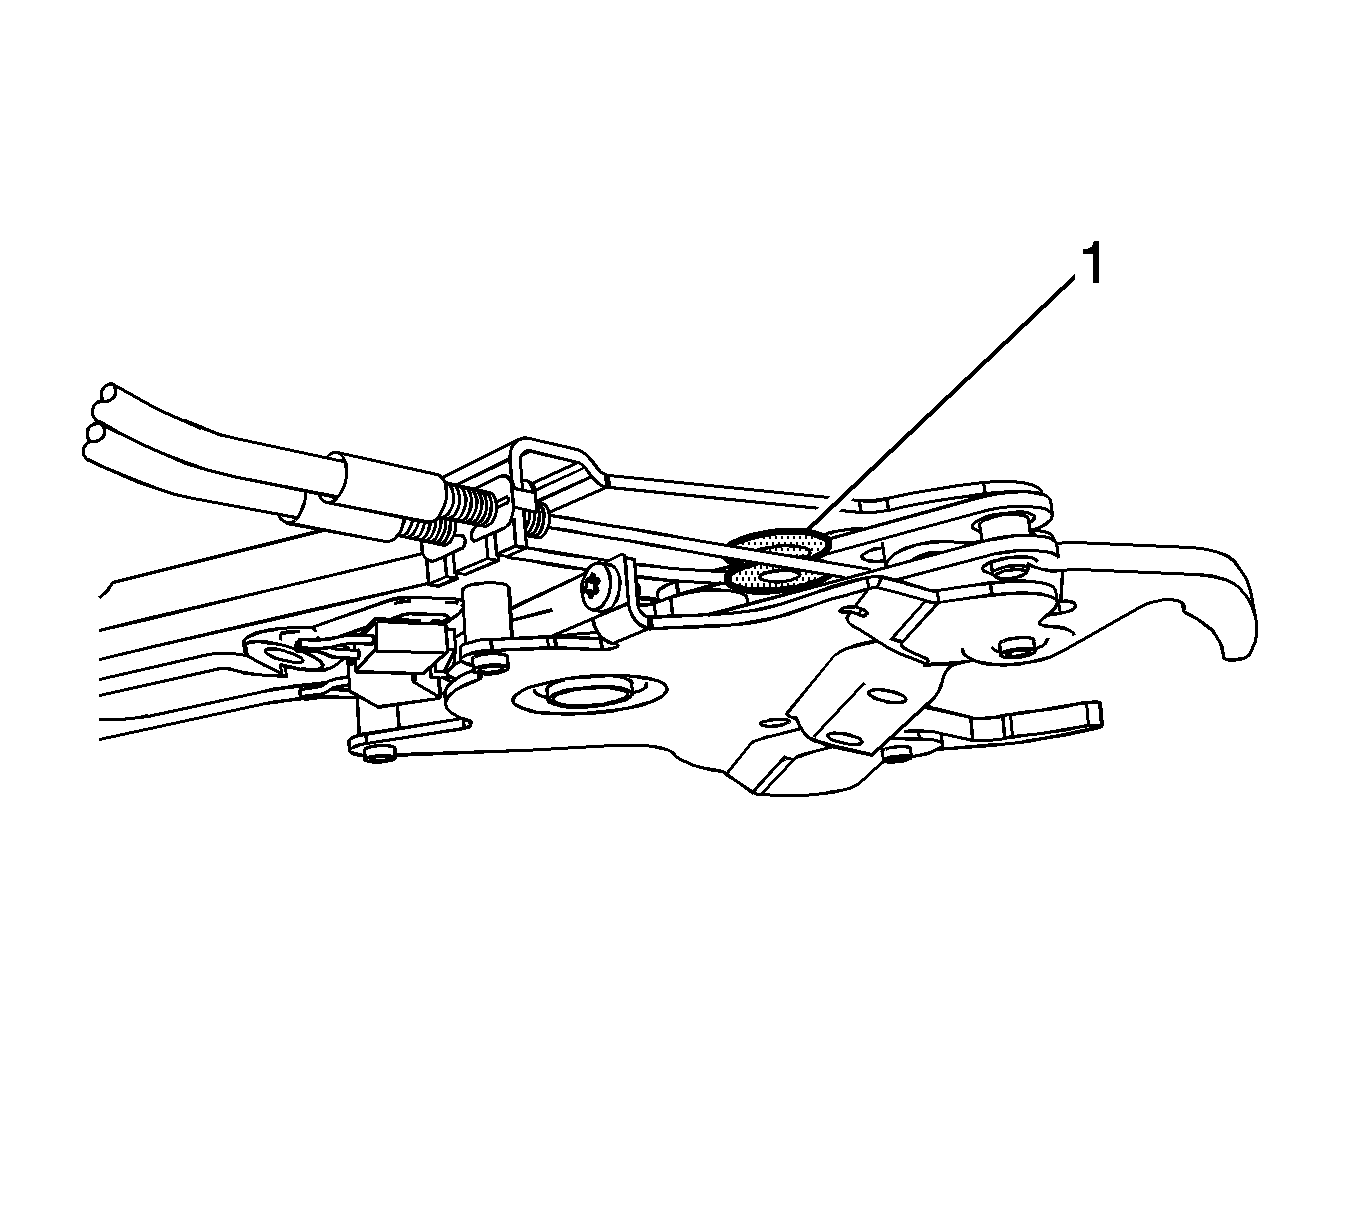
- Remove the pulley wheel (1) from the latch.
- Remove the cable from the latch retainer slot.


Important: Before you remove the cable from the latch, observe the differences in the lengths of the cable sheathing. The right side sheathing is longer than the left side sheathing. Verify that the sheathings are installed properly.
Installation Procedure
- Install the right side cable sheathing to the right side latch retainer slot.
- Push the bare cable into the latch. Provide enough slack so that you can install the pulley wheel without cable interference.
- Install the pulley wheel (1) in the latch and align the wheel with the latch access holes.
- Install the pulley wheel pin (1) through the latch access hole (2) and the pulley wheel.
- Close the latch so that the pulley wheel pin is not visible through the access holes.
- Install the travel limit C-clip pin (2) to the latch.
- Install the travel limit C-clip (1) to the pin (2).
- Insert the left side cable sheathing to the left side latch retainer slot.
- Install the latch. Refer to Folding Top Front Latch Replacement .


Important: Before installing the left side cable, verify that the cable is aligned with the groove in the pulley wheel.
