For 1990-2009 cars only
Removal Procedure
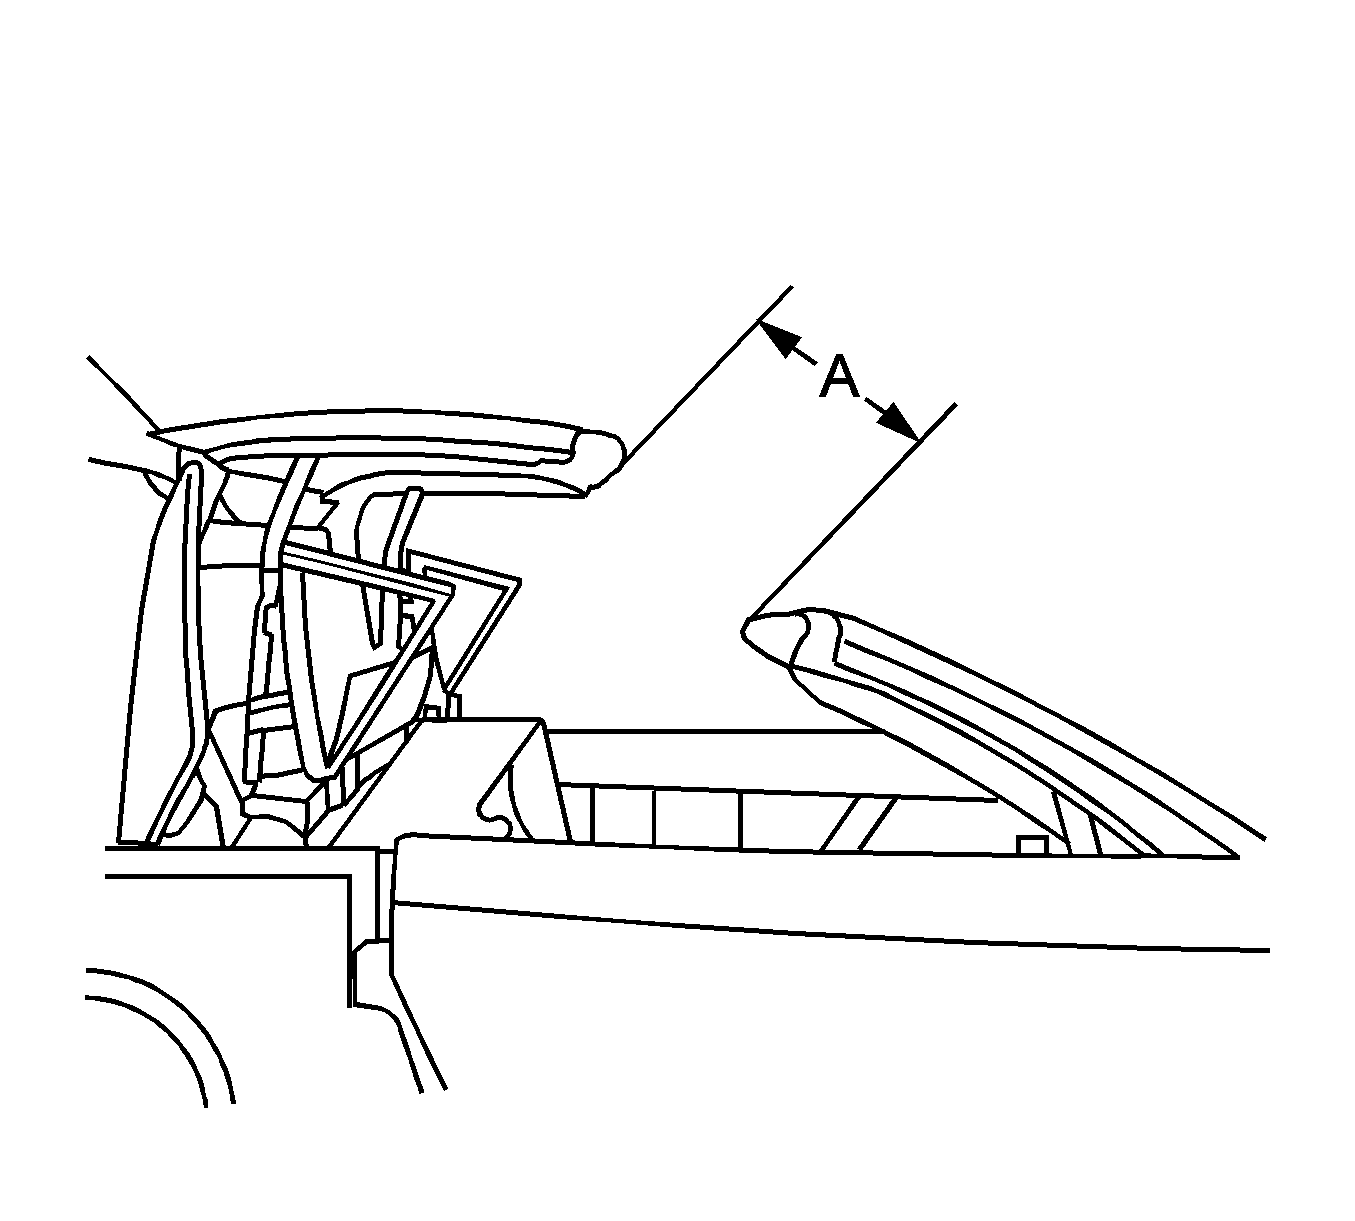
- Manually open the folding top as shown in the illustration. Refer to Folding Top Manual Operation .
- Place a protective covering over the interior of the vehicle and the adjacent body panels.
- Remove the headliner. Refer to Folding Top Headlining Trim Panel Replacement in Interior Trim.
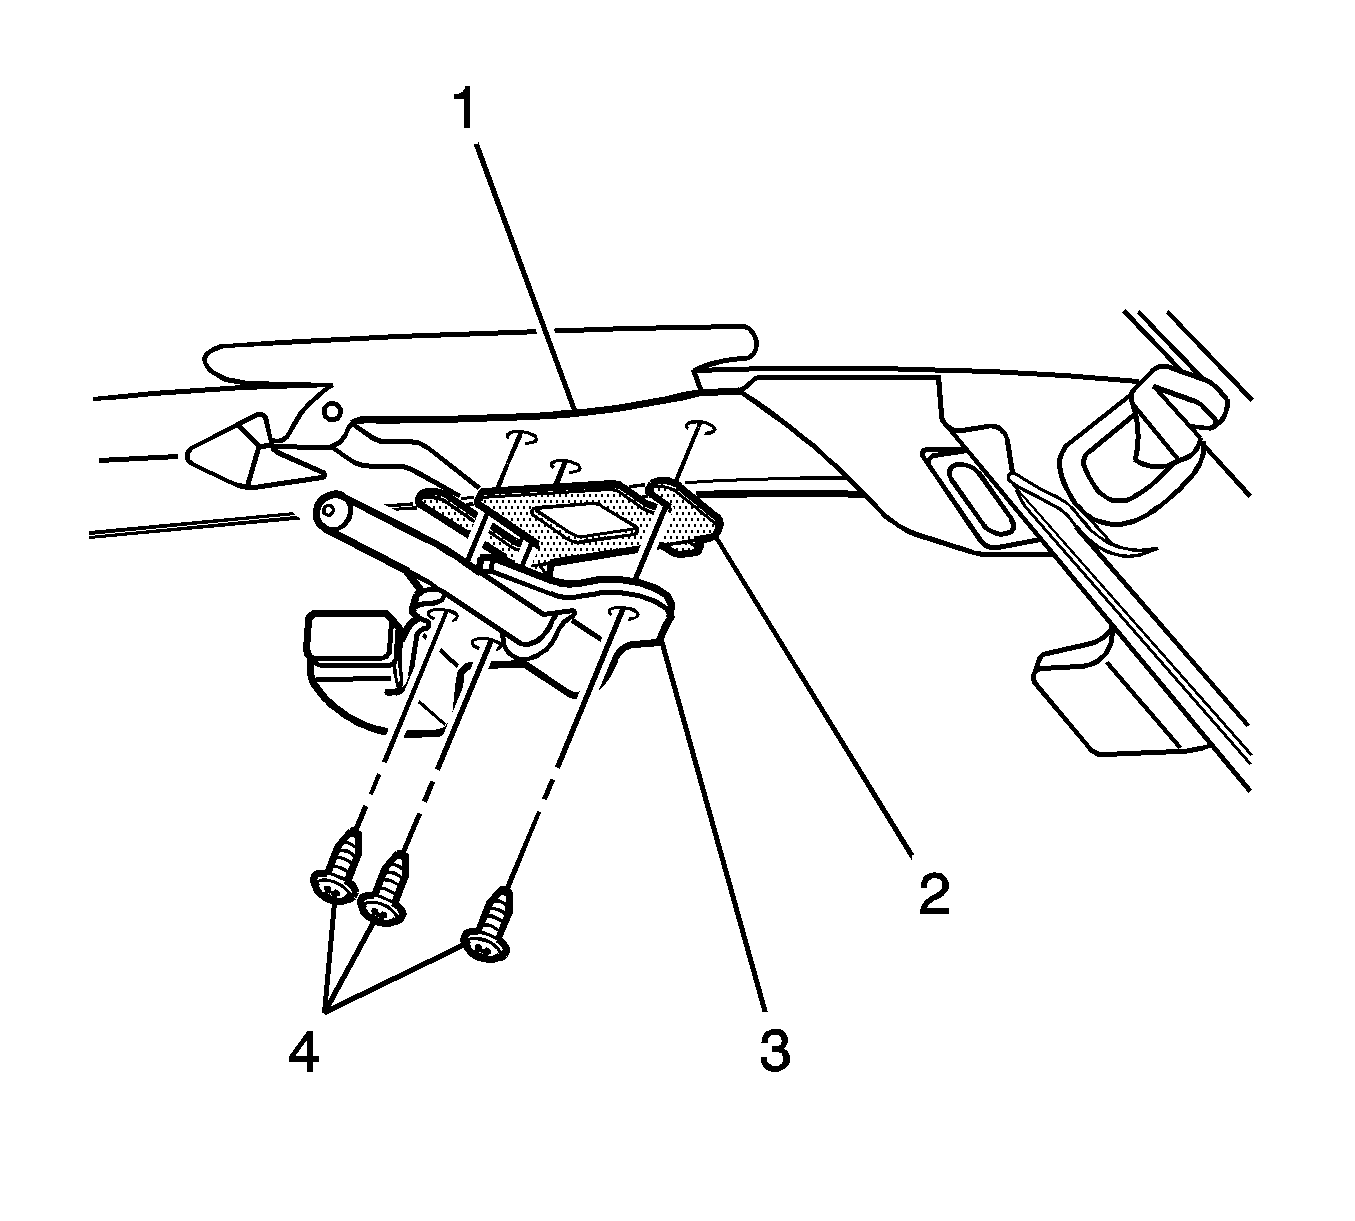
- Remove the locating pin bolts (4).
- Remove the locating pin (3) from the folding top panel (1).
- Note the location and the amount of any shims (2) that may be present.

The distance (A) from the windshield header to the leading edge of the folding top panel is 400 mm (15.75 in).

Installation Procedure
- Position the locating pin (3) to the folding top panel (1).
- Apply LOCTITE™ Blue, GM P/N 12345382 (Canadian P/N 10953489) or equivalent to the bolts.
- Install the locating pin bolts (4) and secure. Do NOT tighten.
- Install the same shims (2) in the original locations.
- Position the folding top panel so that the panel is resting unlatched on the windshield header, with the locating pins in the receivers.
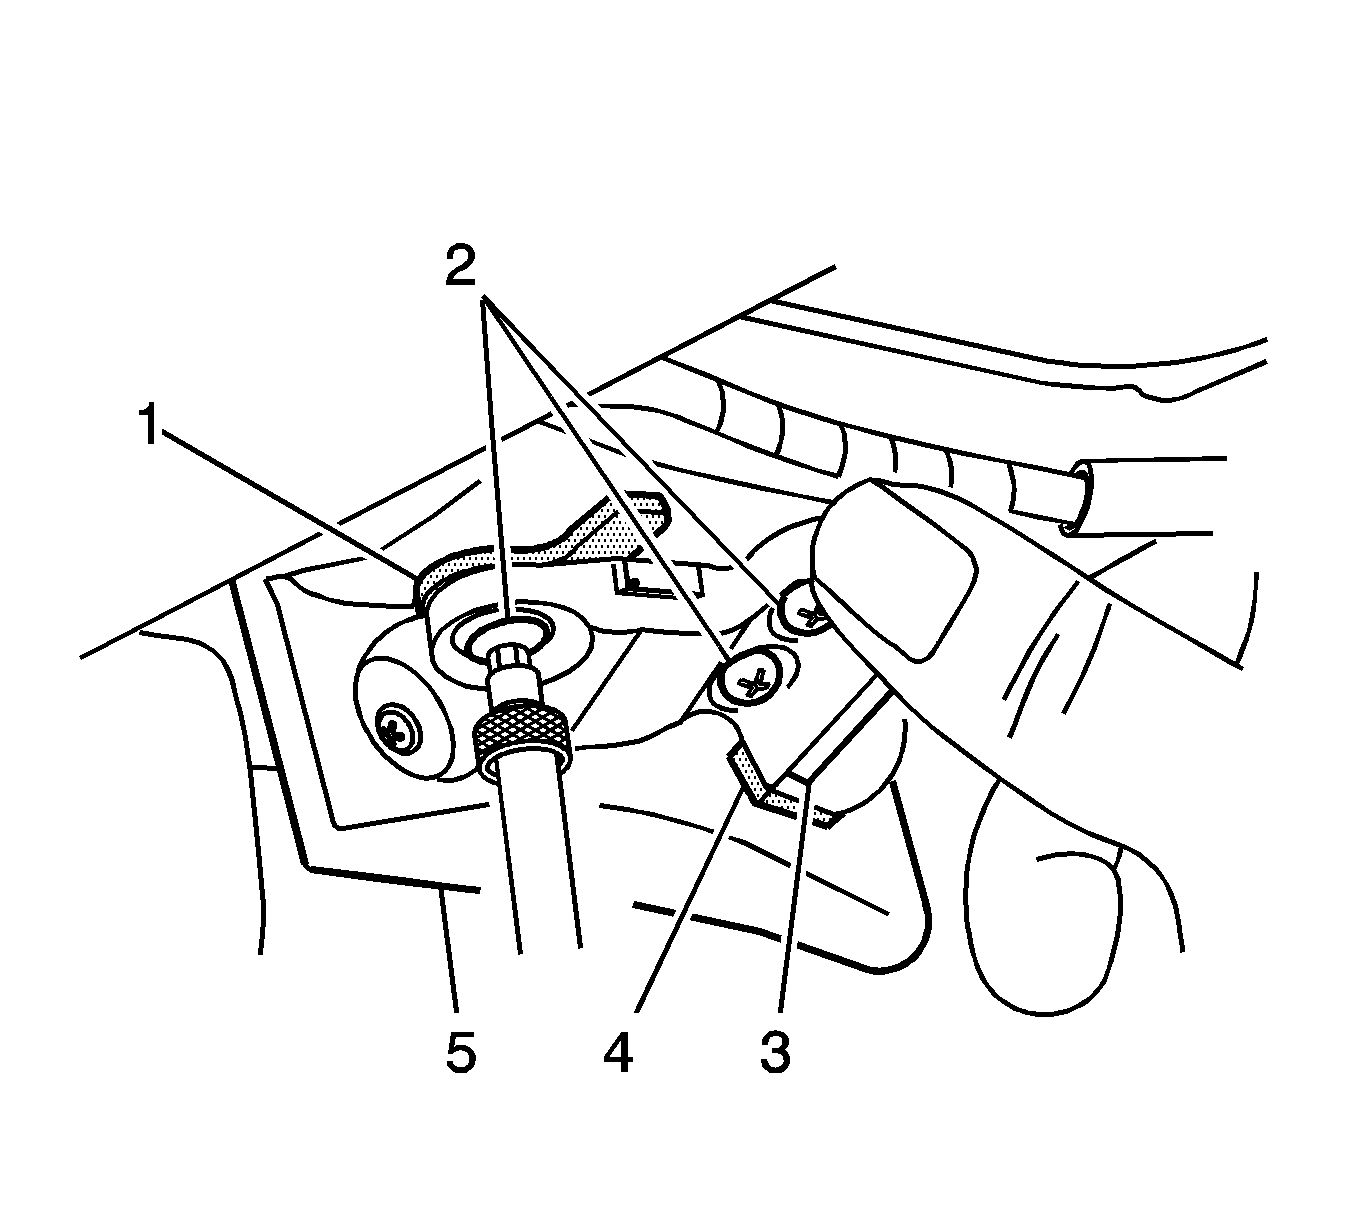
- Manually latch the folding top. Apply pressure to the locating pin (3) so that the rubber bumper (4) is contacting the receiver (5).
- Tighten the locating pin bolts (1).
- Manually open the folding top. Refer to Folding Top Manual Operation .
- Manually close the folding top while inspecting the alignment of the locating pin to the receiver. Manually close and latch the folding top.
- Verify that the folding top panel is aligned properly. Refer to Folding Top Clearance Gap Specifications .
- Adjust the folding top panel, if required. Refer to Folding Top Front Panel Adjustment .
- Remove the protective covering.
- Cycle the folding top under power through one complete cycle in both directions.
- Inspect the folding top for proper operation. Refer to Power Folding Top Description and Operation .
- Install the headliner. Refer to Folding Top Headlining Trim Panel Replacement in Interior Trim.

Notice: Refer to Fastener Notice in the Preface section.

Tighten
Tighten the bolts to 8 N·m (71 lb in).
