For 1990-2009 cars only
Removal Procedure
- Manually open the folding top as shown in the illustration. Refer to Folding Top Manual Operation .
- Place a protective covering over the interior and the adjacent body panels.
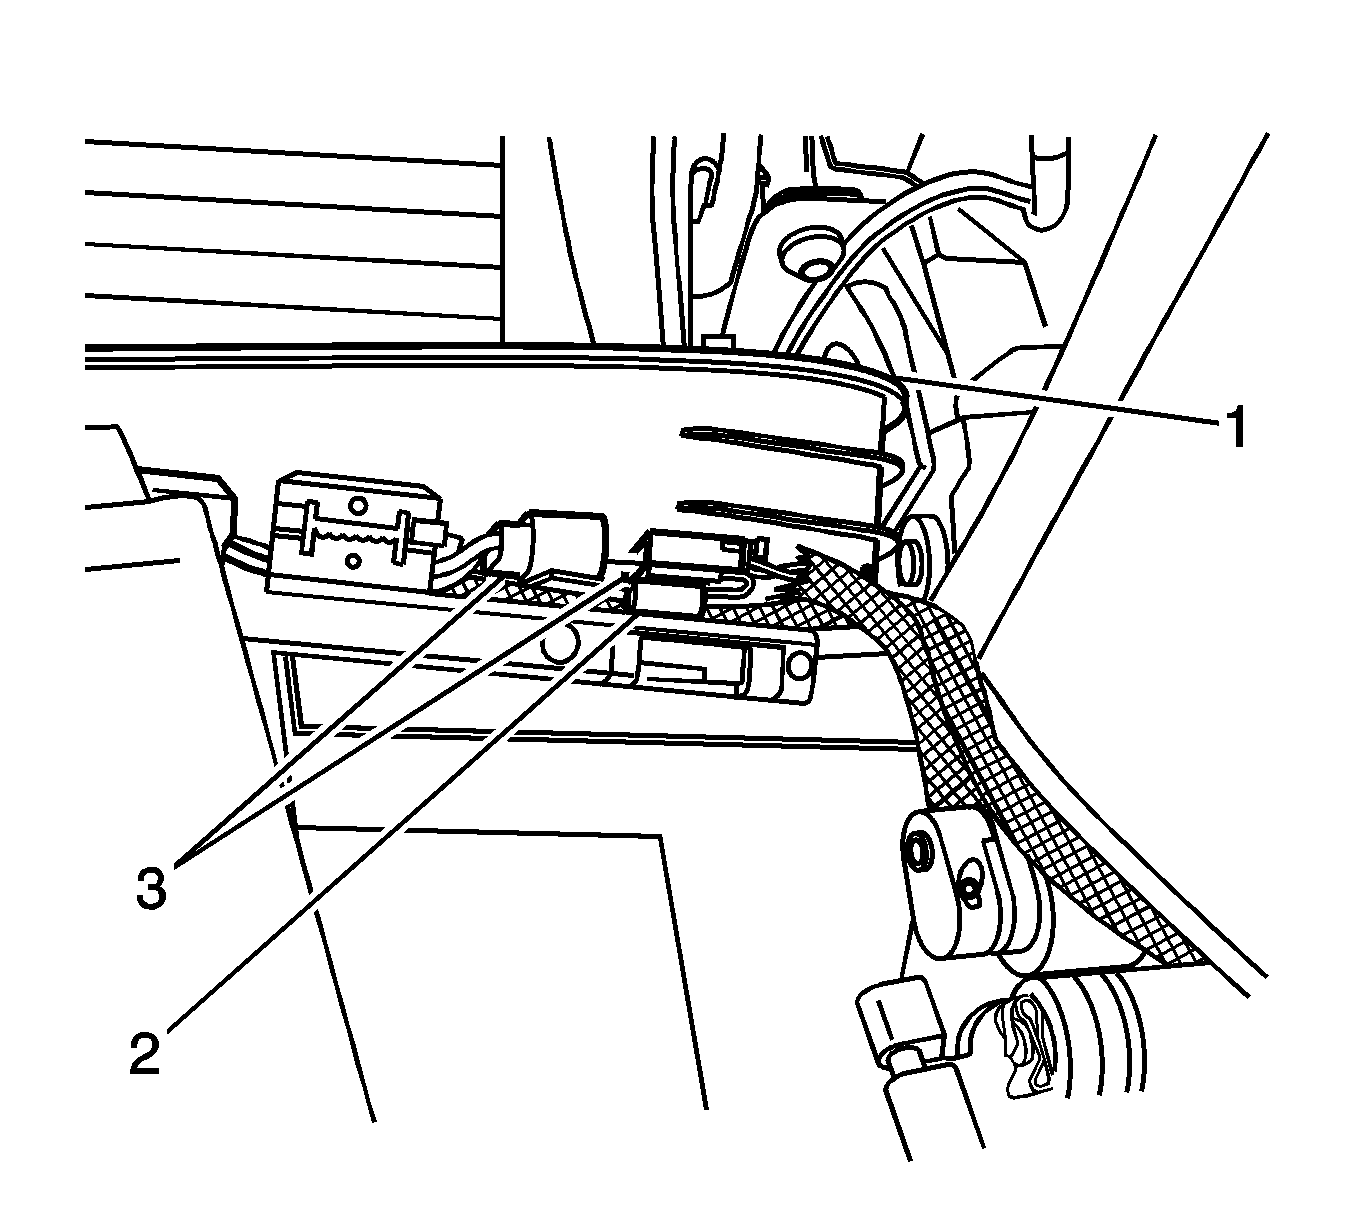
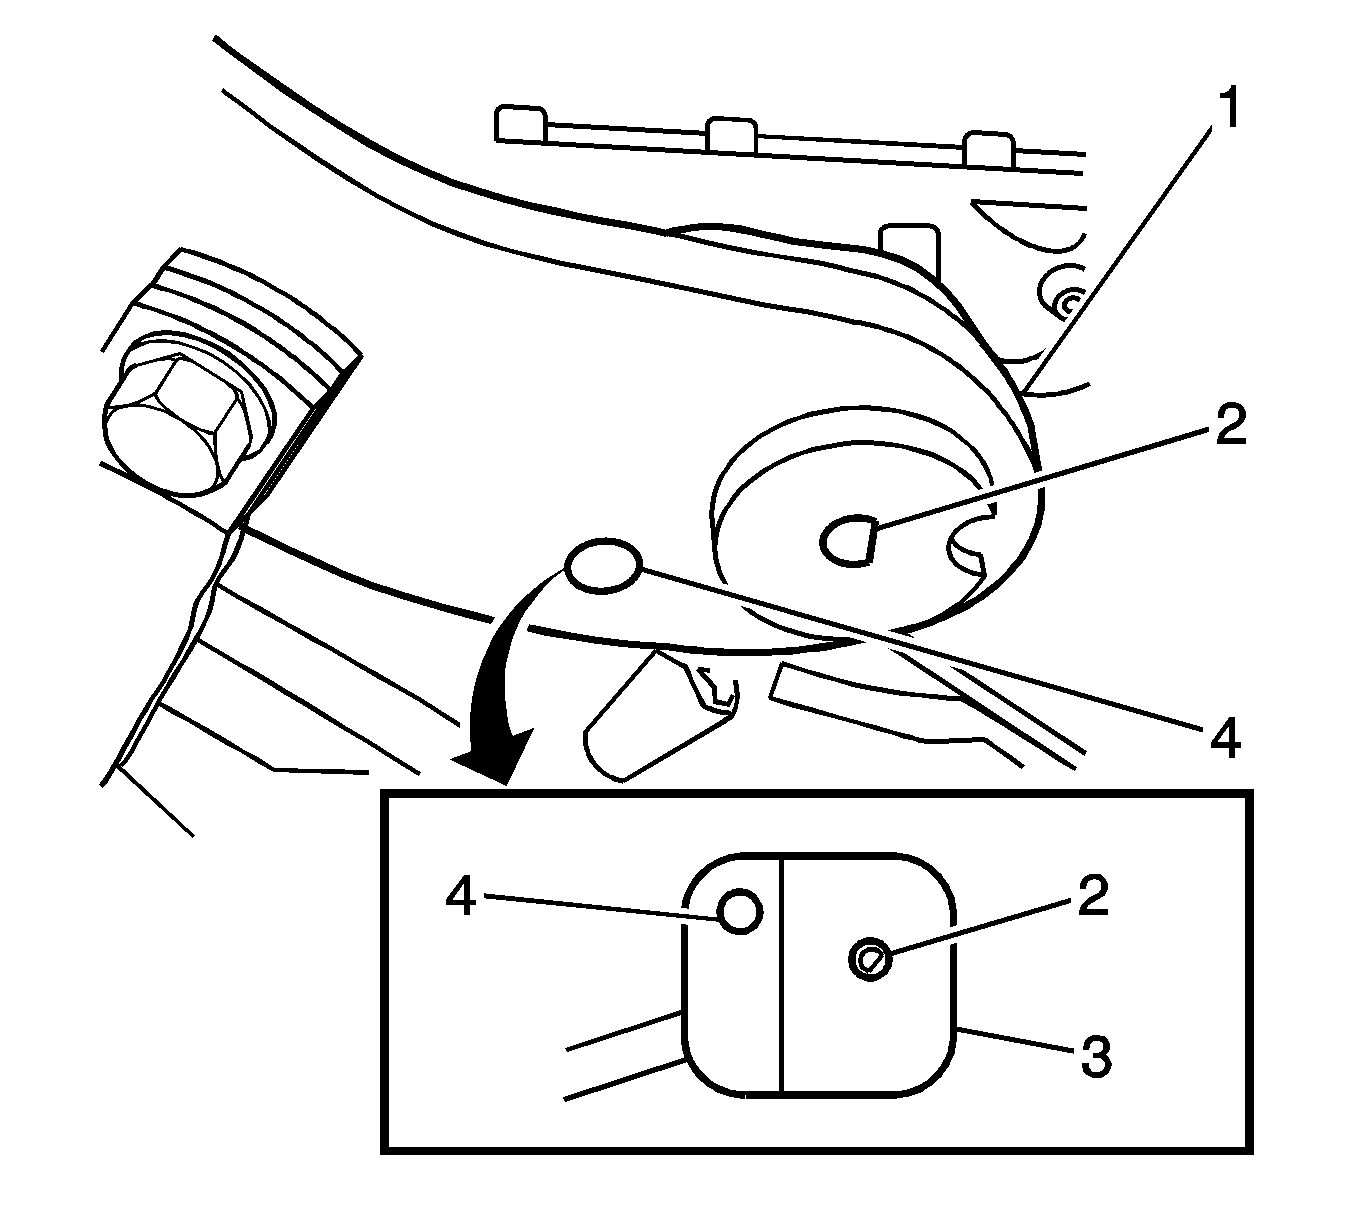
- Remove the trim cover (1).
- Release the electrical connector (2) from the trim cover (1).
- Disconnect the potentiometer electrical connector (3).
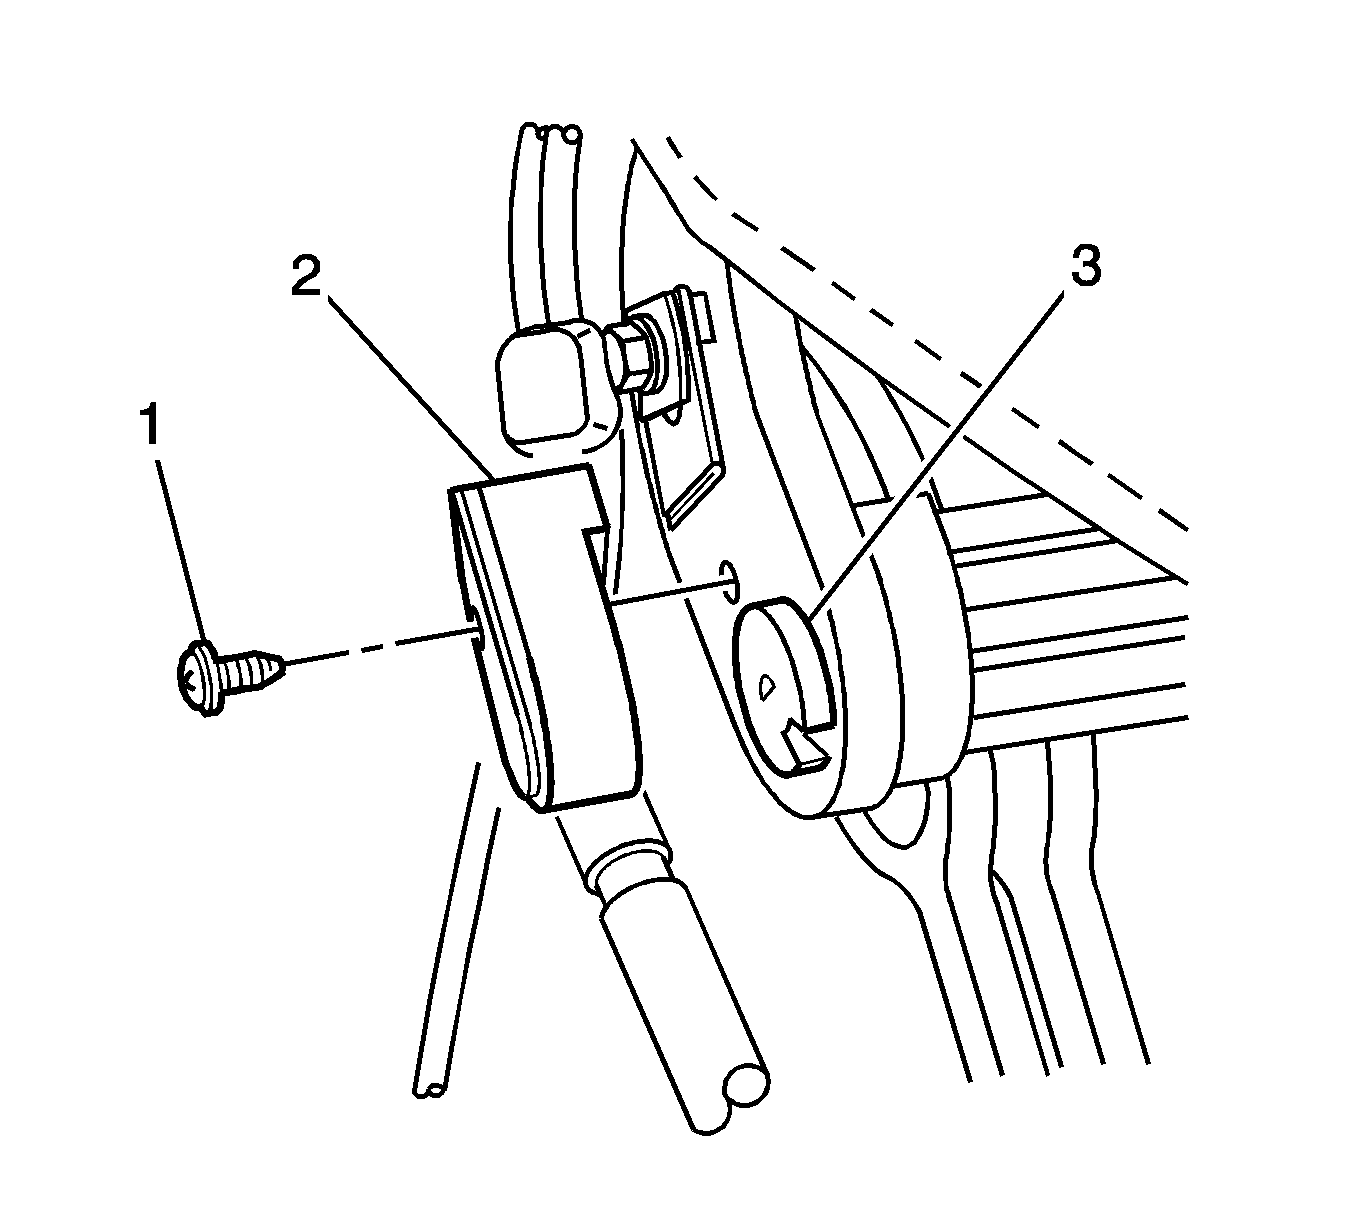
- Remove the potentiometer screw (1).
- Remove the potentiometer (2) from the link (3).
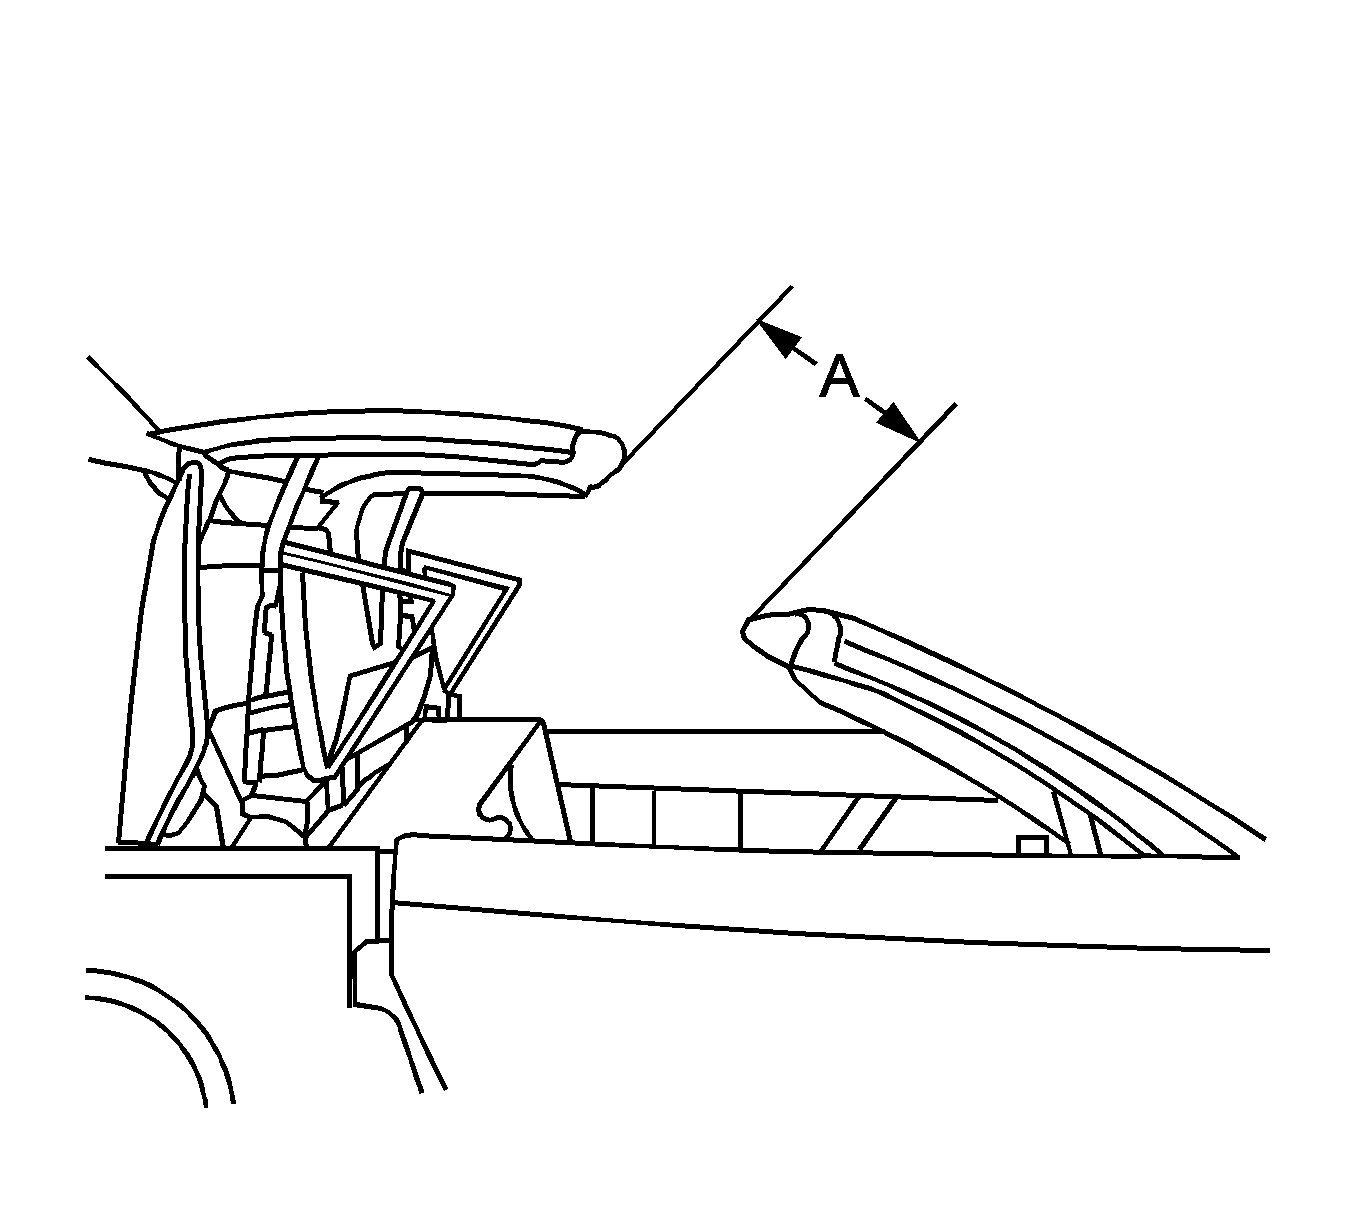
The distance (A) from the windshield header to the leading edge of the folding top panel is 400 mm (15.75 in).
Installation Procedure
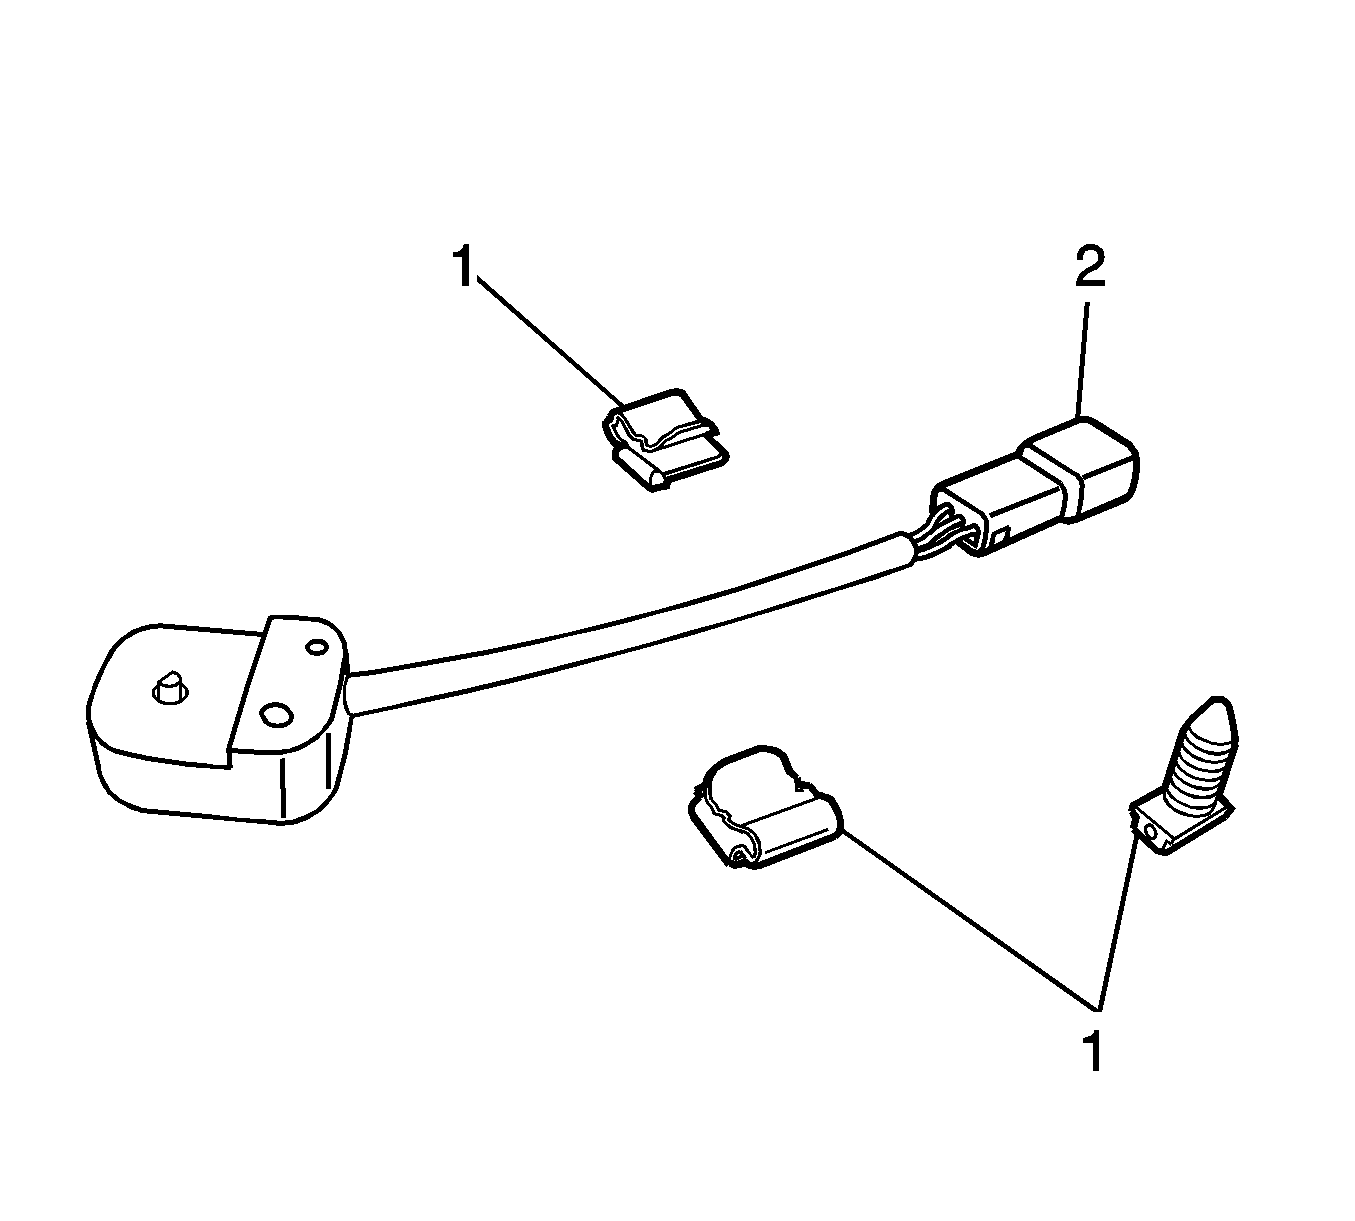
- The potentiometer service kit contains one potentiometer (2) and 3 electrical connector retainer clips (1). Find and install the retainer clip that matches the clip on the potentiometer that you are replacing.
- Position the potentiometer (3) to the link (1). Align the D-shaped rotor into the D-shaped hole (2) in the link.
- Rotate the potentiometer until the screw hole in the potentiometer is aligned with the screw hole in the link (4).
- Install the potentiometer screw (1).
- Connect the potentiometer electrical connector (3).
- Clip the electrical connector (2) to the trim cover (1) in the original location.
- Install the trim cover (1).
- Remove the protective covering.
- Manually close the folding top. Refer to Folding Top Manual Operation .
- Calibrate the folding top. Refer to Power Folding Top Learn .
- Inspect the folding top for proper operation. Refer to Power Folding Top Description and Operation .
Notice: Refer to Fastener Notice in the Preface section.
Tighten
Tighten the screw to 3.5 N·m (31 lb in).
