Removal Procedure
- Manually open the folding top as shown in the illustration. Refer to Folding Top Manual Operation .
- Place a protective covering over the interior and the adjacent body panels.
- With the aid of an assistant, support the folding top to prevent the top from moving when the strut actuator is being removed.
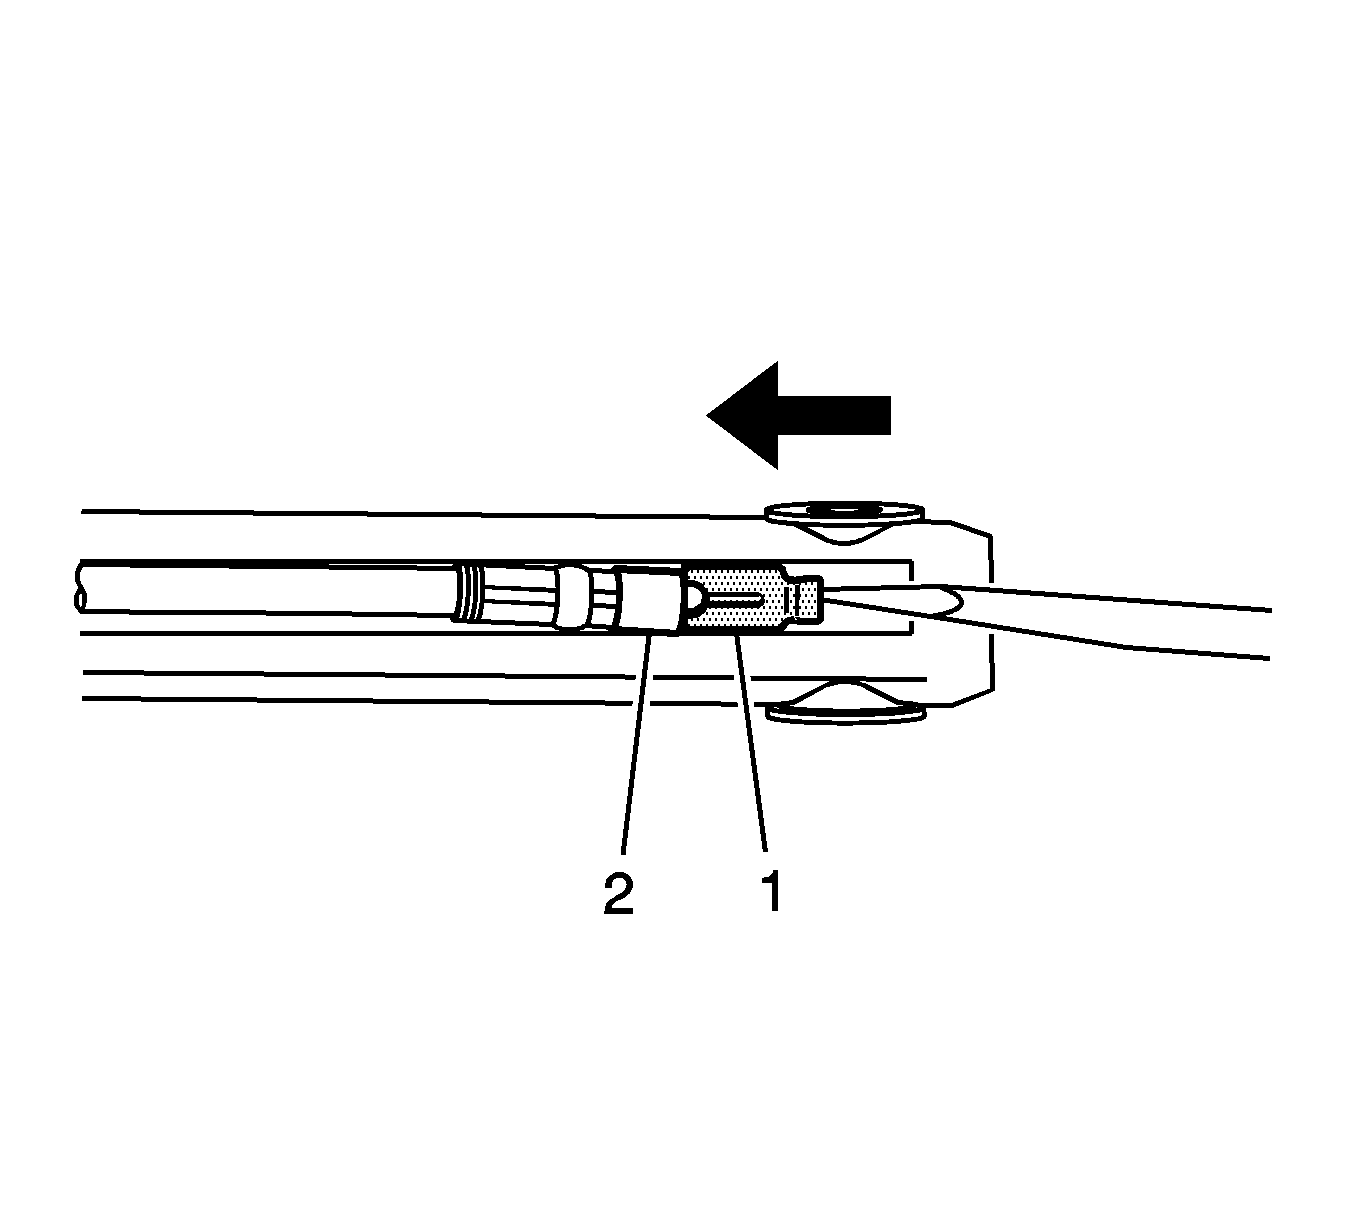
- Use a small flat-bladed tool to lift up the retainer clip (1) on the lower pivot link bracket side of the strut actuator.
- Remove the strut actuator (1) from the ball joint on the lower pivot link bracket (2).
- Position the folding top so that the front panel is resting unlatched on the windshield header, with the locating pins in the receivers.
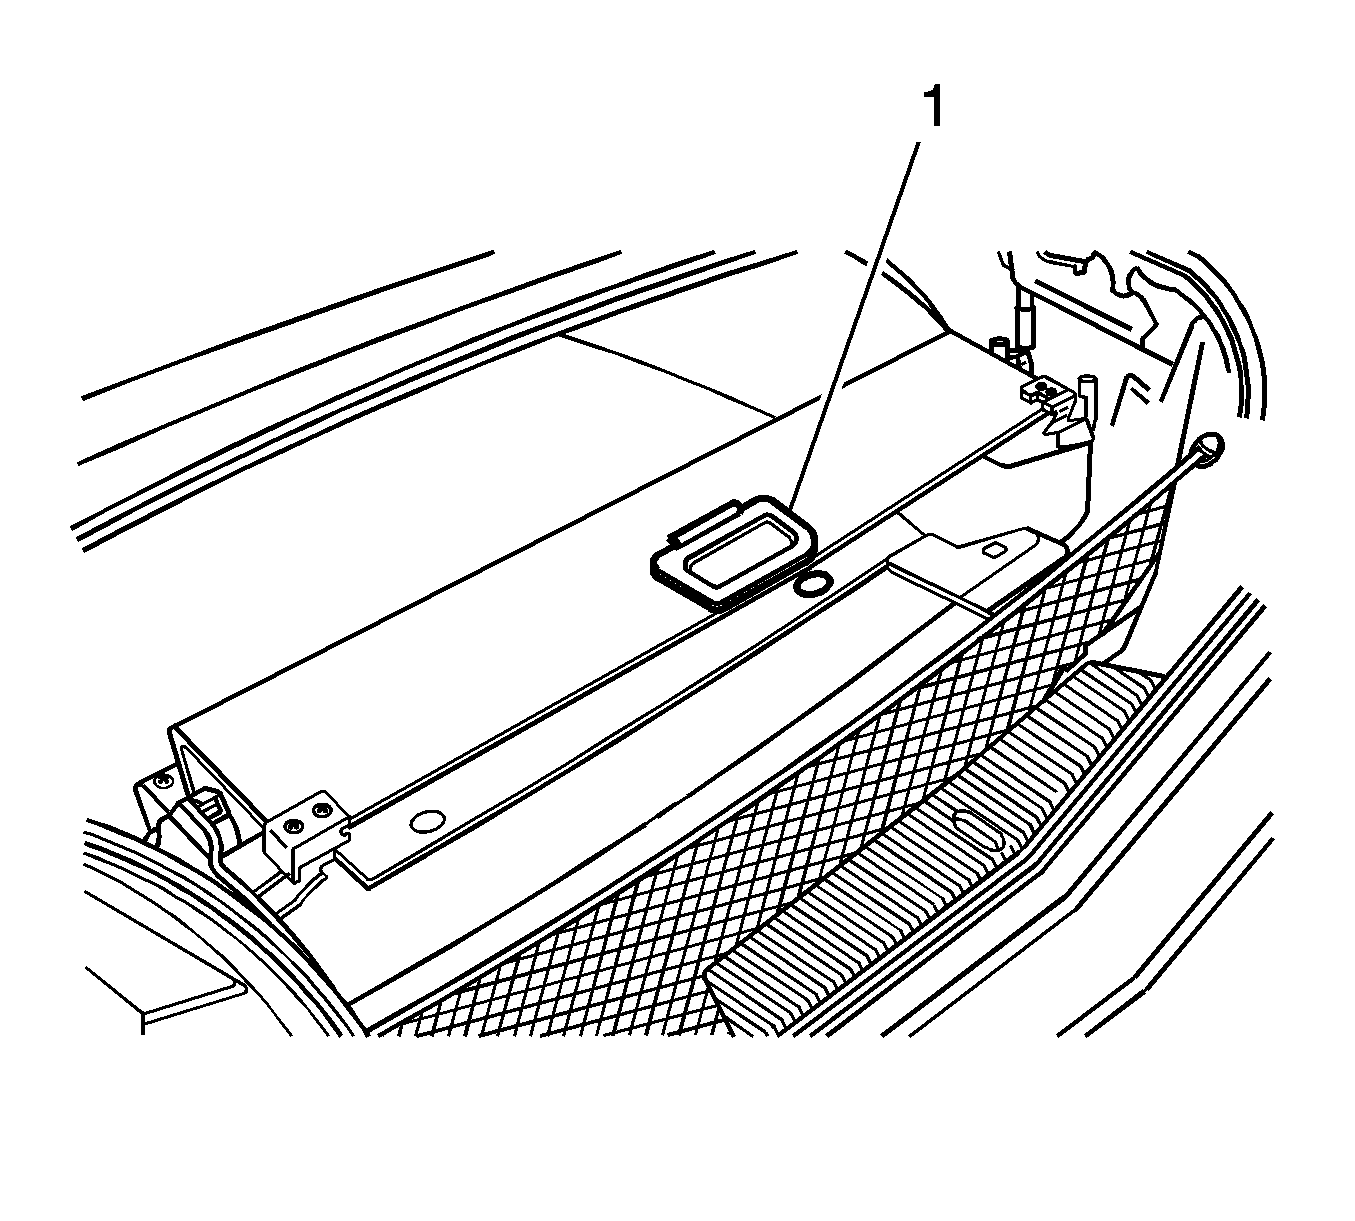
- Lower the rear compartment partition (1).
- Remove the side compartment trim. Refer to Rear Compartment Side Trim Replacement - Left Side or Rear Compartment Side Trim Replacement - Right Side in Body Rear End.
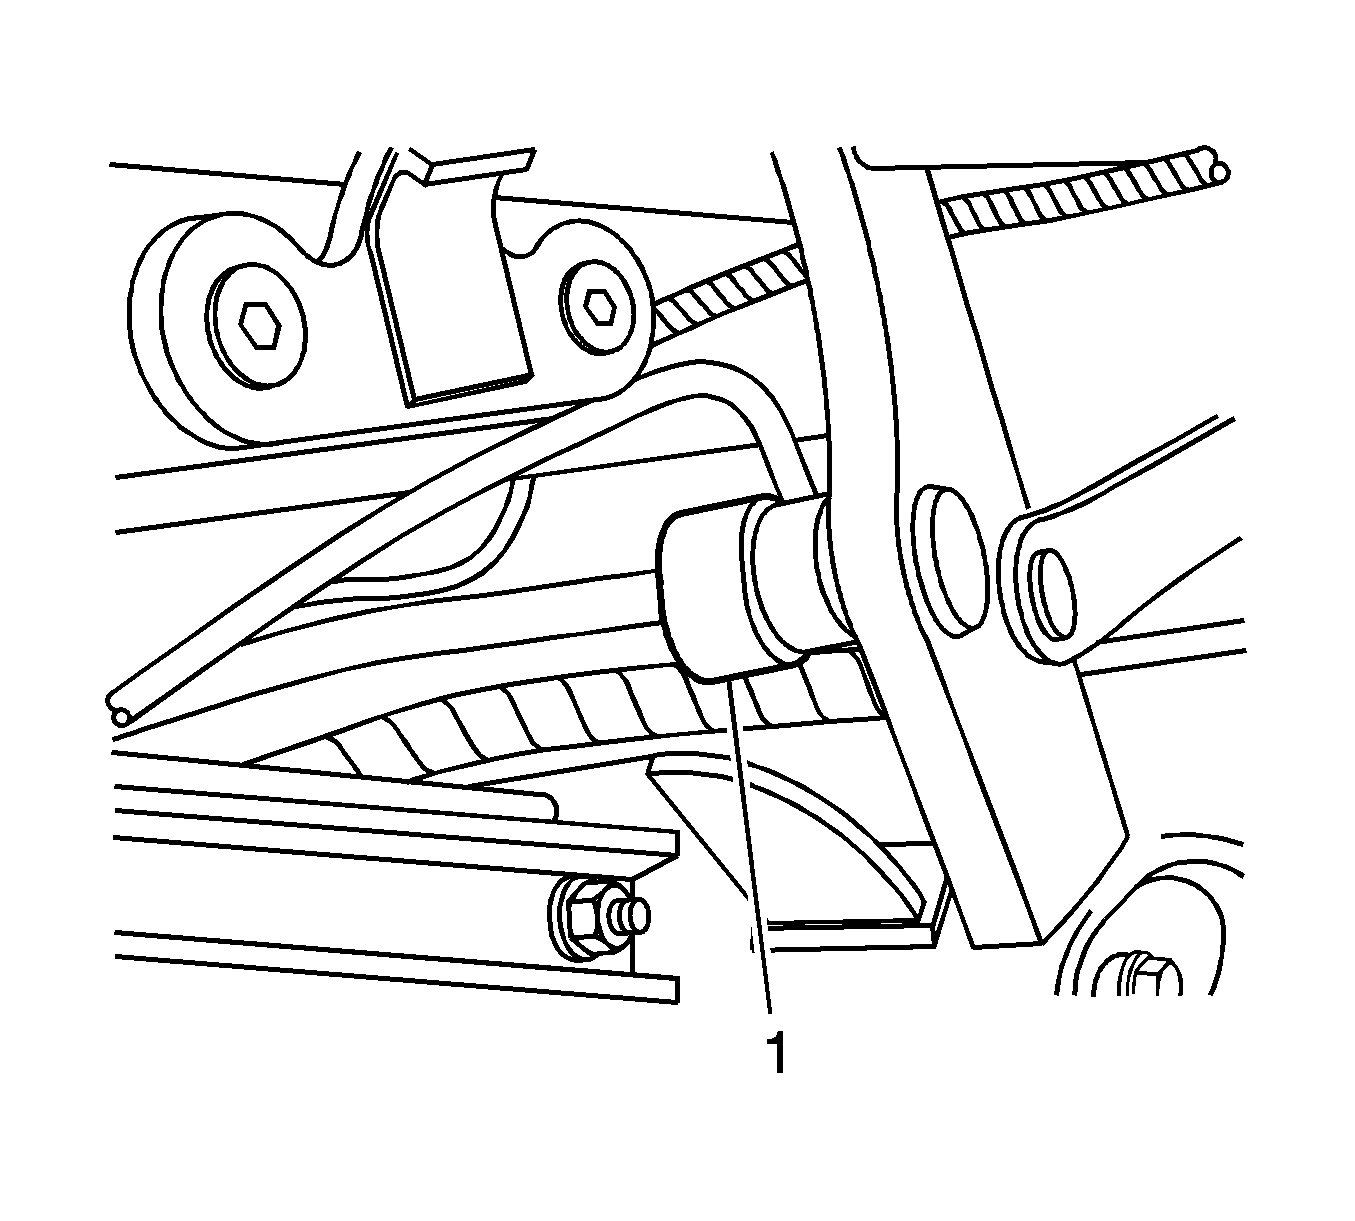
- Locate the cylinder (1).
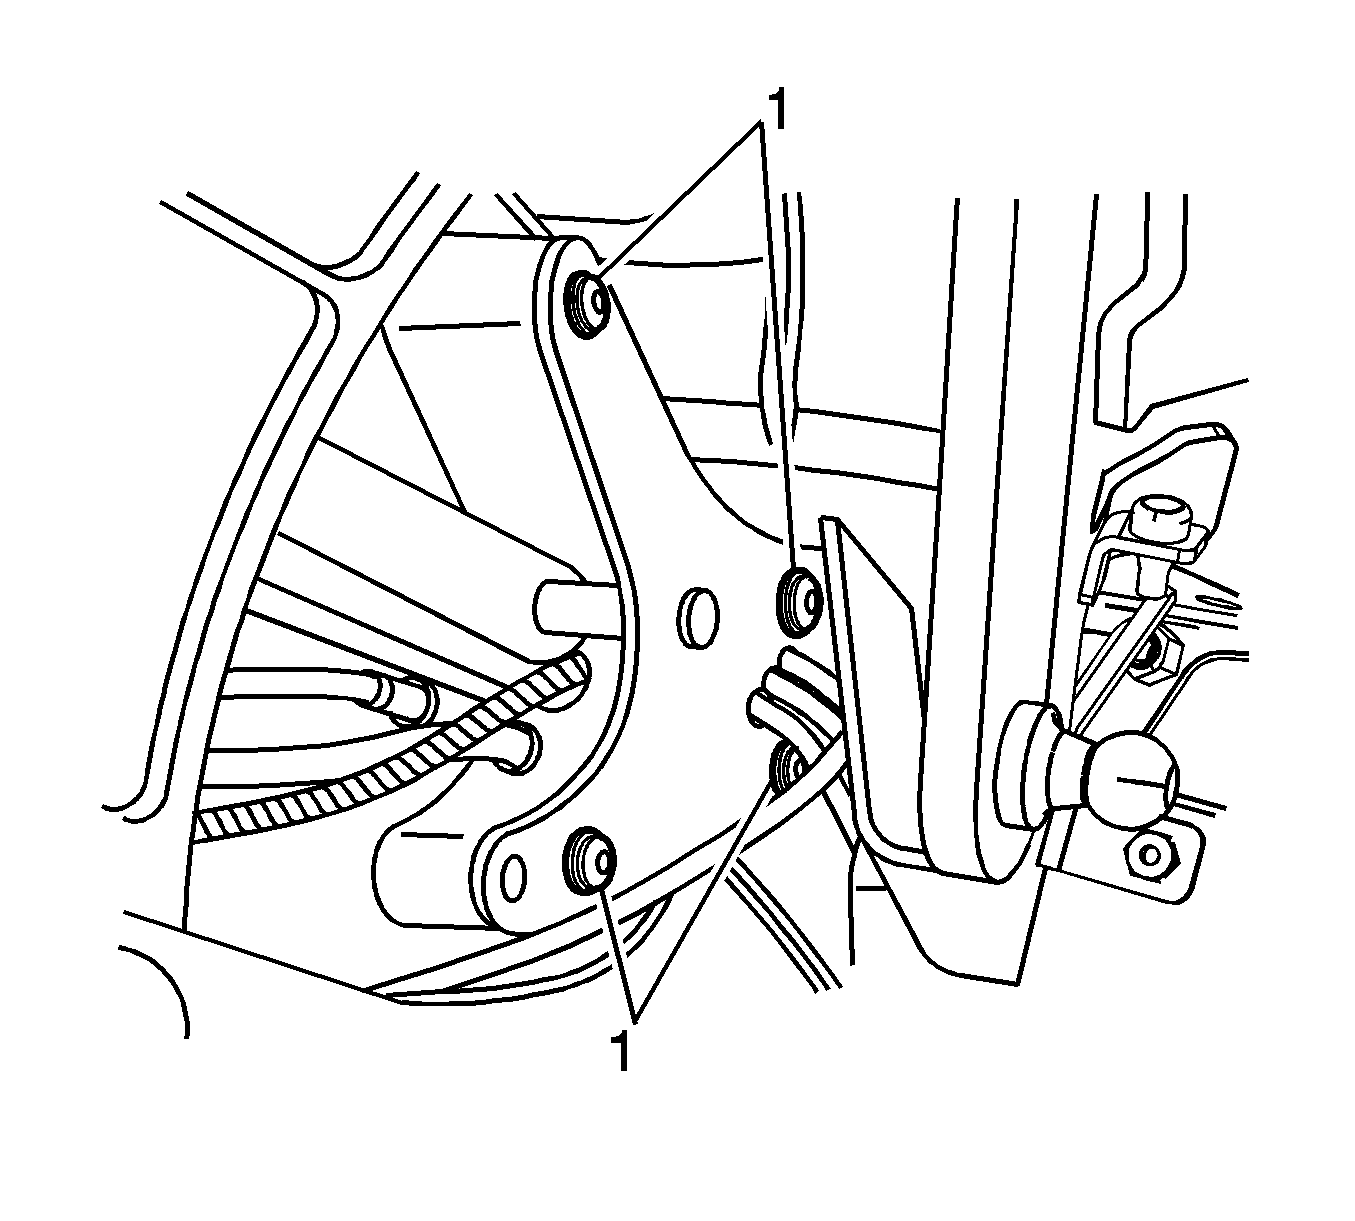
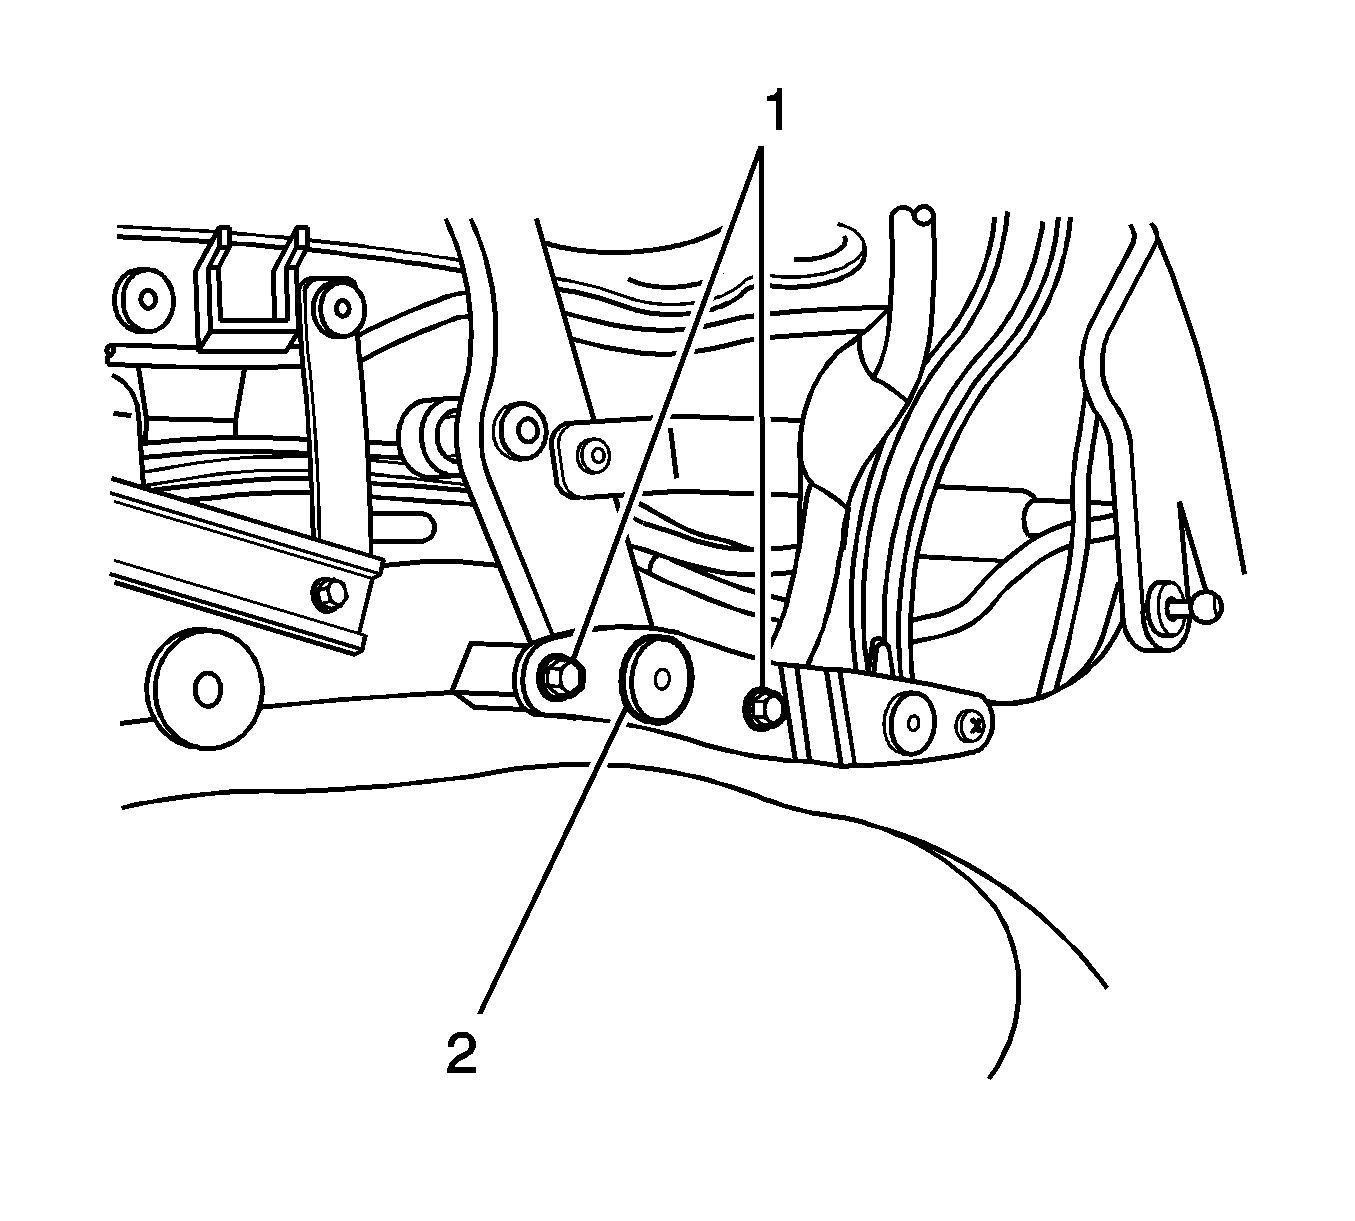
- Remove the bolts (1) from the cylinder retainer plate.
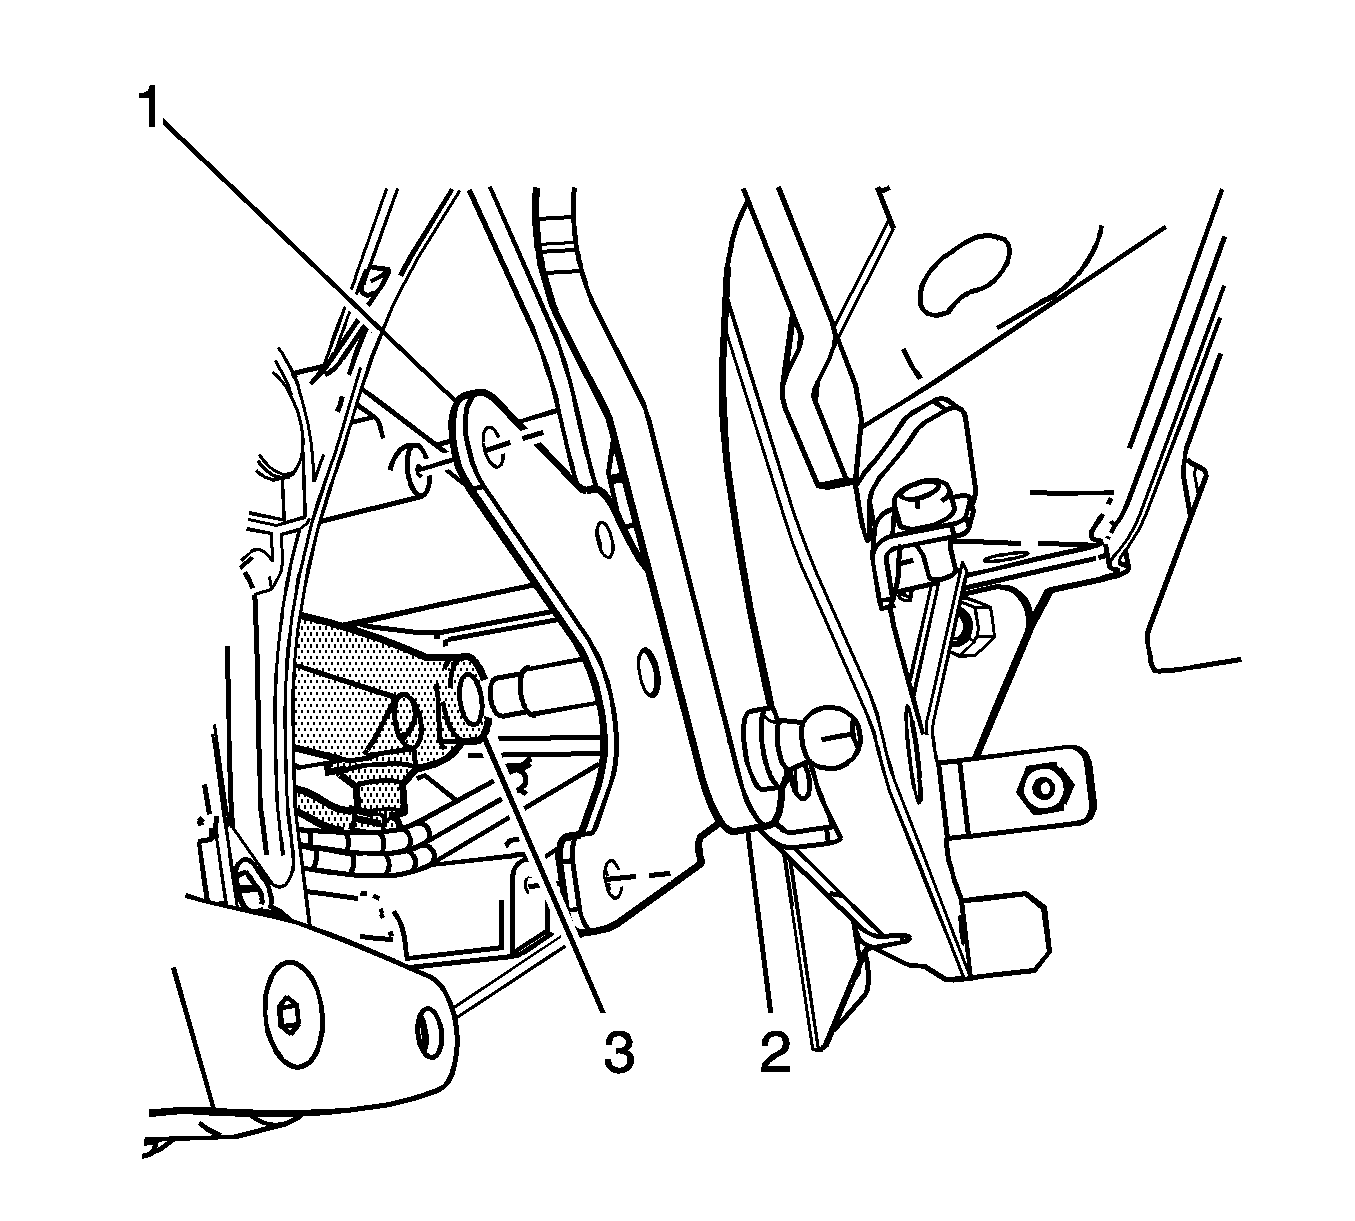
- Pull the cylinder retainer plate (1) out until the plate contacts the idler lower pivot bracket (2).
- Pull the retainer plate (1) and the cylinder (3) towards the rear of the vehicle until you have enough room to remove the retainer plate (1) from the cylinder (3).
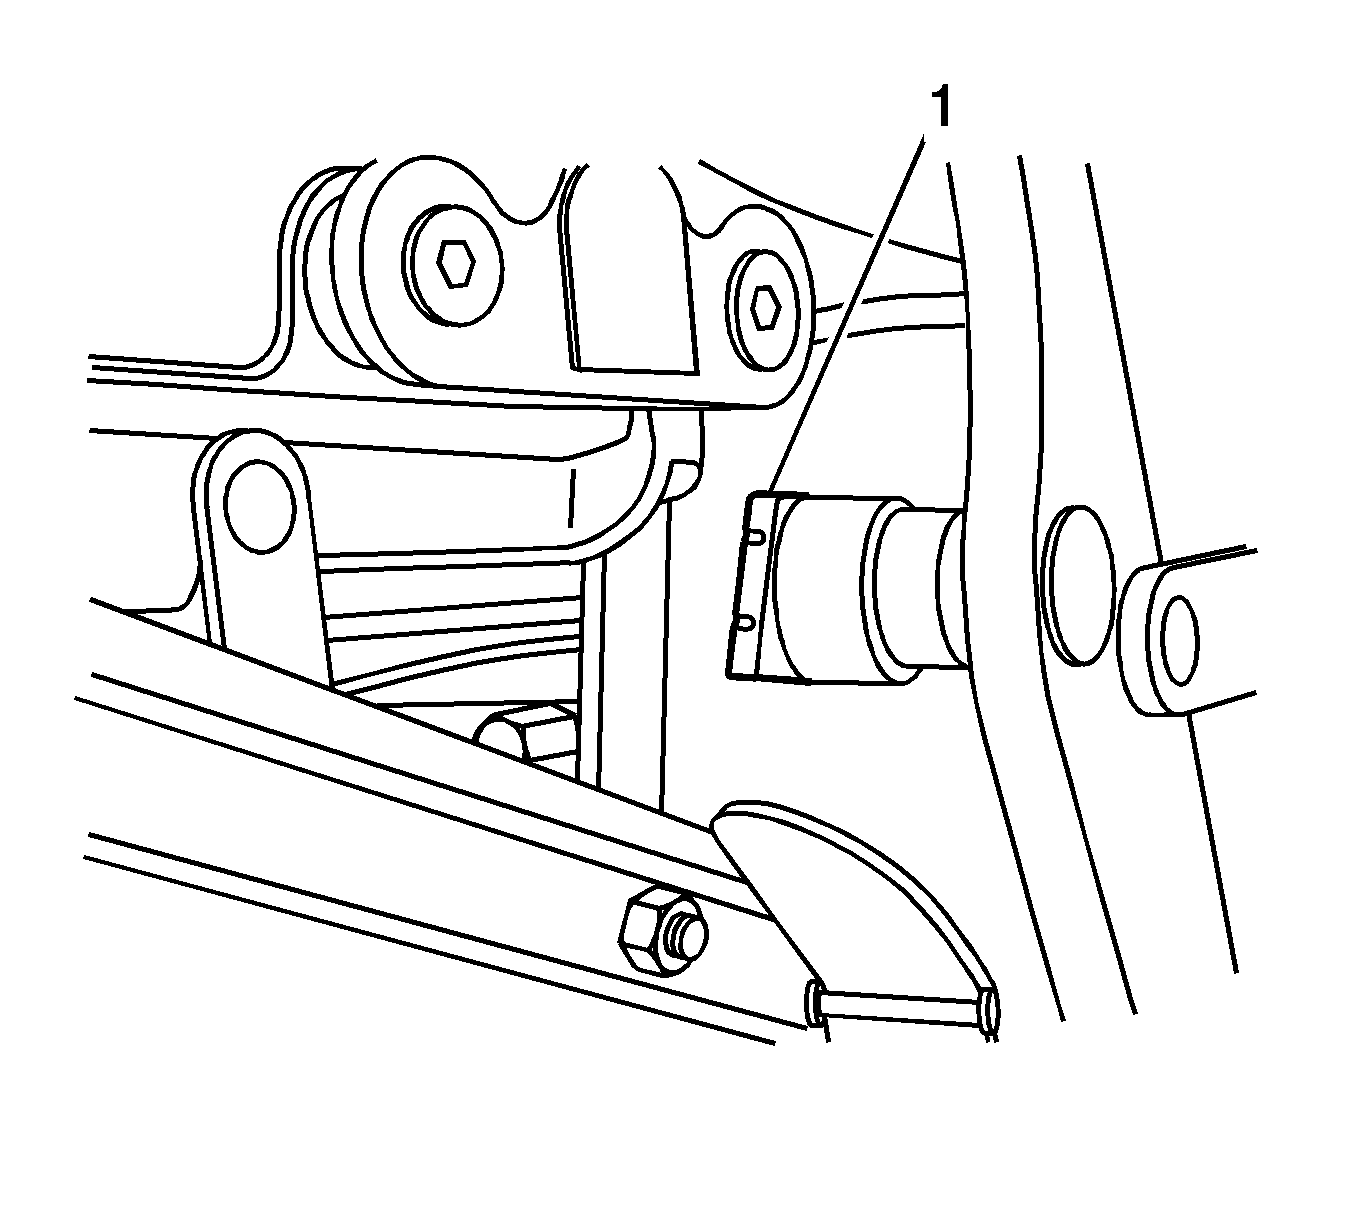
- Remove the spring clip (1) from the cylinder mounting pin.
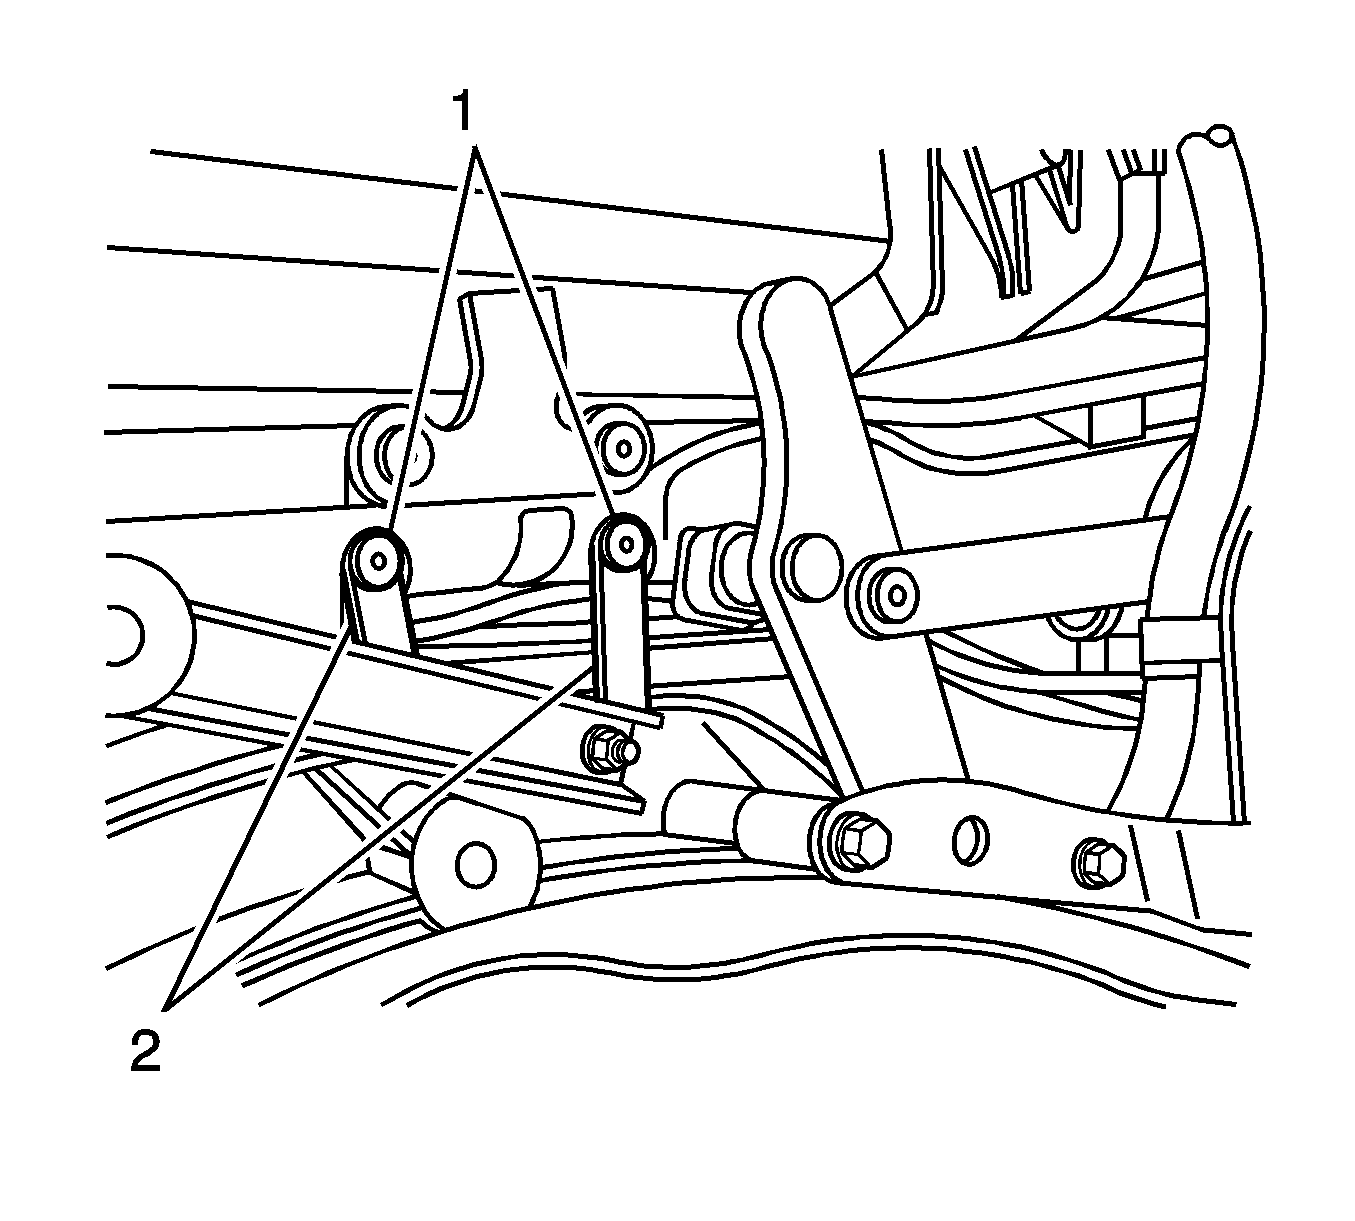
- Loosen the bolts (1) to the hold-down link. Do NOT remove the bolts.
- Remove the shoulder bolt (2) from the folding top panel link.
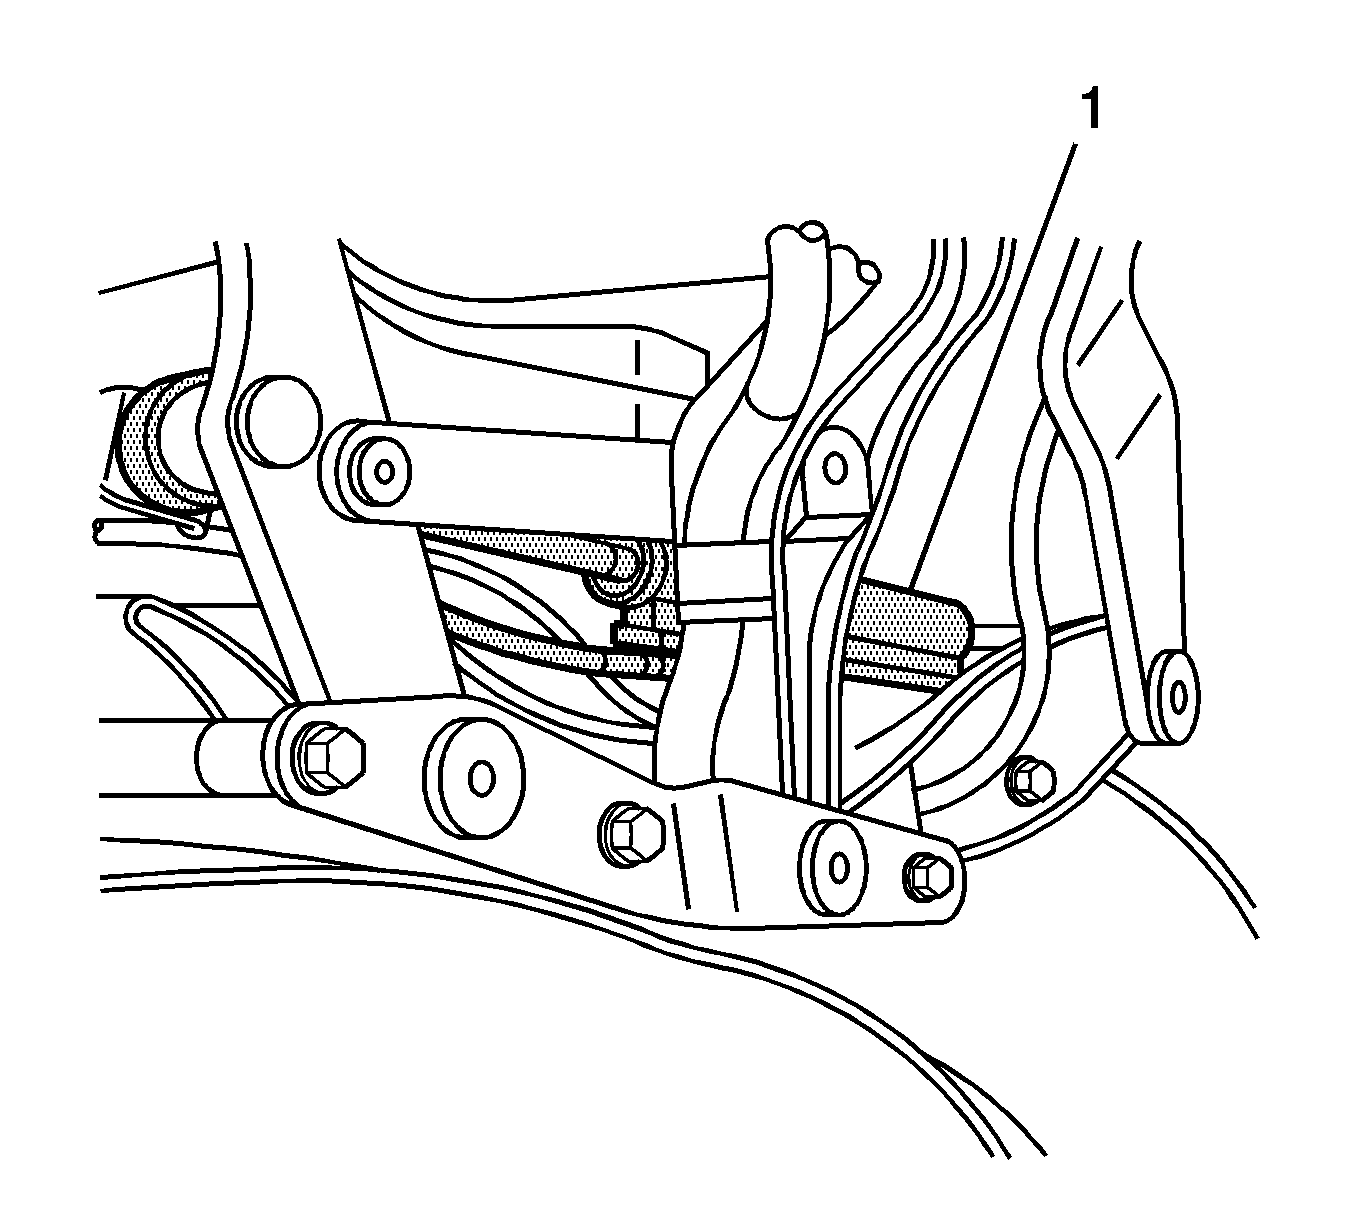
- Remove the pushpin retainers (1).
- Remove the retainer straps holding the cylinder hoses (2) in place.
- Pull down on the rear folding top panel until the cylinder (1) is centered over the hose channel. Move the cylinder hoses to the edges of the hose channel before removing the cylinder.
- Slide the cylinder off of the mounting pin.
- Remove the cylinder.
Caution: Refer to Eye Protection Caution in the Preface section.
Caution: Refer to Folding Top Hydraulic Pressure Caution in the Preface section.
Caution: Refer to Servicing Electrical Components Caution in the Preface section.
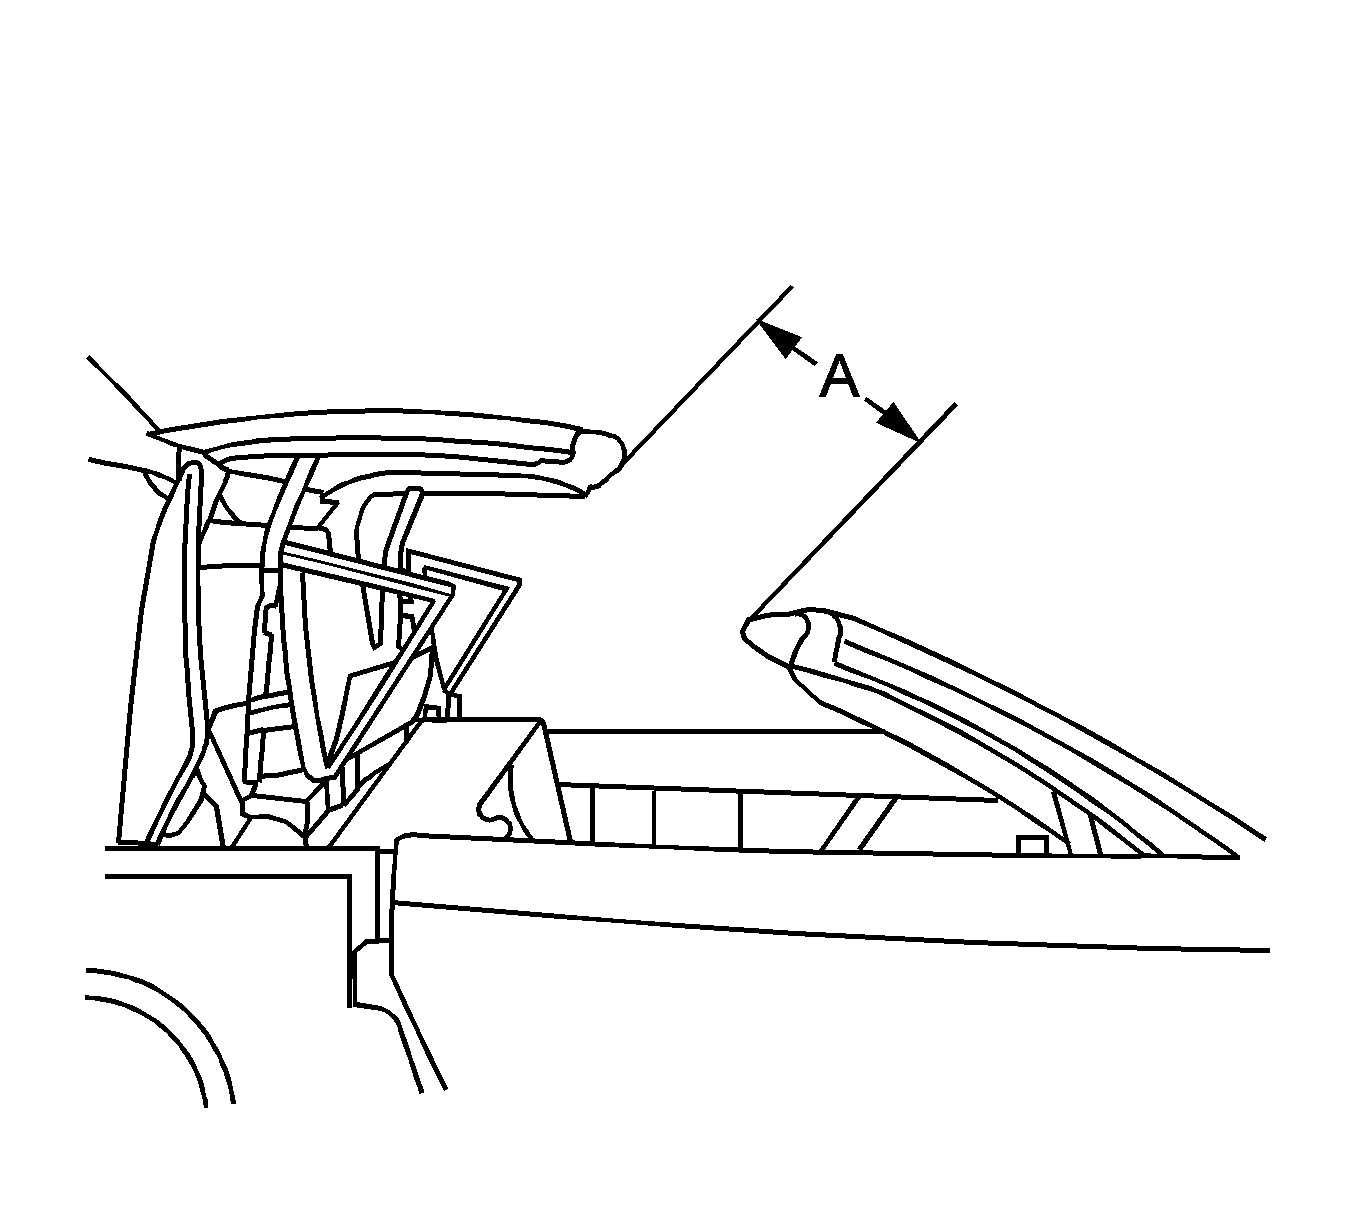
The distance (A) from the windshield header to the leading edge of the folding top panel is 430 mm (17 in).
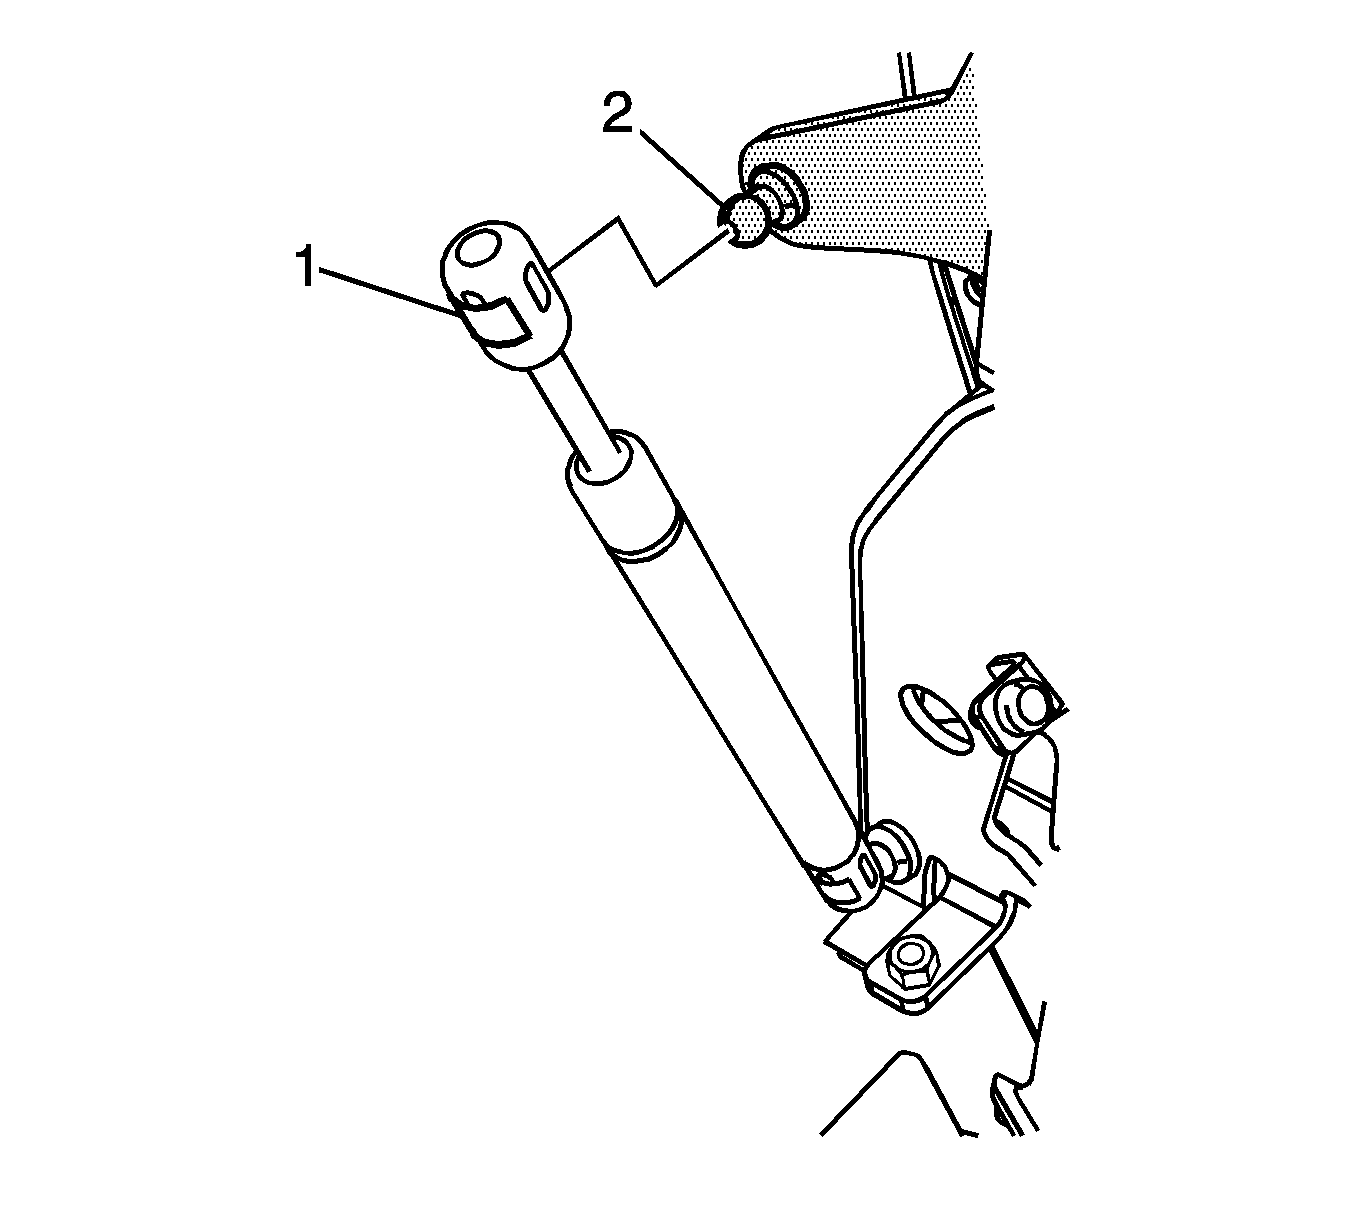
Notice: Apply pressure only at the end of the strut actuator that you are removing or attaching. DO NOT apply pressure to the middle of the rod because damage or bending will result.
Disassembly Procedure
- Ensure that the ignition switch is in the OFF position and that the folding top has not been operated under power for at least 6 minutes.
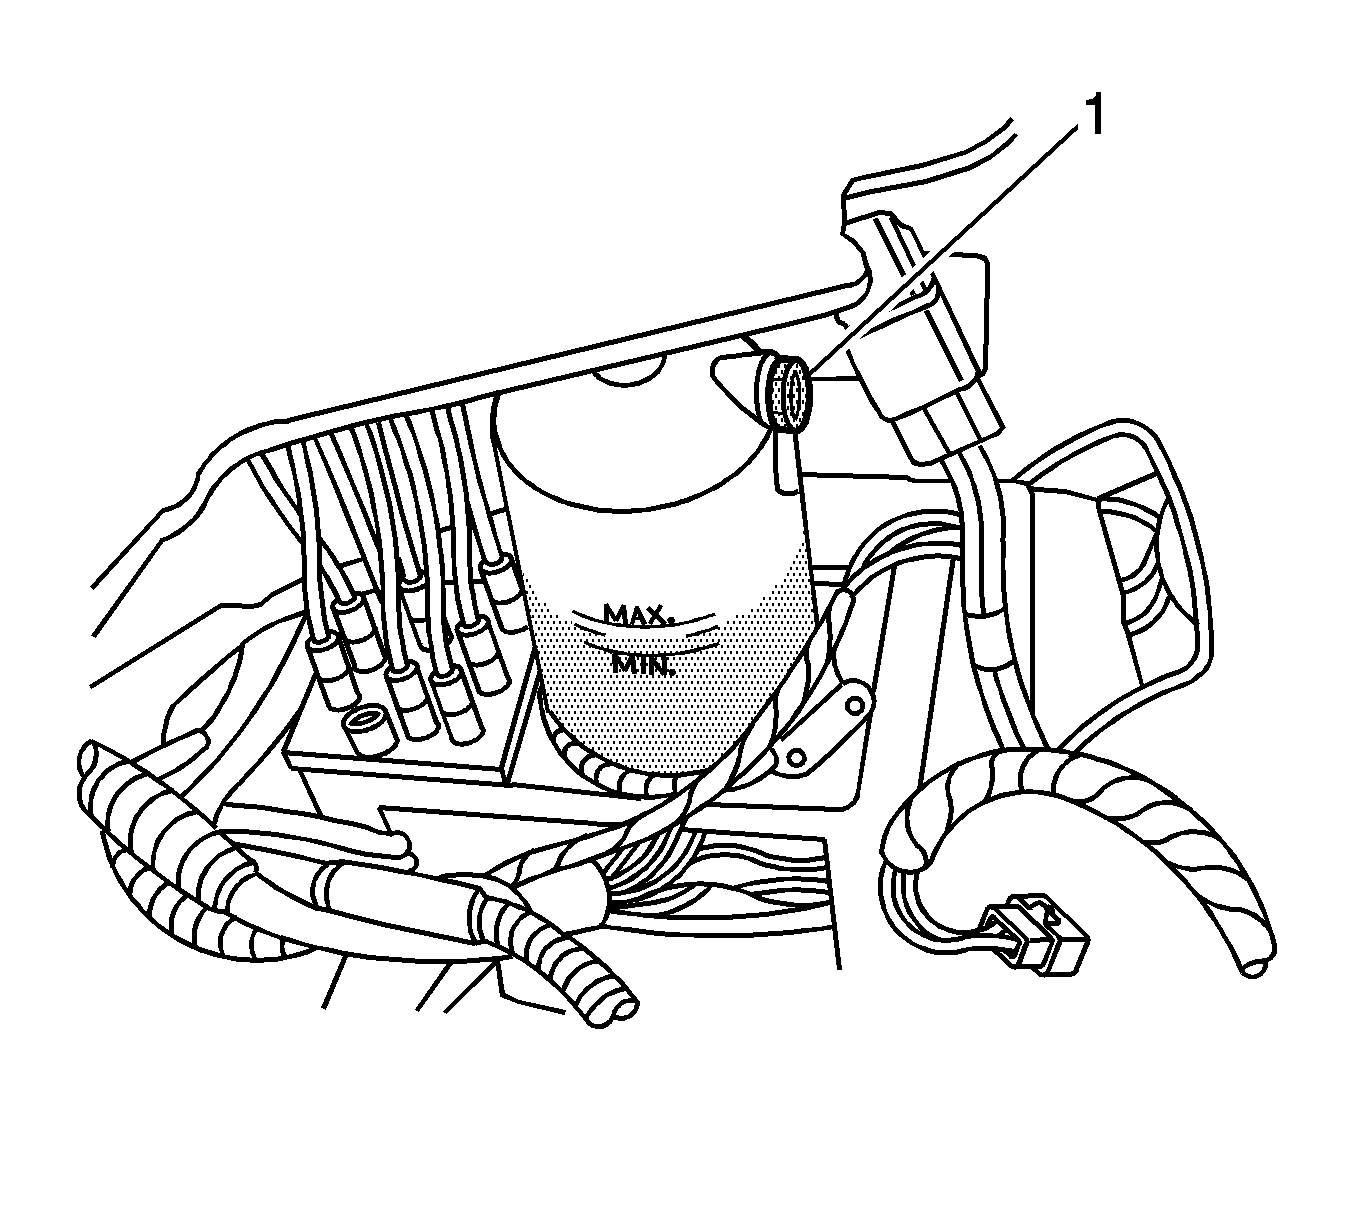
- Remove the reservoir filler plug (1).
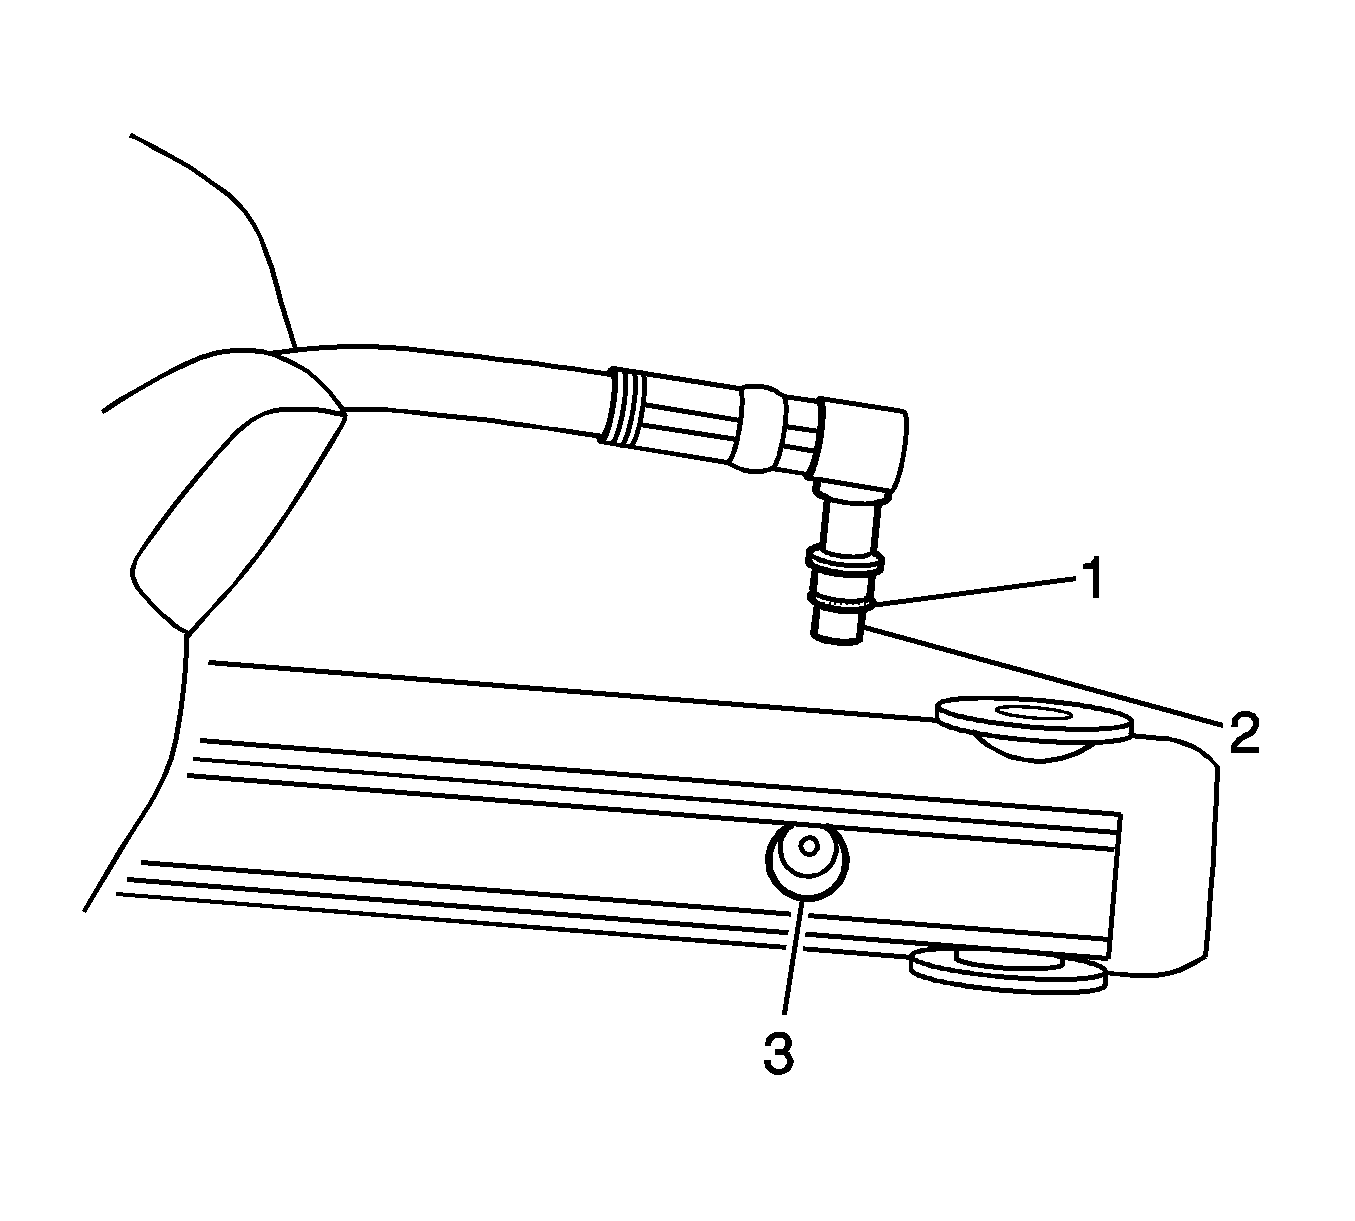
- Using a small flat-bladed tool, release the retainer clip (1) from one of the cylinder hoses.
- Remove the cylinder hose retainer clip (1).
- Remove the cylinder hose (1). Use a clean shop towel to control any hydraulic fluid leakage.
- Remove the cylinder hose O-ring (1).
- Using a small flat-bladed tool, release one of the port plug retainer clips from the replacement cylinder.
- Remove the retainer clips from the replacement cylinder.
- Remove the port plug from the replacement cylinder.
- Remove the port plug O-ring from the replacement cylinder.
Notice: Refer to Cylinder Hoses Notice in the Preface section.
Important: Once the cylinder hose or the port plug has been removed, do NOT move the cylinder rod. This will cause fluid to squirt out of the ports.
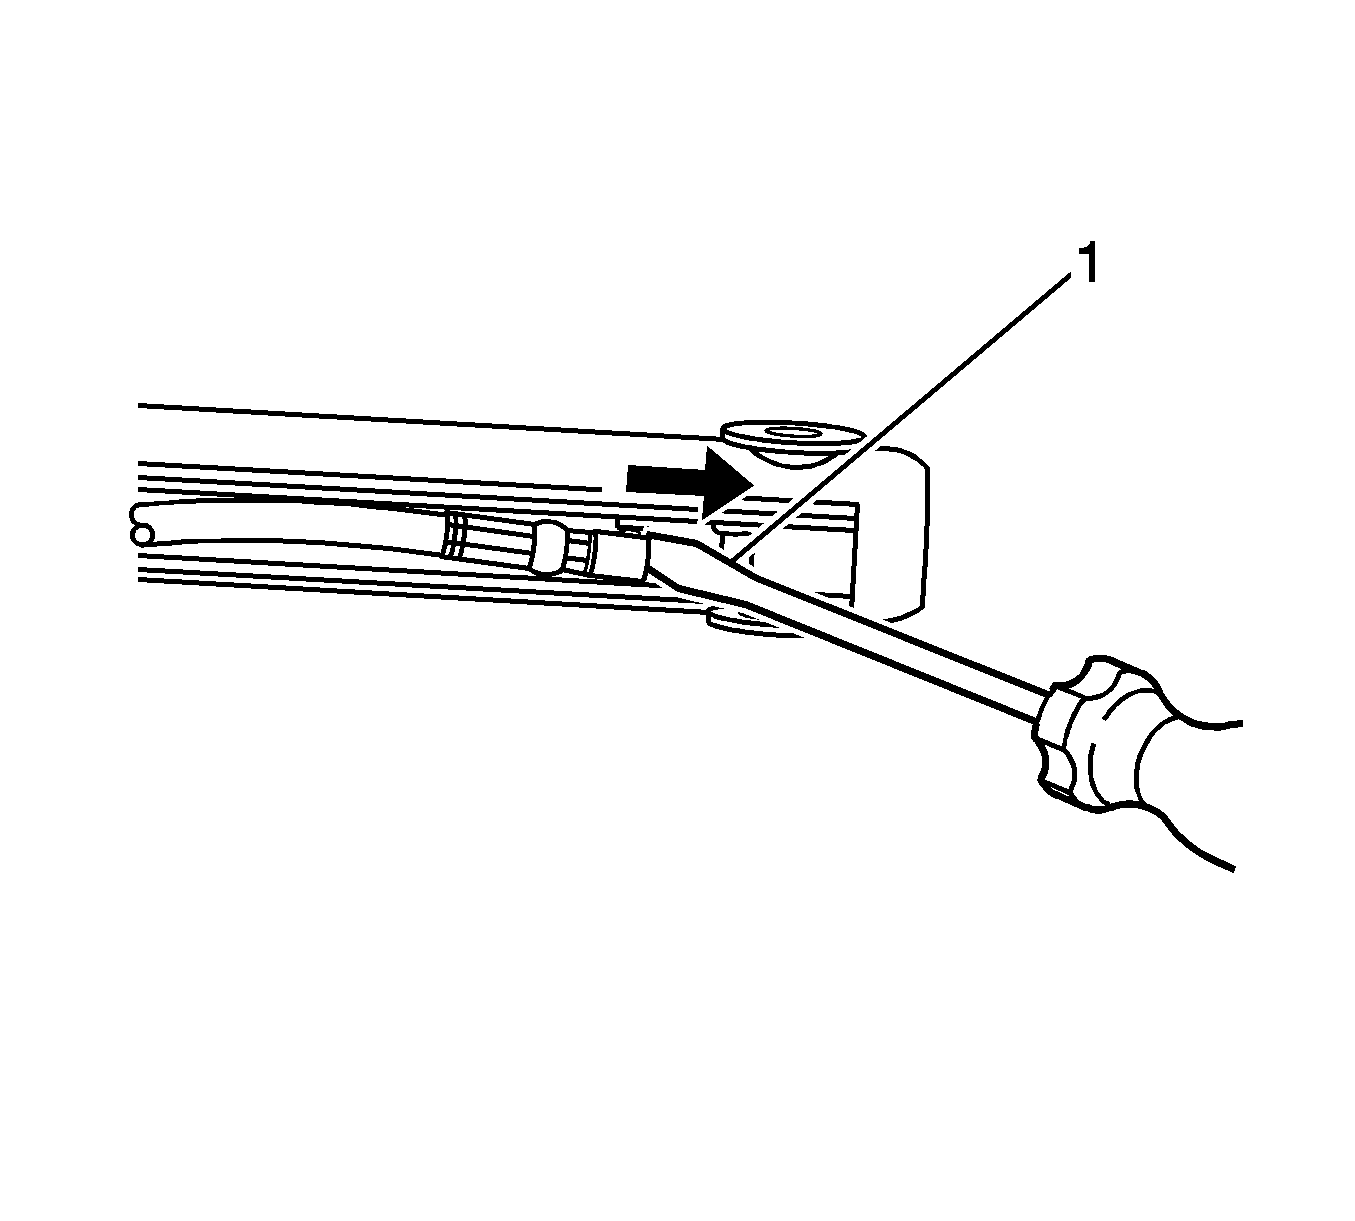
Important: Remove the 2 hose connectors one at a time. This procedure is repeated later for the second hose.
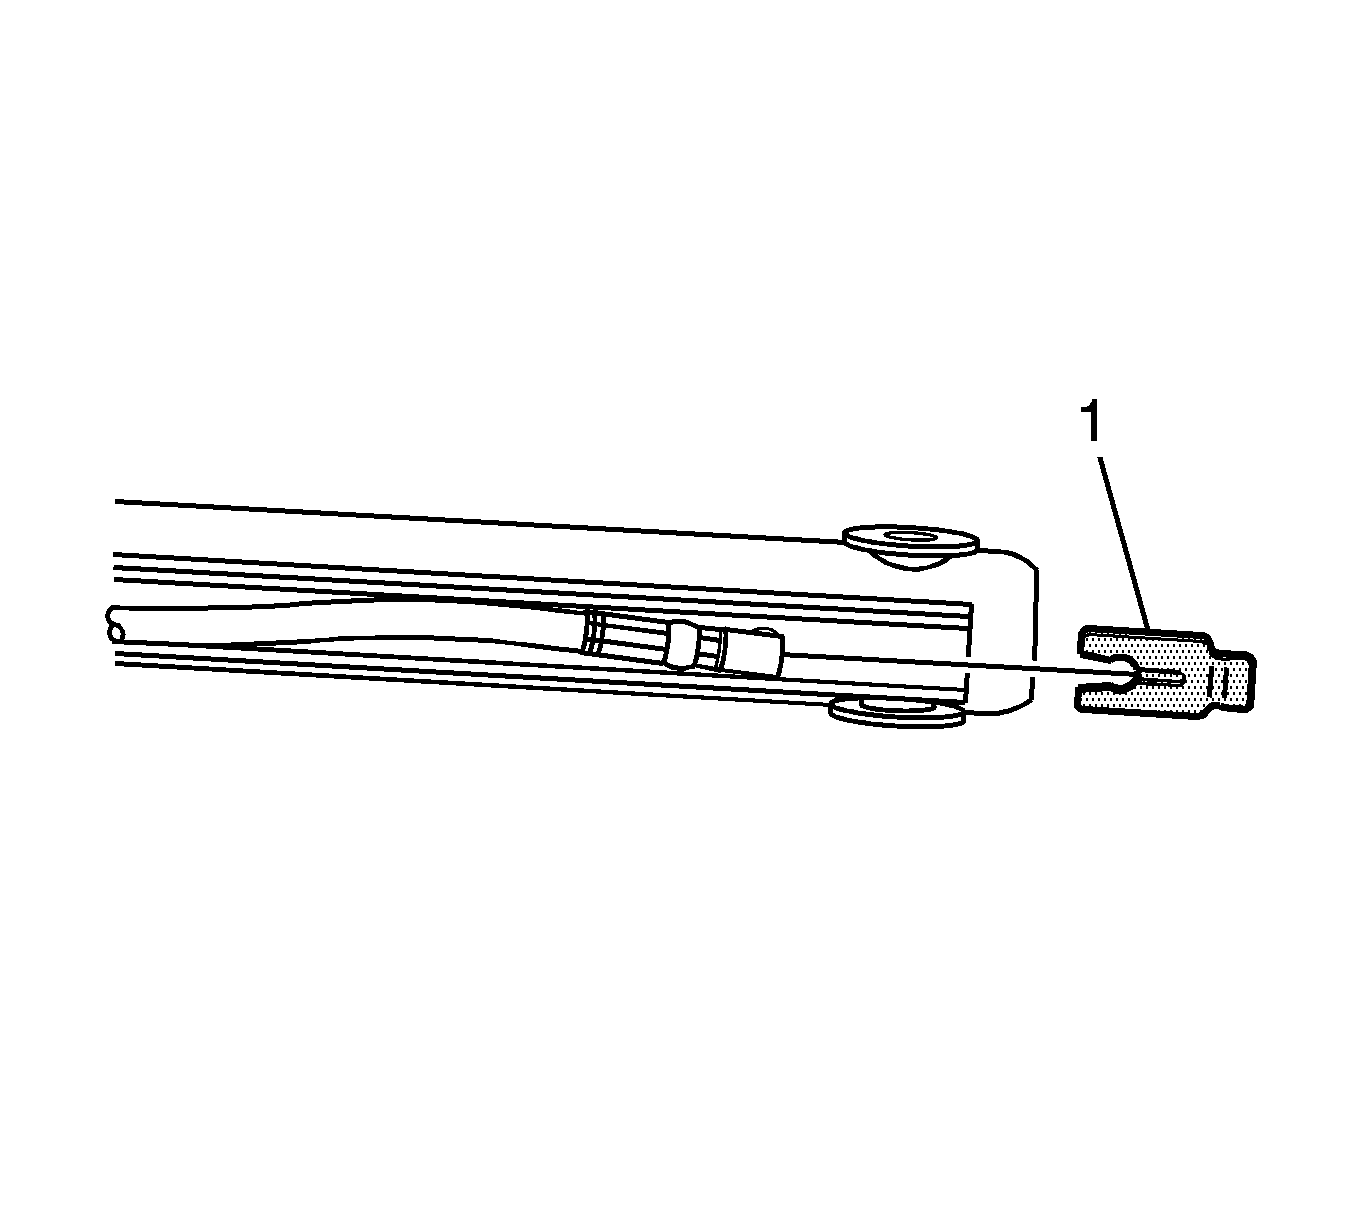
Important: Before disconnecting the cylinder hoses, have the replacement cylinder ready.
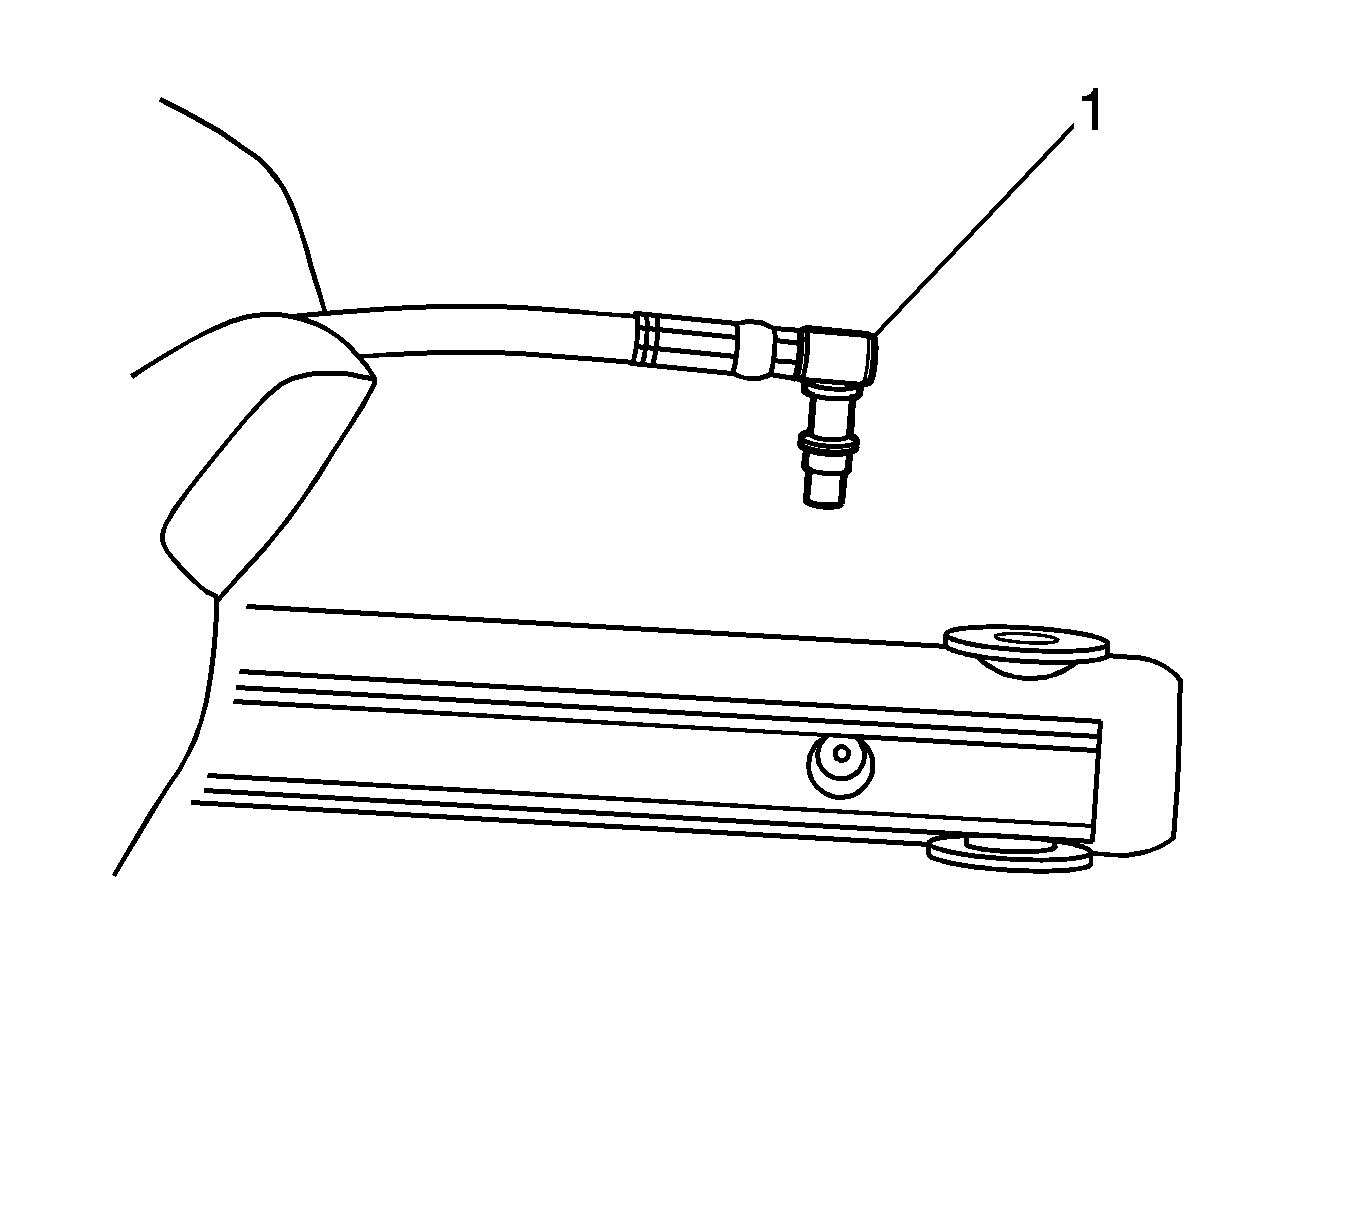
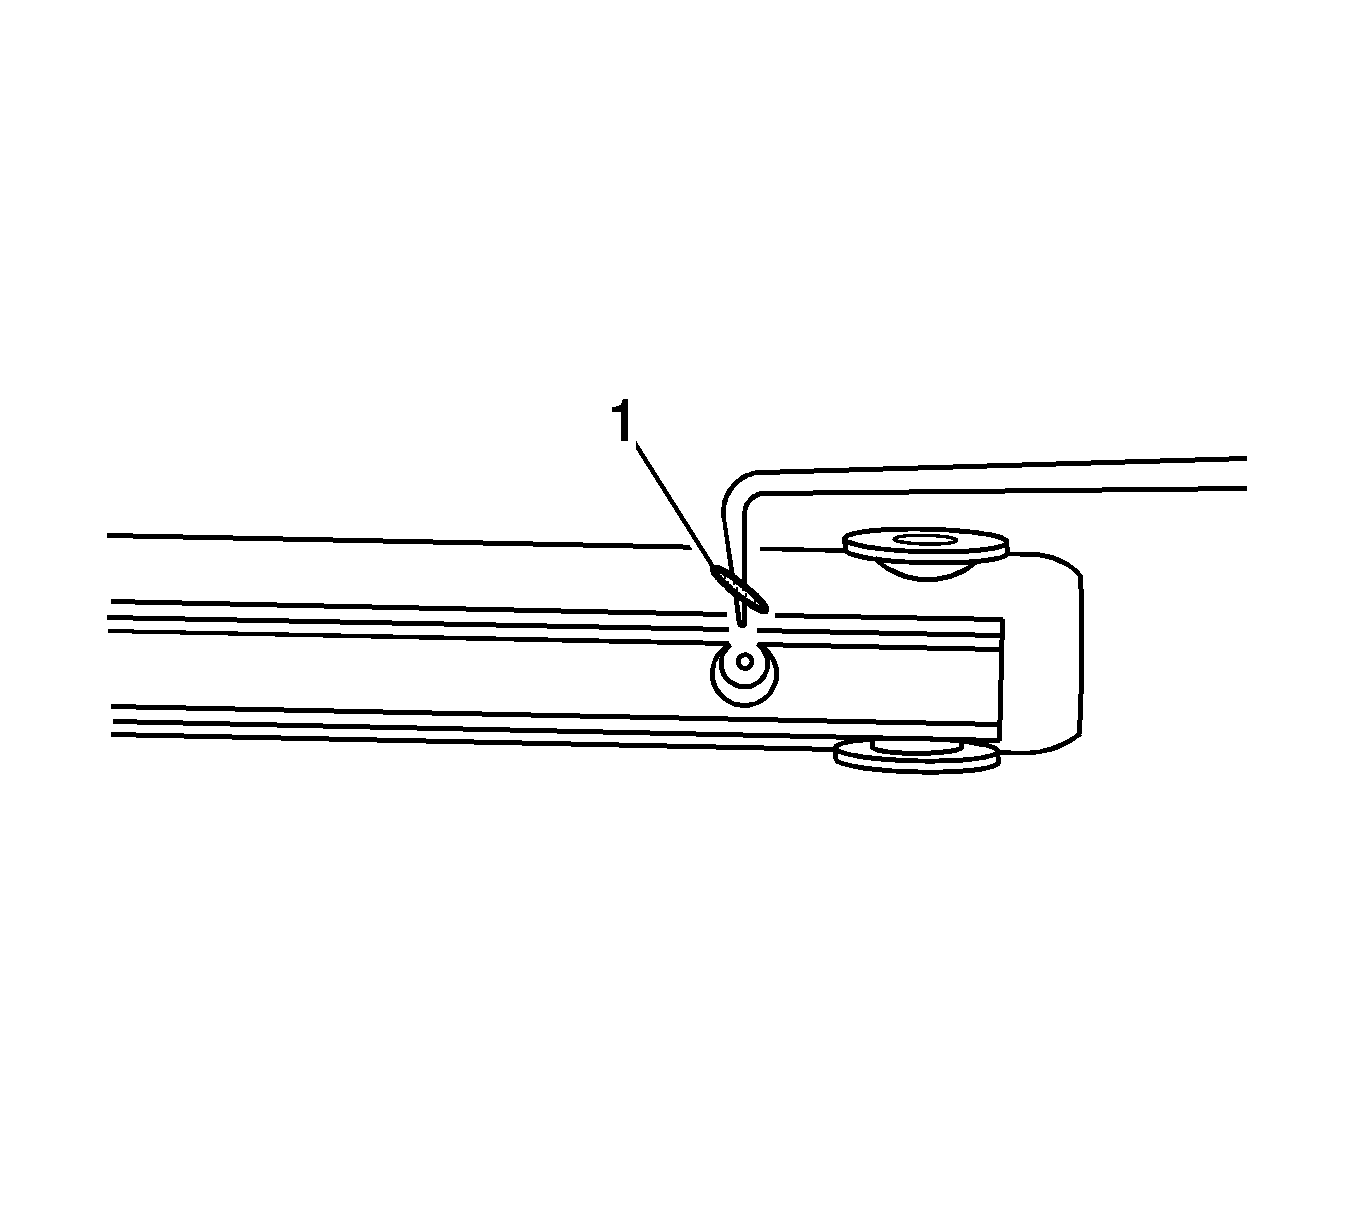
Important: Replacement cylinders are filled with fluid. Do NOT remove the port plug from the cylinder until you are ready to connect the cylinder hose.
Assembly Procedure
- Install a new O-ring (1) onto the cylinder hose (2).
- Install the hose into the cylinder port (3). Press down on the hose until the hose is fully seated in the cylinder.
- Install a new cylinder hose retainer clip (1). Inspect the retainer clip to ensure that the clip is fully seated around the hose (2).
- Repeat this procedure for the other hose.
- Install the reservoir filler plug (1).

Installation Procedure
- Position the cylinder (1) to the vehicle.
- Slide the cylinder on to the mounting pin.
- Install the spring clip (1) to the cylinder mounting pin.
- Apply LOCTITE™ Blue, GM P/N 12345382 (Canadian P/N 10953489) or equivalent to the bolts.
- Install the shoulder bolt (2) to the folding top panel link.
- Tighten the bolts (1) to the hold-down link.
- Install the cylinder retainer plate (1) into the hydraulic cylinder (3).
- Push the retainer plate and the cylinder towards the front of the vehicle until the pivot pin on the retainer plate is aligned with the hole in the folding top support bracket.
- Apply LOCTITE™ Blue, GM P/N 12345382 (Canadian P/N 10953489) or equivalent to the bolts.
- Install the bolts (1) to the cylinder retainer plate.
- Install the retainer straps (2).
- Install the pushpin retainers (1).
- Position the folding top as shown in the illustration.
- Install the strut actuator (1) to the ball joint on the lower pivot link bracket (2).
- Manually close the folding top. Refer to Folding Top Manual Operation .
- Remove the protective covering.
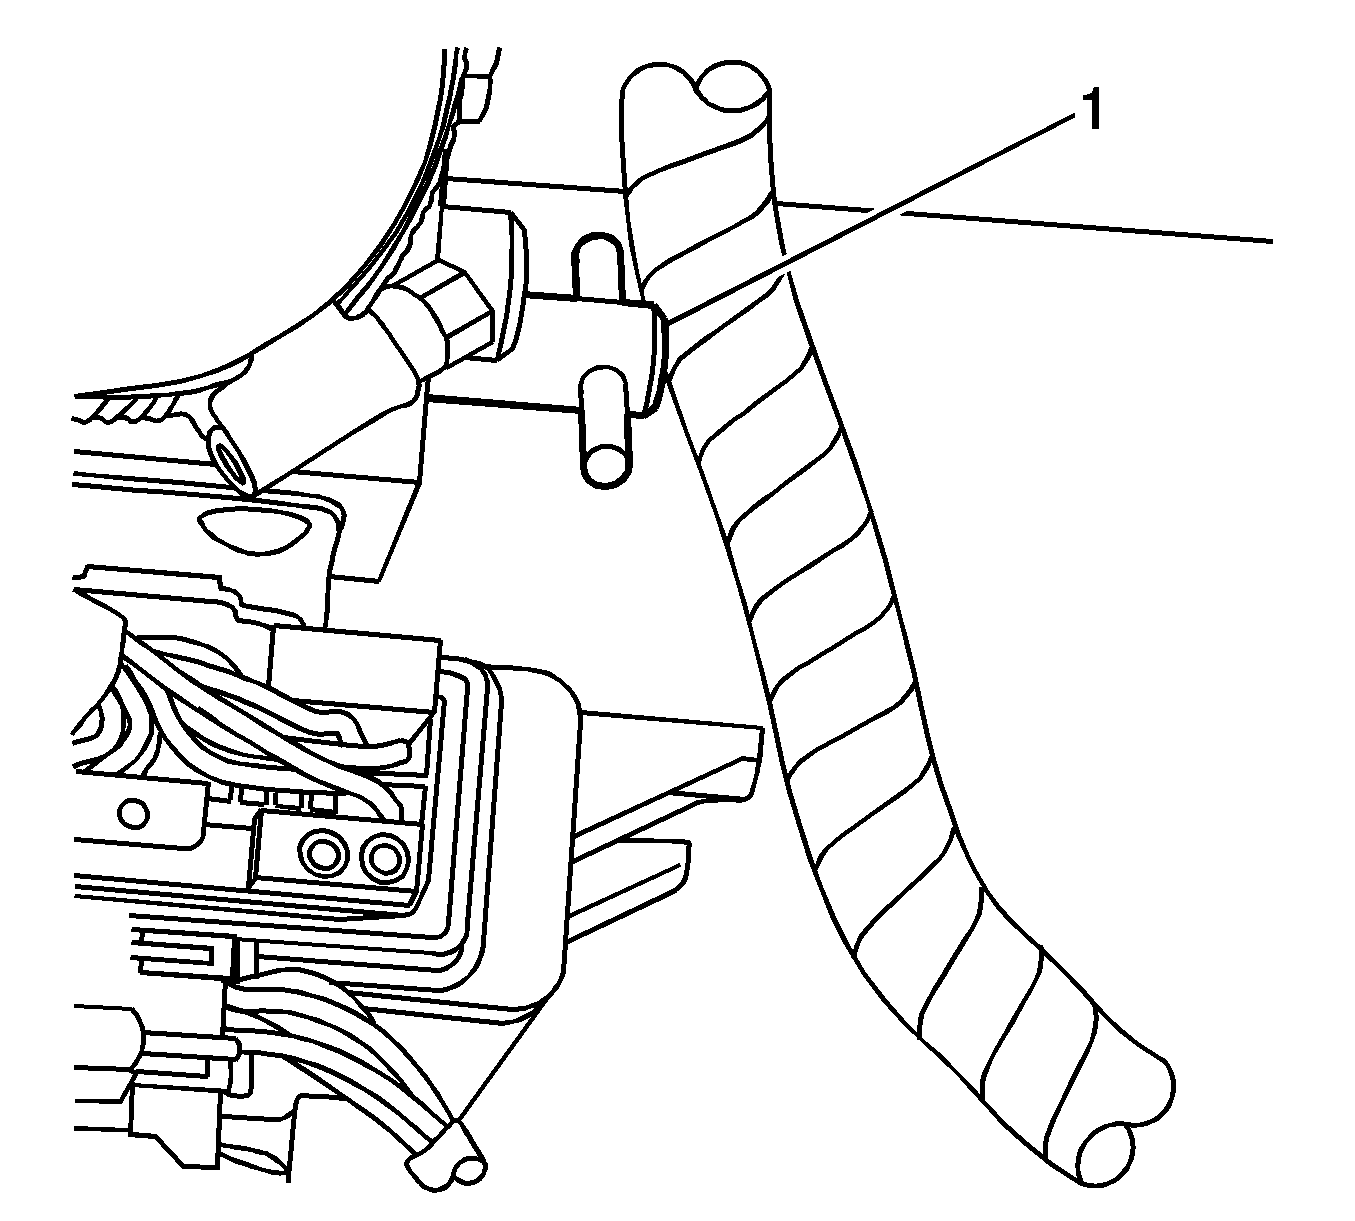
- Turn the pump bypass valve (1) clockwise until the valve stops.
- Raise the rear compartment partition (1).
- Install the support and the carpet over the hydraulic pump.
- Close the rear compartment.
- Bleed the hydraulic system. Refer to Folding Top Hydraulic System Bleeding Procedure .
- Inspect the hydraulic system for fluid leaks.
- Inspect the fluid level and add fluid as needed. Refer to Folding Top Fluid Addition .
- Inspect the folding top for proper operation. Refer to Power Folding Top Description and Operation .


Notice: Refer to Fastener Notice in the Preface section.
Tighten
Tighten the bolt to 36 N·m (27 lb ft).
Tighten
Tighten the bolts to 7 N·m
(62 lb in).


Tighten
Tighten the bolts to 7 N·m (62 lb in).


The distance (A) from the windshield header to the leading edge of the folding top panel is 430 mm (17 in).

Notice: Apply pressure only at the end of the strut actuator that you are removing or attaching. DO NOT apply pressure to the middle of the rod because damage or bending will result.
