For 1990-2009 cars only
Removal Procedure
- Raise and support the vehicle. Refer to Lifting and Jacking the Vehicle .
- Remove the left front wheel. Refer to Tire and Wheel Removal and Installation .
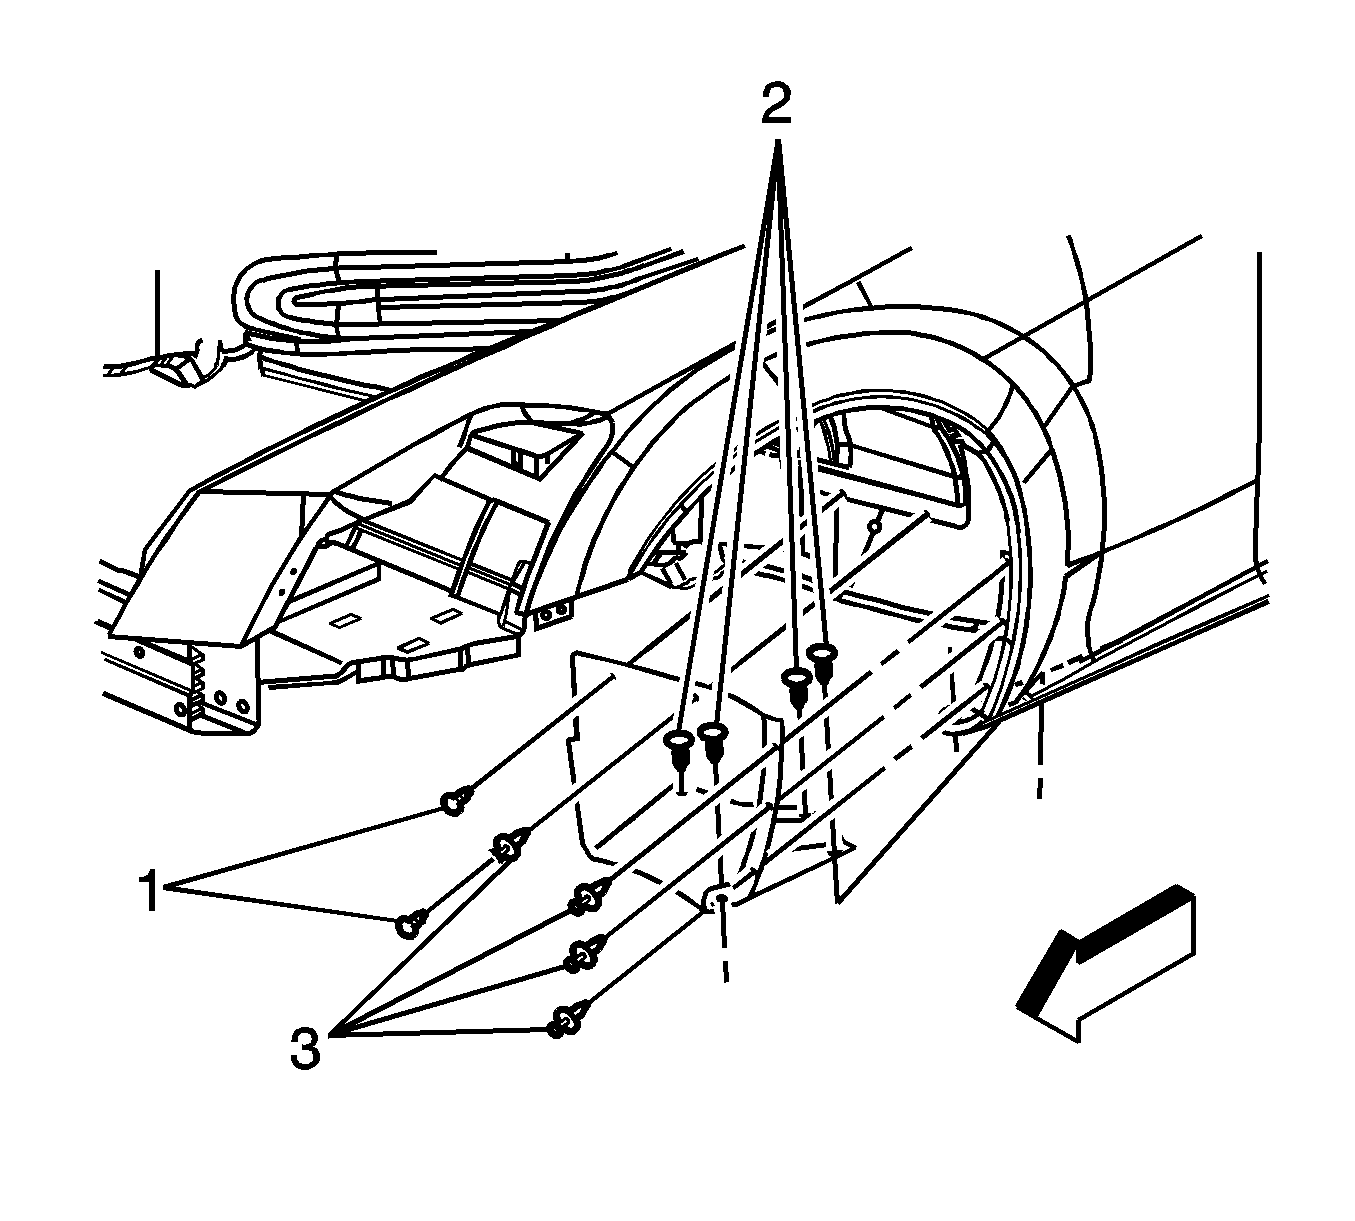
- Remove the left front lower wheelhouse splash shield fasteners (1, 2, 3) from the rear of the wheelhouse. Note the position of the fender for installation alignment.
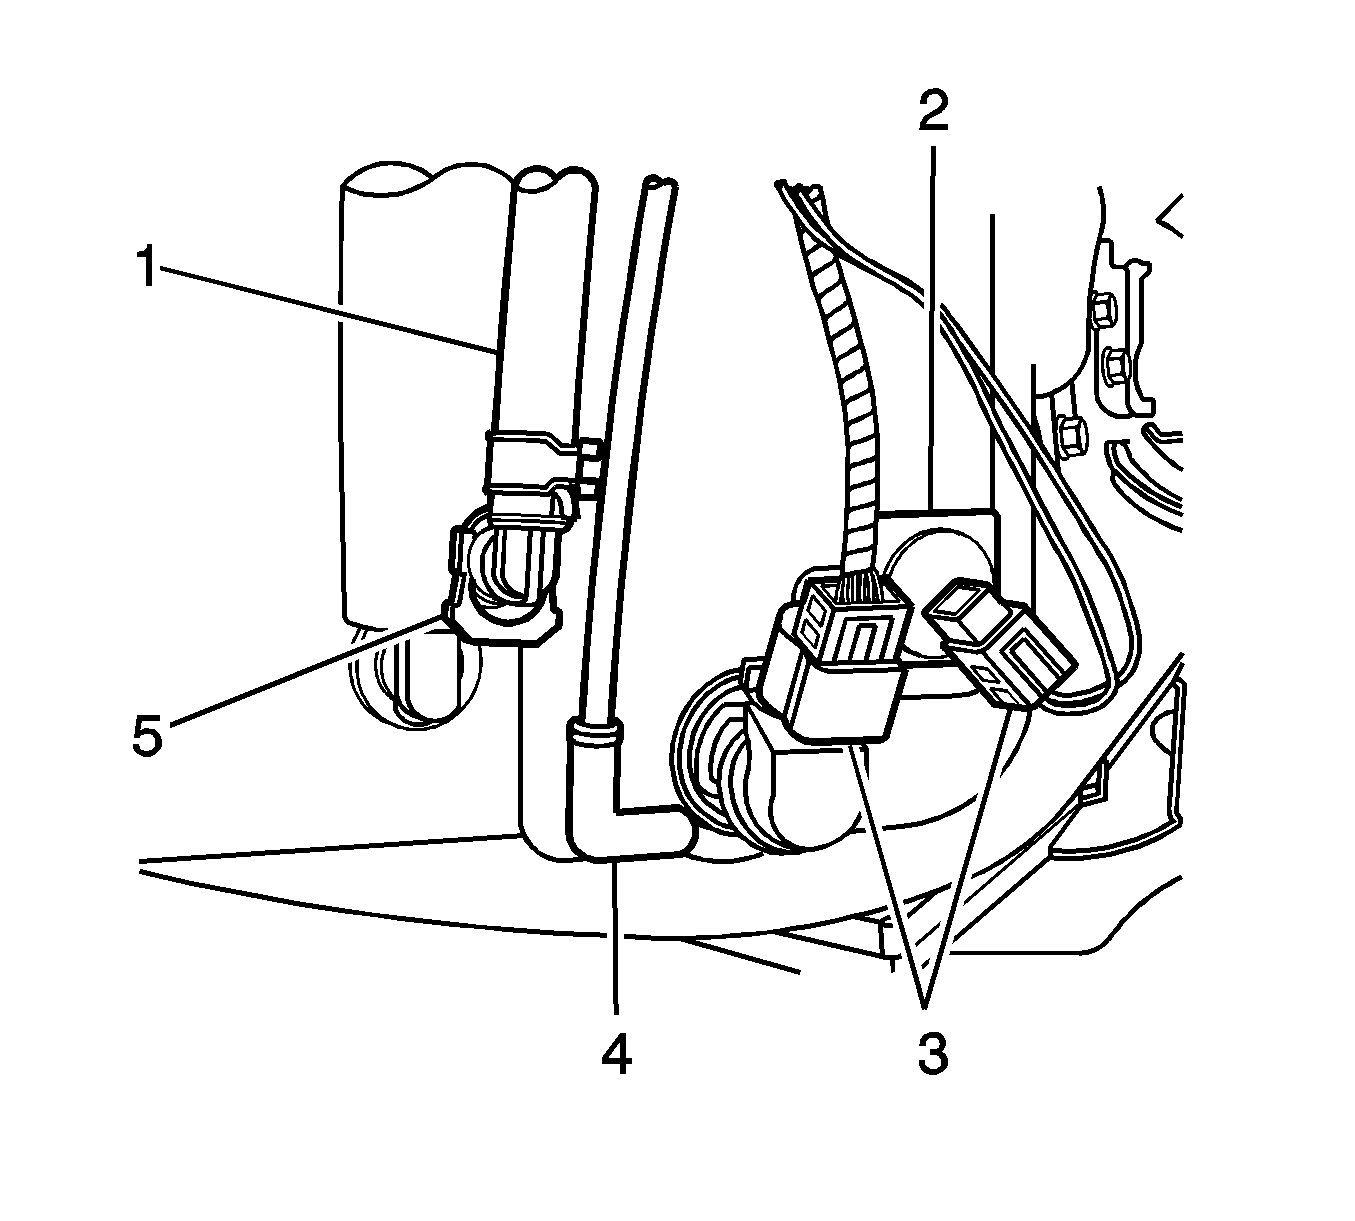
- Disconnect the output hose (4) from the lower mounted windshield washer pump. Drain the contents into a suitable container.
- Disconnect the headlamp washer pump output hose (1) by disengaging the slide lock (5), and pulling the hose off.
- Disconnect the electrical connector from the headlamp washer pump.
- Twist the washer pump out of the washer solvent container, and remove.
Important: Ensure that the hoist is clear of the left front fender, to allow the lower fender to be moved away from the body for clearance.


Installation Procedure
- Dampen the headlamp washer pump body rubber grommet.
- Insert the pump through the grommet until the pump is seated as originally oriented.
- Connect the electrical connector to the headlamp washer pump.
- Connect the headlamp washer pump output (1) hose to the pump. Secure the sliding lock (5).
- Connect the output hose (4) from the lower mounted windshield washer pump.
- Lower the vehicle.
- Refill the washer solvent container.
- Inspect the operation of the washer pumps and the level sensor, and for leaks.
- Align the fender, and install the fasteners (1, 2, 3) to the left front lower wheelhouse splash shield.
- Install the left front wheel. Refer to Tire and Wheel Removal and Installation .


