For 1990-2009 cars only
Removal Procedure
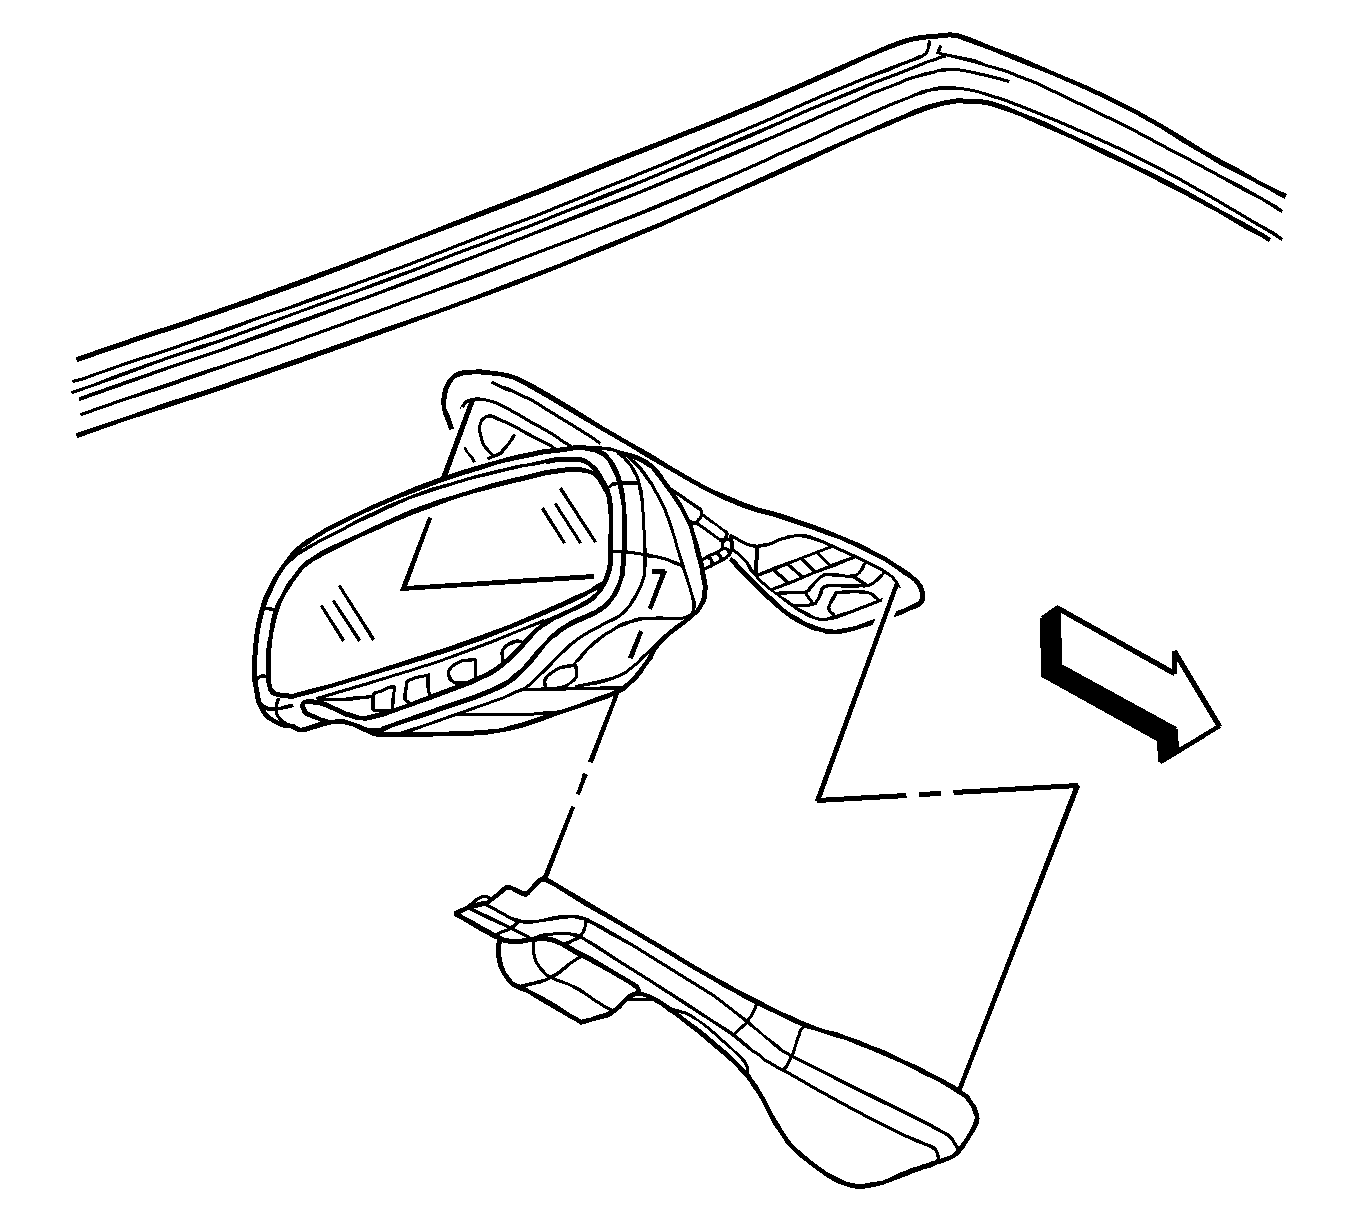
- Remove the outside moisture sensor. Refer to Windshield Outside Moisture Sensor Replacement .
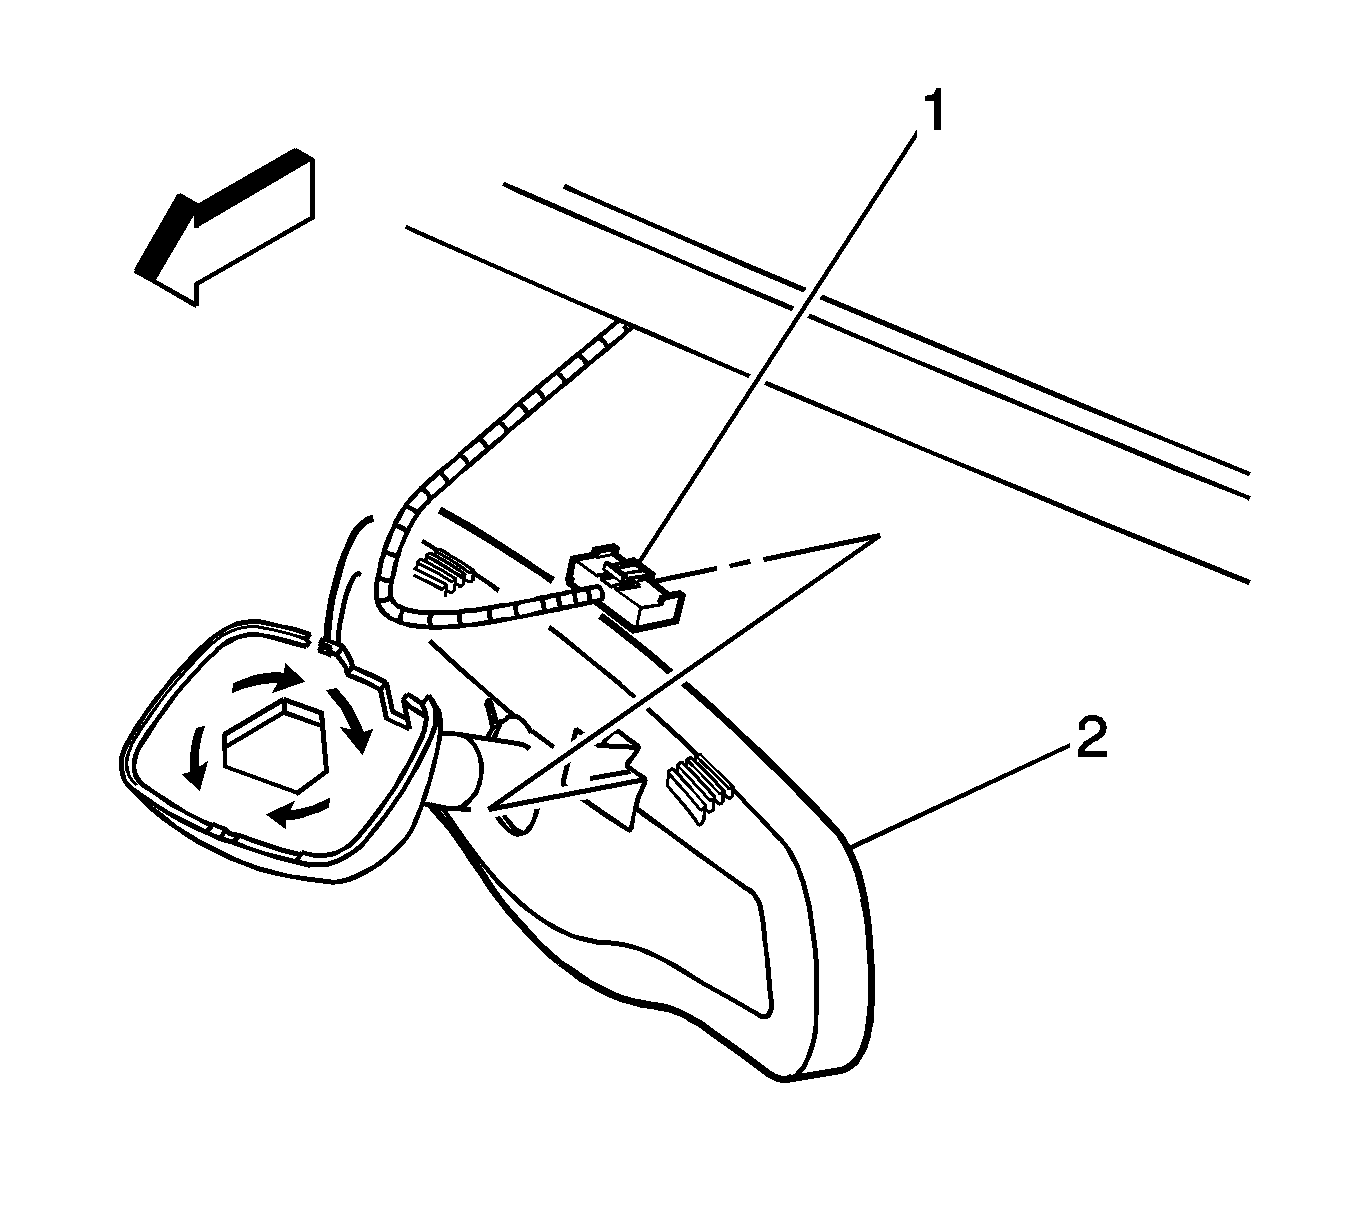
- Remove the electrical connector (1) from the back of the inside rearview mirror (2) .
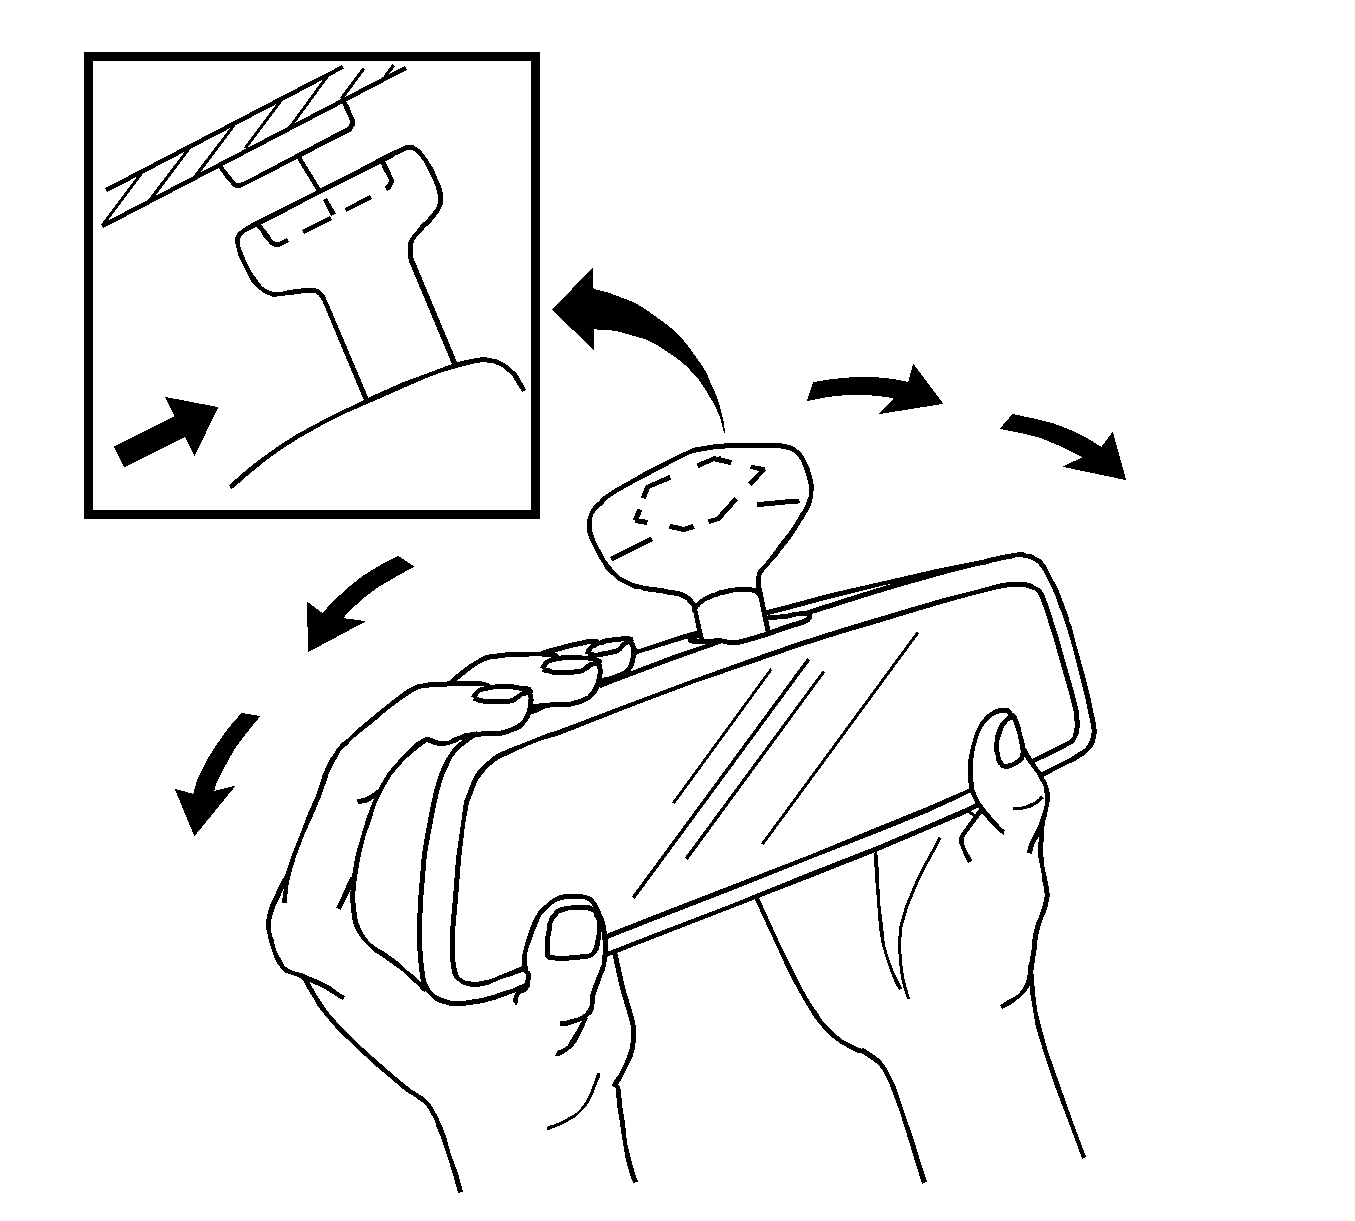
- Remove the inside rearview mirror by pushing inward and turning firmly clockwise.
- Remove the inside rearview mirror from the support.

Remove the outside moisture sensor cover, pulling rearward at the base of the cover, no tools are required.


Notice: Do NOT pull rearward on the rearview mirror while installing or removing the mirror. Damage to the support or to the windshield may occur.
An audible click is heard when the inside rearview mirror is releasing from the support.
Installation Procedure
- Perform the following steps to install the inside rearview mirror:
- Line up the back of the rearview mirror with the support on the windshield.
- Push firmly and turn countclockwise until an audible click is heard.
- Install the electrical connector (1) to the back of the inside rearview mirror (2).
- Remove the outside moisture sensor cover. Refer to Windshield Outside Moisture Sensor Replacement .
- Inspect the mirror for proper operation.

Notice: Do NOT pull rearward on the rearview mirror while installing or removing the mirror. Damage to the support or to the windshield may occur.


Install the outside moisture sensor wiring harness cover, by snapping in it place, no tools are required
