General Waterleak Guide

| Subject: | General Waterleak Guide |
| Models: | 2004-2007 Cadillac XLR |
This bulletin is being updated to add model years. Please discard Corporate Bulletin Number 05-08-57-005 (Section 08 - Body and Accessories).
Condition
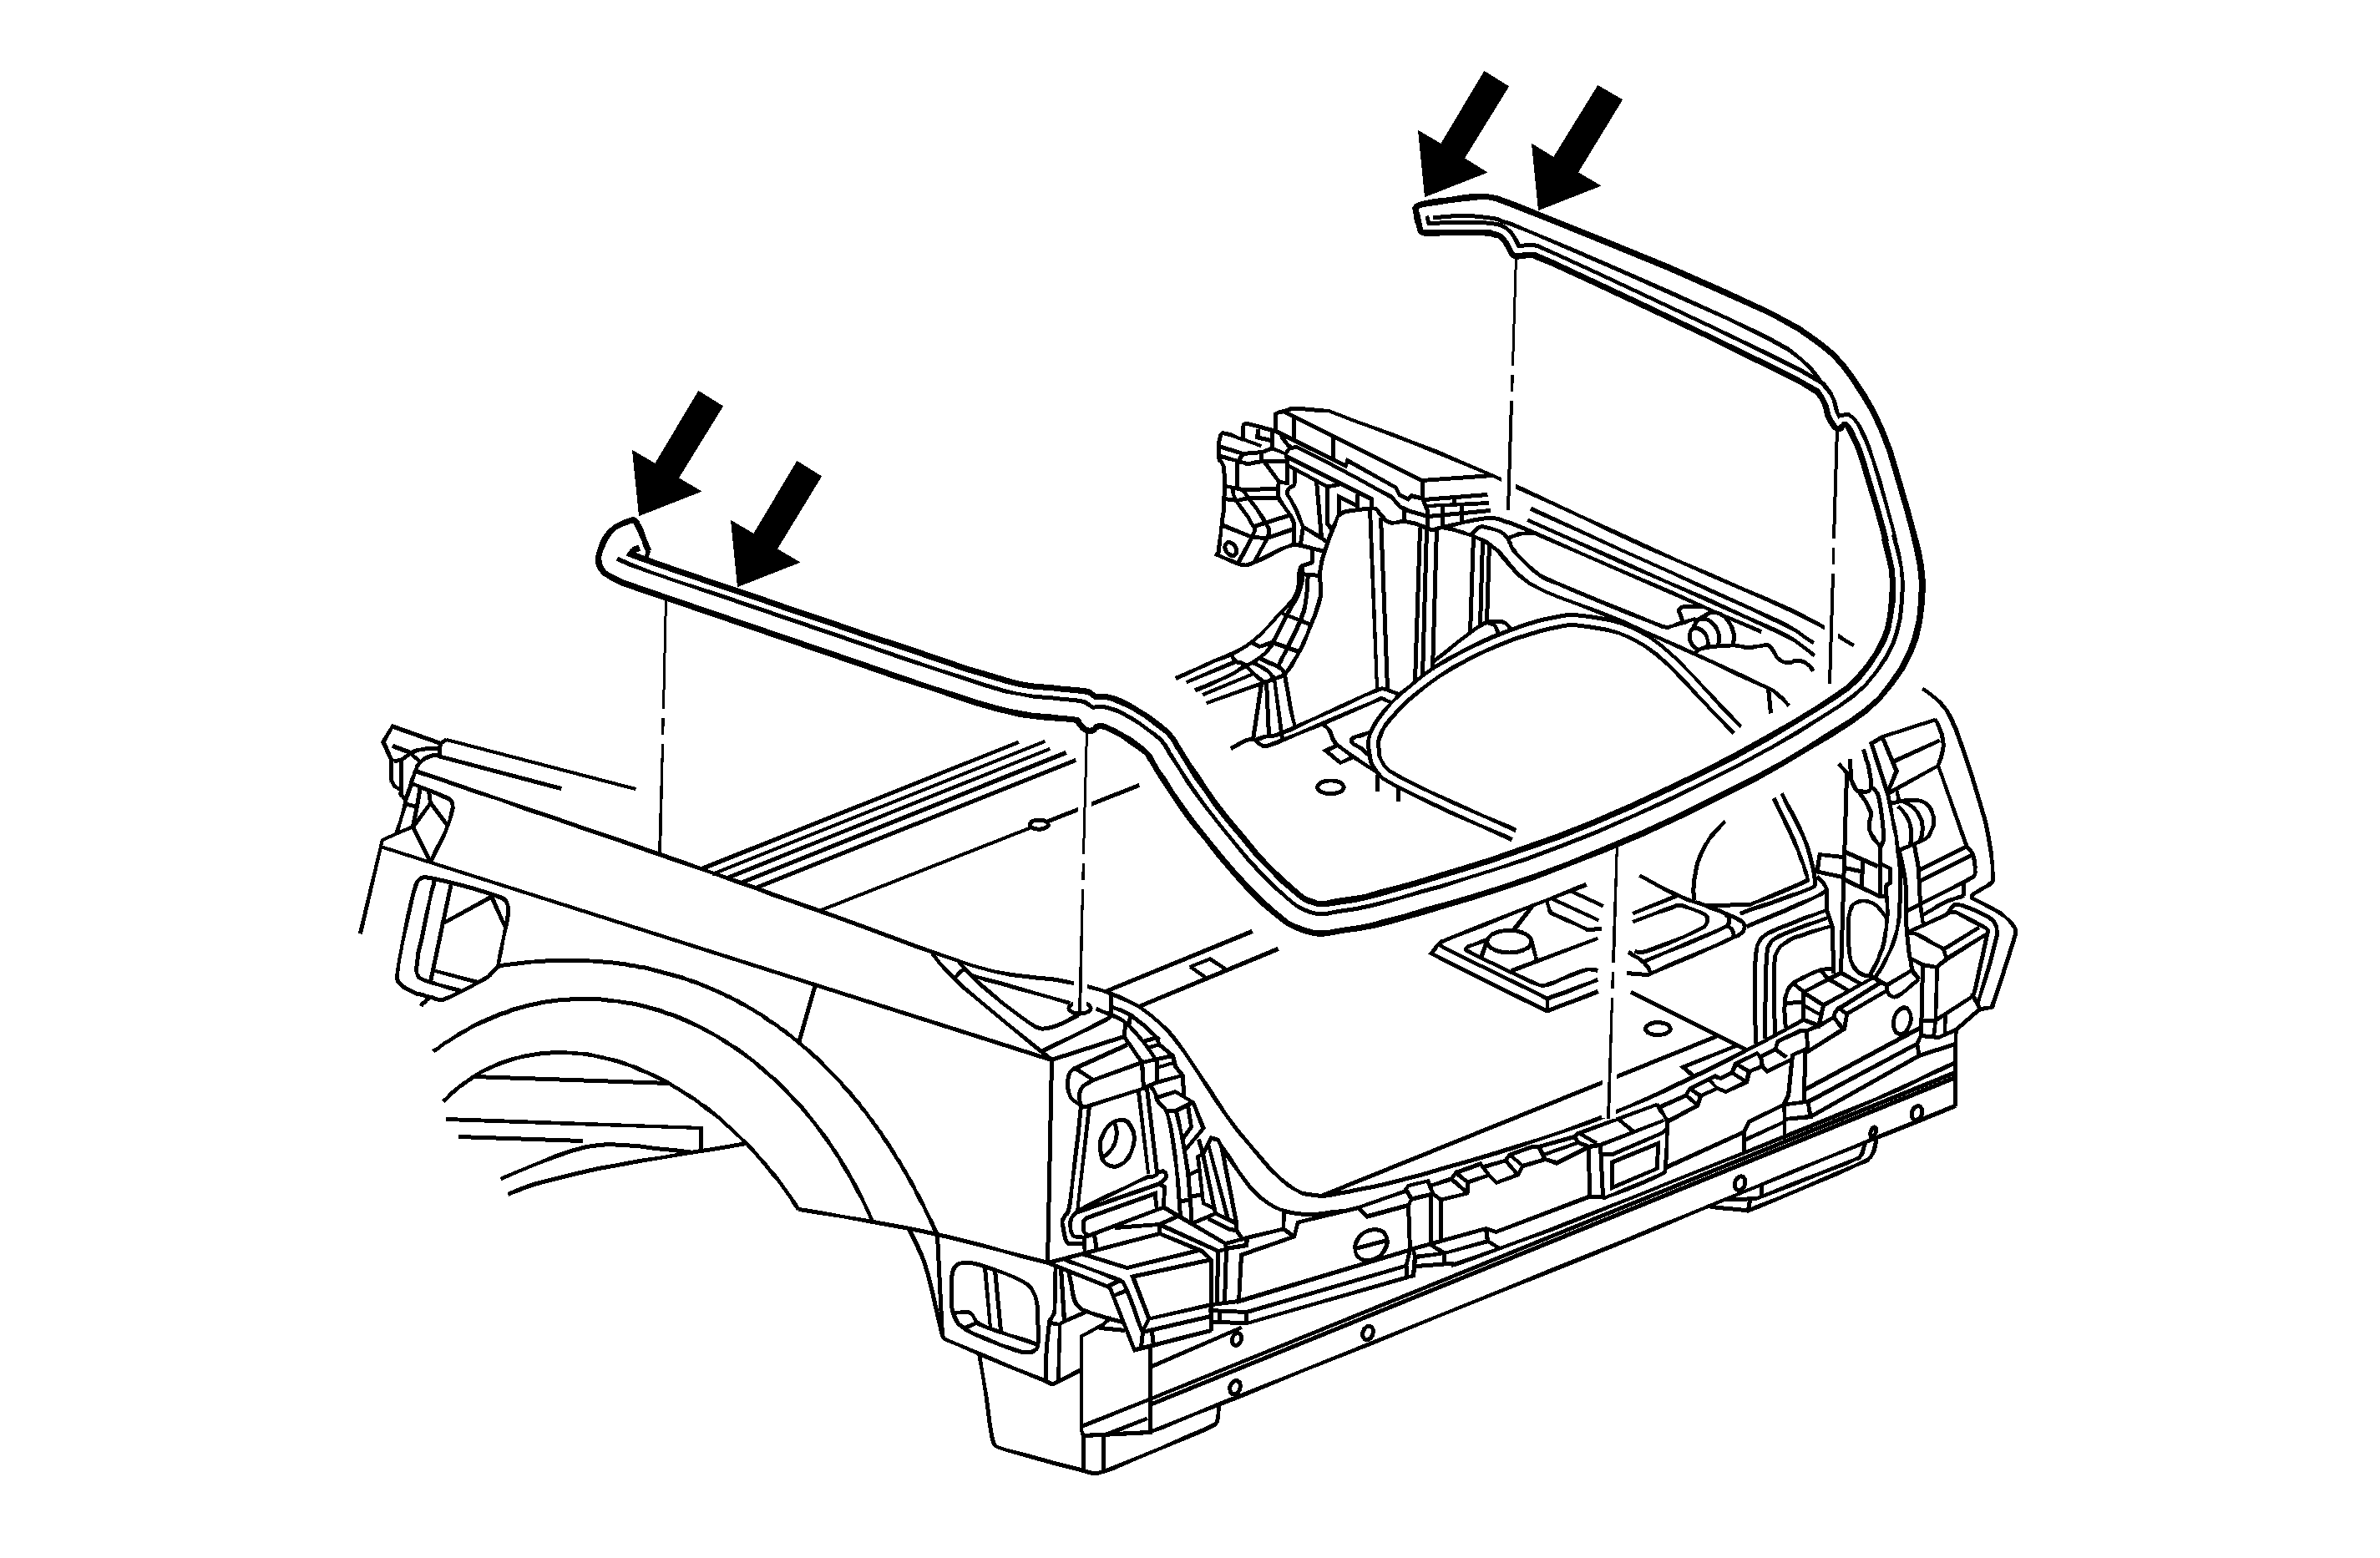
Water entry over the wheelhouse traced back to the joint between the rear compartment weatherstrip and quarter belt weatherstrip.
Correction

Separate the joints and lift each end 50-76 mm (2-3 in) enough to apply 3M™ Bedding and Glazing Compound, P/N 08509, inside the U-Channel of the weatherstrip. Refer to the illustration above. Apply enough compound so that it extends to both ends of the weatherstrip and will cause slight squeeze out when reinstalled. As you reinstall the weatherstrips, be sure the smaller weatherstrip is fully inserted into the opposite weatherstrip. Work the weatherstrips onto the flange and towards each other to ensure a tight joint when finished.
Condition
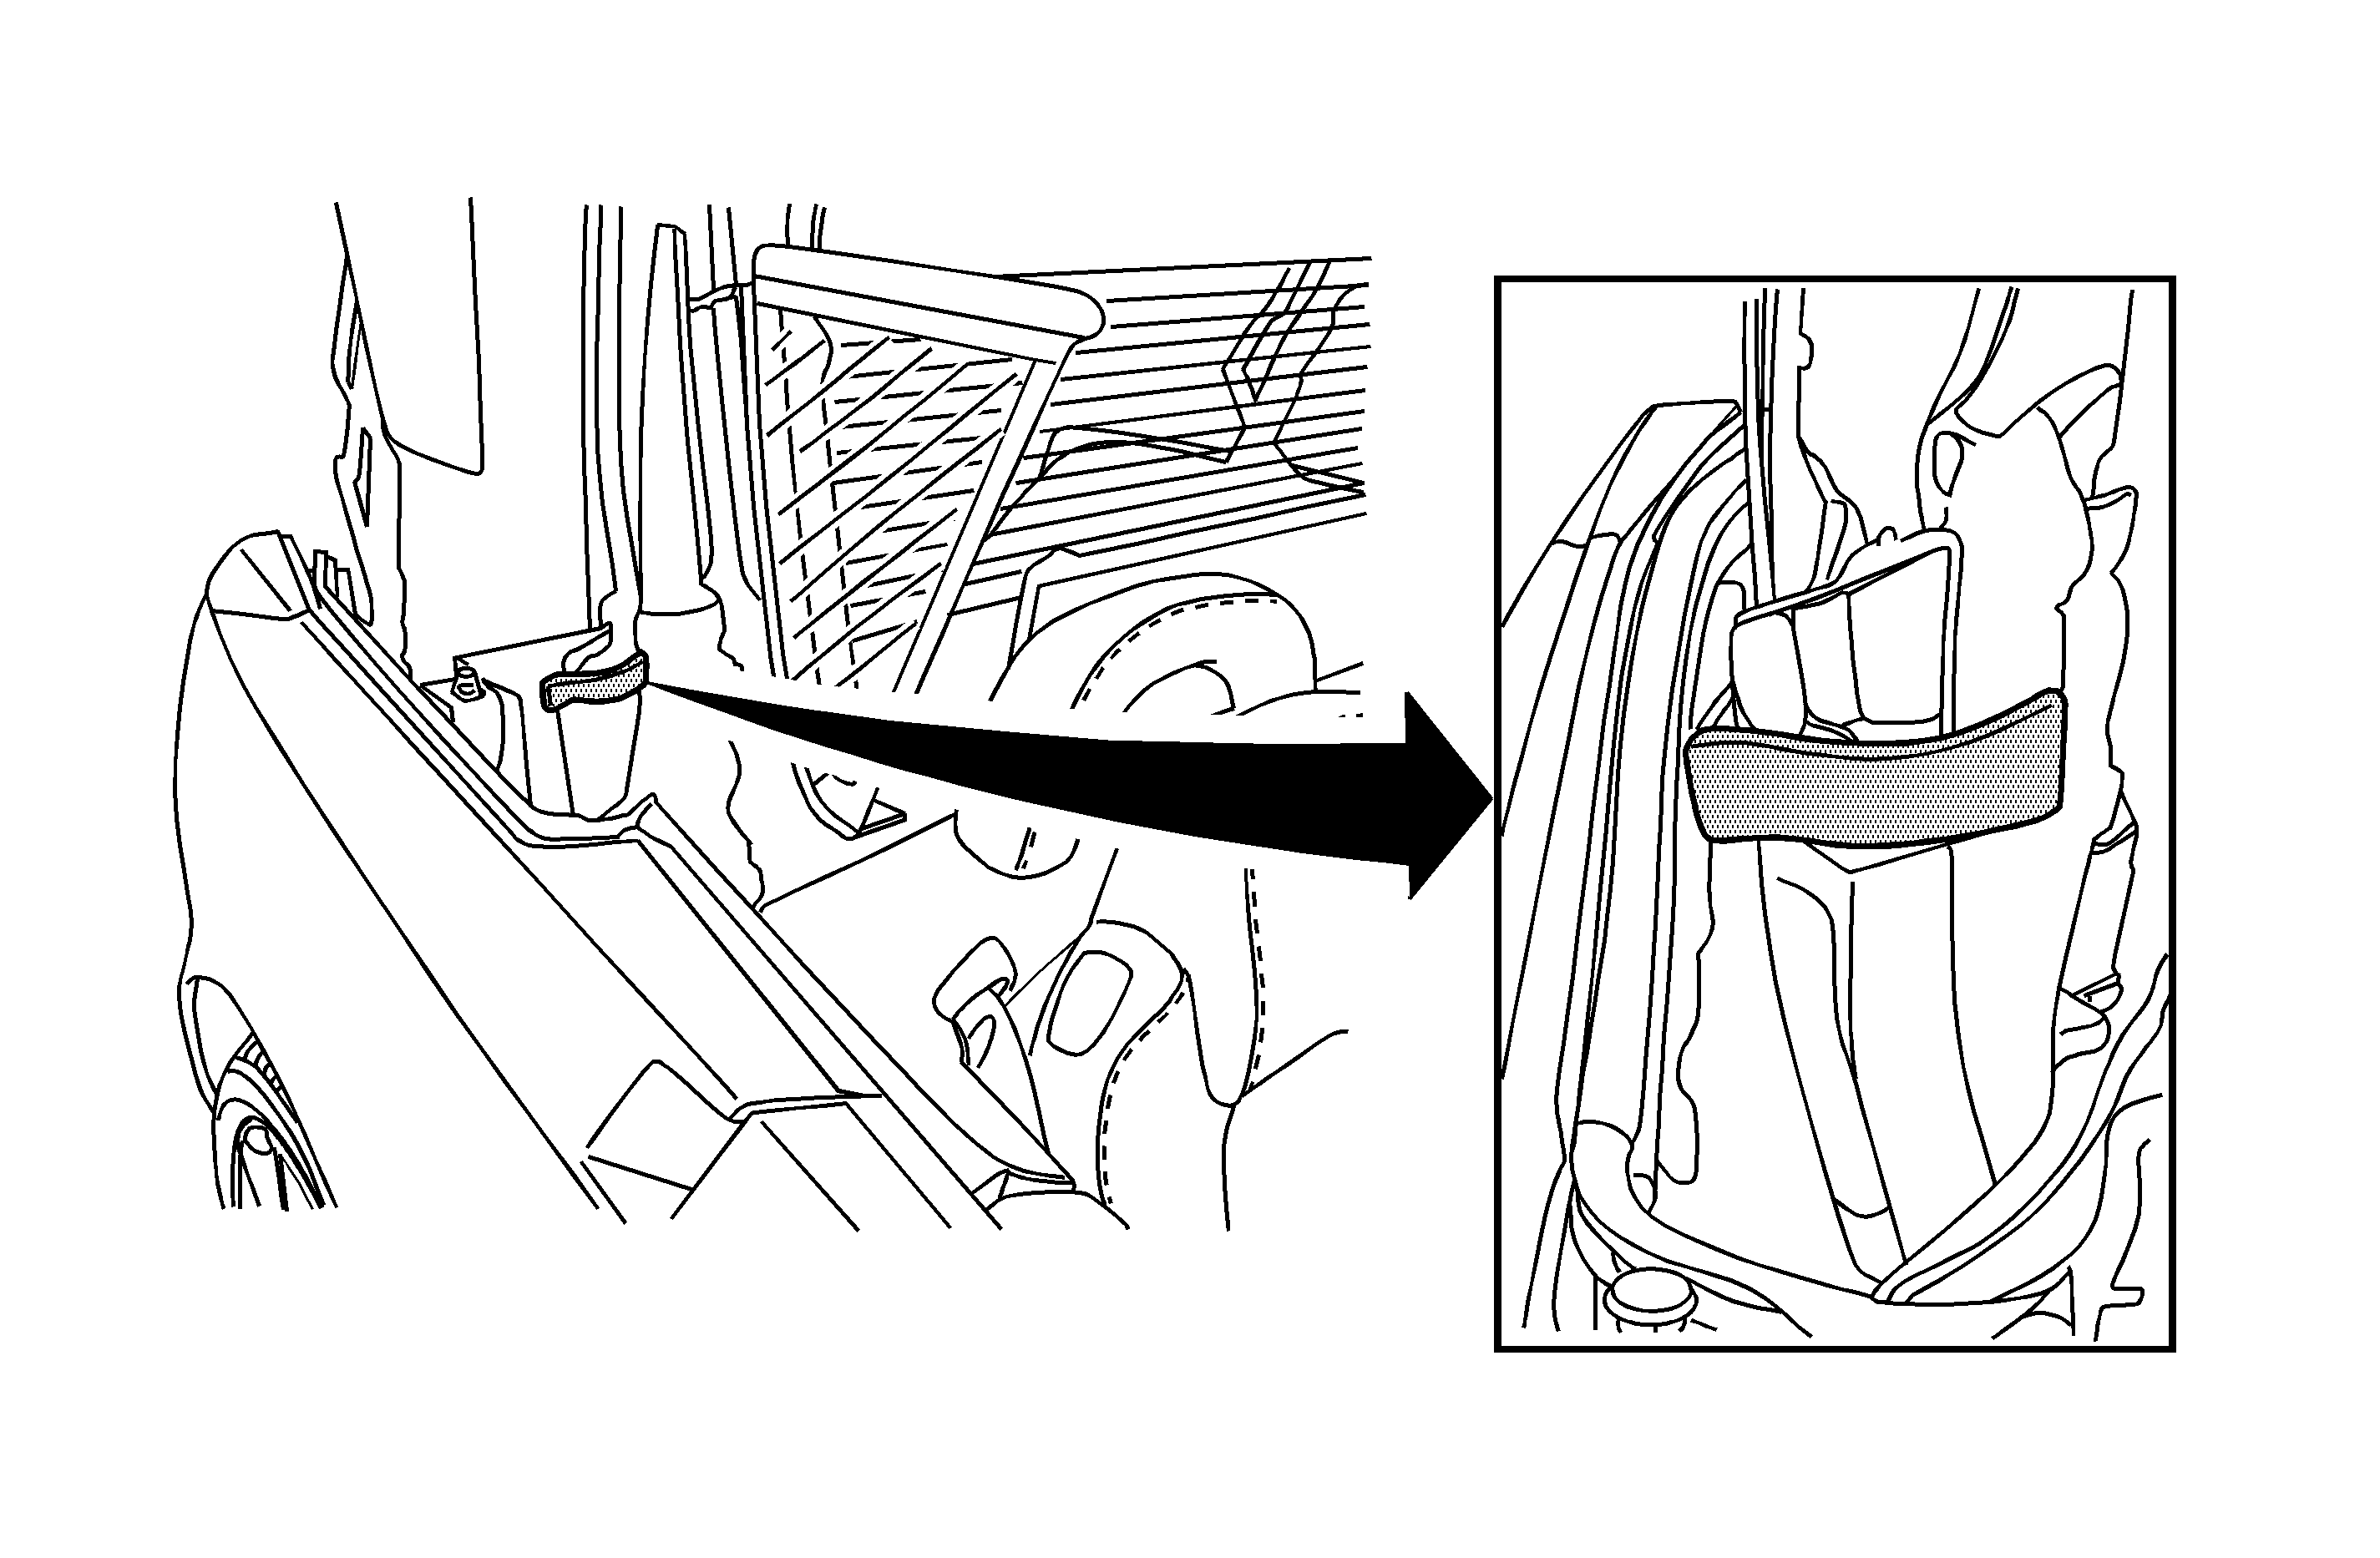
Water entry over wheel house and traced back to quarter belt cup. The cup drain is not large enough to allow water to drain adequately and floods over the dry side of the sealing system, which allows water to enter the trunk.
Correction

The cup joint is located at the rear of the quarter belt seal and it looks like a trough. This area is where the rear roof panel lower weatherstrip contacts when the roof is closed. The area just forward (toward front of car) of this cup is a "wet area" and to better manage the water into this wet area, a strip of foam must be added into the rear roof panel lower weatherstrip where it contacts the cup. Cut a strip of adhesive backed foam Kent Adhesive - Back Shim Stock, P/N P46475, 60 mm X 15 mm (2 1/4 in X 5/8 in). Clean the area of the rear roof panel lower weatherstrip where the foam will be added using de-natured alcohol before installing the foam strip to ensure adhesion. Refer to the illustration above.
Condition
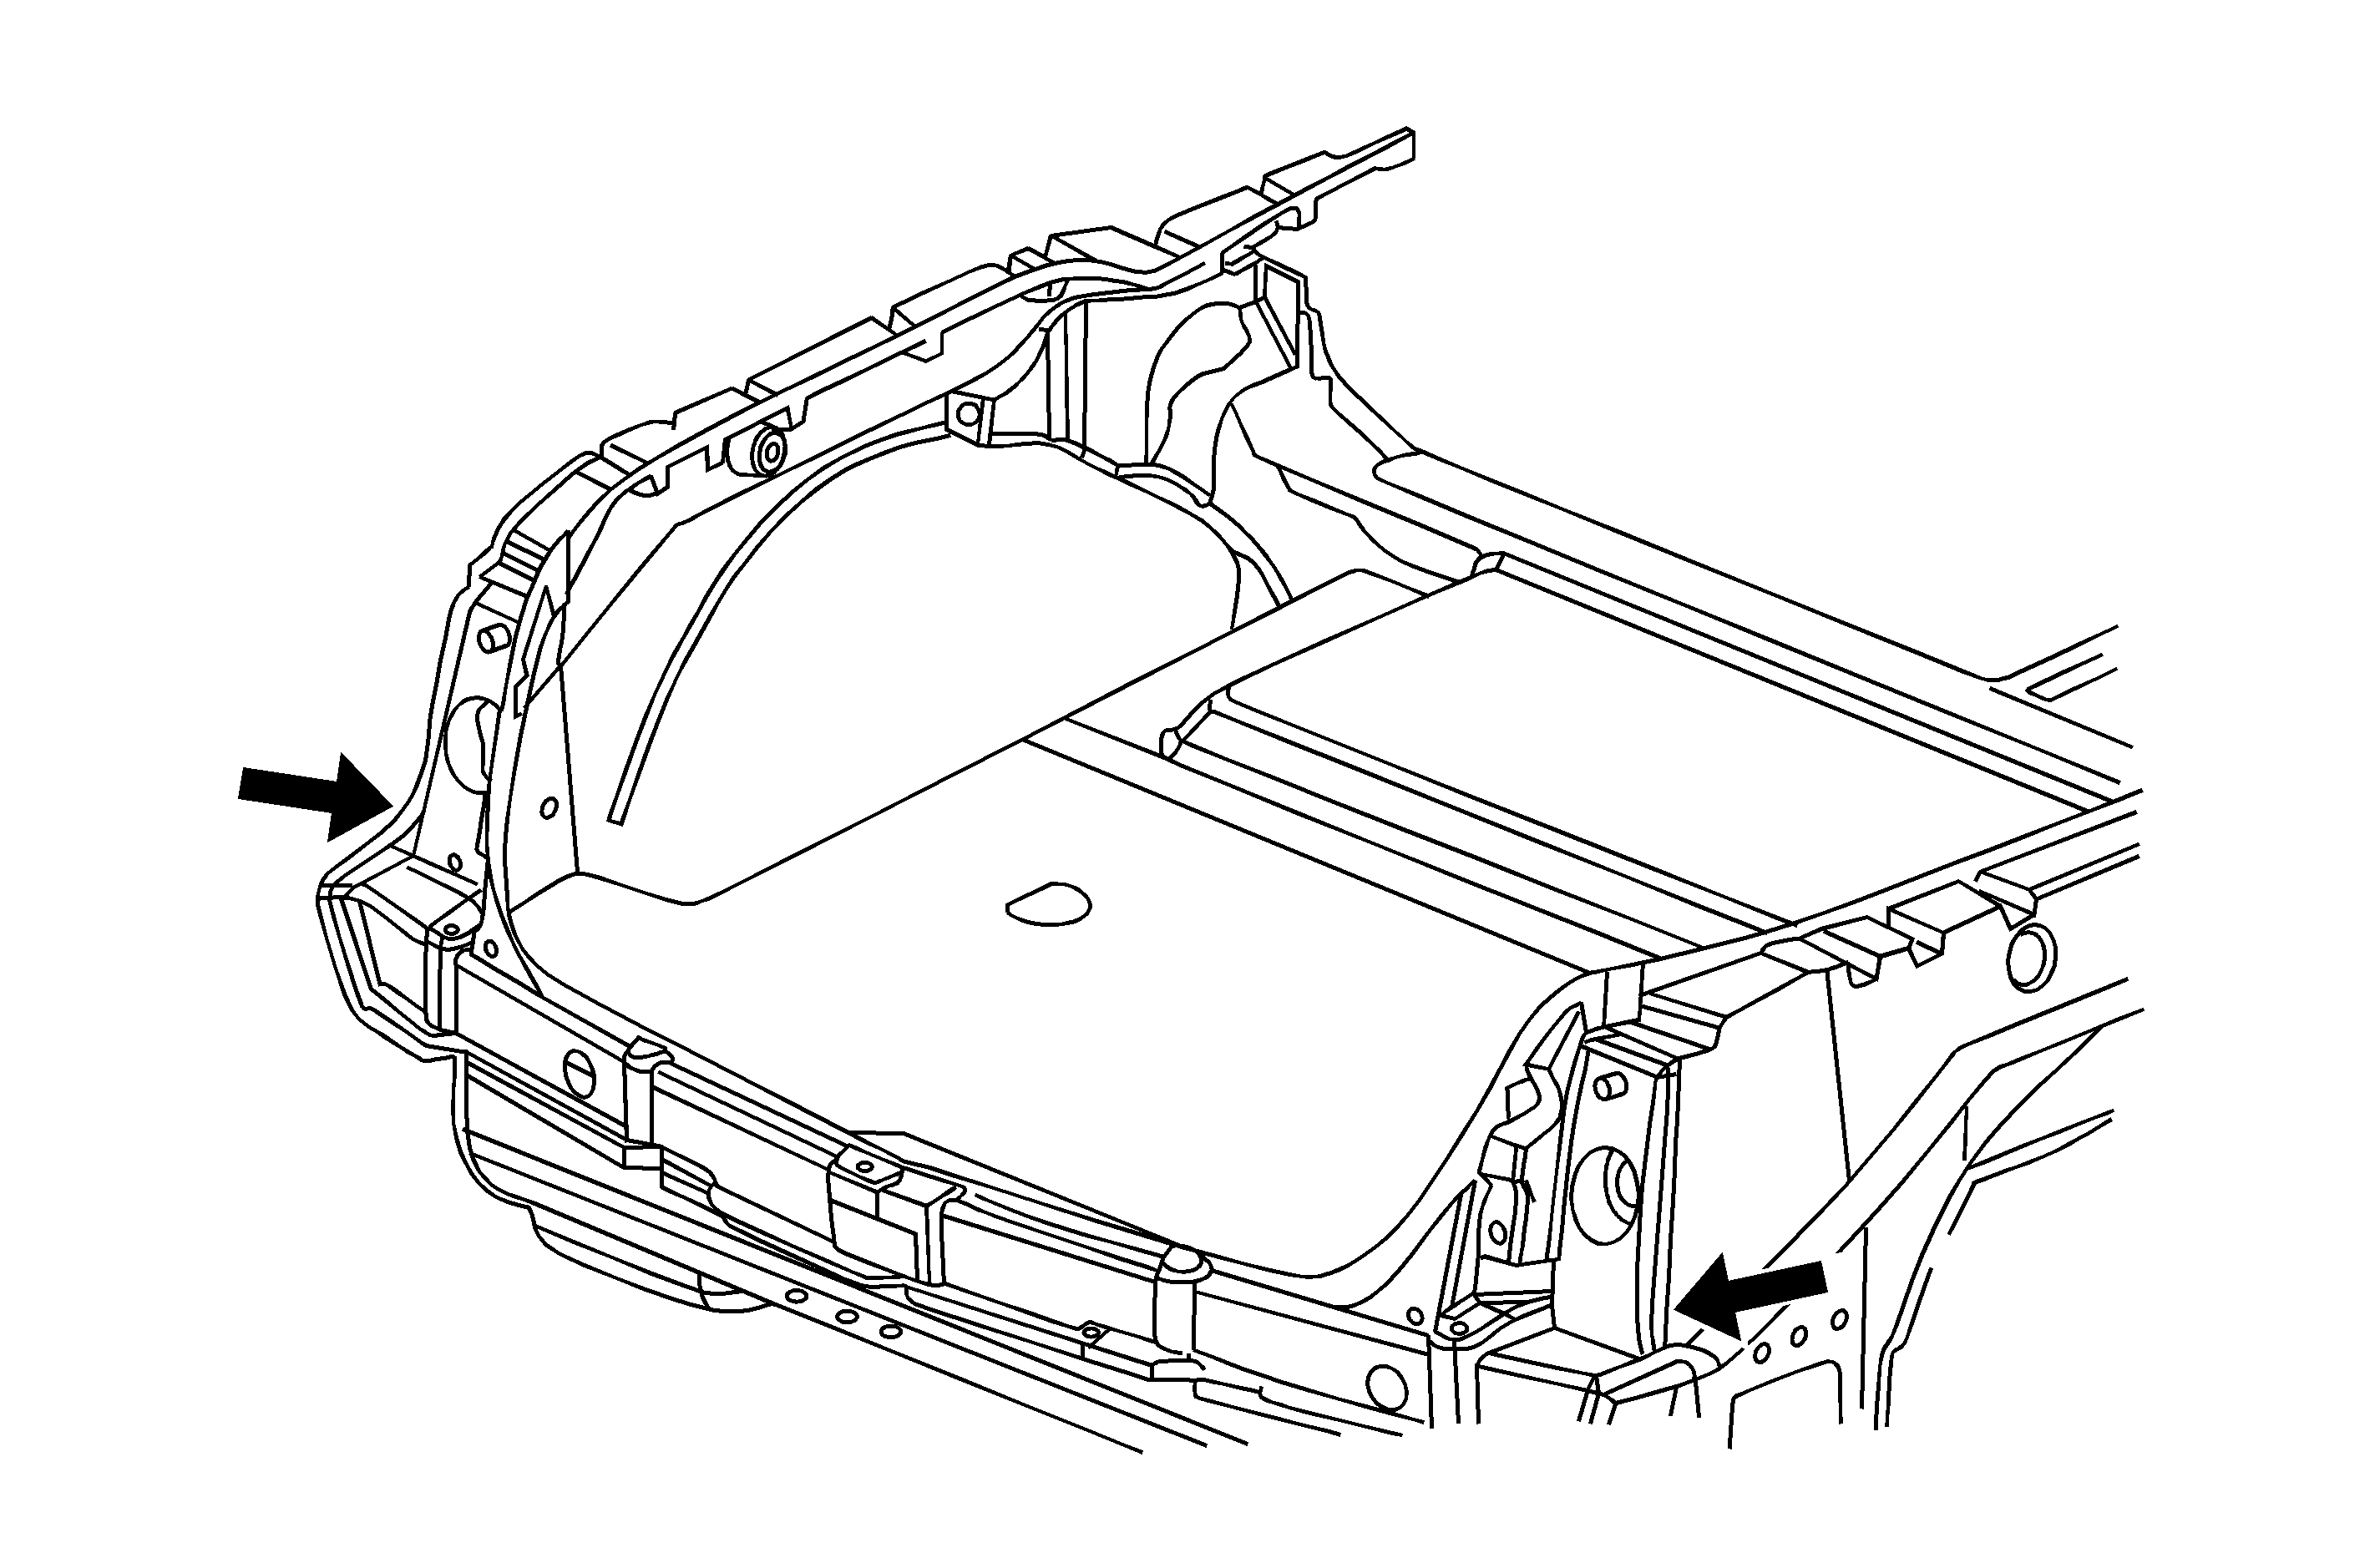
Water entry into rear tubs located behind the rear wheelhouses traced to the area behind the rear tail lamps.
Correction

There are a number of panels that are bonded together in this area. If water entry is traced to this area, remove the rear tail lamp on the affected side to help gain access. Use Kent Seam Sealer, P/N P10200, to seal the affected joint. Refer to the illustration above.
Condition
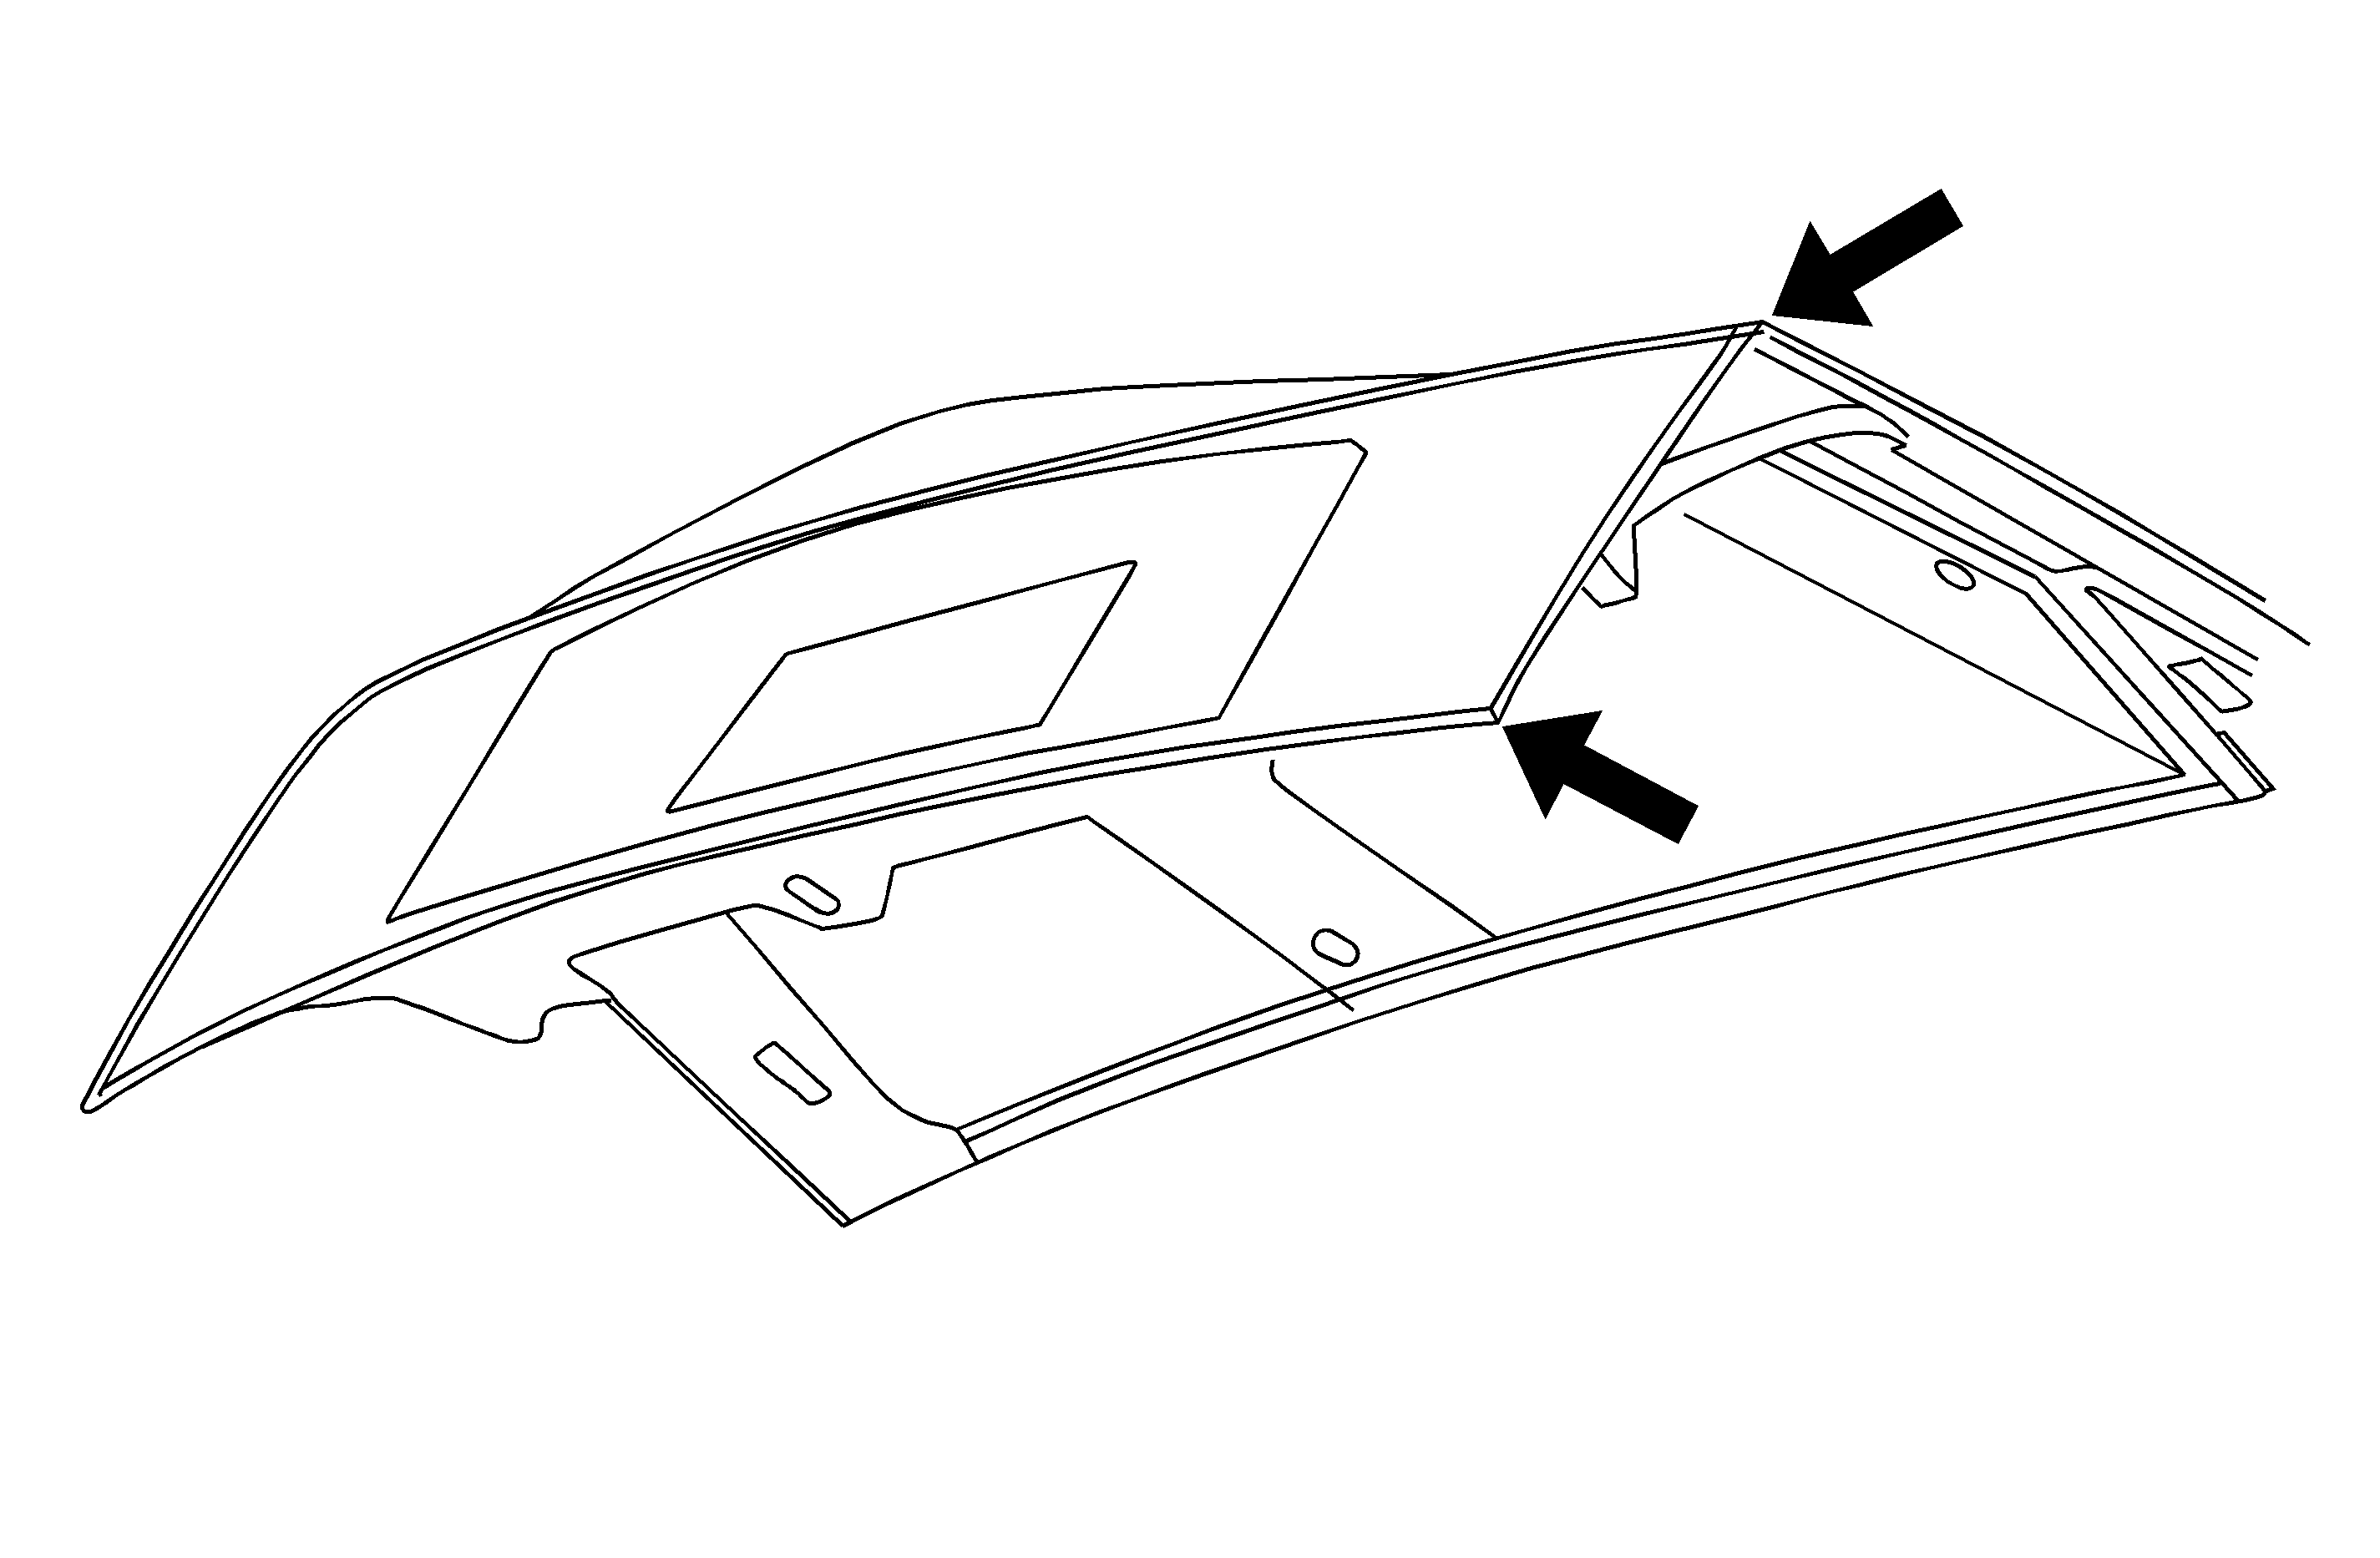
Water entry into the rear compartment. Water may be present on the sill of the lower rear compartment opening (near the latch). Water may be seen dripping from the rear compartment lid inner trim at the lower corners.
Correction

Seal the area of the rear compartment lid inner and outer panels at the outer most vertical seam (between arrows - either side). The seam is on the inside of the rear compartment lid. Refer to the illustration above. Use Kent Seam Sealer, P/N P10200, to seal the seam for best appearance.
Important: Inspect the rear tub drains to ensure that they are clear of any obstructions. Inspect to be sure that there is no loose material in the tub that could cover the drain on the inside of the tub. If the drain has a duck bill type drain at the end, use scissors to make one cut in the bottom opening so that if viewed from the bottom it will have an "X" instead of a slit in the opening.
Parts Information
Kent Products can be purchased by calling 1-800-654-6333 (in Canada, 1-800-563-1717).
