Evaporative Emission Hoses/Pipes Replacement - Engine/Chassis for Cadillac XLR 2007
Removal Procedure
Caution: In order to reduce the risk of fire and personal injury observe the
following items:
• Replace all nylon fuel pipes that are nicked, scratched or damaged
during installation, do not attempt to repair the sections of the nylon fuel
pipes • Do not hammer directly on the fuel harness body clips when installing
new fuel pipes. Damage to the nylon pipes may result in a fuel leak. • Always cover nylon vapor pipes with a wet towel before using a
torch near them. Also, never expose the vehicle to temperatures higher than
115°C (239°F) for more than one hour, or more than 90°C (194°F)
for any extended period. • Apply a few drops of clean engine oil to the male pipe ends before
connecting fuel pipe fittings. This will ensure proper reconnection and prevent
a possible fuel leak. (During normal operation, the O-rings located in the
female connector will swell and may prevent proper reconnection if not lubricated.)
- Remove the engine sight shield. Refer to Intake Manifold Sight Shield Replacement .
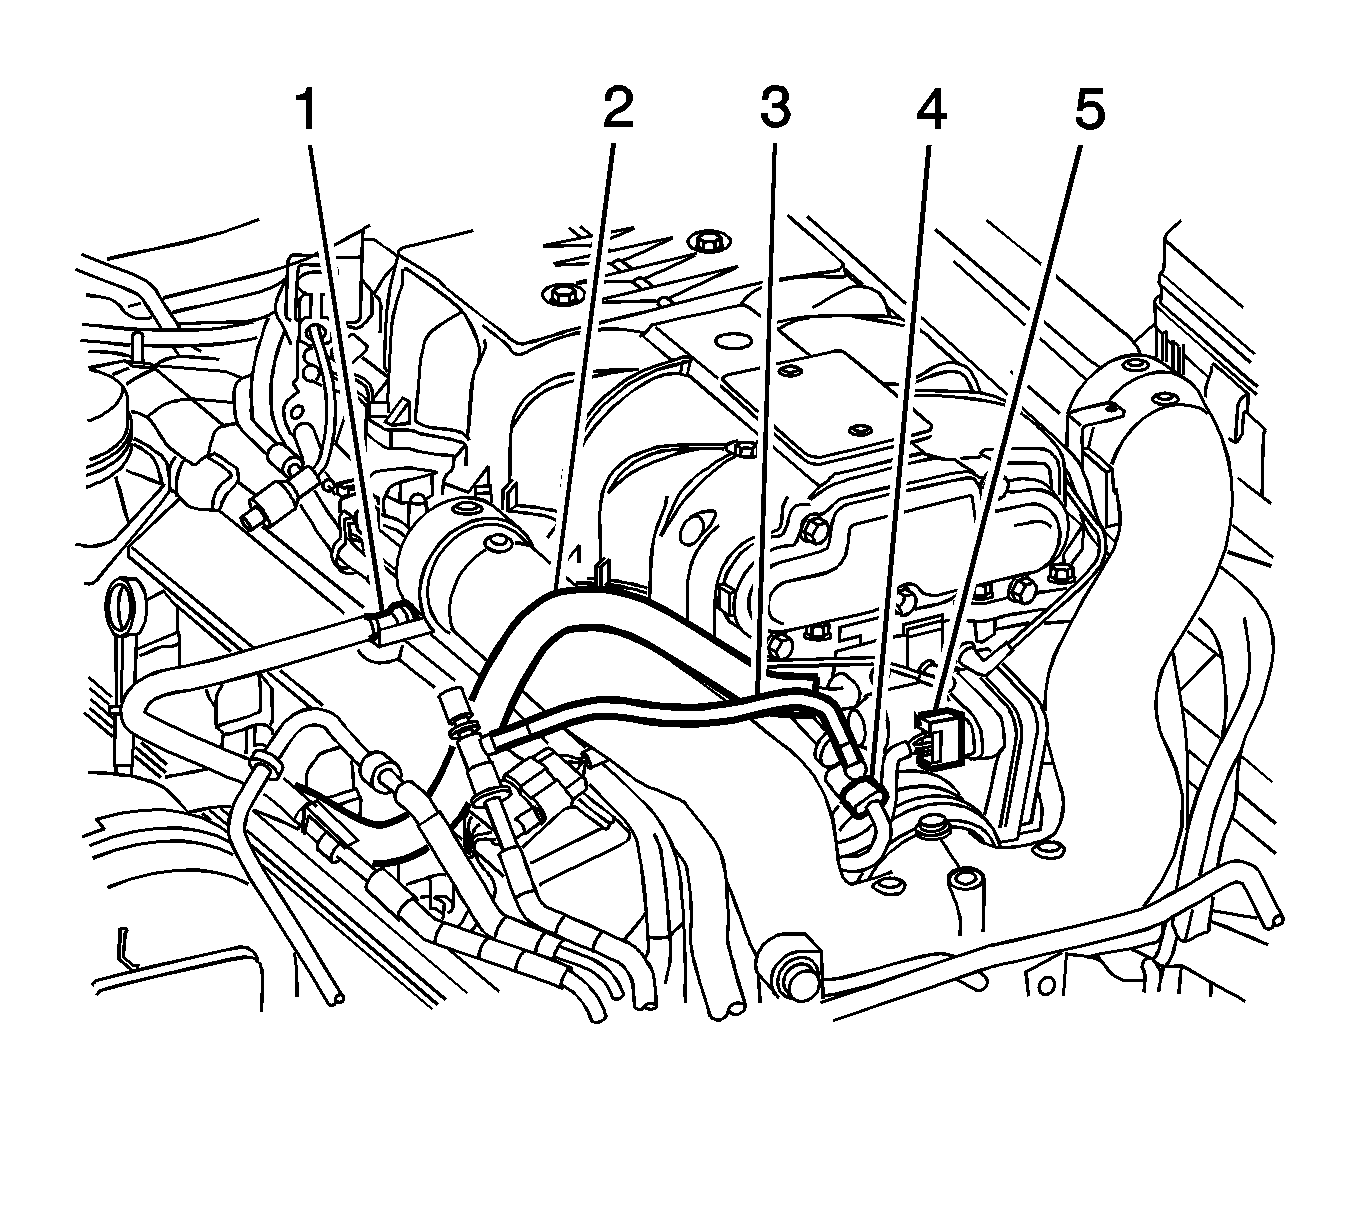
- Disconnect the engine purge pipe (3) quick-connect fitting from the evaporative emission (EVAP) canister purge valve. Refer to Plastic Collar Quick Connect Fitting Service .
- Disconnect the engine purge pipe (3) quick-connect fitting from the chassis pipe. Refer to Plastic Collar Quick Connect Fitting Service .
- Remove the EVAP pipe.
- Cap the chassis pipe and the EVAP canister purge valve in order to prevent possible contamination.
Installation Procedure
- Remove the caps from the chassis pipe and the EVAP canister purge valve.
- Install the EVAP pipe (3) to the chassis pipe. Refer to Plastic Collar Quick Connect Fitting Service .
- Install the EVAP pipe (3) to the EVAP canister purge valve. Refer to Plastic Collar Quick Connect Fitting Service .
- Install the engine sight shield. Refer to Intake Manifold Sight Shield Replacement .
