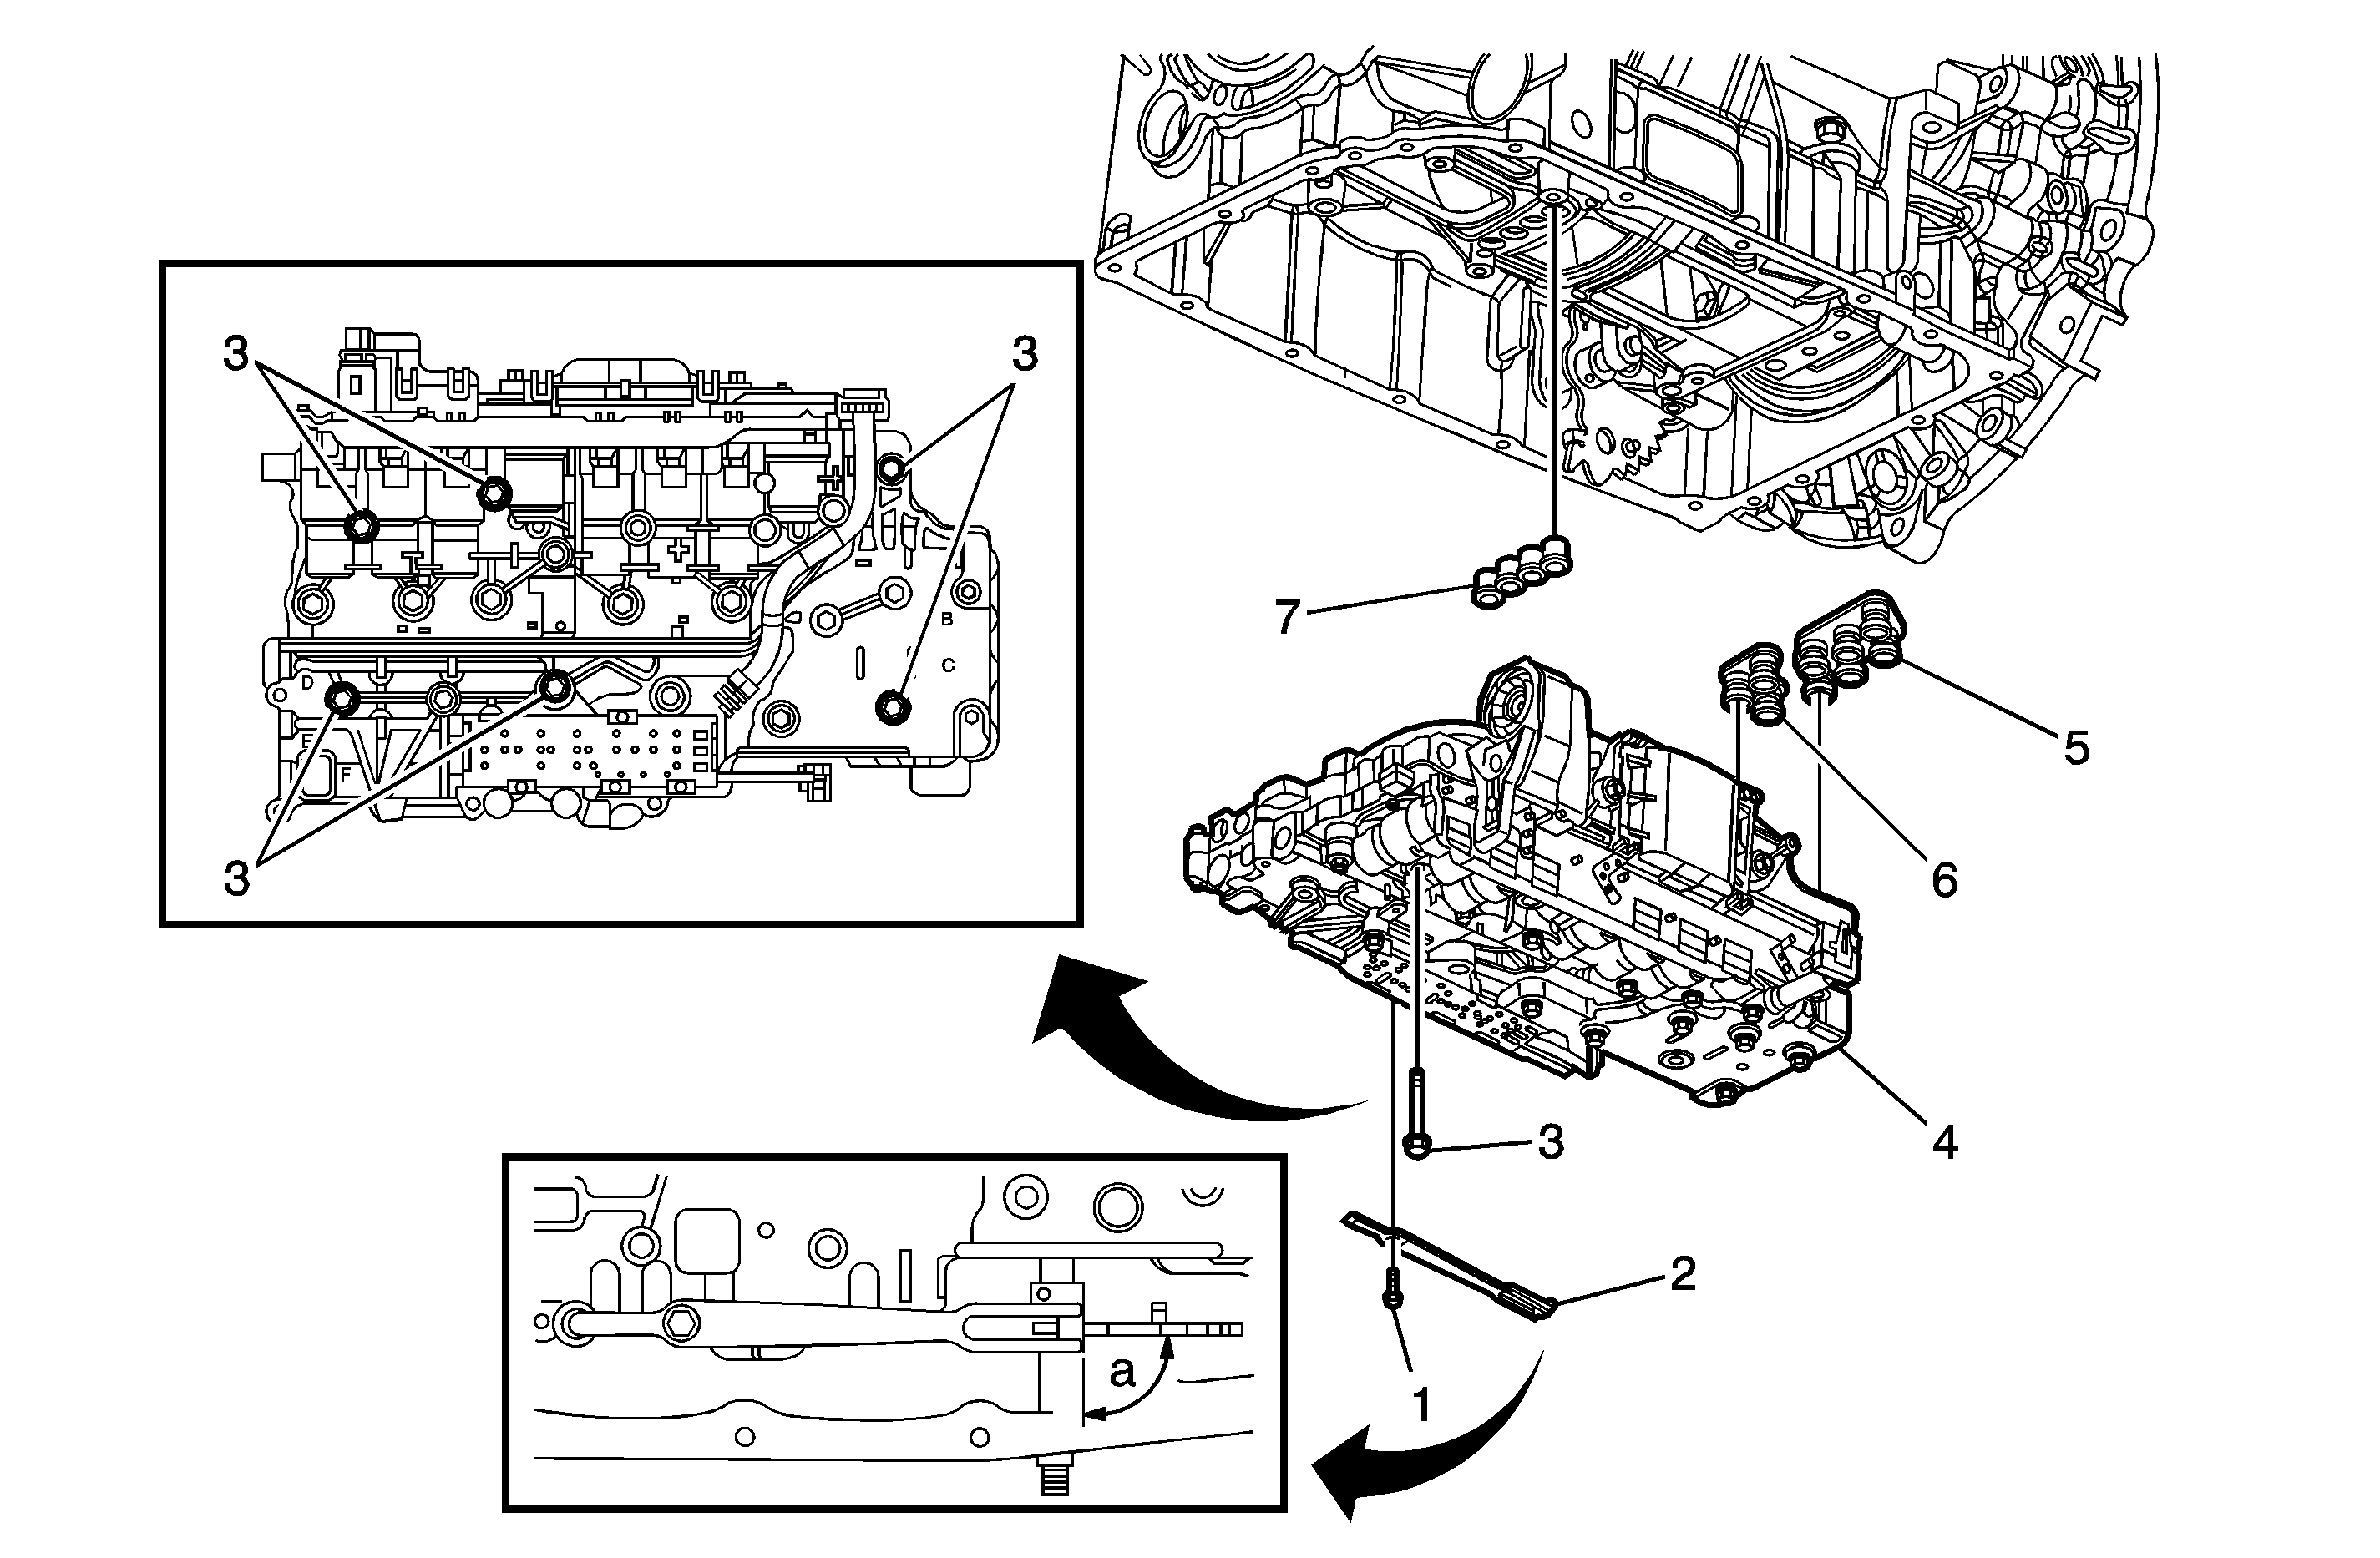
Callout
| Component Name
|
|
Notice: Refer to Fastener Notice in the Preface section.
Important: Do not remove all the bolts in the control valve body assembly. Remove only the bolts indicated.
Fastener Tightening Specifications:
Refer to
Fastener Tightening Specifications
.
Preliminary Procedures
- Raise and support the vehicle. Refer to
Lifting and Jacking the Vehicle
.
- Remove the transmission fluid pan, gasket and filter. Refer to
Automatic Transmission Fluid, Fluid Pan and/or Filter Replacement
.
- Remove the electrical connector sleeve. Refer to
Automatic Transmission Electrical Connector Passage Sleeve Replacement
.
|
1
| Manual Shaft Detent Assembly Bolt (Qty: 1)
Tighten
12 N·m (106 lb in) |
2
| Manual Shaft Detent Assembly
Important: Ensure the manual shaft detent assembly roller is centered over the manual shaft detent lever assembly. Failure to center the roller may cause hard or no shift lever operation.
|
3
| Control Valve Assembly Bolt (Qty: 6)
Tip
Tighten the bolts in the proper order.
Tighten
8 N·m (71 lb in) |
4
| Control Valve Assembly
Tip
| • | For control valve body disassembly. |
| • | For control valve body cleaning and inspection. |
| • | For ball check valve locations. |
| • | For control valve body assembly. |
| • | Align the manual shift shaft position switch activator slide with the detent lever guide pin during control valve body installation. |
|
5
| Fluid Pump Seal Assembly
Important: Do not reuse the seal assembly.
|
6
| Fluid Pump Seal Assembly
Important: Do not reuse the seal assembly.
|
7
| Center Support Fluid Passage Seal Assembly
Important:
| • | Do not reuse the seal assembly. |
| • | After an internal transmission repair or internal part replacement, the Service Fast Learn Adapt procedure should be performed. Refer to
Service Fast Learn Adapts
. |
|

