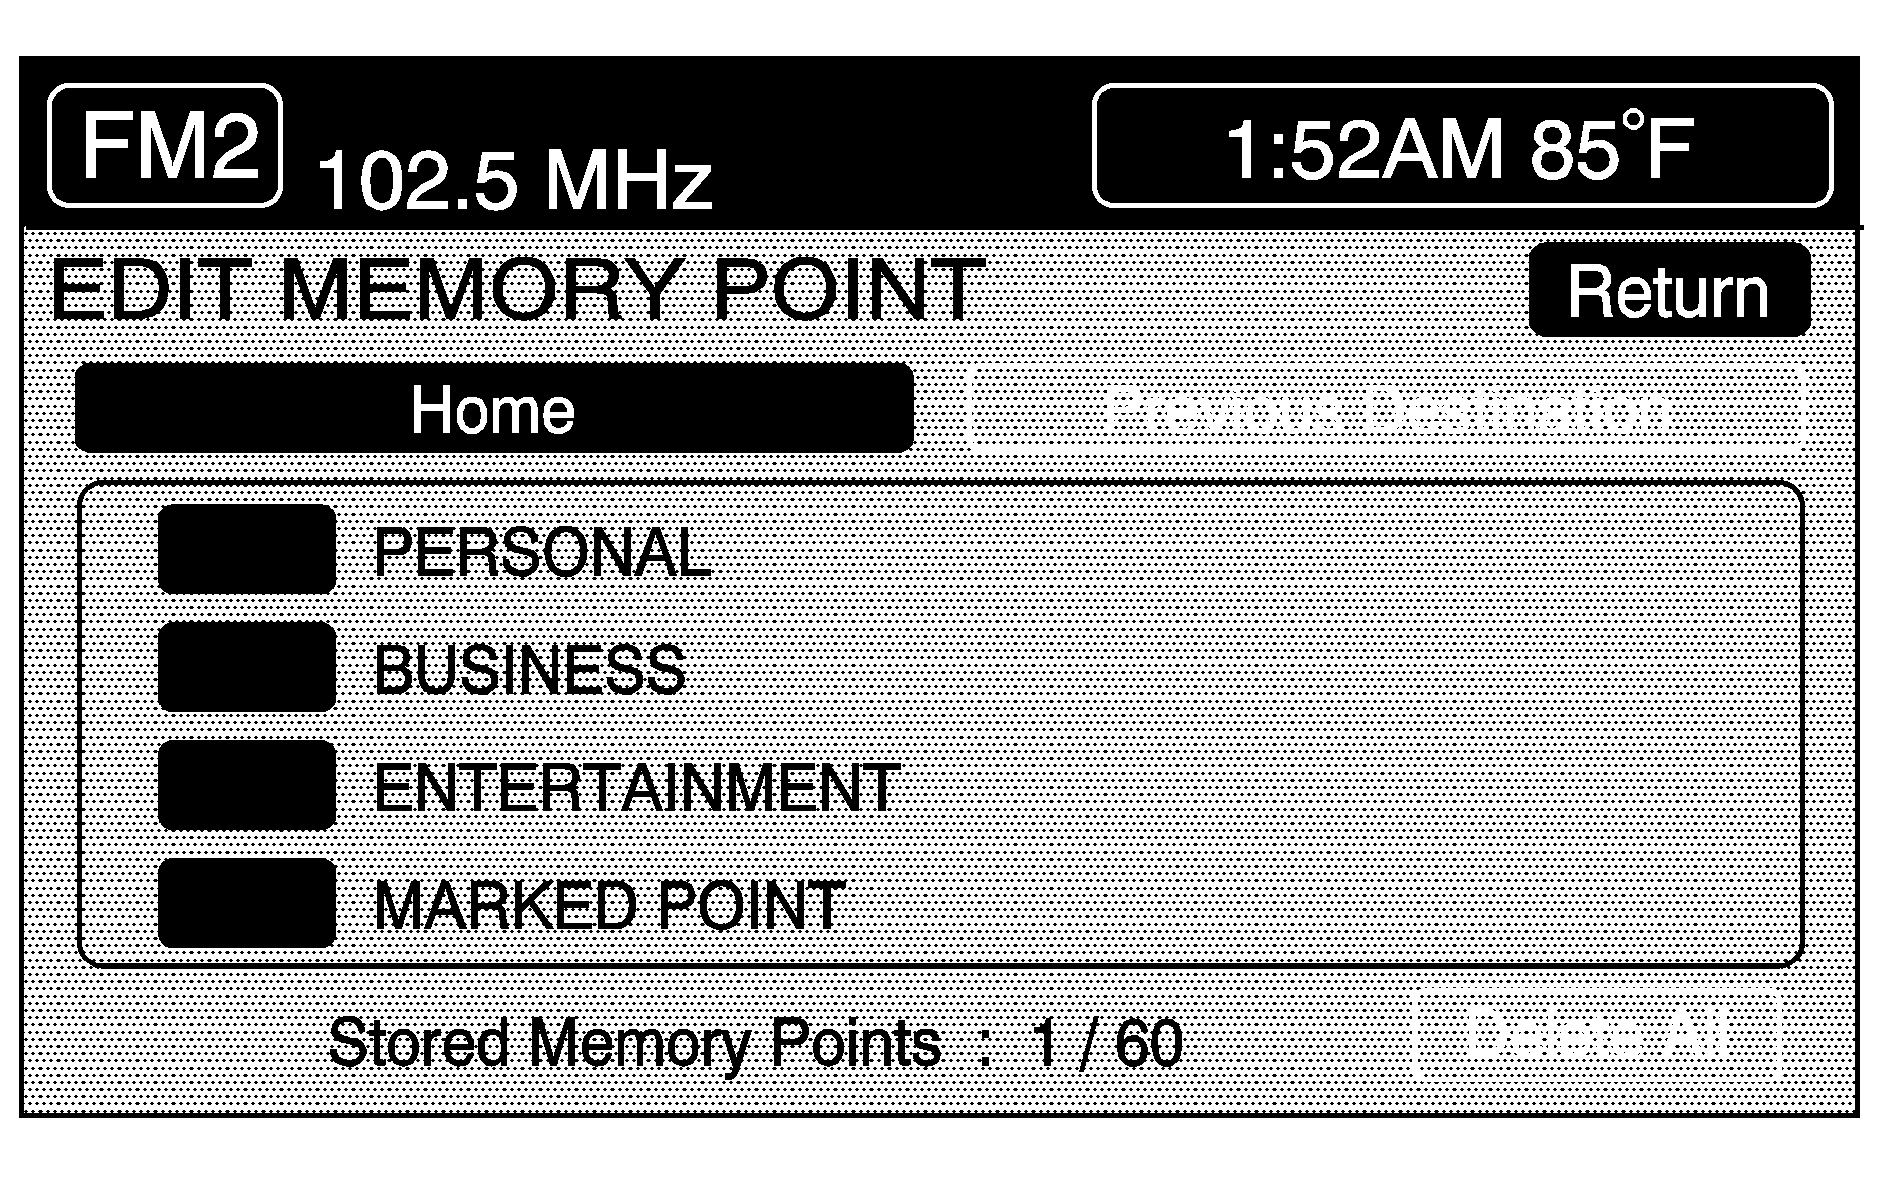
This feature allows you to store, delete, and edit memory points. Touch the Edit Memory Point screen button from the PLAN ROUTE menu to access the EDIT MEMORY POINT screen.

Memory points can be stored in four different categories: personal, business, entertainment, and marked point.
Memory points are stored when either START or MARK are selected when setting a destination on the map or when storing destinations in memory.
A total of 60 locations can be stored. The last 10 destinations entered are stored under Previous Destination. In addition, one memory point can be stored under the Home category.
If all 60 stored points are entered, the system notifies you that there is no available storage left in memory points. A memory point must be removed before storing additional memory points.
Registering Memory Points
To store a memory point:
- Select a category from the EDIT MEMORY POINT menu.
- Touch REGISTER.
- Select a method for entering a destination. A map appears displaying the memory point's location.
- If available, touch INFO to view the address information for the memory point.
- Touch Enter to store the point.
Editing Memory Points
This feature allows you to edit the contents stored in memory. The following options are available:
Icon Editing of a Memory Point
Each memory point is displayed with a default icon. To edit an icon:
- Select the category of the memory point.
- Select the item to be edited.
- Touch the icon. The EDIT MEMORY POINT icon screen appears.
- Touch the icon you would like to use. The system then returns to the EDIT MEMORY POINT menu.
- Touch Return to go back to the previous screen.
The new memory point icon displays on the map.
Choose from 18 different icons, three of which are sound icons. The same icon may be used for other memory points as well.
Name Editing of a Memory Point
To modify the name of a stored memory point:
- Select the category of the memory point.
- Select the item to be edited.
- Touch the NAME screen button and use the alpha keypad to edit the name. Names may contain up to 15 alpha and/or numeric characters.
- Touch Return to go to the previous screen.
Moving Memory Points
To move a memory point from one category to another:
- Select the category of the memory point.
- Select the memory point to be edited.
- Touch CATEGORY. A list of categories appear. The current category for the item will be highlighted and cannot be selected.
- Touch the screen button for the category you want the memory point placed in. A pop-up window appears displaying the change in category.
- Touch Return to go back to the previous screen.
Adjusting a Memory Point
To relocate a memory point's location:
- Select the category of the memory point.
- Select the memory point to be edited.
- Touch POSITION. A map screen with the position of this memory point appears.
- Touch anywhere on the screen to activate the scroll feature and relocate the memory point. See Maps.
- Touch Enter to save the memory point's new location.
- Touch Return to go back to the previous screen.
Changing the Phone Number of a Memory Point
To edit or add the phone number of a memory point:
- Select the category of the memory point.
- Select the memory point to be edited.
- Touch PHONE and use the numeric keypad to edit or add the number.
- Touch the RETURN button to take you back to the previous screen when finished.
Deleting Single Memory Points
To delete a single memory point:
- Press the ROUTE key.
- Touch EDIT MEMORY POINT.
- Select the category of the memory point.
- Touch DELETE.
- Select the memory point to be deleted. A confirmation window appears.
- Touch YES to delete the memory point or NO to return to the previous menu.
- Touch Return to go back to the previous screen.
Deleting All Memory Points
To delete all of the memory points in a category:
- Press the ROUTE key.
- Touch EDIT MEMORY POINT.
- Select the desired category.
- Touch the DELETE ALL screen button. A confirmation window appears.
- Touch YES to delete the memory points or NO to return to the previous menu.
- Touch Return to go back to the previous screen.
Edit Category
To edit the name of a category:
- Press the ROUTE key.
- Touch EDIT MEMORY POINT.
- Select the category to be edited.
- Touch the EDIT CATEGORY screen button and use the alpha keypad to edit the category name.
- Touch Return to go back to the previous screen.
The name can consist of up to 15 alpha and/or numeric characters.
Marked Point
A marked point is a memory point which has been stored by selecting the MARK screen button while traveling on a planned route. The scroll feature can also be used to plan a destination on the map after reaching the destination, or by moving a memory point to a marked point category. See "Editing Memory Points" earlier in this section for more information.
Previous Destination Memory
Each time Start is selected from the map screen, that destination is stored as a memory point under PREVIOUS DESTINATION. This category stores up to 10 destinations.
When the Previous Destination category contains more than 10 destinations, the system removes the oldest destination stored and adds the most recent one selected to the list.
So that a previous destination is not lost, move the destination into a memory point category. See "Moving Memory Points" earlier in this section for more information.
Home Memory
This memory point is stored by selecting Home from the EDIT MEMORY POINT screen. See "Registering Memory Points" earlier in this section and "Home" under Enter Destination for more information.
